User’s Guide 43-329, 43-330 Answering System • Caller ID Cordless Phone 43-330 only 43-329 and 43-330 Thank you for purchasing your new cordless phone from RadioShack. Please read this user’s guide before installing, setting up, and using your new phone.
Contents Contents Package Contents ..........................................................................................................4 Features...........................................................................................................................4 Telephone Setup..............................................................................5 Telephone Base and Charger Installation.....................................................................
Call Log..........................................................................................28 About Caller ID..............................................................................................................28 About the Call Log........................................................................................................28 Missed Calls Indicator . ................................................................................................29 Review the Call Log .............
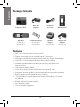
Contents Package Contents Telephone base Base AC adapter Telephone line cord Wall bracket Handset 43-329 qty. 1 43-330 qty. 2 Handset battery 43-329 qty. 1 43-330 qty. 2 Handset charger 43-330 only Charger AC adapter 43-330 only Features • • • • • • • • • • • • • DECT 6.
Telephone Setup Telephone Base and Charger Installation Install the telephone base and chargers as shown below. Make sure that the electrical outlet is not controlled by a wall switch. n Notes: • If you subscribe to high-speed ���������������������������� Internet service (������������������� �������������������� digital subscriber line (DSL)) high-speed Internet service through your telephone line, you must install a DSL filter between the telephone line cord and the telephone wall jack.
Battery Installation and Charging Install the battery as shown below. After installing the battery, you might be able to make and receive short calls. For best performance, charge the handset for at least 16 hours before use. When not in use, place the handset in the telephone base or charger. See page 38 for battery operating times. Telephone Setup 1. Press the indentation and slide to remove the battery cover. 2.
n Notes: • • • When the screen shows LOW BATTERY, the backlight stays off. If the handset will not be used for a long time, disconnect and remove the battery to prevent possible leakage. To purchase replacement batteries, visit your local RadioShack store or go to www.RadioShack.com. Recycle Rechargeable Batteries Battery indicators Battery status Action The screen is blank. Battery has no charge and the handset cannot be used. Charge until the screen shows LOW BATTERY (at least 10 minutes).
Wall Mount Installation Telephone Setup 1. Position the telephone base as shown below. Insert the extended tabs (marked B) of the wall bracket into the slots on the back of the telephone base (marked B). Push the telephone base down until it is securely in place. 2. If you are using a DSL filter, plug the line cord into the filter now. Route the telephone line cord (or DSL filter) through the wall bracket hole. Route the power cord out of the bottom of the telephone. 3.
Telephone Base Layout X/DELETE • Press once to delete the message currently playing. • When the phone is not in use, press twice to delete all previously reviewed messages IN USE light • On when the handset is in use. • Flashes when there is an incoming call or when another telephone sharing the same line is in use. VOICEMAIL light Flashes when a new voicemail signal is received from your telephone company. FIND HANDSET Page all system handsets. VOL • Press to adjust the volume during playback.
Telephone Setup Handset Layout CHARGE light On when the handset is charging in the telephone base or charger. (Speakerphone) Press to switch between speakerphone and handset. / FLASH • Press to make or answer a call. • During a call, press to receive an incoming call when you receive a call waiting alert. 1 While reviewing a call log entry, press repeatedly to add or remove 1 in front of the telephone number before dialing or saving it in the directory. REDIAL/PAUSE • Press to review the redial list.
CID (Caller ID) / VOL • Press to review the call log when the telephone is not in use. • While in a menu, press to scroll down. • During a call, press to lower the listening volume. MENU/SELECT • Press to show the menu. • While in a menu, press to select an item, or save an entry or setting. OFF/CLEAR • During a call, press to hang up. • While the handset is ringing, press to silence the ringer temporarily. • Press and hold while the telephone is not in use to erase the missed calls indicator.
Ringer Volume (Handset) You can set the ringer volume or turn the ringer off. 1. Press MENU/SELECT to show the menu. Telephone Setup 2. Press or to select >RINGER VOLUME, then press MENU/SELECT. 3. Press or to adjust the volume. A sample of each ringer volume plays as you scroll through the choices. ANS. SYSTEM DIRECTORY CALL LOG >RINGER VOLUME RINGER TONE RINGER VOLUME 4. Press MENU/SELECT to confirm your selection. n Notes: • • Setting the volume to the lowest level turns off the ringer.
LCD Language You can select ENGLISH, FRANÇAIS or ESPAÑOL to be used in all screen displays. CALL LOG RINGER VOLUME RINGER TONE KEY TONE >LCD LANGUAGE 1. Press MENU/SELECT to show the menu. 2. Press or to select >LCD LANGUAGE, then press MENU/SELECT. or to scroll through the choices. 4. Press MENU/SELECT to confirm your selection. Set Date and Time he answering system announces the day and time T �������� of� the message prior to playing it.
voicemail while away from home). Clearing the voicemail waiting indicator only turns off the indicators; it does not delete your voicemail messages. As long as you have new voicemail messages, your local telephone company continues to send the signal to turn on the indicators. To manually turn off these indicators: Telephone Setup 1. Press MENU/SELECT to show the menu. 2. Press or to select >CLR VOICEMAIL, then press MENU/SELECT. The screen shows TURN OFF INDICATOR? PRESS SELECT TO CONFIRM. 3.
Answering System Set Up Use a handset to change your answering system settings. Number of Rings You can choose from two, four, or six rings; or toll saver. With toll saver selected, the answering system answers after two rings when you have new messages, and after four rings when you have no new messages. This enables you to check for new messages and avoid paying unnecessary long distance charges if you are calling from out of your local area. 1. Press MENU/SELECT to show the menu. 2.
. Press or to select from ON or OFF, then press MENU/SELECT to confirm your selection. n Note: The answering system must be turned on for the message alert tone to function. Announcement The telephone is preset with a greeting that answers calls with “Hello, please leave a message after the tone.” You can use this preset announcement, or replace it with your own. Record Your Own Announcement 1. Press MENU/SELECT to show the menu. Answering System Setup 2. Press MENU/SELECT to select >ANS. SYSTEM. 3.
Delete Your Announcement 1. Press MENU/SELECT to show the menu. 2. Press MENU/SELECT to select >ANS. SYSTEM. 3. Press or to select >ANS SYS SETUP, then press MENU/SELECT. 4. Press or to select >ANNOUNCEMENT, then press MENU/SELECT. . The handset announces, “To play, press 2. To record, press 7.” Press 3 to delete your own recorded announcement. n Note: When your announcement is deleted, calls are answered with the preset announcement.
Telephone Operation Make a Call 1. Press /FLASH or . You hear a dial tone. 2. Dial the number. Make a Predialed Call 1. Dial the number. 2. Press n Notes: • • /FLASH or . The screen shows the elapsed time as you talk (in hours, minutes and seconds). When predialing (preview numbers before dialing), press MUTE/REMOVE or OFF/CLEAR to backspace and delete; press and hold REDIAL/PAUSE to insert a dialing pause (P appears). Answer a Call Press /FLASH, or any of the dialing keys (0-9, #, *).
Mute The mute function allows you to hear the other party but the other party cannot hear you. 1. During a call, press MUTE/REMOVE on the handset. The handset screen shows MUTED for a few seconds and MUTE appears until the mute function is turned off. 2. Press MUTE/REMOVE again to resume the conversation. The handset screen temporarily shows MICROPHONE ON. Ringer Mute When the telephone is ringing, press OFF/CLEAR or MUTE/REMOVE to temporarily silence the ringer without disconnecting the call.
Chain Dialing Use this feature to initiate a dialing sequence from numbers stored in the directory, call log or redial while you are on a call. Chain dialing can be useful if you wish to access other numbers (such as bank account information or access codes) from the directory, call log or redial list. To access a number in the directory while on a call: 1. Press MENU/SELECT twice to select >DIRECTORY. 2. Scroll to the desired entry by pressing or . 3. Press MENU/SELECT to dial the displayed number.
Multiple Handset Use You can use up to two system handsets at a time on an outside call. If a handset is already on a call and you would like to join the call, press /FLASH or on another handset to join the call. To end the call, press OFF/CLEAR or place the handset in the telephone base or charger. The call will not be terminated until all handsets hang up. You can buy additional expansion handsets for this telephone base. You can register up to 12 handsets to the telephone base.
Answer an Incoming Call During an Intercom Call If you receive an incoming outside call during an intercom call, there will be an alert tone. • To answer the call, press /FLASH. The intercom call ends automatically. • To end the intercom call without answering the incoming call, press OFF/CLEAR. Share an Outside Call TRANSFER TO: You can call another system handset to join an outside call. That call continues even if you hang up. Telephone Operation 1. During a call, press INT. The other handset rings.
3. From this intercom call, you have the following options: • You can let the other handset join you on the outside call in a threeway conversation. Press and hold INT on your originating handset. • You can transfer the call. Press OFF/CLEAR, or place your handset back in the telephone base or charger. Your screen shows CALL TRANSFERED. The other handset is automatically connected to the outside call.
Directory DIRECTORY EMPTY The directory can store up to 50 entries with up to 30 digits for each phone number and 15 characters for each name. • Directory entries are shared by all system handsets. Any additions, deletions or edits made on one handset affect the directory on all handsets. • When there are no records in the directory, the screen shows DIRECTORY EMPTY. • When the directory is full and you try to save an entry, the screen shows LIST FULL.
• Copy a number from the redial list by pressing REDIAL/PAUSE and then , or REDIAL/PAUSE to select a number. Press MENU/SELECT to copy the number. 5. Press MENU/SELECT to move to the name. The screen shows ENTER NAME. ENTER NAME _ 6. Use the dialing keys (see “Character Chart” below) to enter the name. • Press MUTE/REMOVE to backspace and erase a character. • Press and hold MUTE/REMOVE to erase the entire entry. • Press to move the cursor to the left or to the right. 7. Press MENU/SELECT to confirm.
Search the Directory >REVIEW STORE Entries are sorted alphabetically. To search the directory: 1. Press when the handset is not in use. -ORPress MENU/SELECT. Press or to select >DIRECTORY and then press MENU/SELECT twice. 2. Press or RadioShack 843-7422 to browse. Alphabetical Search To start an alphabetical search: 1. Press when the handset is not in use. -ORPress MENU/SELECT. Press press MENU/SELECT twice. or to select >DIRECTORY and then 2.
2. Press or to select >DIRECTORY and then or , or use the alphabetical search to browse (see page 26). 3. Press MENU/SELECT to select an entry. The screen shows EDIT NUMBER. EDIT NUMBER 4. Use the dialing keys to edit the number. 843-7422_ • Press MUTE/REMOVE to backspace and erase a digit. • Press and hold MUTE/REMOVE to erase the entire entry. • Press to move the cursor to the left or to the right. • Press and hold REDIAL/PAUSE to insert a dialing pause (P appears). 5.
Call Log Call Log About Caller ID This product supports caller ID services provide by most local telephone service companies. Depending on your service subscription, you may see the caller’s number, or the caller’s name and number that are sent by the telephone company after the first or second ring. Caller ID allows you to see the name, number, date and time of calls.
n Notes: • • For call log entries with numbers between 16 and 24 digits, in order to view the entire number, you must save the entry to the directory (see page 24). If the phone number has more than 24 digits, it will not be saved or shown in the call log. Missed Calls Indicator When there are unreviewed calls in the call log, the handset shows XX MISSED CALL(S). Each time you review a call log entry marked NEW, the number of missed calls decreases by one.
Call Log 2. Press or to select >CALL LOG, then press MENU/SELECT. 3. Press or to select >REVIEW, then press MENU/SELECT. ANS. SYSTEM DIRECTORY >CALL LOG RINGER VOLUME RINGER TONE 4. Press or to browse through the call log. • The name (if available), telephone number, date and time of all incoming calls are shown on the screen. • You hear a double beep when the list reaches the beginning or end of the call log.
4. Press MENU/SELECT to move to the name. The screen displays EDIT NAME. EDIT NAME RadioShack_ 5. Use the dialing keys (see page 25) to edit the name. • Press MUTE/REMOVE to backspace and erase a character. • Press and hold MUTE/REMOVE to erase the entire entry. • Press to move the cursor to the left or to the right. 6. Press MENU/SELECT to save. 7. If the entry is already saved in the directory, the handset shows ALREADY SAVED. 8. If there is no caller ID information, the handset shows UNABLE TO SAVE.
Answering System Operation Call Log Display Screen Messages Displays When PRIVATE NAME The caller is blocking the name. PRIVATE NUMBER The caller is blocking the telephone number. PRIVATE CALLER The caller is blocking the name and number. UNKNOWN NAME This caller’s name is unavailable. UNKNOWN NUMBER This caller’s number is unavailable. UNKNOWN CALLER No information is available about this caller. LONG DISTANCE It is a long distance call.
Answering System Operation About the Answering System and Voicemail If you subscribe to a voicemail service through your telephone service provider, you can use your telephone answering system and voicemail together. If you are on a call, or the answering system is busy and you receive another call, the second caller can leave a voicemail message. Set your answering system to answer calls at least two rings earlier than your voicemail is set to answer.
To turn on or off with a handset: 1. Press MENU/SELECT to show the menu. 2. Press MENU/SELECT to select >ANS. SYSTEM. 3. Press or to select >ANS SYS SETUP, then press MENU/SELECT. 4. Press MENU/SELECT to select >ANSWER ON/OFF. Answering System Operation . Press or to choose ON or OFF, then press MENU/SELECT. n Note: Some telephone companies program the delay before answering calls in seconds instead of rings; in this case, allow six seconds per ring when determining the appropriate setting.
When playback begins, you hear the total number of messages followed by the day and time of the message. After the last message, the telephone announces, “End of messages.” To play messages with the telephone base: • Press /PLAY/STOP to listen to messages. To play messages with a handset: 1. Press MENU/SELECT to show the menu. 2. Press MENU/SELECT to select >ANS. SYSTEM. 3. Press MENU/SELECT to select >PLAY MSGS. Options during playback: • Press VOL or VOL to adjust the speaker volume.
Delete All Messages To delete all messages with the telephone base: Press X/DELETE when the phone is not in use. The telephone announces, “To delete all old messages, press delete again.” Press X/DELETE again. All previously heard messages are erased and the telephone announces, “All old messages deleted.” Answering System Operation To delete all messages with a handset: 1. Press MENU/SELECT to show the menu. 2. Press MENU/SELECT to select >ANS. SYSTEM. 3.
Message Window Displays n Note: When the memory is full, the answering system answers incoming calls after 10 rings and announces, “Memory is full. Enter the remote access code.” Remote Access A two-digit security code is required to access the answering system remotely from any touch tone telephone. The preset code is 19; see “Remote Code” on page 15 to change it. 1. Dial your telephone number from any touch tone telephone. 2. When the system plays your announcement, enter the two-digit security code.
Additional Information Battery It takes up to 16 hours for the battery to be fully charged. When it is fully charged, you can expect the following performance: Operation Operating time While in handset use (talking*) Up to eight hours While in speakerphone mode (talking*) Up to five hours While not in use (standby**) Up to six days *Operating times vary depending on your actual use and the age of the battery. Additional Info **Handset is not charging or in use.
Recycle Rechargeable Batteries Placing rechargeable batteries in the trash can be harmful to the environment. Instead, recycle old rechargeable batteries at your local RadioShack store free of charge. RadioShack participates in the RBRC© battery recycling program, and is committed to preserving the environment and conserving natural resources. Call 1-800-THE-SHACK (1-800-843-7422) for more information. Expand Your Telephone System The handsets provided with your telephone system are pre-registered.
Replace a Handset If you want to replace a handset or re-assign the designated handset number of a registered handset, you must de-register all the handsets and then individually register each handset. To make de-registration easier, read all of the instructions on this page before you begin. To de-register all handsets: 1. Press and hold FIND HANDSET on the telephone base for about 10 seconds (until the IN USE light on the telephone base turns on and starts to flash), then release FIND HANDSET.
Troubleshooting If you have difficulty with your telephone, please try the suggestions below. For customer service, visit your local RadioShack store or www.radioshack.com. Low Battery shows on screen. • Place the handset in the telephone base or charger for recharging. • Remove and re-install the battery and use it until fully depleted, then recharge the handset in the telephone base or charger for up to 16 hours. • If the above measures do not correct the problem, replace the battery.
• If the battery is completely depleted, it can take up to 10 minutes to charge the handset before LOW BATTERY appears on the screen (page 6). • Purchase a new battery. Refer to the “Battery” section (page 38). Additional Info The CHARGE light is off. • Clean the charging contacts on the handset and telephone base each month with a pencil eraser or a dry non-abrasive fabric. • Make sure the power adapter and telephone line cord are plugged in correctly and securely. • Unplug the power adapter.
• Test a working telephone at the telephone wall jack. If another telephone has the same problem, the problem is in the telephone wall jack. Contact your local telephone company (charges may apply). • The telephone line cord might be malfunctioning. Install a new telephone line cord. • Re-install the battery and place the handset in the telephone base or charger. • Wait for the handset to synchronize with the telephone base. Allow up to one minute for this to take place.
Additional Info • If you subscribe to high-speed DSL (Digital Subscriber Line) Internet service through your telephone lines, you must install a DSL filter between the telephone base and the telephone wall jack. The filter prevents noise and caller ID problems caused by DSL interference. Contact your DSL service provider for more information about DSL filters. • Appliances or other cordless telephones plugged into the same circuit as the telephone base can cause interference.
My caller ID features are not working properly. • Caller ID is a subscription service. You must subscribe to this service from your local telephone company for this feature to work on your telephone. • The caller might not be calling from an area which supports caller ID. • Both you and the caller’s telephone companies must use equipment compatible with the caller ID service. • The caller ID information shows after the first or second ring.
Additional Info • Reset your telephone by unplugging the power adapter from the telephone base. Disconnect the battery from the cordless handset. Wait for 15 seconds, then plug in the power adapter and re-install the battery. Place the handset in the telephone base and allow up to one minute for the handset and telephone base to synchronize. • Other electronic products might prevent your handset and telephone base from communicating with each other.
• If the caller’s voice is very soft, the answering system might stop recording and disconnect the call. The answering system does not respond to remote commands. • Make sure your remote code is correct (page 15). • Make sure you are calling from a touch-tone telephone. When dialing a number, there should be tones. If there are clicks, then it is not a touchtone telephone and cannot activate the answering system.
these openings must not be blocked by placing the product on a soft surface such as a bed, sofa or rug. This product should never be placed near or over a radiator or heat register. This product should not be placed in any area where proper ventilation is not provided. . This product should be operated only from the type of power source indicated on the marking label. If you are not sure of the type of power supply in your home, consult your dealer or local power company. .
16. The power adapters are intended to be correctly oriented in a vertical or floor mount position. The prongs are not designed to hold the plug in place if it is plugged into a ceiling or an under-the-table/cabinet outlet. SAVE THESE INSTRUCTIONS Operating Range This cordless telephone operates with the maximum power allowed by the Federal Communications Commission (FCC).
Cleaning your telephone Your telephone has a durable plastic casing that should retain its luster for many years. Clean it only with a soft cloth slightly dampened with water or a mild soap. Do not use excess water or cleaning solvents of any kind. Remember that electrical appliances can cause serious injury if used when you are wet or standing in the water. If the telephone base should fall into the water, DO NOT RETRIEVE IT UNTIL YOU UNPLUG THE POWER CORD AND TELEPHONE LINE CORD FROM THE WALL.
Specifications Frequency control Crystal controlled PLL synthesizer Transmit frequency Handset: 1921.536-1928.448 MHz Channels 5 Nominal effective range Maximum power allowed by FCC and IC. Actual operating range might vary according to environmental conditions at the time of use. Size Handset: 6.38 X 1.85 X 1.23 in (162.00 X 47.00 X 31.20 mm) Telephone base: 1921.536-1928.448 MHz Telephone base: 5.88 X 4.21 X 2.06 in (149.30 X 107.00 X 52.40 mm) Charger: 3.13 X 3.67 X 1.85 in (79.60 X 93.
Additional Info FCC Information This equipment has been tested and found to comply with the requirements for a Class B digital device under Part 15 of the Federal Communications Commission (FCC) rules. These requirements are intended to provide reasonable protection against harmful interference in a residential installation.
The plug and jack used to connect this equipment to premises wiring and the telephone network must comply with applicable Part 68 rules and technical requirements adopted by ACTA. A compliant telephone cord and modular plug is provided with this product. It is designed to be connected to a compatible modular jack that is also compliant. An RJ11 jack should normally be used for connecting to a single line and an RJ14 jack for two lines. See Installation Instructions in the user’s manual.
Limited Warranty RadioShack warrants this product against defects in materials and workmanship under normal use by the original purchaser for one (1) year after the date of purchase from a RadioShack-owned store or an authorized RadioShack franchisee or dealer. RADIOSHACK MAKES NO OTHER EXPRESS WARRANTIES.
INCIDENTAL, OR CONSEQUENTIAL DAMAGES, EVEN IF RADIOSHACK HAS BEEN ADVISED OF THE POSSIBILITY OF SUCH DAMAGES. Some States do not allow limitations on how long an implied warranty lasts or the exclusion or limitation of incidental or consequential damages, so the above limitations or exclusions may not apply to you. This warranty gives you specific legal rights, and you may also have other rights which vary from State to State.
Protect the environment by recyclying your used electronics. Go to E-CyclingCentral.com to find an electronic recycling center near you. ©2009. RadioShack Corporation. All rights reserved. RadioShack and RadioShack.com are trademarks used by RadioShack Corporation.