PRO-95 Dual Trunk-Tracking Handheld Scanner 20-525 OWNER’S MANUAL — Please read before using this equipment. ! IMPORTANT ! If an icon appears at the end of a paragraph, go to the box on that page with the corresponding icon for pertinent information. — Warning — Caution ! — Important Ó — Hint Ô — Note o CONTENTS Features ................. 2 The FCC Wants You to Know .................. 6 Scanning Legally ............... 7 Preparation ............ 9 Power Sources .. 9 Using AC Power ...............
Features About Your Scanner ............... 15 About the Keypad ................. 16 Quick Start ........... 19 Understanding Banks ................... 19 Channel Storage Banks .............. 19 Search Banks .. 20 Understanding Your Scanner's Modes . 20 AM Mode ......... 21 FM Mode ......... 21 Motorola Mode ............... 21 EDACS Mode .. 23 Open and Closed Modes ............. 25 Operation ............. 26 Turning on the Scanner and Setting Squelch ........... 26 Storing Known Frequencies into Channels .
This scanner gives you direct access to over 59,000 frequencies including those used by police and fire departments, ambulance services, government agencies, air, and amateur radio services. Your scanner includes these features: Simultaneous Trunking Operation — tracks two trunking systems (Motorola and EDACS) and conventional systems at the same time.
Features Reviewing LockedOut Talk Group IDs ................... 67 Clearing Talk Group IDs ........ 67 Clearing All Talk Group IDs in One Bank ........ 67 Changing the Open/Closed Mode ............... 68 A General Guide to Frequencies ......... 69 US Weather Frequencies (in MHz) ........... 69 Ham Radio Frequencies ..... 69 Birdie Frequencies ..... 69 Guide to the Action Bands ........ 71 Typical Band Usage (in MHz) ........... 71 Band Allocation ......... 73 Frequency Conversion ...........
Features Priority Channel — lets you set the scanner to check one channel every 2 seconds so you do not miss transmissions. Attenuate — lets you program your scanner to reduce the scanner's sensitivity to strong local signals, to reduce interference or noise caused by these signals. Text Input — lets you input a text label for each channel, talk group ID, bank, or other memory location so you can easily identify the transmission.
a vehicle using a DC adapter (not supplied). Supplied Trunking Guide — provides a quick reference to public safety trunking radio systems in the United States. Your scanner can receive these frequencies: • 25 – 54 MHz • 108 – 136.9875 MHz The FCC Wants You to Know • 137 – 174 MHz • 216.0025 – 225 MHz • 406 – 512 MHz • 806 – 823.9875 MHz • 849 – 868.
instructions, may cause harmful interference to radio communications. The FCC Wants You to Know However, there is no guarantee that interference will not occur in a particular installation. If this equipment does cause harmful interference to radio or television reception, which can be determined by turning the equipment off and on, the user is encouraged to try to correct the interference by one or more of the following measures: • Reorient or relocate the receiving antenna.
companies, amateur radio services, military operations, pager services, and wireline (telephone and telegraph) service providers. It is legal to listen to almost every transmission your scanner can receive. However, there are some transmissions you should never intentionally listen to.
Ô NOTE Ô • Connecting an AC or DC adapter to the scanner disconnects internal batteries when you use the supplied non-rechargeable battery holder, but it does not disconnect internal batteries when you use the supplied rechargeable battery holder. • If you install the rechargeable battery holder, you can operate the scanner and recharge the rechargeable batteries at the same time. See “Using Batteries” and “Charging Rechargeable Batteries” on Page 11.
o o Never install nonWARNING rechargeable batteries in the rechargeable yellow battery holder. Nonrechargeable batteries can get hot or explode if you try to recharge them. CAUTION • The battery holder fits only one way. Do not force it. • Use only fresh batteries of the required size and recommended type. • • Preparation • 10 Always remove old or weak batteries. Batteries can leak chemicals that destroy electronic circuits.
Your scanner has a built-in charging circuit that lets you charge nickel-metal hydride (NiMH) or nickel cadmium (Ni-CD) rechargeable batteries (not supplied) while they are in the scanner. To charge rechargeable batteries, connect an appropriate AC or DC adapter to the PWR DC 9V jack. For best results we recommend RadioShack rechargeable nickel-metal hydride (NiMH) 1600mAh batteries. ! To charge batteries with a DC adapter from a DC power source, you must use a 9V, 300 mA DC adapter such as RadioShack Cat.
CAUTION You must use a Class 2 power source that supplies 9V DC and delivers at least 300 mA. Its center tip must be set to positive and its plug must fit the scanner's PWR DC 9V jack. Using an adapter that does not meet these specifications could damage the scanner or the adapter. ! • Preparation Always connect the AC or DC adapter to the scanner before you connect it to AC power or power source.
Connecting an Optional Antenna Always use 50-ohm coaxial cable, such as RG-58 or RG-8, to connect an outdoor antenna. For lengths over 50 feet, use RG-8 low-loss dielectric coaxial cable. If your antenna's cable does not have a BNC connector, you will also need a BNC adapter (not supplied, available at your local RadioShack store). Follow the installation instructions supplied with the antenna, route the antenna cable to the scanner, then connect it to the antenna jack.
! IMPORTANT ! Preparation The EPA certified RBRC® Battery Recycling Seal on the nickelcadmium (Ni-Cd) battery indicates RadioShack is voluntarily participating in an industry program to collect and recycle these batteries at the end of their useful life, when taken out of service in the United States or Canada. The RBRC program provides a convenient alternative to placing used Ni-Cd batteries into the trash or the municipal waste stream, which may be illegal in your area.
USING THE BELT CLIP You can use the belt clip attached to the back of the scanner for hands-free carrying when you are on the go. Slide the belt clip over your belt or waistband. TRANSFERRING DATA TO AND FROM ANOTHER SCANNER OR A PC You can transfer the programmed data to and from another PRO-95 scanner using a connecting cable which has 1/8-inch phone plugs on both ends (not supplied). Connect the cable between each scanner's PC/IF jacks. See “Cloning the Programmed Data” on Page 53.
About the Keypad You can also search the SEARCH banks, which are preprogrammed frequencies in the scanner's memory (see “Searching a Preprogrammed Frequency Range” on Page 32 for the frequency list). You can even change the frequency range on one of the SEARCH banks (SR5) to limit the search. When you find a frequency, you can store it into a programmable memory location called a channel, which is grouped with other channels in a channel-storage bank.
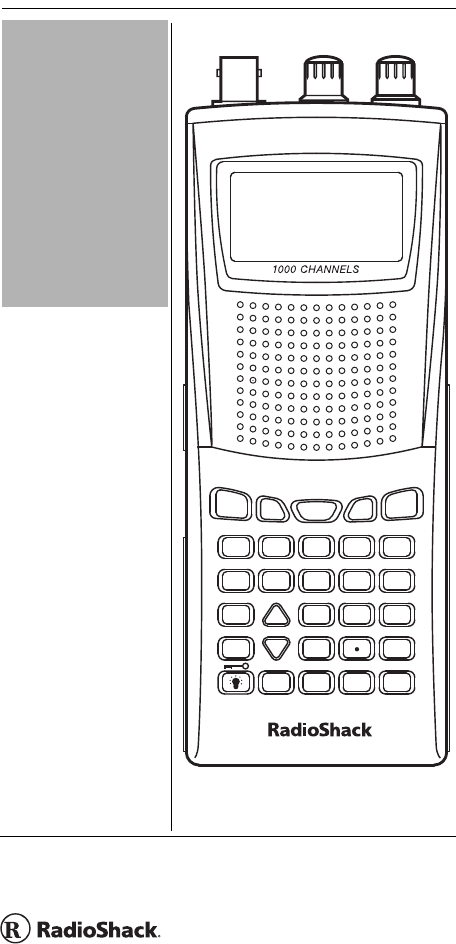
About the Keypad TRUNK — stores the trunking ID code or holds the trunking ID while scanning. PRI (Priority) — sets and turns the priority function on or off. TEXT — lets you input text. PAUSE — stops search. MODE — changes the receive mode (AM, FM, MOT, ED). / — turns on/off the display's backlight, or when used with FUNC locks/unlocks the keypad to prevent accidental entries. TUNE — lets you input a frequency and allows you to fine tune a frequency along with or .
1 — enters a 1, or inputs characters 0 through 9 in text mode. About the Keypad 2/ABC — enters a 2, or inputs characters A, B, or C. 3/DEF — enters a 3, or inputs characters D, E, or F. 4/GHI — enters a 4, or inputs characters G, H, or I. 5/JKL — enters a 5, or inputs characters J, K, or L. 6/MNO — enters a 6, or inputs characters M, N, or O. 7/PQRS — enters a 7, or inputs characters P, Q, R, or S. 8/TUV — enters an 8, or inputs characters T, U, or V.
QUICK START To help familiarize yourself with the scanner’s functions, keypad, and available frequencies, you can utilize one of these three features before you begin programming the scanner. Quick Start Preprogrammed Search Banks — allow you to listen to frequencies and decide which frequencies you want to store when you are ready to program the scanner. See “Searching a Preprogrammed Frequency Range” on Page 32.
To make it easier to identify and select the channels you want to listen to, your scanner divides the channels into 10 banks (0 to 9) of 100 (00 to 99) channels each, a total of 1,000 channels. You can use each channel-storage bank to group frequencies, such as those used by Motorola trunking, EDACS trunking, Marine, CB, Police, Fire, Aircraft and Ham (see “Typical Band Usage (in MHz)” on Page 71).
However, you cannot program MOT (Motorola), or ED (EDACS) mode in VHF. Each receive mode affects how your scanner operates when scanning and receiving transmissions, and also affects what transmissions you receive when you set the scanner to the closed mode. See “Changing the Receive Mode” on Page 49. Ô AM MODE Ô NOTE Ô Your scanner’s closed mode lets you hear only those talk groups you specify. For more information, see “Open and Closed Modes” on Page 25.
Motorola systems are trunking systems used primarily by business and public safety groups to efficiently allocate a small number of frequencies (as few as five) to many groups of users (as many as several thousand). To do this, each group of users in the system is assigned to a specific talk group. For example, the east side patrol officers might all be assigned to talk group 2160. One channel in the system is continuously transmitting data that identifies which talk groups are active on which channel.
FFF=Fleet ID SS=Subfleet ID Ô To properly map the raw Type I data to the correct fleet-subfleet format, you must program the correct fleet map into the scanner. Fleet map information is widely available on the Internet for most Type I systems in use. Type II system talk groups are identified by a 5-digit number. Valid talk group IDs are divisible by 16. If you try to enter an invalid talk group ID, the scanner rounds the ID down to the next valid ID.
is assigned a Logical Channel Number (LCN). For the scanner to correctly switch to an active frequency, you must program the frequencies in LCN order, starting with Memory 01. EDACS talk group IDs are entered as a 4-digit decimal number from 0001 to 2047 or AFS (Agency Fleet Subfleet) number from 00-001 to 15-157. Understanding Your Scanner's Modes When there is activity on an EDACS system, that information is sent out on the control channel. The scanner decodes the ID for the active talk group.
Ô NOTE Ô • In open mode, you hear all active talk groups except those you specifically exclude, making it easy to hear everything going on. In closed mode, you hear only those talk groups you specify. This makes it easy to listen only to talk groups you are interested in and exclude others. • When you select a channel manually, any transmission opens squelch, regardless of the current mode. • When no ID code is programmed into the scanner, it receives the signal in MOT or ED mode.
Ô NOTE Ô • • • • Operation 26 The scanner does not scan if there are no frequencies stored in channels. If the scanner does not scan and you have already stored frequencies in channels, turn SQUELCH further clockwise. If the scanner picks up unwanted, partial, or very weak transmissions, turn SQUELCH clockwise to decrease the scanner's sensitivity to these signals. If you want to listen to a weak or distant station, turn SQUELCH counterclockwise.
sure to get a current copy. Also see the supplied Trunking Guide. Ô NOTE Ô • If you are storing frequencies for an EDACS system, you must store them in order, with the first frequency in channel 1 for the current bank. For example, if you want to store frequencies of 150.0100, 150.0200, 150.0300, and 150.0400 MHz, you must store them in Channels 1, 2, 3, and 4 respectively. • When M is on the display, you can also select your desired bank and channel number with the FUNC and arrow keys.
Ô NOTE Ô • • • If you made a mistake in Step 3, Invalid Freq briefly appears and the scanner beeps when you press ENTER. Start again from Step 3. Your scanner automatically rounds the entered frequency to the nearest valid frequency. For example, if you enter a frequency of 151.553, your scanner accepts it as 151.550. After a transmission, to have the scanner pause for 2 seconds on this channel before proceeding to the next active transmission, press ./DELAY to turn the delay function on.
6. Repeat Steps 4 and 5 to enter the other trunking group frequencies for EDACS or additional control channel frequencies for Motorola systems. 7. If necessary, press MODE to change the receiving mode. STORING TEXT TAGS You can customize your scanner by storing text tags (up to 12 characters) for easy identification of channel transmissions, trunk IDs, or banks. Assigning a Text Tag to a Channel 1. Press MANUAL, enter the channel number where you want to enter the text, then press MANUAL again.
• “H” is the second letter associated with 4 on the keypad. Press 4 then 2. • “A” is the first letter associated with 2 on the keypad. Press 2 then 1. • “M” is the first letter associated with 6 on the keypad. Press 6 then 1. • “Space.” Press ./DELAY. • “6” is the sixth number associated with 1 on the keypad. Press 1 then 6. • “m” is the first letter associated with 6 on the keypad. Press 6 and FUNC (for the lower case set), then press 1. 5. Press ENTER to input the text.
Assigning a Text Tag to a Bank 1. Select a channel within the desired bank by pressing MANUAL and entering the bank number (000 for bank 0 or 200 for bank 2, for example). Press MANUAL again. 2. Press PGM. Ô NOTE Ô • To access the numbers, after you press TEXT (when you assign the text tag to a channel) or you press FUNC and 7 (when you assign the text tag to a bank), press 1. Then press the desired number you want to enter.
Press Character 0 .-#_@+*&/ , 0 then FUNC $ % ! ^ ( ) ? -> ` <- Ô NOTE Ô • • You can use the scanner's delay feature while searching the search bank. See “Using the Delay Function” on Page 45. The scanner does not search lockedout frequencies while searching ranges. See “Locking Out Channels or Frequencies” on Page 45. /DELAY space CL backspace FINDING AND STORING ACTIVE FREQUENCIES You can search for transmissions in the scanner’s preprogrammed search bank.
bank (SR0, SR1, SR2, SR3, SR4, or SR5). 2. In the marine and CB bands, you can directly select a channel or search through the band. When M appears at the left most position of the second line, you can directly select a channel (refer to “Band Charts” on Page 34). Press the desired channel number while M appears to select it. You can also change the channels by pressing or . 3. Press FUNC then SEARCH while M appears. M changes to S and now you can search through the band.
Band Charts Search bank: SR0 Marine band Receive mode: FM Operation 34 Channel Frequency (MHz) Channel Frequency (MHz) 01 156.050 05 156.250 06 156.3000 07 156.3500 08 156.4000 09 156.4500 10 156.5000 11 156.5500 12 156.6000 13 156.6500 14 156.7000 15 156.7500 16 156.8000 17 156.8500 18 156.9000 19 156.9500 20 157.0000 161.6000 21 157.0500 22 157.1000 23 157.1500 24 157.2000 161.8000 25 157.2500 161.8500 26 157.3000 161.9000 27 157.3500 161.
Two frequencies are assigned in one channel in some Marine frequencies. For example, 157.000 and 161.600 are assigned in Channel 20. Search bank: SR1 CB band Channel Frequency (MHz) Channel Frequency (MHz) 26.9750 01 26.9650 02 03 26.9850 04 27.0050 05 27.0150 06 27.0250 07 27.0350 08 27.0550 27.0750 09 27.0650 10 11 27.0850 12 27.1050 13 27.1150 14 27.1250 15 27.1350 16 27.1550 27.1750 17 27.1650 18 19 27.1850 20 27.2050 21 27.2150 22 27.2250 23 27.
Search bank: SR2 Police/Fire band Receive Mode: FM Group Frequency (MHz) 0 Step (kHz) 33.420–33.980 20 37.020–37.420 20 39.020–39.980 20 42.020–42.940 20 44.620–45.860 40 45.880 45.900 1 45.940–46.060 40 46.080–46.500 20 153.770–154.130 60 154.145–154.445 15 154.650–154.950 15 155.010–155.370 60 155.415–155.700 15 155.730–156.210 60 158.730–159.210 60 166.250 170.150 2 3 Operation 36 453.0375– 453.9625 12.5 458.0375– 458.9625 12.5 460.0125– 460.6375 12.5 465.
Search bank: SR3 Aircraft Receive mode: AM Frequency (MHz) Step (kHz) 108.000–136.9875 12.5 Search bank: SR4 Ham band Receive mode: FM Group Frequency (MHz) Step (kHz) 0 28.0000–29.7000 5 1 50.0000–54.0000 5 2 144.0000– 148.0000 5 3 222.0000– 225.0000 5 4 420.0000– 450.0000 12.5 5 1240.0000– 1300.0000 6.
Ô NOTE Ô • • You can copy and save a frequency into a specified bank, channel, or priority channel when the scanner finds an active frequency. See “Using Frequency Copy” on Page 41 to save the frequency. The frequency copy works only in search banks 2, 3, 4 and 5. While the scanner is searching, you can use the seek search by pressing FUNC then 7. Seek ON appears on the bottom line. The scanner stops at an active frequency for five seconds and restarts searching automatically.
In the Air and Limit search bands, press FUNC then press to start searching up from the lowest frequency or press to start searching down from the highest frequency. Manually Tuning a Frequency You can manually set the scanner to move through all receivable frequencies, or select a specific frequency as a starting point. Ô NOTE Ô If you press PAUSE while tuning, the scanner stops tuning and ** PAUSED ** appears. Press PAUSE again, and the scanner resumes tuning. 1. Press TUNE.
Ô NOTE Ô • • Operation 40 The scanner does not display the actual area affected by SAME messages. It uses only the message portion of the SAME signal (Warning, Watch, Statement, or Test Message). Your scanner can also receive weather alert tones (see “Priority” on Page 47). The scanner sounds an alert or beep when it receives the SAME code. If you do not stop the alert, it sounds the alert (or beep) for five minutes. Then the alert stops and the scanner beeps every ten seconds.
WX Alert and Beep Tone Confirmation 1. To test the WX alert, press WX for more than 2 seconds while DIG WX STBY appears. The display indicates the type of message, and the scanner sounds an alert or series of beeps. The beeps automatically change every 3 seconds. 2. Press any key except stop test sound mode. to USING FREQUENCY COPY You can copy a frequency into a specified channel, a vacant channel in a specified bank, or a priority channel.
second, the frequency to be copied flashes. 3. Press ENTER. All the conditions such as receive mode and delay condition are copied onto the channel. Chan Store! briefly appears. The scanner automatically returns to search mode. If you try to copy a frequency which is already stored, the scanner sounds the notice tone 3 times after you press ENTER. Dupl.f Chxxx appears at the bottom line. If you want to copy the duplicate frequency anyway, press ENTER, or if not, press CL to cancel.
copied on the channel. After about 2 seconds, the scanner automatically returns to search mode. 3. If you try to copy a frequency which is already stored, the scanner sounds the notice tone 3 times after you press ENTER. Dupl.f Chxxx appears at the bottom line. If you want to copy the duplicate frequency anyway, press ENTER, or if not, press CL to cancel. Ô NOTE Ô • You must store frequencies into channels before the scanner can scan them. The scanner does not scan through empty channels.
Turning Channel-Storage Banks Off and On To turn off banks while scanning, press the bank's number key so the bank's number disappears. For example, to turn off bank 1, press 1. The scanner does not scan any of the channels within the banks you turned off. Selected for Scanning in Open Mode Bank Off Selected for Scanning in Closed Mode Ô NOTE Ô • You cannot turn off all banks. There must be at least one active bank. • You can manually select any channel in a bank, even if the bank is turned off.
SPECIAL FEATURES Special Features USING THE DELAY FUNCTION Many conversations might have a pause of several seconds between a query and a reply. To avoid missing a reply, you can program a 2-second delay into any of your scanner's channels. Then, when the scanner stops on the channel, D appears and the scanner continues to monitor the channel for 2 seconds after the transmission stops before it resumes scanning or searching. Ô To turn delay on or off, press . /DELAY.
Reviewing the Lock-Out Channels Special Features To review all locked out channels, press MANUAL. Then repeatedly alternate between pressing FUNC and then L/OUT to view each locked-out channel. When you finish reviewing locked-out channels, press MANUAL. Locking Out Frequencies To lock out a frequency during a search, press L/OUT when the scanner stops on that frequency. The scanner locks out the frequency, then continues searching.
Special Features Clearing a Locked-Out Frequency To clear a locked-out frequency, select that frequency (see “Reviewing Locked-Out Frequencies” on Page 46), then press CL. If all locked-out frequencies are cleared within a bank, Empty. Lockout list appears. Clearing All Locked-Out Frequencies in a Search Bank 1. Press SEARCH. 2. Select the search bank in which you want to clear all locked-out frequencies. 3. Press FUNC then press L/OUT. Lockout list appears. 4. Press FUNC then 6.
the scanner has one priority channel. Special Features With the priority feature, you can scan through programmed channels and still not miss an important or interesting transmission on a specific channel. When priority is turned on, the scanner checks that channel every 2 seconds, and stays on the channel if there is activity until the activity stops. Ô Ô NOTE Ô • • • The priority feature does not operate while the scanner receives a trunking voice channel or during trunking delay time.
Special Features 2. Select the weather channel you want to program as the priority channel. 3. Press FUNC then PRI. Pri Channel flashes on the bottom line two times. To turn on the priority feature, press PRI so P appears on the top line while scanning. PRIon (or PRIwx if you set the priority to a weather frequency) appears on the bottom line. If the scanner detects activity on the priority channel, Pri Channel appears.
might have to change the receive mode. Special Features To change the receive mode, repeatedly press MODE.
Special Features When you turn it off, A changes to “.”. You cannot set the attenuator while the scanner is scanning. Press FUNC and then ATT to set the attenuator to its global mode. Global ATT. appears for 2 seconds at the bottom line and a or appears. a means the attenuator is on and - means it is off. Press ATT to turn the attenuator on or off. ATTon or ATT— appears on the bottom line while scanning. Press FUNC and then ATT again to turn off the global attenuation mode.
Special Features lit areas. Press to turn on the backlight for 5 seconds. To turn off the backlight before it automatically turns off, press again. To turn on the backlight so it does not turn off automatically, hold down for about 1 second. Press while the backlight is on to turn it off. You can select the amount of time the light stays on. Follow these steps to change the illuminated time: 1. If the scanner is on, turn it off and back on again. Welcome to Dual Trunking appears. 2.
locked. appears when you press any key after locking the keypad. CHANGING CONTRAST THE Special Features To turn off the key lock, press FUNC then / . The scanner beeps three times and Key unlocked appears. DISPLAY 1. Press MANUAL. 2. Press FUNC then 9. Use Up/ Down keys to set contrast. appears. 3. Press or to select the contrast. 4. Press ENTER to set the display contrast.
4. Press 1 to send the data to the other unit or press any other key to cancel the operation. The scanner sends the data. To exit the clone mode, remove the cable. TRUNKING TRUNKING OPERATION Trunking The scanner tracks transmissions that use the Motorola Type I and Type II (such as Smartnet and Privacy Plus) and hybrid analog trunking systems, plus GE/ Ericsson (EDACS) type systems extensively used in many communication systems. Trunking systems allocate a few frequencies to many different users.
the need to enter all the Motorola group frequencies. When the scanner decodes the Motorola control channel and finds the voice channel, the scanner displays the control channel memory location on the top line, the received frequency with VC (voice channel) on the second line, the bank and control channel memory location number on the third line and the Motorola ID number on the bottom line.
Ô NOTE Ô • • Trunking • You can scan only one type of trunked frequency, either EDACS or Motorola in a bank at one time. You can, however, mix conventional channels and frequencies in a bank. If you are programming trunked frequencies for Motorola Type I and hybrid systems, you must first program the fleet map (see “Programming Fleet Maps” on Page 60). If you are programming frequencies for an EDACS system you must store them in the Logical Channel Number order (usually listed as LCN#).
Ô NOTE Ô • To move through the bank selection faster, press PGM then FUNC and hold down or . To move through the banks one at a time, repeat the sequence of PGM, FUNC then or until you reach the desired bank. • If you select Not trunked instead of MOT, or ED, the scanner does not scan trunked frequencies. Instead, Not P000~.. D.+FM 0.00000 Bank 0 Ch 00 2. Press TRUNK to enter the ID program mode. 3.
Ô NOTE Ô Trunking Programming Trunking Frequencies • If you enter a frequency that has already been entered, the scanner sounds an error tone and displays Dupl. f and the channel number that has been duplicated. If the dual entry is an error press CL and enter the correct frequency. If the dual entry is intentional press ENTER to accept. • You may replace any frequency by selecting the bank and channel, pressing PGM and entering the new frequency.
1. Press PGM then TRUNK to enter the ID program mode. 2. Press FUNC and press (or hold) or to select the bank. 3. Press MODE and select MOT. 4. Press FUNC then 2. The display indicates Base freq.: on the first line, 406.0000 on the second line, Offset: 380 on the third line and Step: 25.0kHz on the bottom line. Trunking 5. While B in Base blinks, if necessary, press the desired Base frequency with the number keys and press ENTER. Confirm the entry.
Ô NOTE Ô • • On the 800 MHz trunking band, you can select a base frequency (normal or offset). On the 900 MHz trunking band, you do not need to set the base frequency (base, offset, step). PROGRAMMING MOTOROLA TRUNKING SYSTEM (800 MHZ) Follow these steps to program 800 MHz band Motorola trunking. Ô 1. Press PGM then TRUNK to enter the ID program mode. 2. Press FUNC then or to select the desired bank. 3. Press MODE and select Motorola trunking mode. 4. Press FUNC then 3.
1. Press PGM then TRUNK. 2. For each bank you want to program, repeatedly press FUNC. Then or to select the bank. 3. Press FUNC. Then press 8. Block 0 size code. Use 15 for type II. S—00 appears. Block 0 Trunking 4. Enter the size code supplied with the Type I system information, referring to the instruction that appears on the display. If the information was not supplied, try the following common fleet maps.
Ô NOTE Ô • • The default setting of the bank is for Motorola Type II. However, if you set Type I and you want to return to Type II, enter 15 at Step 5. Trunking To confirm the input, repeat Steps 1–5 and press ENTER. Each time you press ENTER, you confirm the size code. If you find an error, press CL and begin again at Step 1. 5. Press ENTER for each entry. If you make a mistake, press CL and enter the correct size code. Ô 6. Press SCAN to start scanning.
If the ID has already been stored when you press TRUNK, ID was saved appears. Ô Follow these steps to manually store talk group IDs or to edit a stored ID. 1. Press PGM. 2. Press TRUNK. Ô NOTE Ô When you try to store more than 100 talk group IDs in a bank, Memory full! appears. Clear some talk group IDs in order to store new ones (see “Clearing Talk Group IDs” on Page 67). Bank 0-0 ID No. 00 MOT: none Trunking 3.
Ô NOTE Ô • • If you made a mistake in Step 4, Invalid ID. appears and the scanner beeps when you press ENTER. Start again at Step 3. Trunking You can enter either decimal or AFS code for ED (EDACS) ID. The default setting is decimal ID entry. When you press FUNC then 2, AFS format appears for about 2 seconds. Now you can enter the ID code with AFS format. 8. If you want to tag the ID, press TEXT, enter the desired text tag for the ID. Then press ENTER (see “Text Input Chart” on Page 31). 9.
the scan indication S at the first digit in the top line is changed to H. To release ID hold, press SCAN or TRUNK. TURNING AN ID SUBBANK ON OR OFF Follow these steps to turn the ID sub-bank on or off during the program mode: 1. Press TRUNK repeatedly to select the desired sub-bank. Trunking 2. Press FUNC then 1 to turn the sub-bank on if it is off or off if it is on. Follow these steps to turn the ID sub-bank on or off during the scan mode: 1.
3. Press FUNC, or to move to the desired bank. 4. Press or to select the ID memory. 5. Press L/OUT to lock out the ID. L appears. 6. To remove the lockout from a trunking ID, manually select the ID memory, and press L/OUT until L disappears. Trunking You can confirm the ID code while the scanner shows the text when the received signal is a voice channel. 1. Press TEXT while the scanner is receiving the voice channel and indicating the text name. The ID code appears as MOT:XXXXXX or ED:XXXX. 2.
REVIEWING LOCKED-OUT TALK GROUP IDS You cannot clear all lockouts from a talk group at the same time. 1. Press PGM then TRUNK. 2. Press FUNC. Then L/OUT. The locked out ID appears. If the ID memory bank has no locked-out ID, you hear the low beep tone. Trunking 3. Press FUNC then or to select a search bank. Or, just press or to search for any locked out IDs in a bank. CLEARING TALK GROUP IDS 1. Press PGM then TRUNK. 2. Press FUNC, or to select ID memory. 3. Press FUNC then CL.
4. Press FUNC then 6. Confirm list clear? 1=YES Press other key for NO. appears. 5. Press 1 to clear all talk group IDs within a bank. List cleared appears. To cancel the deletion, press any key except 1. The scanner returns to the talk group ID memory mode. CHANGING THE OPEN/CLOSED MODE 1. Press MANUAL. Trunking 2. Press FUNC then or to select the channel storage bank. 3. Press FUNC then 5. Bank OPEN. or Bank CLOSED. appears.
A GENERAL GUIDE TO FREQUENCIES Reception of the frequencies covered by your scanner is mainly “line-of-sight.” That means you usually cannot hear stations that are beyond the horizon. US WEATHER FREQUENCIES (IN MHZ) 162.400 162.425 162.450 162.475 162.500 162.525 162.550 HAM RADIO FREQUENCIES Wavelength A General Guide to Frequencies Ham radio operators often transmit emergency information when other means of communication break down.
receiver. These operating frequencies might interfere with transmissions on the same frequencies. If you program one of these frequencies, you hear only noise on that frequency. If the interference is not severe, you might be able to turn SQUELCH clockwise to omit the birdie. The scanner’s birdie frequencies (in MHz) are:: UHF Low Band (MHz) 408.0000 420.7500 446.2500 459.0000 433.5000 471.7500 482.30625 484.5000 497.2500 510.0000 VHF High Band (MHz) A General Guide to Frequencies 114.7500 116.
antenna and moving it away from the scanner. Make sure that no other nearby radio or TV sets are turned on near the scanner. Use the search function and scan every frequency range from its lowest frequency to the highest. Occasionally, the searching will stop as if it had found a signal, often without any sound. This is a birdie. Make a list of all the birdies in your scanner for future reference. GUIDE TO THE ACTION BANDS TYPICAL BAND USAGE (IN MHZ) HF Band HF Range 25.000–26.960 Citizen’s Band 26.
UHF Band U.S. Government 406.000–420.000 70-cm Amateur 420.000–450.000 Low Range 450.000–470.000 FM-TV Audio Broadcast, Wide Band 470.000–512.000 800 band Law Enforcement 806.000–824.000 Conventional Systems 851.000–856.000 Conventional/ Trunked Systems 856.000–861.000 Public Safety 866.000–869.000 Trunked Private/ General 894.000–960.000 25-cm Amateur 1240.000–1300.
UHF Band Activities Frequencies (MHz) 70Centimeter Amateur Band 420.000 – 450.000 FM Repeaters Land-Mobile “Paired” Frequencies 450.000 – 470.000 Base Stations 451.025 – 454.950 Mobile Units 456.025 – 459.950 Repeater Units 460.025 – 464.975 Control Stations Ô 465.025– 469.975 BAND ALLOCATION To help decide which frequency ranges to scan, use the following listing of the typical services that use the frequencies your scanner receives.
Abbreviation Service FIRE Fire Department HAM Amateur (Ham) Radio GOVT Federal Government GMR General Mobile Radio GTR General Trunked IND Industrial Services (Manufacturing, Construction, Farming, Forest Products) MAR MARI Military Amateur Radio Maritime Limited Coast (Coast Guard, Marine Telephone, Shipboard Radio, Private Stations) MARS Military Affiliate Radio System MED Emergency/Medical Services Guide to the Action Bands MIL U.S.
Abbreviation Service ROAD Road & Highway Maintenance RTV Radio/TV Remote Broadcast Pickup TAXI Taxi Services TELM Telephone Maintenance TOW Tow Trucks TRAN Transportation Services (Trucks, Tow Trucks, Buses, Railroad, Other) TSB Trunked Systems TVN FM-TV Audio Broadcast USXX Government Classified UTIL Power & Water Utilities WTHR Weather HIGH FREQUENCY (HF) — (3 MHz-30 MHz) CB Band (26.965-27.405 MHz) 10-Meter Amateur Band (28.0-29.7 MHz) 28.000-29.700 ............................
35.020-35.980........... BUS, PUB, IND, ................................................... TELM 36.000-36.230.................... GOVT, MIL 36.230-36.990...........Oil Spill Cleanup, ........................................... GOVT, MIL 37.020-37.980...................... PUB, IND 38.000-39.000.................... GOVT, MIL 39.020-39.980...............................PUB 40.000-42.000......... GOVT, MIL, MARI 42.020-42.940...............................POL 42.960-43.180................................
Guide to the Action Bands 152.870-153.020..................IND, MOV 153.035-153.725.......... IND, OIL, UTIL 153.740-154.445................ PUB, FIRE 154.490-154.570.................. IND, BUS 154.585......................Oil Spill Cleanup 154.600-154.625...........................BUS 154.655-156.240.............MED, ROAD, ............................................ POL, PUB 156.255-157.425................. OIL, MARI 157.450....................................... MED 157.470-157.515......................
ULTRA HIGH FREQUENCY (UHF) — (300 MHz-3 GHz) U. S. Government Band (406-420 MHz) 406.125-419.975........... GOVT, USXX 70-Centimeter Amateur Band (420-450 MHz) 420.000-450.000......................... HAM Low Band (450-470 MHz) 450.050-450.925.......................... RTV 451.025-452.025...... IND, OIL, TELM, ..................................................... UTIL 452.0375-453.00................ IND, TAXI, ............................. TRAN TOW, NEWS 453.0125-454.000................ PUB, OIL 455.
Conventional Systems Band — Locally Assigned (in 6.25 kHz steps) Frequency Range Service 851.0125–855.9875 MHz CSB Conventional/Trunked Systems Band — Locally Assigned (in 6.25 kHz steps) Frequency Range Service 856.0125–860.9875 MHz CTSB Trunked Systems Band — Locally Assigned (in 6.25 kHz steps) Frequency Range Service 861.0125–865.9875 MHz TSB Public Safety Band — Locally Assigned (in 6.25 kHz steps) Frequency Range Service 866.0125–868.9875 MHz PSB Frequency Range Service 902.000–928.
Private Trunked Band (in 6.25 kHz steps) Frequency Conversion Frequency Range Service 935.0125–939.9875 MHz PTR General Trunked Band (in 6.25 kHz steps) Frequency Range Service 940.0125–940.9875 MHz GTR 23-Centimeter Amateur Band (in 6.25 kHz steps) Frequency Range Service 1240.000–1300.000 MHz HAM FREQUENCY CONVERSION The tuning location of a station can be expressed in frequency (kHz or MHz) or in wavelength (meters). The following information can help you make the necessary conversions.
Frequency Conversion To convert from kHz to MHz, divide the number of kilohertz by 1,000: 127.800 (kHz) / 1,000 = 127.
TROUBLESHOOTING Problem Scanner is totally inoperative. Poor or no reception. Possible Cause Troubleshooting The AC or DC adapter is not connected. Be sure the adapter's barrel plug is fully inserted into the PWR DC 9V jack. Batteries have failed Recharge the rechargeable batteries or replace the standard batteries An antenna is not connected or is connected incorrectly. Be sure an antenna is properly connected to the scanner. Programmed frequencies are the same as “birdie” frequencies.
RESETTING/ INITIALIZING THE SCANNER RESETTING THE SCANNER 1. Turn off the scanner, then turn it on again. 2. Insert a pointed object, such as a straightened paper clip, into the reset opening on the side of the scanner. Then gently press and release the reset button inside the opening. Pressing the reset button does not clear the scanner's memory. INITIALIZING SCANNER THE 1. Turn off the scanner, then turn it on again. Welcome To Dual Trunking appears. ! 2.
CARE Keep the scanner dry; if it gets wet, wipe it dry immediately. Use and store the scanner only in normal temperature environments. Handle the scanner carefully; do not drop it. Keep the scanner away from dust and dirt, and wipe it with a damp cloth occasionally to keep it looking new. Modifying or tampering with the scanner’s internal components can cause a malfunction and might invalidate its warranty and void your FCC authorization to operate it.
ID memory banks............................ 10 Sub-banks per bank.......................... 5 Number of memory IDs per sub-bank ........................................................ 20 Sensitivity (20 dB S/N): FM: 25–54 MHz .............................. 0.3 µV 108 –136.9875 MHz ................. 0.3 µV 137–174 MHz ........................... 0.5 µV 216–225 MHz ........................... 0.5 µV 406–512 MHz ........................... 0.5 µV 806–960 MHz ........................... 0.7 µV 1240–1300 MHz ..
Intermediate Frequencies (IF): 1st .................................... 380.8 MHz 2nd ...................................... 21.4 MHz 3rd.......................................... 455 kHz Priority Sampling................. 2 seconds Operating Temperature ... -14 to 140° F (-10 to 60° C) IF Rejection 380.8 MHz at 154.1 MHz ........ 60 dB 21.4 MHz at 154.1 MHz ........ 100 dB Squelch Sensitivity: Threshold (FM and AM) ............ 0.5µV Tight (FM) ................................. 25 dB Tight (AM) ...........
Parts and Accessories PARTS AND ACCESSORIES Parts and accessories are available at your local RadioShack store. Accessories are also available online at www.radioshack.com. Parts and accessories are available but not limited to the following. Visit your local RadioShack store or obtain a RadioShack catalog for a more complete listing of available accessories. External Antenna Connect to your scanner’s external antenna jack for great reception of signals on many frequencies.
Connecting Cable Parts and Accessories Use to connect your scanner to another scanner so you can transfer data between them. PC Interface Cable Use to connect your scanner to a PC so you can transfer data between them. 9V, 300 mA AC Adapter DUAL Use to connect your scanner to AC power.
Notes NOTES 89
Notes 90
Notes
Limited One-Year Warranty This product is warranted by RadioShack against manufacturing defects in material and workmanship under normal use for one (1) year from the date of purchase from RadioShack company-owned stores and authorized RadioShack franchisees and dealers.