
Specifications

BIOS Configuration
3 3
3-5
Existing (formatted) disks must be set up using the same parameters that were used
originally when the disk was formatted. You must enter the specific cylinder, head,
sector information as listed on the label attached to the drive at the factory. Use the
‘‘User’’ type described below.
Type
For the majority of users who are using a system that was pre-configured, you
probably have an IDE hard disk drive. Select ‘‘None’’ if you are not using an IDE hard
disk drive. In the case for which you have an IDE disk but cannot employ the
‘‘Autotype’’ feature, then select ‘‘User’’ for the Type and enter the correct drive
values for cylinders, heads, sectors/track, and write precomp from the label attached
by RadiSys at the factory. For disks not supplied by RadiSys, consult the product’s
documentation.
Note that there are some restrictions when setting up devices on the EPC-8. If you
plan to boot from a non-IDE device, such as the resident Flash memory or VMEbus,
set the C: drive as None and use the BIOS extension. Flash and VMEbus BIOS
extensions are enabled and configured in the Advanced Menu.
Once you have completed the setup for the IDE Master, you can choose the IDE
Adapter 0 Slave Sub-menu to configure your second drive. When finished, press the
ESC key to return to the Main Menu.
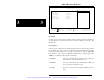
Boot Sequence Sub-Menu
The Boot Sequence Sub-Menu allows you to change the boot sequence options. The
following displays:
Artisan Technology Group - Quality Instrumentation ... Guaranteed | (888) 88-SOURCE | www.artisantg.com