
User's Manual


WinLink 1000 Installation and Operation Manual Quick Start Guide
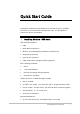
Installing WinLink 1000 Units 3
Î
To align the ODU:
1. Connect power to the IDU.
Do not stand in front of a live outdoor unit.
The antenna used for this transmitter must be installed to provide a
separation distance of at least 364 cm from all persons and must not be
co-located or operating in conjunction with any other antenna or
transmitter.
2. Align the site A ODU in the direction of the site B ODU.
3. Align the site B ODU in the direction of the site A ODU.
4. Alternating between each site, turn each ODU slowly listening to the buzzer
beep sequence until optimal alignment is achieved.
5. Secure the site A and site B ODUs to the mast/wall.
6. Monitor the link quality for about 15 minutes to verify stability.
7. Connect the management station to one of the two IDUs in the link.
8. Start the WINLink Manager application.
9. Open the installation wizard and follow the installation steps.
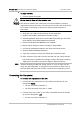
10. After selection of the radio channel and the link rate, verify that the
link quality bar in the WinLink manager is within the green range for
TDM service and within the yellow range for Ethernet service.
Achieve the best possible link quality values. In case of radio link loss,
verify the ODU alignment, or change the radio channel in both sides of
the link. When the radio link resumes continue the installation process.
Connecting User Equipment
Î
To connect user equipment to the IDU:
1. Connect the user equipment (such as PBX) to the IDU RJ-45 port
designated Trunk:
On the rear panel of the IDU-E.
On the front panel of the IDC-C, AIND
2. Connect user hub/router or any other compatible device to the IDU
RJ-45 port designated LAN:
On the rear panel of the IDU-E.
Note
Warning