User Guide EchoView
© Copyright 2014 Honeywell Analytics.
EchoView Host User’s Guide Contents 1 2 3 4 5 6 7 8 Marking .................................................................................... 6 1.1 Operation Area and Conditions ................................. 7 1.1.1 Hazardous Areas classified by Zones ................. 7 1.1.2 Hazardous Areas classified by Divisions ............ 7 1.2 Instruction For Safe Use ............................................ 8 1.3 Use In Hazardous Areas............................................. 8 Standard Kit ....
EchoView Host User’s Guide 9 Viewing Data From Connected Monitors .............................. 35 9.1 One Monitor In Alarm ............................................. 36 9.2 Multiple Monitors In Alarm..................................... 36 9.2.1 Alarm Abbreviations ......................................... 38 9.2.2 Alarm Signal Summary..................................... 39 9.3 Offline Monitor(s) .................................................... 39 9.4 Backlight ...................................
EchoView Host User’s Guide WARNINGS Read Before Operating This manual must be carefully read by all individuals who have or will have the responsibility of using, maintaining, or servicing this product. The product will perform as designed only if it is used, maintained, and serviced in accordance with the manufacturer’s instructions. Warning: Use only the Lithium battery or external rechargeable battery provided by Honeywell Analytics.
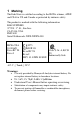
EchoView Host User’s Guide 1 Marking The EchoView is certified according to the IECEx scheme, ATEX and CSA for US and Canada as protected by intrinsic safety. The product is marked with the following information: RAE SYSTEMS 3775 N. 1st. St., San Jose CA 95134, USA FMC-400 Serial No/barcode: XXX-XXXX-000 IECEx TSA 10.0016X Ex ia IIC T4 Ex ia I 0575 IM1/II 1G Class I, Gr.
EchoView Host User’s Guide Applied Standards IECEx IEC 600790:2004 IEC 6007911:2006 ATEX EN 600790:2006 EN 6007911:2007 North America CAN/CSA-C22.2 No. 0-M91 CAN/CSA-C22.2 No. 15792 C22.2 No. 142-M1987 UL 913 UL916 Radio Specifications Radio model: RM900 Frequency range: Within 902 to 907.5 MHz and 915 to 928 MHz, use IEEE 802.15.4 channel 1, 6, 7, 8, 9 and 10 Modulation: 802.15.4 DSSS BPSK RF power (Tx):10dBm Data rate: 40kbps 1.1 Operation Area and Conditions 1.1.
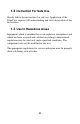
EchoView Host User’s Guide 1.2 Instruction For Safe Use Strictly follow the instructions for safe use. Application of the EchoView requires full understanding and strict observation of the instructions. 1.3 Use In Hazardous Areas Equipment which is intended for use in explosive atmospheres and which has been assessed and certified according to international regulations may be used only under specified conditions. The components may not be modified in any way.
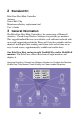
EchoView Host User’s Guide 2 Standard Kit EchoView Host Mini Controller Antenna Swivel Belt Clip Maintenance/battery replacement tool User’s Guide 3 General Information The EchoView Host Mini-Controller is the cornerstone of Honeyell Analytics’ Closed-Loop Wireless Solutions for portable gas monitors.
EchoView Host User’s Guide Extending the range between monitors and an EchoView Host. If a long distance is between the portable monitors and the EchoView Host, Mesh Routers can be employed to extend the range. Up to three Mesh Routers can be used in this configuration, and each can extend the range by up to 300 meters, typical.
EchoView Host User’s Guide 11
2.1. EchoView Host User’s Guide Key Features • Remote wireless access to real-time readings and alarm status of portable gas monitors for faster incident response • Establishes a closed-loop wireless network with and displays real-time readings and alarm status of up to eight portable gas monitors at the same time • Communication range extendable to 1 km / 0.
EchoView Host User’s Guide 4 Physical Description 1 6 2 5 3 4 1 2 3 4 5 6 LED alarm LCD (with backlighting) Buzzer alarm Battery cover (on bottom) Y/+, MODE, and N/- keys Antenna 13
EchoView Host User’s Guide 4.1 LCD Display (Monitoring) 4 1 2 5 3 6 1 2 3 4 5 6 Selected monitor (solid circle or star)* Unselected monitor (open circle or star) Offline monitor (open circle with “X”) Radio transmission indicator (“H” for “Host”) Audible alarm on/off indicator (“on” shown) Battery indicator Note: The Unit ID can be a device ID as well as a radio ID, depending on the portable monitor’s setting. 4.
EchoView Host User’s Guide 5 Specifications RF Certifications Display Audible alarm Visual alarm Calibration EM Immunity Operating Range User Interface Power Supply Operation Time Operating Temperature Humidity Dimensions Weight IP Rating Mounting FCC Part15 CE EN 300328 Graphical LCD (1 x 1.5″) with backlight 90dB @ 30cm 2 super-bright red LEDs None necessary No effect when exposed to 0.
EchoView Host User’s Guide 6 Operation When turned on, the EchoView Host radio is always turned on and listening for remote units. Whenever you start EchoView Host, it automatically tries to form a network with remote wireless devices configured to communicate on the same PAN ID and Channel. Make sure the battery with sufficient charge is installed before operating the EchoView Host. Refer to page 40 for information on battery installation and replacement. 6.
EchoView Host User’s Guide Note: Modem type relates to its permanently set operating frequency. For further information, refer to page 33. Then the EchoView Host attempts to form a wireless network. When the network is created and communication with wireless monitors is established, the main screen is shown.
EchoView Host User’s Guide 6.2 Turning The EchoView Host Off Hold down the [MODE] key through the “5…4…3… 2… 1… Power Off” sequence. The EchoView Host is off when the display is blank. Release the [MODE] key. The EchoView Host is now off. 6.3 Battery Indicator The EchoView Host’s internal battery is designed to provide power for up to 10 days. When the battery gets low, the EchoView Host beeps once per minute and the battery icon is empty. See page 40 for the replacement procedure.
EchoView Host User’s Guide Empty Full Note: For a fixed-system application, an external power source, the provided by RAE PowerPak, can be used as a substitute for the internaToxil battery. Only remove the external battery adapter in nonhazardous locations. 6.4 Buzzer (Audible Alarm) Off Indicator The EchoView Host’s buzzer (audible alarm) can be turned off, so the LED visible alarms flash but there is no sound when in alarm. The icon on the main screen indicates its state. Buzzer on Buzzer off 6.
EchoView Host User’s Guide 7 Deploying The EchoView Host When deploying a wireless portable detector network that utilizes EchoView Hosts, make sure all units on the network have been set up with the same PAN ID and Channel number. The EchoView Host establishes a network automatically with up to eight instruments. 8 Programming The EchoView Host Programming Mode is accessed by first providing the correct password.
EchoView Host User’s Guide If your password is incorrect, you see this screen: After a few seconds, the EchoView Host exits to its main screen. When you have successfully entered Programming Mode, you see this screen: Note: If you do not make a selection in 60 seconds, the EchoView Host automatically exits to the main screen. Press [Y/+] or [N/-] to scroll to “Settings,” “Wireless,” or “Exit.” Then press [MODE] to select your choice. Settings provides information about your instrument.
EchoView Host User’s Guide 8.1 Settings Settings include some read-only information (Serial Number and Firmware Version) and some settings that you can change. Press [Y/+] to scroll up or [N/-] to scroll down. Note: Two more screens contain additional options: Note: The scrolling “wraps,” so once you reach the first or last item, it starts scrolling through the items again.
EchoView Host User’s Guide 8.1.1 Buzzer On/Off You can turn the buzzer (audible alarm) on or off. To access the parameter, press [MODE] when its name is highlighted (dark circle): You are asked whether you want to disable (or enable, if it is already disabled) the audible alarm: or To toggle the audible alarm from on to off (or off to on), press [Y/+], and a confirmation message appears. To exit without performing the reset, press [N/-]. or 8.1.
EchoView Host User’s Guide The contrast value is shown in the display. Step through the digits from left to right by pressing [MODE]. Change a digit’s value by pressing [Y/+] to increase and [N/-] to decrease. After the third digit, you see a flashing “?” • Save your changes by pressing [Y/+]. • Exit without saving changes by pressing [N/-]. • Step back to the first digit by pressing [MODE]. 8.1.3 Serial Number This shows the Serial Number of the EchoView Host.
EchoView Host User’s Guide 8.1.4 Firmware Version This shows the firmware version incorporated in the instrument. It is read-only. You cannot make changes to the information. To view it, press [MODE] when its name is highlighted (dark circle): Press [MODE] to return to the Settings menu. If you do not make a selection in 60 seconds, it automatically exits to the menu. 8.1.5 Factory Reset You can perform a factory reset to the instrument’s original settings.
EchoView Host User’s Guide While the EchoView Host is being reset to its original factory settings, the screen shows that the activity is taking place: When the reset is complete, this screen appears: Then the unit returns to the Settings menu. Note: Factory Reset changes all EchoView Host settings to factorydefault values. These include: • PAN ID: 999 • Channel: - 6 (for 9XX MHz) - 0 (for 868 MHz) All custom-configured settings are removed and cannot be retrieved! 8.1.
EchoView Host User’s Guide Note: If you make a mistake, you can cycle through the digits by pressing [MODE] and then using [Y/+] and [N/-] to change the number in each position. Once all the four digits have been entered, press [MODE] again to see the following screen appear. • Save your changes by pressing [Y/+]. • Exit without saving changes by pressing [N/-]. • Step back to the first digit by pressing [MODE].
EchoView Host User’s Guide 8.1.7 Page Disable The Page feature can be enabled to allow up to four additional EchoView Host “mimic panels” to be used as part of a closed-loop system. When the Page feature is enabled, the EchoView Host broadcasts instrument data. These data can be picked up by mimic panels. If no mimic panels are planned to be used, this feature should be disabled, in order to ensure data privacy. Note: The default value is “Disabled.
EchoView Host User’s Guide 8.2 Wireless Wireless consists of editable parameters and actions to configure, form, and test a closed-loop wireless network. Under Programming Menu, select “Wireless.” Press [Y/+] to scroll up or [N/-] to scroll down through wireless submenus. Note: When you reach the last item and continue scrolling, a second screen appears: The scrolling “wraps,” so once you reach the first or last item of either screen, it starts scrolling through the items in the other screen again.
EchoView Host User’s Guide 8.2.1 Ping Net Pinging tests the radio connection between the EchoView Host and other units on its network. (A “ping” is a short signal sent to the network to prompt a reply; it contains no other data.) Scroll until “Ping Net” is selected. Press [MODE] to ping the network. This message appears: Press [Y/+]. The Echoview Host broadcasts a ping signal to its network. All devices in the network that receive the ping signal respond with a beep if they are within the range.
EchoView Host User’s Guide 8.2.2 PAN ID Setup All units on a network must be programmed with the same PAN ID (Personal Network Identifier) to ensure communication compatibility. When you see this screen, press [MODE] to view the current PAN ID or to change it: Important! The allowed range for PAN ID numbers is 001 through 999. The screen shows the PAN ID, with the cursor blinking on the first digit. Step through the digits from left to right by pressing [MODE].
EchoView Host User’s Guide 8.2.3 Form Net This screen is for forming a network. When you see this screen, press [MODE] to form a network. This function allows the radio to scan all available channels and choose the least-congested one: The screen now displays a message asking if you want to confirm your choice to form a network: • • Press [Y/+] to form a network and automatically find the best channel to operate on. Press [N/-] to exit without creating a network.
EchoView Host User’s Guide 8.2.4 Channel Setup All units in a network must operate on a single channel. The available channels vary by the internal wireless modem’s frequency, and channel ranges are set by Honeywell Analytics to correspond with the wireless modem frequency. These are the modem frequencies and channel ranges: 869 MHz: Channel 0 (channel cannot be changed) 900 MHz: Channels 1 through 10 Note: You can use “Form Net” to automatically have the EchoView Host select the least-congested channel.
EchoView Host User’s Guide • • • Save your changes by pressing [Y/+]. Exit without saving changes by pressing [N/-]. Step back to the first digit by pressing [MODE]. If you have saved the channel number successfully, you see this screen: Important! Remember that the range of allowed channels for instruments on a EchoView Host’s network depends on the wireless modem frequency. Therefore, you may not be able to change the channel to a number outside of its assigned set of numbers.
EchoView Host User’s Guide 9 Viewing Data From Connected Monitors Whenever a monitor on the network goes into alarm the EchoView Host also receives it and displays it. When monitoring the network and when no alarms are present, the EchoView Host’s display looks like this: All monitors are represented with a unique identifier and a circle. (A filled—dark—circle indicates the monitor has been selected for viewing.) To select a monitor: Press [Y/+] to scroll up or [N/-] to scroll down.
EchoView Host User’s Guide 9.1 One Monitor In Alarm When a monitor on the network goes into alarm, the LEDs flash and the buzzer sounds. In addition, the circle to the left of the identifier changes to a star: Regardless of where the monitor is in the list, when that monitor goes into alarm, it automatically moves to the beginning of the list and the circle next to it changes to a star. 9.
EchoView Host User’s Guide Press [MODE]. The screen changes to show the data. For example: Monitor And Status Instrument Model Alarm Status Reading Sensor Name The arrows are soft keys for navigating to other screens for more data. • • • Press [Y/+] to go back one screen. Press [MODE] to exit. Press [N/-] to advance one screen.
EchoView Host User’s Guide 9.2.1 Alarm Abbreviations Because some alarm type names are too long to display completely on the EchoView Host, abbreviations are used. In some cases, the message is not shortened.
EchoView Host User’s Guide 9.2.2 Alarm Signal Summary Alarm Mode Buzzer & LED EchoView Host low battery Monitor fault (such as low battery, sensor error, etc.) Monitor low alarm Monitor high alarm 1 beep per minute 1 beep per second 2 beeps per second 3 beeps per second 9.3 Offline Monitor(s) If any other monitors on the network go offline, the circle accompanying the monitor’s name changes to a circle with an “X” through it. In addition, offline monitors are moved to the last position in the list.
EchoView Host User’s Guide 10 Internal Battery Replacement Battery compartment Battery removal tool 3-pin end Hexagonal end 1. Use the 3-pin end of the tool to unscrew and open the battery cover by turning it counterclockwise. 2. Remove the battery. 3. Insert the new battery with its positive (“+”) pole towards inside of the unit. 4. Replace the battery cover by turning it clockwise with the 3-pin end of the tool.
EchoView Host User’s Guide Note: After changing the battery, wait at least 60 seconds before turning the EchoView Host on. Battery Battery cover Warning Only change the internal battery in non-hazardous locations and use the battery provided by Honeywell Analytics. If you need support with p/n, please contact Honeywell Analytics Representative. 10.
EchoView Host User’s Guide 11 Troubleshooting Failure Symptom Cannot turn on Cause Solution Battery charge too low Replace battery Battery has been changed Wait at least 60 seconds to turn on EchoView Host Contact your Honeywell Analytics Representive for information on batteries EchoView Host cannot receive a monitor’s signal Too much distance between the EchoView Host and monitors The distance should be around 100m/330 ft, line of sight.
EchoView Host User’s Guide 12 Year Of Manufacture To identify the year of manufacture, refer to the serial number of the instrument. The letter in the serial number indicates the year of manufacture. For example, “M” indicates the manufacturing year is 2010.
Find out more www.honeywellanalytics.com Contact Honeywell Analytics: Europe, Middle East, Africa Life Safety Distribution AG Javastrasse 2 8604 Hegnau Switzerland Tel: +41 (0)44 943 4300 Fax: +41 (0)44 943 4398 gasdetection@honeywell.