
User manual

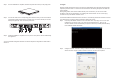
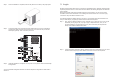

Step 4 Once the installation is completed, insert the tray back and fi x it fi rmly in the proper place.
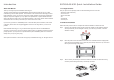
Step 5
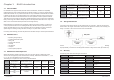
Connect the cables to the corresponding jacks. Make sure that you have connected the
corresponding cables and devices to two SCSI ports, one LAN or RS-232 port and four
eSATA ports (optional). Then connect the power cord.
Step 6 Hardware installation is completed. You can power on the system to start the related setup
and application.
You can use related management interfaces to make the respective confi gurations. Please refer to
section 2.3
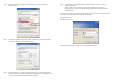
3. Login
SR7650-4S-U3D supports three types of connection for administration login: Web GUI, RS232 and SSH,
respectively. Refer to section 2.3 in the user manual for details. The following descriptions use Web GUI
as the example:
Before getting started, make sure the related network port is connected. If you want to use a static
IP address, make sure the IP address is not confl icting with other IP address. You can use the “ping”
command to verify if IP address confl iction occurs.
The default IP address of SR7650-4S-U3D is 192.168.0.1. The following instructions describe how to start
your initial setup by congifuring a static IP address in Windows XP system.
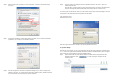
Step 1 First, verify if IP address confl iction occurs. Click Start→Run→Input ping xxx.xxx.xxx.xxx (the
IP address you are going to use). If you get a reply of “Request time out.”, then you can
use the IP address. It is recommend that you may also consult with your MIS personnel directly
for the related IP address information.
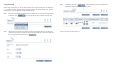
Step 2
Confi gure the domain. Click Start
→
Settings
→
Network Connections. A dialog window for your current
network connection will pop up. Select “Network Connections” and then click “Properties”.
1
5 678
SATA EXPANSION
RS232
LAN
GUI
2
SCSI