Rain+Birdt Simple To Set Timer (SST) Setup & Operation Instructions SST user manual (EN) web.
English Instructions Installation.................................................................. 1 Tools and Supplies Needed........................................................ 1 Step 1. Mount Timer................................................................... 1 Step 2. Connect Power............................................................... 1 Indoor Timer.............................................................................................1 Outdoor Timer..............................
Installation Step 2. Connect Power WARNING: DO NOT plug in or apply power to the timer until cc you have completed and checked all wiring connections. Tools and Supplies Needed • Phillips screwdriver • Wire stripper Indoor Timer Attach the transformer connector to the 24VAC POWER pin connection on the terminal strip. • Hammer • Valve wire: direct burial, color coded multi-strand (not included) • 18 gauge for runs less than 800 feet. • 14 gauge for runs greater than 800 feet.
C Unscrew the wire-nuts from the three wires connecting the power cord to the timer. D Remove the metal bracket holding the power cord to the back of the wiring compartment and pull the cord out through the bottom of the cabinet. E Route the three wires from an external power source into the wiring compartment. F Using the wire-nuts, connect the external power wires to the internal connection wires inside the wiring compartment.
Step 4. Verify System Operation Optional Accessories Battery Pull Tab Rain Sensor To activate the internal battery, grasp the yellow pull-tab on the side of the timer and pull it out. NOTE: If the timer doesn’t have AC power for more than a week, the time needs to be reset. This conserves battery Connect an optional Rain Sensor to the Timer A B power for future outages. Program details are kept in long term non volatile memory so they are not lost even after long power outages.
Master Valve Or Pump Start Relay Additional instructions for connecting a pump start relay Connect an optional master valve or pump start relay SST timers support the use of a master valve or pump start relay. A pump start relay connects to the timer the same way as a master valve, but connects differently at the water source.
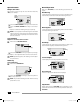
Setting the Timer Select Run Days "" Press the RUN DAYS buttons to select which days to water. Active watering days will show lights illuminated. Step 1. Set Time Turn the dial to the SET TIME position. ggPress the UP/DOWN arrow keys to set the time (verify "" NOTE: By default ALL days are lit. Press the button(s) to turn off the days you don't want to water. AM/PM setting is correct). Run Days Times Per Day Time Step 2. Set Date Turn the dial to the SET DATE position.
Optional Features Normal Operation Multiple Start Times While set to AUTO RUN, one of the following screens will be displayed: After selecting a time per day the screen will show that time, “First", as an example. Not Watering Screen displays the current time, the zone that is scheduled to be watered next, and the date and time when watering will occur. First Start Time Next Run Time " " "" Press the LEFT UP/DOWN arrow keys to set the start time.
Manual Operation Water 1 Zone Now Choose from two Manual Watering options: "" Turn the dial to select a ZONE. gg Press the WATER 1 ZONE NOW button to start watering (default run time of 10 minutes). Water All Zones Now Zone Minutes Remaining Turn the dial to AUTO RUN. gg "" Press the WATER ALL ZONES NOW button to start watering. Screen displays which zone is being watered and the number of minutes remaining for that zone. " gg" Press the UP/DOWN arrow keys to adjust the run time.
Rain+Birdt Rain Bird Corporation 6991 East Southpoint Road Tucson, AZ 85756 USA Tel: (520) 741-6100 Fax: (520) 741-6522 2016 Rain Bird Corporation Registered trademark of Rain Bird Corporation Questions? Call 1-800- RAIN BIRD (800-724-6247) or visit www.rainbird.com Rev.10/16 09OC16 SST user manual (EN) web.