EMBEDDED AND NETWORK COMPUTING TECHNOLOGIES GETTING STARTED WITH THE QIL-A9260 Calao Systems 334 rue des Vingt Toises Le MagistèreII 38950 Saint Martin Le Vinoux France Phone = +33 (0)4 76 56 38 05 Fax = +33 (0)4 76 56 38 06 E-mail = sales@calao-systems.com = support@calao-systems.
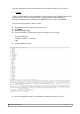
TABLE OF CONTENTS Section 1...............................................................................................................................................3 1.Introduction...................................................................................................................................3 Section 2 ..............................................................................................................................................4 1.QIL-A9260 from scratch............
SECTION 1 1. Introduction This getting started guide is aimed at helping the reader become familiar with the QILA9260. First, we'll describe how to build the AT91Bootstrap loader, Uboot, and the linux kernel from the source code. We will see how to generate the root file system from buildroot. Then we will present you how to make and debug a software application with the uClibc toolchain.
SECTION 2 1. QIL-A9260 from scratch 1.1. AT91Bootstrap The AT91Bootstrap loader is used to download the second level bootloader that is to say UBOOT from the NAND Flash memory. When the AT91SAM9260 boots, the AT91 Bootstrap loader is copied into the 4Kbytes internal SRAM and executed by branching at address 0x0000_0000 after remap. Here are the steps needed to compile the AT91bootstrap loader.
Once the compilation ended, you should have the file named nandflash_qil-a9260.bin 1.2. U-Boot U-Boot is downloaded from the nand flash to the last megabyte of the SDRAM by the AT91 bootstrap loader. The first level bootloader is configured to download 196Kbytes from the nand flash (offset: 0x20000) in the SDRAM memory (offset: 0x23F00000). Here are the steps needed to compile U-Boot. ● ● ● ● Download the source code from the calao ftp site.
Note: We used the DENX toolchain to built u-boot.You can download this cross-compilation toolchain from the following adress: ftp://mirror.switch.ch/mirror/eldk/eldk/3.1.1/arm-linux-x86/iso/arm-2005-03-06.iso 1.3. Linux Kernel The linux kernel will be setup and built in the usual way. First we 'll configure the kernel with the default configuration files.
● Once the compilation ended, you should have a binary file named uImage in the /ARCH/ARM/BOOT/ directory Datasheet GSG-00006-A01 7/34
SECTION 3 1. Buildroot Buildroot allows to generate both a cross-compilation toolchain and a jffs2 root file system for the QIL-A9260 module. 1.1. Buildroot installation Here are the steps needed to install a cross compiler & generate a root file system: ● Download the source code from the calao ftp site The configuration step is very similar to the linux kernel.
/* * NAND flash */ static struct mtd_partition __initdata ek_nand_partition[] = { { .name = "Uboot & Kernel", .offset = 0x00000000, .size = 16 * 1024 * 1024, }, { .name = "Root FS", .offset = 0x01000000, .size = 120 * 1024 * 1024, }, { .name = "FS", .offset = 0x08800000, .size = 120 * 1024 * 1024, }, }; If you want to install your customized root file system quickly without destroying the default one, you can put it on the second partition and modify the u-boot bootargs variable.
Let's erase the second partition with the following command: # flash_eraseall -j /dev/mtd2 Erasing 128 Kibyte @ 77e0000 -- 99 % complete. Cleanmarker written at 77e0000. Let's copy the new root file system on the second partition # flashcp rootfs.arm.
SECTION 4 1.1. The uClibc toolchain Buildroot provides a cross compilation toolchain for the QIL-A9260. It is located in the following directory /QIL-A9260_build_arm/staging_dir/bin. If you want to use the µClibc toochain set your PATH environnement variable with the directory below. Note: Usually, software development is done on a host computer using a cross-compilation toolchain.
1.2. «Hello world» application Once you have setup your environment, you can compile the hello_world.c example by issuing the following command. arm-linux-gcc -o hello_world hello_world.c #include int main(void) { printf("hello world\n"); return 0; } Note: --static option can be added to the LDFLAGS in order to link the application statically. Now you can download the hello_world program on the QIL-A9260 target.
1.3. Debugging an application In order to debug your appplication you need first to enable the building of both GDB server for the target and GDB client for the host from the buildroot menu (Toolchain options). Once your target root file systems is built, you can install it on the target and start the gdbserver. # gdbserver localhost:2000 hello Process hello created; pid = 723 Listening on port 2000 On your host issue the following command: gh@gh-desktop:~/hello_world$ arm-linux-gdb hello GNU gdb 6.
GDB is free software, covered by the GNU General Public License, and you are welcome to change it and/or distribute copies of it under certain conditions. Type "show copying" to see the conditions. There is absolutely no warranty for GDB. Type "show warranty" for details. This GDB was configured as "--host=i386-pc-linux-gnu –target=arm-linux-uclibc"... (gdb) Now issue a target remote 192.168.1.100:2000 from gdb Remote debugging using 192.168.1.
SECTION 5 1. SAM-BA This part describes how to update the QIL-A9260 with the SAM-BA utility. 1.1. Introduction Here is the default configuration of the nand flash memory: Offset File Size Remark 0x00000000 nandflash_qil-a9260.bin =< 4Kb 0x00020000 u-boot.bin =<196Kb 0x000A0000 uImage_cpio ~3Mb Rescue linux kernel bound with a cpio RFS 0x00400000 uImage_jffs2 ~1.2Mb Linux kernel (mount the RFS from /dev/mtd1) 0x01000000 «Root FS» 120Mb The default root filesystem is located here.
1.2. How to use SAM-BA ● First install the SAM-BA utility Use the lastest version of the SAM-BA utility (V2.6). Indeed, the old versions contains a bug on the nand flash bad block management. ● First, connect either a USB cable (UDP port) or a RS232 cable (DBG port) between your host and the QIL-Motherboard. ● Start SAM-BA application by clicking on the icon below. ● Choose the usb or the Serial communication interface & the AT91SAM9260-EK board. Click on the « Connect » button.
In order to program the NAND Flash memory follow the stages below: ● ● ● In the memory download area, click on the appropriate tab in order to choose the NAND memory. Select the « NandFlash Init » script. Click on the « Execute » button. Once the Nand Flash interface is initialized, you can erase the nand flash memory. Choose the « NandFlash Erase All » script. Click on the « Execute » Button.
Once the nand flash erased, you can put the first level bootstrap loader at address 0x00000000. In the memory download area: ● ● Choose the « NandFlash send boot file » script. Click on the « Execute » button.
A pop-up window opens. ● ● Select the nandflash_qil-a9260.bin binary file Click on the « Open » button to start the uploading. In order to program u-boot in the nand flash memory: ● ● ● ● Enter 0x00020000 in the address field, Click on the « open folder » button. Select the u-boot binary file. Click on the « Send File » button to start the uploading.
You can repeat the previous step in order to program the linux kernel uImage in the nand flash.
SECTION 6 1.
SECTION 7 1. Revision History 1.1.
SECTION 8 1. COPYRIGHT Notice: The products specifications provided in this datasheet are subject to change without notice. ©2007 CALAO SYSTEMS-All Rights Reserved. The CALAO SYSTEMS logo is a registered trademark of CALAO SYSTEMS. All other names are the property of their respective owners.
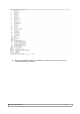
ANNEXE UBOOT list commands Here is the list of the u-boot commands ? - alias for 'help' autoscr - run script from memory The autoscr command allows “shell” scripts to run under U-Boot. To create a U-Boot script image, commands are written to a text file. Then the mkimage tool [of a suitable compiler] is used to convert this text file into a U-Boot image using the image type script. This image can be loaded like any other image file. Autoscr runs the commands in this image.
first the Linux kernel image is uncompressed and copied into RAM, then the ramdisk image is loaded to RAM, and finally control is passed to the Linux kernel, passing information about the location and size of the ramdisk image.
cp - memory copy cp [.b, .w, .l] source target count The memory copy command copies data in memory, starting at the “source” address to the “target”address. The “count” field specifies the number of bytes, words or long words to be copied depending upon the extension field of the cp command. If a “.b” extension is used, the count field specifies the number of bytes. Likewise, if a “.w” or “.l” extension is used, the count field respectively specifies the number of words or long words.
erase - erase FLASH memory reset - No help available.
help - print online help help [command ...] - show help information (for 'command') 'help' prints online help for the monitor commands. Without arguments, it prints a short usage message for all commands. To get detailed help information for specific commands you can type 'help' with one or more command names as arguments. The help command (short: h or ?) prints online help. Without any arguments, the help command prints a list of all U-Boot commands that are available in your configuration of U-Boot.
mm - memory modify (auto-incrementing) mm [.b, .w, .l] address - memory modify, auto increment address The mm is a method to interactively modify memory contents. It will display the address and current contents and then prompt for user input. If you enter a legal hexadecimal number, this new value will be written to the address. Then the next address will be prompted. If you don't enter any value and just press Enter, then the contents of this address will remain unchanged.
nboot - boot from NAND device nboot loadAddr dev QIL-A9260> nand device Device 0: NAND 256MiB 3,3V 8-bit QIL-A9260> nboot 21000000 0 a0000 Loading from device 0: NAND 256MiB 3,3V 8-bit (offset 0xa0000) Image Name: Linux-2.6.21.5 Image Type: ARM Linux Kernel Image (uncompressed) Data Size: 3146364 Bytes = 3 MB Load Address: 20008000 Entry Point: 20008000 Automatic boot of image at addr 0x21000000 ... ## Booting image at 21000000 ... Image Name: Linux-2.6.21.
printenv name ... - print value of environment variable 'name' The printenv command prints one, several or all variables of the U-Boot environment. When arguments are given, these are interpreted as the names of environment variables which will be printed with their values: QIL-A9260> printenv ethaddr ipaddr ethaddr=00:0D:00:0D:00:AB ipaddr=192.168.1.
run - run commands in an environment variable run var [...] - run the commands in the environment variable(s) 'var' You can use U-Boot environment variables to store commands and even sequences of commands. To execute such a command, you use the run command: QIL-A9260> setenv test echo this is an example\;printenv ipaddr\;echo Done QIL-A9260> printenv test test=echo this is an example;printenv ipaddr;echo Done QIL-A9260> run test this is an example ipaddr=192.168.1.
- delete environment variable 'name' To modify the U-Boot environment you have to use the setenv command. When called with exactly one argument, it will delete any variable of that name from U-Boot's environment, if such a variable exists.
tftpboot [loadAddress] [bootfilename] QIL-A9260> tftpboot 21000000 uImage TFTP from server 192.168.1.11; our IP address is 192.168.1.100 Filename 'uImage'.