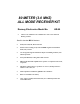
80 METER (3.0 MHZ) ALL MODE RECEIVER KIT Ramsey Electronics Model No. • HR-80 Add our case and knob set for a finished ‘Pro’ look. Cases match all Ramsey products.
RAMSEY TRANSMITTER KITS • FM-10 FM Stereo Transmitter • FM-1,2,3,4 FM Wireless Microphones • PB-1 Telephone Transmitter RAMS LECTR st ki or ld Be RAMSEY HOBBY KITS • SG-7 Personal Speed Radar • SS-70 Speech Scrambler • SP-1 Speakerphone • MD-3 Microwave Motion Detector • PH-10 Peak hold Meter • LC-1 Inductance-Capacitance Meter E EY I CS ON RAMSEY RECEIVER KITS • FR-1 FM Broadcast Receiver • AR-1 Aircraft Band Receiver • SR-1 Shortwave Receiver • AA-7 Active Antenna • SC-1 Shortwave Converter tb
Ramsey Publication No. MHR-80 Price $5.00 KIT ASSEMBLY AND INSTRUCTION MANUAL FOR HR-80 AMATEUR RECEIVER KIT TABLE OF CONTENTS Introduction to the HR-80 ............... 4 About Direct Conversion ................ 5 Circuit description........................... 6 Parts list ......................................... 7 Schematic diagram ........................ 9 Parts layout .................................. 10 Assembly instructions .................. 11 Initial testing .................................
INTRODUCTION: Our HR-40 and HR-80 models are thought of as “best for beginners” because Hams with a Novice or Technician license can operate CW in the 40 and 80 meter bands. If you like plenty of action and DX (long distance) communications, the 40 meter ham band is the place to be. Almost 24 hours a day there’s something interesting happening on 80 meters.
Therefore, we are pleased to assure you that your manual for the HR-80 receiver and the receiver circuit itself have been designed with an understanding of typical operating needs and expectations for the 80 meter band. This receiver circuit is ideal for discovering just how simple a true “Communications Receiver” can be . That’s right- there is a BIG difference between the Ramsey HR-80 and other simple short wave radio circuits we can try to build. Yet it is very easy to build.
Advantages of any Direct Conversion receiver include: • • • It is simple, and therefore economical and easy to build It is quite sensitive even with a simple antenna Its tuning oscillator could even be set up to serve directly as a transmitter VFO in a simple transceiver setup. A common problem with DC receivers is that they are easily overwhelmed by strong AM broadcast stations from almost anywhere, whether it’s your local rock and roll broadcaster, Radio Moscow or the Voice of America.
PARTS SUPPLIED WITH THE HR-30 KIT: CAPACITORS: 2 5 1 1 3 150pF disc capacitor [marked 150 or 151] (C1,C2) .01µF disc capacitor [marked 103 , .01 or 1nF] (C3,C4,C5,C6,C7) 2.2µF electrolytic (C8) 4.
"LEARN-AS-YOU-BUILD" ASSEMBLY STRATEGY: To help you learn just what exactly is going on we'll discuss the purpose of most of the components or groups of components as we go along. Since we are trying to keep assembly of the board simple, we will not be able to fully describe each individual component’s function as you build, but Ramsey's "Learn-As-You-Build" kit assembly philosophy still stands. Check off each step as understood and completed.
Parts Layout: HR-80• 9
RECEIVER ASSEMBLY: 1) Install the RCA antenna jack, J1. Solder all four points. 2) Install C5, a .01µF ceramic disc signal coupling capacitor. This capacitor brings the signal up to the front of the PC board. Notice the long PC trace from J1 through C5 to R1 3) Install potentiometer R1, the RF gain control. Insert it into the PC board so it seats firmly and is straight and even. Solder the three pins and the two mounting tabs.
positive lead into the ‘+’ marked hole on the PC board. 10) Install C11, a 100-220µF electrolytic capacitor. Remember to observe correct polarity. C10 and C11 provide voltage stabilizing which directly improves the performance of the NE602 oscillator. 11) Install C2, 150pF ceramic disc capacitor (marked 150 or 151). This capacitor is a first step in setting up the resonant frequency of the NE602’s internal oscillator, using the resonant LC circuit to be created along with C1, C3 and L1.
22) Install the 9-volt battery snap connector, making sure that the red (+) and black (-) leads are correctly installed. 23) Install C7, .01µF disc capacitor (marked 103 or .01 or 10nF). 24) Install C8, a small 2.2µF electrolytic capacitor. Observe correct polarity. 25) Install R6, 10K ohm resistor (brown-black-orange). 26)Install U2, the LM386 audio amplifier IC chip. Just like the NE602, you must correctly position the notched or banded end.
INITIAL TESTING OF YOUR HR-80: You’re now ready to power up and test your HR-80, but before you begin take some time to sweep off your bench of any loose component leads or solder splashes. A clean work area not only makes testing less frustrating but also less prone to problems.
hear a few whistles as you tune, the NE602 oscillator is working just fine. These simple initial checks verify that your receiver is operating well enough to proceed to the next section, alignment. Alignment: Turn on whatever reference signal source you plan to use. This can be a regular transceiver keying a few milliwatts into a dummy load, a crystal oscillator or a signal generator. Or, you can look for a known signal that you have tuned in on another receiver.
and L2 to get the exact tuning range you want. ALIGNMENT HINT FOR ALL DIRECT CONVERSION RECEIVERS: You will clearly hear the oscillator of your kit - very close to its receiving frequency, if you tune around for it on ANY shortwave radio covering the same frequency range. Even if your shortwave set does not have a BFO (beat frequency oscillator) for CW-SSB, you’ll still hear a powerful ‘hiss or quieting’ when your shortwave receiver is tuned near the frequency of the HR-80.
which you are listening. Therefore, when adjusting the frequency of your companion Ramsey QRP transmitter, be certain that you have in fact tuned to the other station’s lower sideband. The two stations will actually be several KHz apart. Because this receiver’s oscillator is not shared with a transmitter, as in transceivers, there is no need for separate RIT (receiver incremental tuning).
replacement. Remember the NE602 circuits similar to Ramseys generally call for sets of C or D cell batteries! For Experienced Builders more information regarding audio output is in the general notes. The simple design of the audio stage of the Ramsey HR-80 receiver assumes preference for headphone or small speaker operation, low battery drain and general economy.
you receiver on for a few days, just like we leave our computers and Ham gear on all the time? (2) We thought you’d have more fun planning and installing your own lamp that glows in the dark! TROUBLESHOOTING TIPS: PROBLEM: ALL signals are chirpy and unstable. SOLUTION: Sorry to have to say it , but this condition is only caused by a weak battery! Use a fresh alkaline cell. Any strong signal forces the audio circuit to rob voltage from the oscillator, which causes the instability.
A careful check of all construction WILL solve your problem. Over 95% of the kits returned for repair have nothing more than a simple assembly or construction error! GENERAL NOTES FOR EXPERIENCED QRP BUILDERS: We at Ramsey Electronics deliberately designed the HR-series of DC receivers to be easily available, affordable and buildable by any person willing to follow the assembly directions.
BANDSPREAD AND TUNING RANGE: The easiest way to enjoy finer tuning , if you plan to use your receiver only for checking your favorite segment of the band, is to adjust the oscillator coil so that your desired segment falls within the second half of the rotation range of the tuning control. The first half of the rotation range covers about 70% of the actual tuning in KHz, while the other 30% is spread over the other half of the rotation range.
value of C4. This will cause the varactor diode to have greater effect on the tuning. Try values of 33pF up to 100pF. FREQUENCY STABILITY: A kilohertz of drift is not a big deal in FM circuits or a shortwave broadcast configuration, but ANY frequency instability is annoying when trying to receive CW or SSB. The varactor - controlled Local Oscillator is indeed a VFO, and therefore needs all the consideration given to any VFO circuit.
method is to wire a high-impedance counter probe line directly to pin 7 of the NE602, terminated to a rear panel frequency counter connection of your choice. This will consist of a short piece of minicoax to a 1 megohm resistor bridged by a 27 to 33pF capacitor as shown below: NE60 2 PIN 7 27 pF 1 MEGOH M TO COUNT ER With the RF gain turned all the way up , it may be possible to hear the counter’s busy humming action in the background, but not to a serious degree.
modification will achieve any particular ideal signal-to-noise ratio or audio frequency response, but is does significantly boost the output of the NE602 reaching the LM386 audio amplifier IC. Instead of the traditional transistor audio preamp circuit, an additional LM386 is used in its minimum gain configuration (gain of 80), plus one electrolytic capacitor (1 to 10µF) to achieve minimum parts and PCboard drilling. This use of two LM386 ICs amplifies the audio signal of the NE602 by a factor of 1000.
CONSTRUCTION NOTES: HR-80• 24
The Ramsey Kit Warranty Please read carefully BEFORE calling or writing in about your kit. Most problems can be solved without contacting the factory. Notice that this is not a "fine print" warranty. We want you to understand your rights and ours too! All Ramsey kits will work if assembled properly. The very fact that your kit includes this new manual is your assurance that a team of knowledgeable people have field-tested several "copies" of this kit straight from the Ramsey Inventory.
3. FACTORY REPAIR OF ASSEMBLED KITS: To qualify for Ramsey Electronics factory repair, kits MUST: 1. NOT be assembled with acid core solder or flux. 2. NOT be modified in any manner. 3. BE returned in fully-assembled form, not partially assembled. 4. BE accompanied by the proper repair fee. No repair will be undertaken until we have received the MINIMUM repair fee (1/2 hour labor) of $18.00, or authorization to charge it to your credit card account. 5.
HR-80 AMATEUR RECEIVER KIT Quick Reference Page Guide Introduction to the HR-80 ...............4 Circuit description ...........................6 Parts list ..........................................7 Schematic diagram .........................9 Parts layout...................................10 Assembly instructions ...................11 Initial testing..................................14 Alignment......................................15 Troubleshooting guide ..................19 Warranty ..................