LEIHDS120SC/ Users Guide & Installation Instructions
CONTENTS IMPORTANT SAFETY INFORMATION Installation Page 2 Child Safety 2 Maintenance and service 3 Cooker Hood Controls To Operate 4 5 Recirculation 5 Extraction 5 Metal Grease Filters 6 Charcoal Filter 6 Lighting 7 Cleaning 7 INSTALLATION INSTRUCTIONS Technical Information 8 ELECTRICAL CONNECTION Elecrical Requirements 9 Electrical Connection 9 YOUR APPLIANCE OPERATING INSTRUCTIONS MAINTENANCE AND CLEANING INSTALLING THE CHIMNEY HOOD 1 Components 10 Installation Requirem
IMPORTANT SAFETY INFORMATION These warnings are provided in the interests of safety. Ensure that you understand them all before installing or using this appliance. Your safety is of paramount importance. If you are unsure about the meaning of any of these warnings contact the Helpline. • INSTALLATION • Any installation work must be undertaken by a qualified electrician or a competent person.
IMPORTANT SAFETY INFORMATION • MAINTENANCE AND SERVICE • This appliance can be a hazard if the grease filters and charcoal filters are not cleaned and replaced as recommended. • Always insist on genuine RANGEmaster spare parts. • Under no circumstances should you attempt to repair the appliance yourself. Repairs carried out by inexperienced persons may cause injury or more serious malfunction.
YOUR APPLIANCE OPERATING INSTRUCTIONS The chimney hood is designed to extract unpleasant odours from the kitchen, it will not extract steam. The appliance can be installed to recirculate or extract contaminated air. BUTTON V1 - Turns the fan On and Off at the low speed setting. This is an ideal speed when cooking for long periods as the continuous flow of air is particularly quiet. COOKER HOOD CONTROLS BUTTON V2 - Medium speed, suitable for most normal operating conditions.
OPERATING INSTRUCTIONS TO OPERATE Select the required fan speed and light if required. To obtain the best performance when cooking it is advisable to switch the chimney hood on for a few minutes before you start cooking and leave it running for about 15 minutes after finishing. RECIRCULATION In the recirculation mode contaminated air enters the chimney hood through the grease filter cassettes.
MAINTENANCE AND CLEANING Regular maintenance and cleaning will ensure good performance and reliability, while extending the working life of the hood. Special attention should be paid to the grease filter cassettes and the charcoal filter when the hood is used in the recirculation mode. Before carrying out any maintenance or cleaning isolate the cooker hood from the mains supply.
MAINTENANCE AND CLEANING LIGHTING The canopy is fitted with three 20W halogen spotlamps. If one of the spotlamps fails to function check that the two pins are correctly inserted into the lamp holder. To replace a spotlamp remove the two screws, which secure the lens retaining ring and glass lens as illustrated. Take care to ensure the lens and retaining ring are supported while removing the screws. Extract the spotlamp from the lamp holder by pulling gently. Replacement spotlamps are specified 230V 20W.
INSTALLATION INSTRUCTIONS It is dangerous to alter the specifications or attempt to modify this chimney hood in any way.
ELECTRICAL CONNECTION THIS APPLIANCE MUST BE EARTHED ELECTRICAL REQUIREMENTS Any permanent electrical installation must comply with the latest I.E.E. Regulations and local Electricity Board regulations. For your own safety this should be undertaken by a qualified electrician e.g. your local Electricity Board, or a contractor who is on the roll of the National Inspection Council for Electrical Installation Contracting (NICEIC).
INSTALLING THE CHIMNEY HOOD COMPONENTS The chimney hood comprises of the following: No 1 150x120mm ducting spigot (A) No 1 120x125mm ducting flange (B) No 1 Canopy (C) No 2 Recirculation grilles (G) No 1 Lower chimney stack (I) No 1 Recirculation ducting (P) No 2 Recirculation extension ducts (P1) No 1 Recirculation spigot (R) No 1 Upper chimney stack (S) No 1 Valve (V) optional No 2 Chimney fixing brackets (2) Please ensure when the appliance is fitted it is easily accessible to an engineer in the event of
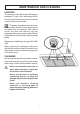
INSTALLING THE CHIMNEY HOOD CLEARANCE HEIGHTS The chimney hood is designed to be fitted over a cooking appliance. A minimum clearance height of 650mm (25˚ins) is required when installed above a built-in electric hob, or 700mm (27˚ins) when installed above a built-in gas hob.
INSTALLING THE CHIMNEY HOOD 4. 1. Drill the holes for the fixing screws using an 8mm masonry drill bit. Insert the rawl plugs and fix the brackets (2) using the 4.2 x 44.4mm screws provided. 5. DRILLING THE HOLES 1 Draw a horizontal line through the vertical 970mm up the wall from the top of the cooking appliance, ensuring it is level with a spirit level. 2. Mark the centres for the holes 1, 116mm either side of the vertical line. 3.
INSTALLING THE CHIMNEY HOOD DUCTING The hood is more effective when used in the extraction mode (ducted to the outside). When used in the extraction mode ensure the ducting spigot has been correctly fitted as illustrated. The ducting used must be Æ 125 (5ins) or Æ 150mm (6ins), flexible or rigid and must be manufactured from fire retardant material, produced to BS.476 or DIN.4102B1. The choice should be made by the installer.
INSTALLING THE CHIMNEY HOOD by pressing it downwards until the two pieces meet. 3. Connect the two recirculation extension ducting pipes P1 on to the outlets on either side of the spigot R, which push fit into position, by pressing them horzontally until the two pieces meet. 4. Do not fit the recirculation grilles until after the chimney has been installed. FITTING THE TELESCOPIC CHIMNEY The chimney stack consists of two sections. 1.
4329643 03 020412