
Owner's manual


Table Of Contents
- Chapter 1: Introduction
- Chapter 2: Accessing CC-SG
- Chapter 3: Configuring CC-SG with Guided Setup
- Chapter 4: Creating Associations
- Chapter 5: Adding Devices and Device Groups
- Chapter 6: Configuring Nodes and Interfaces
- Chapter 7: Adding and Managing Users and User Groups
- Chapter 8: Policies
- Chapter 9: Configuring Remote Authentication
- Chapter 10: Generating Reports
- Audit Trail Report
- Error Log Report
- Access Report
- Availability Report
- Active Users Report
- Locked Out Users Report
- User Data Report
- Users in Groups Report
- Group Data Report
- AD User Group Report
- Asset Management Report
- Node Asset Report
- Active Nodes Report
- Node Creation Report
- Query Port Report
- Active Ports Report
- Scheduled Reports
- CC-NOC Synchronization Report
- Chapter 11: System Maintenance
- Chapter 12: Advanced Administration
- Appendix A: Specifications (G1, V1, and E1)
- Appendix B: CC-SG and Network Configuration
- Appendix C: User Group Privileges
- Appendix D: SNMP Traps
- Appendix E: Troubleshooting
- Appendix F: Two-Factor Authentication
- Appendix G: FAQs
- Appendix H: Keyboard Shortcuts
CHAPTER 9: CONFIGURING REMOTE AUTHENTICATION 107
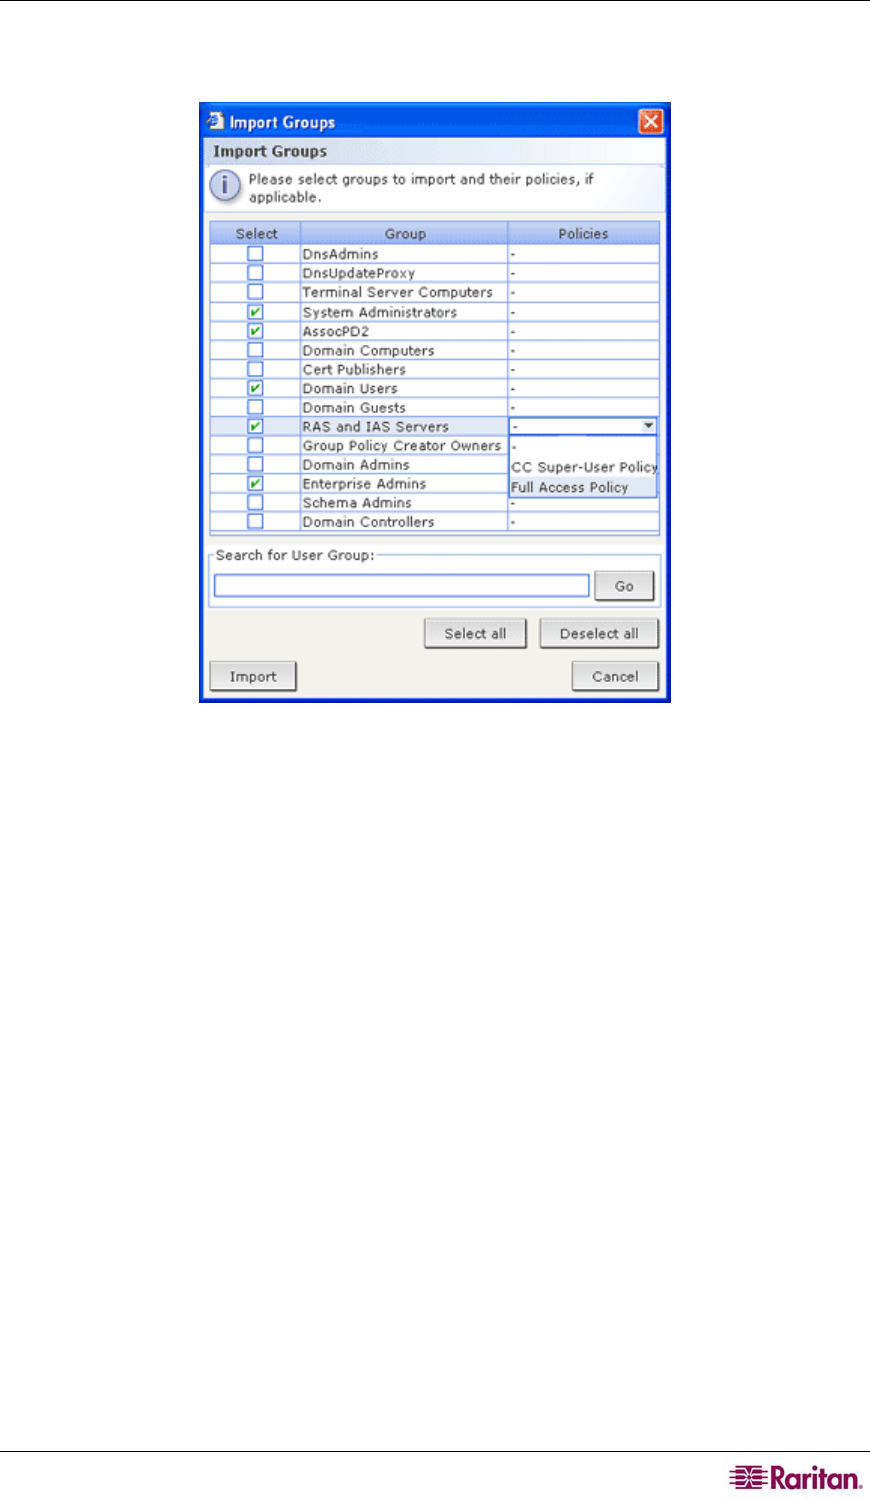
3. Click Import Groups… to retrieve a list of user group values stored on the AD server. If any
of the user groups are not already on the CC-SG, you can import them here and assign them
an access policy.
Figure 100 Importing Groups from AD Server
4. Check the checkboxes next to the groups you want to import to CC-SG. Click a column
header to sort the list of user groups by the information in that column. To search for user
groups, type a search string in the Search for User Group field, and then click Go. Click
Select all to select all user groups for import. Click Deselect all to deselect all selected user
groups.
5. In the Policies column, click the field and then select a CC-SG access policy from the list to
assign the policy to the selected group. These policies should already be created, please refer
to
Chapter 8: Policies for additional information.
6. Click Import to import the selected user groups.
7. To check that the group was imported properly and to view the privileges of the group just
imported, click the Users tab, then select the imported group to open the User Group Profile
screen. Verify the information in the Privileges and Device/Node Policies tab. Click the
Active Directory Associations tab to view information on the AD module associated with
the user group.