KVM and Serial Access Clients User Guide Active KVM Client, Virtual KVM Client, Multi-Platform Client, Raritan Remote Client and Raritan Serial Client Copyright © 2011 Raritan, Inc.
This document contains proprietary information that is protected by copyright. All rights reserved. No part of this document may be photocopied, reproduced, or translated into another language without express prior written consent of Raritan, Inc. © Copyright 2011 Raritan, Inc. All third-party software and hardware mentioned in this document are registered trademarks or trademarks of and are the property of their respective holders.
Contents Chapter 1 Introduction 1 Overview ........................................................................................................................................ 1 KVM and Serial Access Client Help............................................................................................... 1 Proxy Server Configuration for Use with MPC, VKC and AKC...................................................... 1 Client Uses with Raritan Products ..................................................
Contents Digital Audio ................................................................................................................................. 33 Supported Audio Device Formats...................................................................................... 33 Audio Recommendations and Requirements .................................................................... 33 Audio Bandwidth Requirements ........................................................................................
Contents Chapter 4 Virtual Media 157 Overview .................................................................................................................................... 158 Prerequisites for Using Virtual Media .............................................................................. 161 Virtual Media in a Linux Environment .............................................................................. 162 Virtual Media in a Mac Environment ..................................................
Contents Audio in a Mac Environment............................................................................................ 199 Audio in a Windows Environment .................................................................................... 199 USB Ports and Profiles .............................................................................................................. 200 Help for Choosing USB Profiles ......................................................................................
Chapter 1 Introduction In This Chapter Overview ....................................................................................................1 KVM and Serial Access Client Help ..........................................................1 Proxy Server Configuration for Use with MPC, VKC and AKC .................1 Client Uses with Raritan Products .............................................................
Chapter 1: Introduction b. Select 'Use a proxy server for your LAN'. c. Click Advanced. The Proxy Settings dialog opens. d. Configure the proxy servers for all protocols. IMPORTANT: Do not select 'Use the same proxy server for all protocols'. Note: The default port for a SOCKS proxy (1080) is different from HTTP proxy (3128). 2. Click OK at each dialog to apply the settings. 3. Next, configure the proxies for Java™ applets by selecting Control Panel > Java. e. On the General tab, click Network Settings.
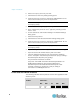
Chapter 1: Introduction Product Works with... KX II G2 KX II 2.2 (or later) KX II-101 KX II-101-V2 KX 101 G1 KSX G1 KSX II G2 LX 2.4.5 (or later) SX IP Reach G1 UST-IP G1 Legend: G1 Generation 1 G2 Generation 2 Note: There are some differences in MPC when used with the Dominion KX I, Dominion KX II, and Dominion KSX II devices; these differences are noted in the respective device user guides. Note: MPC and VKC are Java™ based. AKC is .NET based.
Chapter 2 Virtual KVM Client (VKC) and Active KVM Client (AKC) In This Chapter About the Virtual KVM Client .....................................................................5 About the Active KVM Client .....................................................................5 Toolbar.......................................................................................................7 Connection Properties ...............................................................................
Chapter 2: Virtual KVM Client (VKC) and Active KVM Client (AKC) About the Virtual KVM Client Whenever you access a target server using the Remote Console, a Virtual KVM Client (VKC) window opens. There is one Virtual KVM Client for each target server connected. These windows can be accessed via the Windows® task bar. Note: Some features, such as client launch settings and smart cards, are not supported by the LX and, as such, are not supported by AKC or VKC when used in conjunction with the LX.
Chapter 2: Virtual KVM Client (VKC) and Active KVM Client (AKC) AKC Supported .NET Framework, Operating Systems and Browsers .NET Framework AKC requires Windows .NET® version 3.5, and will work with both 3.5 and 4.0 installed but will not work with 4.0 alone. Operating Systems When launched from Internet Explorer®, AKC allows you to reach target servers via the KX II 2.2 (and later) and the LX 2.4.5 (and later). AKC is compatible with the following platforms running .NET Framework 3.
Chapter 2: Virtual KVM Client (VKC) and Active KVM Client (AKC) Prerequisites for Using AKC In order to use AKC: Ensure the cookies from the IP address of the device that is being accessed are not currently being blocked. Windows Vista, Windows 7 and Windows 2008 server users should ensure that the IP address of the device being accessed is included in their browser's Trusted Sites Zone and that Protected Mode is not on when accessing the device.
Chapter 2: Virtual KVM Client (VKC) and Active KVM Client (AKC) Button Button Name Description Note: This feature is available with the KX II 2.4.0 (and later). Note: This feature is not supported by the LX. Synchronize Mouse Dual-mouse mode forces the realignment of the target server mouse pointer with the mouse pointer. Note: Not available in KX II-101-V2. Refresh Screen Forces a refresh of the video screen.
Chapter 2: Virtual KVM Client (VKC) and Active KVM Client (AKC) Connection Properties The dynamic video compression algorithms maintain KVM console usability under varying bandwidth constraints. The devices optimize KVM output not only for LAN use, but also for WAN use. These devices can also control color depth and limit video output, offering an optimal balance between video quality and system responsiveness for any bandwidth.
Chapter 2: Virtual KVM Client (VKC) and Active KVM Client (AKC) 384 Kb (Slow DSL/T1) 256 Kb (Cable) 128 Kb (Dual ISDN) 56 kb (ISP Modem) 33 kb (Fast Modem) 24 kb (Slow Modem) Note that these settings are an optimization for specific conditions rather than an exact speed. The client and server always attempt to deliver video as quickly as possible on the network regardless of the current network speed and encoding setting.
Chapter 2: Virtual KVM Client (VKC) and Active KVM Client (AKC) Connection Information To obtain information about your Virtual KVM Client connection: Choose Connection > Info... The Connection Info window opens. The following information is displayed about the current connection: Device Name - The name of the device. IP Address - The IP address of the device. Port - The KVM communication TCP/IP port used to access the target device. Data In/Second - Data rate in.
Chapter 2: Virtual KVM Client (VKC) and Active KVM Client (AKC) Import/Export Keyboard Macros Macros exported from Active KVM Client (AKC) cannot be imported into Multi-Platform Client (MPC) or Virtual KVM Client (VKC). Macros exported from MPC or VKC cannot be imported into AKC. Note: KX II-101 does not support AKC. To import macros: 1. Choose Keyboard > Import Keyboard Macros to open the Import Macros dialog. Browse to the folder location of the macro file. 2.
Chapter 2: Virtual KVM Client (VKC) and Active KVM Client (AKC) The macros are then imported. If a macro is imported that contains a hot key that already exists, the hot key for the imported macro is discarded. To export macros: 1. Choose Tools > Export Macros to open the Select Keyboard Macros to Export dialog. 2. Select the macros to be exported by checking their corresponding checkbox or using the Select All or Deselect All options. 3. Click Ok.
Chapter 2: Virtual KVM Client (VKC) and Active KVM Client (AKC) Building a Keyboard Macro To build a macro: 1. Click Keyboard > Keyboard Macros. The Keyboard Macros dialog appears. 2. Click Add. The Add Keyboard Macro dialog appears. 3. Type a name for the macro in the Keyboard Macro Name field. This name appears in the Keyboard menu after it is created. 4. From the Hot-Key Combination field, select a keyboard combination from the drop-down list.
Chapter 2: Virtual KVM Client (VKC) and Active KVM Client (AKC) 10. Click Close to close the Keyboard Macros dialog. The macro now appears on the Keyboard menu in the application. Select the new macro on the menu to run it or use the keystrokes you assigned to the macro. Running a Keyboard Macro Once you have created a keyboard macro, execute it using the keyboard macro you assigned to it or by choosing it from the Keyboard menu.
Chapter 2: Virtual KVM Client (VKC) and Active KVM Client (AKC) To remove a macro: 1. Choose Keyboard > Keyboard Macros. The Keyboard Macros dialog appears. 2. Choose the macro from among those listed. 3. Click Remove. The macro is deleted. Ctrl+Alt+Del Macro Due to its frequent use, a Ctrl+Alt+Delete macro is preprogrammed. Clicking on the Ctrl+Alt+Delete button in the toolbar sends this key sequence to the server or to the KVM switch to which you are currently connected.
Chapter 2: Virtual KVM Client (VKC) and Active KVM Client (AKC) Video Properties Refreshing the Screen The Refresh Screen command forces a refresh of the video screen. Video settings can be refreshed automatically in several ways: The Refresh Screen command forces a refresh of the video screen. The Auto-sense Video Settings command automatically detects the target server's video settings. The Calibrate Color command calibrates the video to enhance the colors being displayed.
Chapter 2: Virtual KVM Client (VKC) and Active KVM Client (AKC) Adjusting Video Settings Use the Video Settings command to manually adjust the video settings. To change the video settings: 1. Choose Video > Video Settings or click the Video Settings button in the toolbar to open the Video Settings dialog. 2. Adjust the following settings as required. As you adjust the settings the effects are immediately visible: a.
Chapter 2: Virtual KVM Client (VKC) and Active KVM Client (AKC) Warning: Exercise caution when changing the Clock and Phase settings. Doing so may result in lost or distorted video and you may not be able to return to the previous state. Contact Raritan Technical Support before making any changes. j. Horizontal Offset - Controls the horizontal positioning of the target server display on your monitor. k. Vertical Offset - Controls the vertical positioning of the target server display on your monitor. 3.
Chapter 2: Virtual KVM Client (VKC) and Active KVM Client (AKC) Note: Some Sun background screens, such as screens with very dark borders, may not center precisely on certain Sun servers. Use a different background or place a lighter colored icon in the upper left corner of the screen.
Chapter 2: Virtual KVM Client (VKC) and Active KVM Client (AKC) Using Screenshot from Target You are able to take a screenshot of a target server using the Screenshot from Target server command. If needed, save this screenshot to a file location of your choosing as a bitmap, JPEG or PNG file. To take a screenshot of the target server: 1. Select Video > Screenshot from Target or click the Screenshot from Target button on the toolbar. 2.
Chapter 2: Virtual KVM Client (VKC) and Active KVM Client (AKC) Changing the Maximum Refresh Rate If the video card you are using on the target uses custom software and you are accessing the target through MPC or VKC, you may need to change the maximum refresh rate of the monitor in order for the refresh rate to take effect on the target. To adjust the monitor refresh rate: 1. In Windows®, select Display Properties > Settings > Advanced to open the Plug and Play dialog. 2. Click on the Monitor tab. 3.
Chapter 2: Virtual KVM Client (VKC) and Active KVM Client (AKC) Mouse Pointer Synchronization When remotely viewing a target server that uses a mouse, two mouse cursors are displayed: one belonging to your remote client workstation and the other belonging to the target server. When the mouse pointer lies within the Virtual KVM Client target server window, mouse movements and clicks are directly transmitted to the connected target server.
Chapter 2: Virtual KVM Client (VKC) and Active KVM Client (AKC) Additional Notes for Intelligent Mouse Mode Be sure that there are no icons or applications in the upper left section of the screen since that is where the synchronization routine takes place. Do not use an animated mouse. Disable active desktop on KVM target servers. Synchronize Mouse In dual mouse mode, the Synchronize Mouse command forces realignment of the target server mouse pointer with Virtual KVM Client mouse pointer.
Chapter 2: Virtual KVM Client (VKC) and Active KVM Client (AKC) Intelligent Mouse Mode In Intelligent Mouse mode, the device can detect the target mouse settings and synchronize the mouse cursors accordingly, allowing mouse acceleration on the target. Intelligent mouse mode is the default for nonVM targets. During synchronization, the mouse cursor does a “dance” in the top left corner of the screen and calculates the acceleration. For this mode to work properly, certain conditions must be met.
Chapter 2: Virtual KVM Client (VKC) and Active KVM Client (AKC) Please note that mouse configurations will vary on different target operating systems. Consult your OS guidelines for further details. Also note that intelligent mouse synchronization does not work with UNIX targets. Absolute Mouse Mode In this mode, absolute coordinates are used to keep the client and target cursors in sync, even when the target mouse is set to a different acceleration or speed.
Chapter 2: Virtual KVM Client (VKC) and Active KVM Client (AKC) 2. Click the Single/Double Mouse Cursor button in the toolbar. To exit single mouse mode: 1. Press Ctrl+Alt+O on your keyboard to exit single mouse mode. Tool Options General Settings To set the tools options: 1. Click Tools > Options. The Options dialog appears. 2. Select the Enable Logging checkbox only if directed to by Technical Support. This option creates a log file in your home directory. 3.
Chapter 2: Virtual KVM Client (VKC) and Active KVM Client (AKC) German (Switzerland) Hungarian (Hungary) Spanish (Spain) Italian (Italy) Slovenian Translation: French - US Translation: French - US International In AKC, the keyboard type defaults to the local client, so this option does not apply. Additionally, the KX II-101 and KX II-101-V2 do not support single cursor mode, so the Exit Single Cursor Mode function does not apply for those devices. 4.
Chapter 2: Virtual KVM Client (VKC) and Active KVM Client (AKC) Keyboard Limitations Turkish Keyboards If using a Turkish keyboard, you must connect to a target server through the Active KVM Client (AKC). It is not supported by other Raritan clients. Slovenian Keyboards The < key does not work on Slovenian keyboards due to a JRE limitation.
Chapter 2: Virtual KVM Client (VKC) and Active KVM Client (AKC) Client Launch Settings Configuring client launch settings allows you to define the screen settings for a KVM session. Note: LX devices support this feature in MPC. LX does not support client launch setting in VKC and AKC. To configure client launch settings: 1. Click Tools > Options. The Options dialog appears. 2. Click on the Client Launch Settings tab. To configure the target window settings: a.
Chapter 2: Virtual KVM Client (VKC) and Active KVM Client (AKC) Scan Settings The KX II and LX provide a port scanning feature that searches for selected targets and displays them in a slide show view, allowing you to monitor up to 32 targets at one time. You can connect to targets or focus on a specific target as needed. Scans can include standard targets, blade servers, tiered Dominion devices, and KVM switch ports. See Scanning Ports.
Chapter 2: Virtual KVM Client (VKC) and Active KVM Client (AKC) Scaling Scaling your target window allows you to view the entire contents of the target server window. This feature increases or reduces the size of the target video to fit the Virtual KVM Client window size, and maintains the aspect ratio so that you see the entire target server desktop without using the scroll bar. To toggle scaling (on and off): Choose View > Scaling.
Chapter 2: Virtual KVM Client (VKC) and Active KVM Client (AKC) Digital Audio The KX II 2.4.0 (and later) supports end-to-end bidirectional digital audio connections for digital audio playback and capture devices from a remote client to a target server. The audio devices are accessed over a USB connection. A D2CIM-DVUSB and the current device firmware are required. Windows®, Linux® and Mac® operating systems are supported.
Chapter 2: Virtual KVM Client (VKC) and Active KVM Client (AKC) Audio Bandwidth Requirements The table below details the bandwidth requirements to transport audio under each of the selected formats. Audio format 44.1 KHz, 16bit stereo Network bandwidth requirement 176 KB/s 44.1 KHz, 16bit mono 88.2 KB/s 2.05 KHz, 16bit stereo 88.2 KB/s 22.05 KHz, 16bit mono 44.1 KB/s 11.025 KHz, 16bit stereo 44.1 KB/s 11.025 KHz, 16bit mono Audio 22.
Chapter 2: Virtual KVM Client (VKC) and Active KVM Client (AKC) 2. Connect to the target from the Port Access page. 3. Once connected, click the Audio icon in the toolbar. The Connect Audio Device dialog appears. A list of available audio device connected to the remote client PC is displayed. Note: If there are no available audio devices connected to the remote client PC, the Audio icon is grayed out. . 4. Check Connect Playback Device if you are connecting to a playback device. 5.
Chapter 2: Virtual KVM Client (VKC) and Active KVM Client (AKC) Once an audio connection is established, that Audio menu is changed to Disconnect Audio. To disconnect from the audio device: 36 Click the Audio icon in the toolbar and select OK when you are prompted to confirm the disconnect. A confirmation message appears. Click OK.
Chapter 2: Virtual KVM Client (VKC) and Active KVM Client (AKC) Smart Cards (VKC, AKC and MPC) Using the KX II 2.1.10 (and later) or KSX II 2.3.0 (and later), you are able to mount a smart card reader onto a target server to support smart card authentication and related applications. For a list of supported smart cards, smart card readers, and additional system requirements, see Supported and Unsupported Smart Card Readers (on page 39).
Chapter 2: Virtual KVM Client (VKC) and Active KVM Client (AKC) 4. A progress dialog will open. Check the 'Mount selected card reader automatically on connection to targets' checkbox to mount the smart card reader automatically the next time you connect to a target. Click OK to begin the mounting process. To update the smart card in the Select Smart Card Reader dialog: Click Refresh List if a new smart card reader has been attached to the client PC.
Chapter 2: Virtual KVM Client (VKC) and Active KVM Client (AKC) Supported and Unsupported Smart Card Readers External, USB smart card readers are supported. Supported Smart Card Readers Type Vendor Model Verified USB SCM Microsystems SCR331 Verified on local and remote USB ActivIdentity® ActivIdentity USB Reader v2.0 Verified on local and remote USB ActivIdentity ActivIdentity USB Reader v3.
Chapter 2: Virtual KVM Client (VKC) and Active KVM Client (AKC) Type Vendor Model Notes Microsoft® driver USB Keyboard/Card reader Combo SCM Microsystems SCR338 Proprietary card reader implementation (not CCID-compliant) USB Token Aladdin® eToken PRO™ Proprietary implementation Smart Card Minimum System Requirements Local Port Requirements The basic interoperability requirement for local port attachment to the is: All devices (smart card reader or token) that are locally attached must be US
Chapter 2: Virtual KVM Client (VKC) and Active KVM Client (AKC) If you are using a Linux® target, the following requirements must be met to use smart card readers with the Raritan device. CCID Requirements If the Raritan D2CIM-DVUSB VM/CCID is not recognized as a smart card reader by your Linux target, you may need to update the CCID driver version to 1.3.8 or above and update the driver configuration file (Info.plist). Operating system CCID requirements RHEL 5 ccid-1.3.8-1.el5 SuSE 11 pcsc-ccid-1.
Chapter 2: Virtual KVM Client (VKC) and Active KVM Client (AKC) Create a Java™ Library Link A soft link must be created to the libpcsclite.so after upgrading RHEL 4, RHEL 5 and FC 10. For example, ln –s /usr/lib/libpcsclite.so.1 /usr/lib/libpcsclite.so, assuming installing the package places the libraries in /usr/lib or /user/local/lib. PC/SC Daemon When the pcsc daemon (resource manager in framework) is restarted, restart the browser and MPC, too.
Chapter 3 Multi-Platform Client and Raritan Remote Client In This Chapter Overview ..................................................................................................43 Requirements and Installation .................................................................43 Operation .................................................................................................61 Administrative Functions .......................................................................
Chapter 3: Multi-Platform Client and Raritan Remote Client MPC Supported Operating Systems and Browsers Operating Systems When launched as a web applet or as a standalone application, MPC allows you to reach target servers via different Raritan Dominion devices and IP Reach models. Following are the operating systems and browsers supported for Generation 1 and Generation 2 Raritan devices using MPC.
Chapter 3: Multi-Platform Client and Raritan Remote Client Generation 2 Windows 7® (32 and 64 bit) Internet Explorer 6 and above** Windows XP operating system Windows 2008 Firefox 1.5, 2.0 and 3.0 (up to build 3.0.10) Windows 2003 Safari 3.0 or later Windows 2000® operating system SP4 Windows Vista operation system (32 and 64 bit) Red Hat Enterprise Workstation 4.0 and 5.0 Open SUSE Linux 10 and 11 Fedora Core 8 -11 Mac* OS 10.
Chapter 3: Multi-Platform Client and Raritan Remote Client ** Note: If you are using Internet Explorer® 7, you may run into permission issues when trying to connect to a target server. To avoid this, do the following: 1. In Internet Explorer, click Tools > Internet Options to open the Internet Options dialog. 2. In the "Temporary Internet files" section, click Settings. The Settings dialog opens. 3. In the "Check for newer versions of stored pages" section, select Automatically. 4.
Chapter 3: Multi-Platform Client and Raritan Remote Client Mode Operating system Windows Server 2008 Browser 8.0 Windows 7 Note: If you are using Internet Explorer 8 to access MPC and do not have Java installed on your machine, an alert bar or a dialog opens asking you to download the latest version of Java. However, in some instances, only a blank window opens and you are prompted to perform the download. If this occurs, set Internet Explorer 8 to use Compatibility View.
Chapter 3: Multi-Platform Client and Raritan Remote Client Character , Description Comma Character ` Description Grave accent - Dash { Left brace . Period | Pipe sign / Forward slash } Right brace < Less than sign ~ Tilde Invalid MPC Username Characters The following characters cannot be used in usernames for MPC.
Chapter 3: Multi-Platform Client and Raritan Remote Client 3. If copying MPC-installer.jar from a known location, double-click the file to start installation. Windows To check the JRE version in Windows: 1. Do one of the following to check the JRE version in Windows: Determine your version of the JRE from the Java website: http://www.java.com/en/download/help/testvm.xml. Click the Windows Start button at the bottom left of your page and click Control Panel.
Chapter 3: Multi-Platform Client and Raritan Remote Client Note: If you are using Windows 7, when User Access Control is turned on, you will need to manually create a folder to contain the MPC files. You will also need to assign the Admin user, at a minimum, Write permissions to the folder from Properties dialog > Security tab. Alternatively, you can turn off User Access Control. 5. Click Next. 6.
Chapter 3: Multi-Platform Client and Raritan Remote Client Linux® Determine your version of the JRE from the Java website: http://www.java.com/en/download/help/testvm.xml. You may need some configuration depending on your OS and browser. Configuration instructions are provided with the JRE download. Important: When launching MPC from a browser, it is highly recommended that you disable the Java Applet caching.
Chapter 3: Multi-Platform Client and Raritan Remote Client To install MPC for Linux: You must have Administrative privileges to install MPC. 1. Download the MPC-installer.jar file or copy it from a known location. 2. Open a terminal dialog and open the directory where the installer is saved. 3. Type java -jar MPC-installer.jar and press Enter to run the installer. 4. After the initial page loads, click Next. 5.
Chapter 3: Multi-Platform Client and Raritan Remote Client 2. Type java-version in the command line and press Enter. The currently-installed version of Java Runtime Environment (JRE) appears. If your path variable is not set to where the java binaries have been installed, you may not be able to see the JRE version. a. To set your path and assuming JRE 1.6 is installed in /usr/local/java, you must set your PATH variable. b. To set path for bash shell, export PATH=$PATH:/usr/local/java/j2re1.6/bin. c.
Chapter 3: Multi-Platform Client and Raritan Remote Client To open MPC in Sun Solaris: 1. Open a terminal window and navigate to the directory where you installed MPC (the default location is /usr/local/Raritan/Raritan MPC/version number). 2. Type ./start.sh and press Enter to open MPC. 3. Double-click the desired device to establish a connection, type your user name and password, and click OK to log on. Macintosh® To check JRE on a Mac®: 1. Launch a terminal window on the Macintosh desktop. 2.
Chapter 3: Multi-Platform Client and Raritan Remote Client Connecting to a Server via MPC when Alternate RADIUS Authentication is Enabled on the KX II-101 When Alternate RADIUS Authentication is enabled, you are authenticated exclusively against a remote authentication database. If the remote authentication database is inaccessible, you will be authenticated against a local authentication database and will be prompted to enter your local authentication username and password.
Chapter 3: Multi-Platform Client and Raritan Remote Client Note: Depending on your browser and browser security settings, you may see various security and certificate check and warning messages. It is necessary to accept the options in order to open MPC. Note: If you are using Firefox 3.0.3, you may experience problems launching the application. If this occurs, clear the browser cache and launch the application again.
Chapter 3: Multi-Platform Client and Raritan Remote Client 4. Locate the version of the standalone RRC client you are using. The entry for the standalone RRC client is a .zip file which contains the release notes and the installer for standalone RRC. Check the release notes for the latest information. 5. Download the .zip file or simply click on the .zip file entry. 6. Double-click on the installer executable in the .
Chapter 3: Multi-Platform Client and Raritan Remote Client Opening RRC from a Web Browser Your device features web browser-access capabilities and can provide a connection from any Windows-based, remote PC running Microsoft® Internet Explorer® 6.0/7.0. Security Settings To access a device via the web, your web browser must be configured appropriately on the Internet Explorer security settings tab. Specifically: "Download Signed ActiveX controls" should be set to either Enable or Prompt.
Chapter 3: Multi-Platform Client and Raritan Remote Client You are redirected to an HTTPS (128-bit) secure web page so you can open RRC. 2. Depending on your browser and its security configuration, you may see any or all of the following dialogs asking you to confirm you want to access and open an externally-provided application. Click Yes to accept these prompts.
Chapter 3: Multi-Platform Client and Raritan Remote Client Removing RRC from the Browser Cache To remove RRC from your browser cache for any reason, follow the standard procedure for your web browser software. To remove cached files in Internet Explorer v6.0: 1. If you have used RRC recently, exit all instances of Internet Explorer and restart Internet Explorer. 2. On the Internet Explorer Tools menu, choose Internet Options. 3.
Chapter 3: Multi-Platform Client and Raritan Remote Client Operation Navigator The navigator provides a tree view of every known Raritan device. From this panel, access all Raritan networked devices for which a connection profile exists and/or all Raritan devices automatically identified on the network. Note: Automatic Raritan device identification uses the UDP protocol and typically identifies all Raritan devices on your subnet.
Chapter 3: Multi-Platform Client and Raritan Remote Client Devices in the RRC Navigator In RRC, profiled devices are listed in the Navigator according to the data in the Description field of the device's profile. Automatically-identified devices are identified according to the name assigned to them in that device's network configuration setting.
Chapter 3: Multi-Platform Client and Raritan Remote Client Icon Description Connected (green) - You are currently authenticated and connected to this device. Available (black) - This device is currently available on the network but you are not currently connected to it. Unavailable - A profile exists for this device but it is not currently available on the network. (Note that all devices to which you are not currently connected and that have modem profiles use this icon.
Chapter 3: Multi-Platform Client and Raritan Remote Client Icon Action Description option is the only method of connecting to a Raritan device configured to use a DHCP IP address. MPC Navigator Tabs MPC tabs at the base of its Navigator pane. These tabs allow you to change how you display devices.
Chapter 3: Multi-Platform Client and Raritan Remote Client Navigator Display and Sort Options To better organize your view of all ports, use the Show and Sort options in the View menu. Note that you do not need an open connection to a target to show and sort targets in the Navigation panel. Showing Ports Discovered Devices - Shows or hides discovered devices from the Navigator view. You will not see broadcast messages when this option is disabled (not selected).
Chapter 3: Multi-Platform Client and Raritan Remote Client Name - When sorted by name (View > Sort > Name), port names are sorted alphanumerically within each group. Status - When sorted by status (View > Sort > Status), ports are sorted in the following order: Active Channels Busy Channels Available Devices Unavailable Devices Note: Sorting ports does not apply to KX II-101.
Chapter 3: Multi-Platform Client and Raritan Remote Client Set Scan Group a port scanning feature that searches for selected targets and displays them in a slide show view, allowing you to monitor up to 32 targets at one time. You can connect to targets or focus on a specific target as needed. Scans can include standard targets, blade servers, tiered Dominion devices, and KVM switch ports. Note: Scanning for tiered devices is not supported by the Multi-Platform Client (MPC).
Chapter 3: Multi-Platform Client and Raritan Remote Client See Using Scan Options (on page 69) for information on the options available to you while scanning targets.
Chapter 3: Multi-Platform Client and Raritan Remote Client Using Scan Options Following are options available to you while scanning targets. With the exception of the Expand/Collapse icon, all of these options are selected from the Options menu in the upper left of the Port Scan viewer. The options will return to their defaults when you close the window. Hide or View Thumbnails Use the Expand/Collapse icon at the upper left of the window to hide or view thumbnails. Expanded is the default view.
Chapter 3: Multi-Platform Client and Raritan Remote Client Button Button name New Profile Description Creates a new Navigator entry for a Raritan device. Same result as choosing Connection > New Profile in the menu. Connection Properties Opens the Modify Connection Properties dialog to manually adjust bandwidth options (such as connection speed, color depth, and so forth).
Chapter 3: Multi-Platform Client and Raritan Remote Client Button Button name Auto-sense Video Settings Description Enter OnScreen Menu Not applicable for the device. Used by the application with other Raritan products. Forces a refresh of the video settings (resolution, refresh rate). Same as choosing Video > Video Settings or choosing Video Settings on the shortcut menu, which is opened by pressing Ctrl+Left Alt+M. Same as choosing Keyboard > Enter OnScreen Menu.
Chapter 3: Multi-Platform Client and Raritan Remote Client Button Button name Description to open the shortcut menu and then choose Full/Normal Screen or press the F key on your keyboard. Scaling Increases or reduces the target video size so you can view the entire contents of the target server window without using the scroll bar. Show/Hide Navigator Toggles the Navigator panel between visible and hidden. Same as choosing View > Navigator.
Chapter 3: Multi-Platform Client and Raritan Remote Client MPC Connected Server(s) Toolbar The Connected Server(s) toolbar is comprised of a button for each connected target server port, thus enabling quick access to connected targets. When you connect to a port, a button corresponding to that port is added to the toolbar and labeled with the name of the port. Conversely, when you disconnect from a port, the corresponding button is removed from the toolbar.
Chapter 3: Multi-Platform Client and Raritan Remote Client Icon Session information Description Concurrent connections indicator Indicates that multiple remote users are currently connected to the same target server on the device. One icon indicates a single user is connected, and two icons indicates two or more users are connected.
Chapter 3: Multi-Platform Client and Raritan Remote Client Diagram key Session information Description Video sensing status/path indicator Indicates when video sensing occurs during connections to target KVM server ports. Bandwidth Indicates how much of your total usage indicator available bandwidth is currently being used. The connection speed setting determines total available bandwidth.
Chapter 3: Multi-Platform Client and Raritan Remote Client Diagram key Session information Description Lock key indicators Indicates the status of the current target KVM Server, in respect to the activation of the Caps-Lock, Num-Lock, and ScrollLock keys. If these keys are enabled on the target server being viewed, this affirmative status is reflected on the status bar.
Chapter 3: Multi-Platform Client and Raritan Remote Client MPC Full Screen Mode Full Screen mode provides you with the ability to view the target server desktop in Full Screen mode, which removes all toolbars from view. Activate Full Screen mode once you are connected to a target by doing one of the following: Click the Full Screen button in the toolbar and then click OK in the confirmation message that appears. Choose View > Full Screen and then click OK in the confirmation message that appears.
Chapter 3: Multi-Platform Client and Raritan Remote Client RRC Full Screen Mode Full screen mode removes the surrounding RRC graphical interface and your local desktop area, filling your screen with the video from the target server. Your screen's resolution is adjusted to match the resolution of the target server (provided your graphics system supports it).
Chapter 3: Multi-Platform Client and Raritan Remote Client MPC Scaling Scaling your target window size allows you to view the entire contents of the target server window. This feature increases or reduces the size of the target video to fit the window size and maintains the aspect ratio. This allows you to see the entire target server desktop while in standard view. To activate Scaling, do one of the following: Choose View > Scale Video.
Chapter 3: Multi-Platform Client and Raritan Remote Client Auto-Scroll The auto-scroll feature automatically scrolls the video display in the direction of the cursor as the cursor approaches the edge of the display. A thin border appears around the perimeter of the remote desktop area to indicate the function is on. When enabled, if you see scroll bars and then move the cursor onto the border, the page automatically scrolls in the appropriate direction.
Chapter 3: Multi-Platform Client and Raritan Remote Client 3. From the Product drop-down, choose the Raritan product you are using. TCP/IP Connections 4. Select the type of connection from the Connection Type drop-down. a. If TCP/IP Connection is selected for a LAN/WAN connection, complete the information in the "Find Raritan device By" section: Type the IP address assigned to your Raritan device. Type the name assigned to your Raritan device during initial setup.
Chapter 3: Multi-Platform Client and Raritan Remote Client Note: For security reasons, you must use the MPC standalone client if you require modem access. Further, one modem on a client PC can be used for only one device connection. Note: Dial-up is not support in KX II-101. 5. Select the Use Default Port Number checkbox to use the default port number (5000). For TCP Ports, devices are automatically configured to use TCP Port 5000 when communicating with the client.
Chapter 3: Multi-Platform Client and Raritan Remote Client 256 kb (Cable) 128 kb (Dual ISDN) 56 kb (ISP Modem) 33 kb (Fast Modem) 24 kb (Slow Modem) Note: Raritan recommends that if you are connecting to the device via modem, you set the connection speed to 33kb. 7. Set the Color Depth. Devices can dynamically adapt the color depth transmitted to remote users in order to maximize usability in all bandwidths. Select from among the options in the drop-down list.
Chapter 3: Multi-Platform Client and Raritan Remote Client 9. Selecting the Internet Flow Control checkbox ensures that packets transmitted by the device are received and reconstructed by the client application in the correct order. This is useful when using a device over an unpredictable public WAN (particularly in international scenarios). 10. Use the slider to select the desired level of video Smoothing (15-bit mode only).
Chapter 3: Multi-Platform Client and Raritan Remote Client 14. Click OK to create the connection profile. To modify a profile: 1. Select the device in the Navigator panel and right-click it. 2. Choose Modify Profile. The Modify Connection dialog appears. 3. Update the fields as appropriate. 4. Click OK. To delete a profile: 1. Select the device with a profile in the Navigator and right-click it. 2. Choose Delete Profile. 3.
Chapter 3: Multi-Platform Client and Raritan Remote Client Note: The Compression and Security tabs are not available for Generation 2 devices. Connect Tab 2. On the Connect tab, type a meaningful description of the device in the Description field. This description identifies the Raritan device in the Navigator. 3. Select Dial Up Connection from the Connection Type drop-down for a direct analog modem connection to the Raritan device. Type the parameters that MPC or RRC should use to establish a connection.
Chapter 3: Multi-Platform Client and Raritan Remote Client 4. Select the Use Default Port Number checkbox to use the default port number (5000). For TCP Ports, devices are automatically configured to use TCP Port 5000 when communicating with the client. If you do not want to use the default port number, deselect the checkbox and type the port number in the Port Number field. Compression Tab 5. Set the Connection Speed.
Chapter 3: Multi-Platform Client and Raritan Remote Client Important: For most administrative tasks (server monitoring, reconfiguring, and so forth), administrators do not require the full 24bit or 32-bit color spectrum made available by most video graphics cards. Attempting to transmit such high color depths wastes network bandwidth. 7. Select Progressive Update to increase the usability in constrained bandwidth environments.
Chapter 3: Multi-Platform Client and Raritan Remote Client 9. Use the slider to select the desired level of video Smoothing (15-bit mode only). The level determines how aggressively to blend page regions with small color variation into a single, smooth color. Smoothing improves the appearance of the target video by reducing the video noise that is displayed. Security Tab 10. Enter the private security key in the Private Key field if your device is configured to use a private security key.
Chapter 3: Multi-Platform Client and Raritan Remote Client 12. Click OK to create the connection profile. Managing Profiles in KX, KSX and KX-101 G2 Devices Creating, Modifying and Deleting Profiles in MPC - Generation 2 Devices To create a profile: 1. There are two ways to create a profile: For automatically discovered devices, right-click the device name in the Navigator and choose Add Profile from the shortcut menu. For other devices, choose Connection > New Profile.
Chapter 3: Multi-Platform Client and Raritan Remote Client TCP/IP Connections a. If TCP/IP Connection is selected for a LAN/WAN connection, complete the information in the "Find Raritan device By" section: Type the IP address assigned to your Raritan device. Type the name assigned to your Raritan device during initial setup. Type the Domain Name Server (DNS) name in the Host Name field.
Chapter 3: Multi-Platform Client and Raritan Remote Client Select the modem (as configured in Windows) from the dropdown list that will be used to dial and connect to your Raritan device. Note: For security reasons, you must use the MPC standalone client if you require modem access. Further, one modem on a client PC can be used for only one device connection. a.
Chapter 3: Multi-Platform Client and Raritan Remote Client 3. When prompted to confirm the deletion, click Yes to delete the profile for this device or click No to return to the application without deleting. Establishing a New Connection Note: Depending on your version of the JRE™, you might receive a certificate message when using the standalone application to access a Dominion device. You have to accept the certificate in order to establish the connection.
Chapter 3: Multi-Platform Client and Raritan Remote Client Generation 1 Devices The following information is displayed about a current connection to Generation 1 devices: Connection information Description Device name The name of your device. IP address The IP address of your device. Port The KVM Communication TCP/IP Port used to access the target device. Data in/second Data rate in. Data out/second Data rate out. FPS The frames per second transmitted for video.
Chapter 3: Multi-Platform Client and Raritan Remote Client Connection information Description Serial devices count Number of serial devices detected. Reserved 0 - not used FPS* Frames per second * Available only in MPC. To copy this information: Click Copy to Clipboard in the Connection Info dialog. The information is now available to be pasted into the program of your choice.
Chapter 3: Multi-Platform Client and Raritan Remote Client Connecting to a Remote KVM Console Once you establish a connection with a Raritan device, that device's icon in the Navigator can be expanded to display all ports enabled for remote access. Choose one of the following options to establish a remote KVM console connection: Double-click the KVM port. This method closes any previous connection before connecting to the new port. Right-click the port and choose Switch from the shortcut menu.
Chapter 3: Multi-Platform Client and Raritan Remote Client 3. To exit completely, click Exit on the Connection menu Shortcut Menu To access the shortcut menu, use either the default keyboard combination of Ctrl+Left Alt+M or the keyboard combination you assign. See Changing the Shortcut Menu Keyboard Combination (on page 98) for more information. TIP: If at some point you forget the keyboard combination used to open the shortcut menu, press Ctrl+Left Alt at the same time.
Chapter 3: Multi-Platform Client and Raritan Remote Client To Press Ctrl+Left Alt+M+ Send Left Alt+Tab T Auto Sense A Calibrate Color C * If Full Screen mode is active, executing this command automatically ends Full Screen mode. Changing the Shortcut Menu Keyboard Combination To change the keyboard combination, do the following: 1. Choose Tools > Options to open the Options dialog. 2.
Chapter 3: Multi-Platform Client and Raritan Remote Client Keyboard Macros A hot key combination is a set of keystrokes that performs an action when pressed. For example, the hot key combination Ctrl+Alt+0 might be created to minimize all windows. A keyboard macro is a shortcut that sends a hot key combination to a target server.
Chapter 3: Multi-Platform Client and Raritan Remote Client 7. For example, create a macro to close a window by selecting Left Ctrl + Esc. This appears in the Macro Sequence box as follows: Press Left Ctrl Release Left Ctrl Press Esc Release Esc 8. Review the Macro Sequence field to be sure the macro sequence is defined correctly. a. To remove a step in the sequence, select it and click Remove. b.
Chapter 3: Multi-Platform Client and Raritan Remote Client Running a Keyboard Macro Once you have created a keyboard macro, execute it using the keyboard macro you assigned to it or by choosing it from the Keyboard menu. Run a Macro from the Menu Bar When you create a macro, it appears under the Keyboard menu. Execute the keyboard macro by clicking on it in the Keyboard menu.
Chapter 3: Multi-Platform Client and Raritan Remote Client Send Text to Target You are able to paste text from the client machine to the target using the Send Text to Target option on the Keyboard menu. To send text to a target: 1. Select Keyboard > Send Text to Target. 2. In the Send Text dialog, paste the text from the client machine in the space provided. 3.
Chapter 3: Multi-Platform Client and Raritan Remote Client Hot Key Combination Description application window. Specifically, if the focus is on the application, the application closes. If the focus is on an application‟s title bar in the target‟s video, that application closes.
Chapter 3: Multi-Platform Client and Raritan Remote Client Hot Key Combination Description Ctrl+Left Alt+M Brings up the shortcut menu. Print Scrn Treated locally and copies the page to the clipboard.
Chapter 3: Multi-Platform Client and Raritan Remote Client Supported Audio Device Formats The KX II 2.4.0 (and later) supports one playback device and one record device on a target at a time. The following audio device formats are supported: Stereo, 16 bit, 44.1K (Playback only) Mono, 16 bit, 44.1K (Playback only) Stereo, 16 bit, 22.05K (Playback only) Mono, 16 bit, 22.05K (Playback only) Stereo, 16 bit, 11.025K (Playback and Capture) Mono, 16 bit, 11.
Chapter 3: Multi-Platform Client and Raritan Remote Client 11. Click OK. If the audio connection is established, a confirmation message appears. Click OK. If the connection was not established, an error message appears. Once an audio connection is established, that Audio menu is changed to Disconnect Audio. To disconnect from the audio device: Click the Audio icon in the toolbar and select OK when you are prompted to confirm the disconnect. A confirmation message appears. Click OK.
Chapter 3: Multi-Platform Client and Raritan Remote Client Video Properties Refreshing the Screen The Refresh Screen command forces a refresh of the video screen. Video settings can be refreshed automatically in several ways: The Refresh Screen command forces a refresh of the video screen. The Auto-sense Video Settings command automatically detects the target server's video settings. The Calibrate Color command calibrates the video to enhance the colors being displayed.
Chapter 3: Multi-Platform Client and Raritan Remote Client Calibrating Color Use the Calibrate Color command to optimize the color levels (hue, brightness, saturation) of the transmitted video images. The color settings are on a target server-basis. Note: The Calibrate Color command applies to the current connection only. To calibrate the color, do the following: Choose Video > Calibrate Color or click the Calibrate Color button in the toolbar. The target device screen updates its color calibration.
Chapter 3: Multi-Platform Client and Raritan Remote Client c. Brightness: Use this setting to adjust the brightness of the target server display. d. Brightness Red - Controls the brightness of the target server display for the red signal. e. Brightness Green - Controls the brightness of the green signal. f. Brightness Blue - Controls the brightness of the blue signal. g. Contrast Red - Controls the red signal contrast. h. Contrast Green - Controls the green signal. i.
Chapter 3: Multi-Platform Client and Raritan Remote Client 3. Click Save to save the screenshot. Changing the Maximum Refresh Rate If the video card you are using on the target uses custom software and you are accessing the target through MPC or VKC, you may need to change the maximum refresh rate of the monitor in order for the refresh rate to take effect on the target. To adjust the monitor refresh rate: 1. In Windows®, select Display Properties > Settings > Advanced to open the Plug and Play dialog. 2.
Chapter 3: Multi-Platform Client and Raritan Remote Client Mouse Options Single Cursor Mode/Dual Cursor Mode When remotely viewing a target server that uses a mouse, two mouse cursors are displayed on the remote desktop. When your mouse pointer lies within the remote desktop area, mouse movements and clicks are directly transmitted to the connected target server. The pointer, generated by the operating system, slightly leads the target server's mouse pointer during movement.
Chapter 3: Multi-Platform Client and Raritan Remote Client Mouse Synchronization Options In addition to synchronizing mouse cursors or toggling between single and dual cursor mode, the Mouse menu provides three options for synching cursors when in dual cursor mode: Menu option Description Absolute When connected to selected Dominion devices and targets with USB ports, the application uses absolute coordinates to keep the cursors in sync. See Absolute Mouse Mode (on page 26) for more information.
Chapter 3: Multi-Platform Client and Raritan Remote Client Absolute Mouse Mode In this mode, absolute coordinates are used to keep the client and target cursors in sync, even when the target mouse is set to a different acceleration or speed. This mode is supported on servers with USB ports and is the default mode for VM and dual VM targets. To enter absolute mouse mode: Choose Mouse > Absolute.
Chapter 3: Multi-Platform Client and Raritan Remote Client Intelligent Mouse Mode In Intelligent Mouse mode, the device can detect the target mouse settings and synchronize the mouse cursors accordingly, allowing mouse acceleration on the target. Intelligent mouse mode is the default for nonVM targets. During synchronization, the mouse cursor does a “dance” in the top left corner of the screen and calculates the acceleration. For this mode to work properly, certain conditions must be met.
Chapter 3: Multi-Platform Client and Raritan Remote Client Please note that mouse configurations will vary on different target operating systems. Consult your OS guidelines for further details. Also note that intelligent mouse synchronization does not work with UNIX targets. Standard Mouse Mode Standard Mouse mode uses a standard mouse synchronization algorithm using relative mouse positions.
Chapter 3: Multi-Platform Client and Raritan Remote Client MPC Connection Properties - Generation 1 Devices To adjust connection properties: 1. Choose Connection > Properties or click the Connection Properties button tab. in the toolbar. Update the settings in the Compression 2. Set the Connection Speed. Use this setting to manually adjust the connection speed to accommodate bandwidth constraints. Devices can automatically detect available bandwidth and not limit bandwidth use.
Chapter 3: Multi-Platform Client and Raritan Remote Client 384 kb (Slow DSL/T1) 256 kb (Cable) 128 kb (Dual ISDN) 56 kb (ISP Modem) 33 kb (Fast Modem) 24 kb (Slow Modem) 3. Set the Color Depth. Devices can dynamically adapt the color depth transmitted to remote users in order to maximize usability in all bandwidths. Select from among the options in the drop-down list.
Chapter 3: Multi-Platform Client and Raritan Remote Client MPC Connection Properties - Generation 2 Devices To adjust connection properties: 1. Choose Connection > Properties or click the Connection Properties button tab. in the toolbar. Update the settings in the Compression 2. Set the Connection Speed. Use this setting to manually adjust the connection speed to accommodate bandwidth constraints. Devices can automatically detect available bandwidth and not limit bandwidth use.
Chapter 3: Multi-Platform Client and Raritan Remote Client 2-bit Gray Black and White Important: For most administrative tasks (server monitoring, reconfiguring, and so forth), administrators do not require the full 24bit or 32-bit color spectrum made available by most video graphics cards. Attempting to transmit such high color depths wastes network bandwidth. 4. Use the slider to select the desired level of video Smoothing (15-bit mode only).
Chapter 3: Multi-Platform Client and Raritan Remote Client RRC Connection Properties To adjust connection properties: 1. Choose Connection > Properties or click the Connection Properties button tab. in the toolbar. Update the settings in the Compression 2. Set the Connection Speed. Use this setting to manually adjust the connection speed to accommodate bandwidth constraints. Devices can automatically detect available bandwidth and not limit bandwidth use.
Chapter 3: Multi-Platform Client and Raritan Remote Client 256 kb (Cable) 128 kb (Dual ISDN) 56 kb (ISP Modem) 33 kb (Fast Modem) 24 kb (Slow Modem) 3. Set the Color Depth. Devices can dynamically adapt the color depth transmitted to remote users in order to maximize usability in all bandwidths. Select from among the options in the drop-down list.
Chapter 3: Multi-Platform Client and Raritan Remote Client 7. Click OK to create the connection profile. Video Settings Video Settings - Generation 1 Devices Following are instructions on configuring video settings for Generation 1 devices. These settings can be refreshed using the Color Calibration command by manually forcing a device to autodetect the video settings (on the Video menu, click Auto-sense Video Settings) or by changing the settings in this page.
Chapter 3: Multi-Platform Client and Raritan Remote Client Devices can filter out the electrical interference of video output from graphics cards. This feature optimizes picture quality and reduces bandwidth. Higher settings transmit variant pixels only if a large color variation exists in comparison to the neighboring pixels. However, setting the threshold too high can result in the unintentional filtering of desired page changes. Lower settings transmit most pixel changes.
Chapter 3: Multi-Platform Client and Raritan Remote Client Select the Link Color Controls checkbox to make all slide adjusters move in unison when any one option is moved. Red Gain - Controls the amplification of the red signal. Red Offset - Controls the bias of the red signal. Green Gain - Controls the amplification of the green signal. Green Offset - Controls the bias of the green signal. Blue Gain - Controls the amplification of the blue signal.
Chapter 3: Multi-Platform Client and Raritan Remote Client Note: The default Noise Filter is 2. Raritan recommends that you lower this value to 0 (zero). Although higher settings will stop the needless transmission of false color variations, true and intentional small changes to a video image may not be transmitted. b. PLL Settings If the video image looks extremely blurry or unfocused, the PLL settings for clock and phase can be adjusted until a better image appears on the active target server.
Chapter 3: Multi-Platform Client and Raritan Remote Client 4. Check the Automatic Color Calibration checkbox to enable this feature. 5. Select the video sensing mode: Best possible video mode - Devices will perform the full Auto Sense process when switching targets or target resolutions. Selecting this option calibrates the video for the best image quality. 6. Quick sense video mode - Selecting this option will cause the device to use a quick video Auto Sense in order to show the target's video sooner.
Chapter 3: Multi-Platform Client and Raritan Remote Client 8. Click OK to apply the settings and close the dialog. Click Apply to apply the settings without closing the dialog. Port Access Page Sort To change the display sort order and/or view more ports on the same page: 1. Click the column heading by which you want to sort. The list of KVM target servers is sorted by that column. 2. In the Rows per Page, enter the number of ports to be displayed on the page and click Set.
Chapter 3: Multi-Platform Client and Raritan Remote Client 2. Ensure that a solid white color covers approximately 15% or more of the target server's desktop. TIP: Open Microsoft® Notepad and maximize the window. 3. On the Video menu, choose Calibrate Color or click the Color Calibration button on the toolbar. The target device page updates its calibration. Tip: Specify automatic color calibration using Tools > Options.
Chapter 3: Multi-Platform Client and Raritan Remote Client Smart Cards (VKC, AKC and MPC) Using the KX II 2.1.10 (and later) or KSX II 2.3.0 (and later), you are able to mount a smart card reader onto a target server to support smart card authentication and related applications. For a list of supported smart cards, smart card readers, and additional system requirements, see Supported and Unsupported Smart Card Readers (on page 39).
Chapter 3: Multi-Platform Client and Raritan Remote Client 4. A progress dialog will open. Check the 'Mount selected card reader automatically on connection to targets' checkbox to mount the smart card reader automatically the next time you connect to a target. Click OK to begin the mounting process. To update the smart card in the Select Smart Card Reader dialog: Click Refresh List if a new smart card reader has been attached to the client PC.
Chapter 3: Multi-Platform Client and Raritan Remote Client Administrative Functions Although your device provides a remote interface to administrative functions through the device manager, the client provides an interface to frequently-used administrative functions directly from its own interface. When logged into a device as an administrator, you can perform the administrative tasks discussed here.
Chapter 3: Multi-Platform Client and Raritan Remote Client General Options, Advanced Options, Client Launch Settings and Scan Settings Options in MPC for KX II and KSX II The Options available in the Tools menu allow you to customize scroll borders, mouse mode settings, Single Cursor mode, auto color calibration, hot key configuration, keyboard type, broadcast port, and logging.
Chapter 3: Multi-Platform Client and Raritan Remote Client General Options To configure the general options in MPC: 1. Choose Tools > Options. The Options dialog appears and displays the General tab by default.
Chapter 3: Multi-Platform Client and Raritan Remote Client General Options 2. Select the "Show scroll borders" checkbox to view the thin scroll borders designating the autoscroll area. Note: "Auto-Synch Mouse in two-cursor mode" is not available for use with the KX II and KSX II. 3. If you select the "Display single cursor mode instructions" checkbox, the Single Cursor Mode dialog will appear each time Single Cursor is enabled in the application. See Mouse Options (on page 111) for more information. 4.
Chapter 3: Multi-Platform Client and Raritan Remote Client Keyboard Limitations Japanese Kanji Keyboards For Kanji keyboards, when using DCIM-USBs and MPC, the remote client cannot enter EISU mode by pressing the Caps Lock key (key#30). Local port access is not affected. You can access the DCIM-USBs using RRC or using the keyboard macro Shift + Caps Lock in MPC. Slovenian Keyboards The < key does not work on Slovenian keyboards due to a JRE limitation.
Chapter 3: Multi-Platform Client and Raritan Remote Client 2. Select the Advanced tab to configure advanced options. 3. From the KVM Switch OSUI Hot Key section, select the hot key to use when switching between target server displays. 4. Enter the HTTPS port and Discovery Port. 5. Select the Enable IPv6 Networking checkbox for IPv6 to enable IPv4 and IPv6 dual-stack operation. 6. Select the Enable Logging checkbox only if directed to by Technical Support.
Chapter 3: Multi-Platform Client and Raritan Remote Client c. Select Pin Menu Toolbar if you want the toolbar to remain visible on the target when it is in Full Screen mode. By default, while the target is in Full Screen mode, the menu is only visible when you hover your mouse along the top of the screen. 3. Click OK.
Chapter 3: Multi-Platform Client and Raritan Remote Client 4. If you select the "Display single cursor mode instructions" checkbox, the Single Cursor Mode dialog will appear each time Single Cursor is enabled in the application. See Mouse Options (on page 111) for more information. 5. Select the Automatic Color Calibration checkbox to enable automatic color calibration. This option is available for KX generation 1 (G1) only. 6.
Chapter 3: Multi-Platform Client and Raritan Remote Client 8. For advanced options, open the Advanced tab. 9. From the KVM Switch OSUI Hot Key section, select the hot key to use when switching between target server displays. 10. For the Broadcast Port, type the broadcast port number in the Port field if you want to use a port other then 5000. 11. Select the Enable IPv6 Networking checkbox for IPv6 to enable IPv4 and IPv6 dual-stack operation.
Chapter 3: Multi-Platform Client and Raritan Remote Client Options in RRC The Options available in the Tools menu provide options that allow you to customize scroll borders, mouse mode settings, single cursor mode, auto color calibration, hot key configuration, keyboard type, broadcast port, and logging. To configure the general options in RRC: 1. In RRC, choose Tools > Options to open the Options dialog. 2.
Chapter 3: Multi-Platform Client and Raritan Remote Client 4. If you select the "Display single cursor mode instructions" checkbox the Single Cursor Mode dialog appears each time Single Cursor is enabled in the application (see Mouse Options (on page 111) for more information). 5. Select Auto-Color Calibration to enable it. 6. In the KVM Switch OSUI Hot Key panel, select the radio button next to the hot key combination you would like to use. 7.
Chapter 3: Multi-Platform Client and Raritan Remote Client 5. Open a new IE7 session and go to Raritan's website to download the newest version of RRC. Changing a Password To update your password 1. Connect to a target by selecting it in the Navigator. 2. Highlight the target's icon in the Navigator and then choose Tools > Update > User Password. The Change Password dialog appears. 3. Type your current password in the Old Password field. 4. Type the new password in the New Password field. 5.
Chapter 3: Multi-Platform Client and Raritan Remote Client Backing Up and Restoring an Entire System (Dominion KX II only) To back up the entire system (both user and device configuration): 1. Choose Tools > Backup All. The Backup All dialog appears. 2. Navigate to the desired directory and give the backup file a name. (Backup files have an extension of .rfp). 3. Click Save. A message is displayed confirming the successful backup. 4. Click OK.
Chapter 3: Multi-Platform Client and Raritan Remote Client Note: Backups are always complete system backups. Restores can be complete or partial depending on your selection. To restore: 1. Choose Tools > Restore Configuration. The Restore Device Configuration dialog appears. 2. Navigate to the appropriate directory and select the backup file. 3. Click Open. The Restore Packages dialog appears. 4. Select the type of restore you want to run: a.
Chapter 3: Multi-Platform Client and Raritan Remote Client Device Settings Restore - This option includes only device settings such as power associations, USB profiles, blade chassis related configuration parameters, and Port Group assignments. Use this option to quickly copy the device information. 5. Click OK. Backing Up and Restoring a Device Configuration To back up a device: 1. Download the device configuration to your local computer by selecting the device in the Navigator. 2.
Chapter 3: Multi-Platform Client and Raritan Remote Client Diagnostic Log (excluding KX II) To download a detailed diagnostic log for reporting or analysis: 1. Select the device in the Navigator. 2. On the Tools menu, choose Save Diagnostic Log. Broadcast Port By default, all Raritan devices send data through Port 5000. This network traffic includes the autodiscovery broadcast. In the case of conflicts or to deal with firewall issues, you may want to use a different broadcast port.
Chapter 3: Multi-Platform Client and Raritan Remote Client Note: If you want the application to autodiscover Raritan devices on the new broadcast port you entered in the Options window, you must configure all Raritan devices to use the new port number. If you do not want to use the broadcasting function at all, it can be turned off. To turn off broadcasting: 1. In RRC, select View > Show. 2. Deselect the Discovered Devices checkbox.
Chapter 3: Multi-Platform Client and Raritan Remote Client Broadcasting is turned off and the devices are not be displayed in the navigator. Remote Power Management AC power to associated targets can be managed when used with a properly configured Raritan Remote Power Control Strip (RPC strip). Three options are available when performing remote target power management: Power On Power Off Cycle Power To change the power status of a target: 1. Select the target in the Navigator. 2.
Chapter 3: Multi-Platform Client and Raritan Remote Client a. If too many macros are found in the file, an error message is displayed and the import terminates once OK is selected. b. If the import fails, an error dialog appears and a message regarding why the import failed is displayed. Select OK to continue the import without importing the macros that cannot be imported. 3. Select the macros to be imported by checking their corresponding checkbox or using the Select All or Deselect All options. 4.
Chapter 3: Multi-Platform Client and Raritan Remote Client The macros are then imported. If a macro is imported that contains a hot key that already exists, the hot key for the imported macro is discarded. To export macros: 1. Choose Tools > Export Macros to open the Select Keyboard Macros to Export dialog. 2. Select the macros to be exported by checking their corresponding checkbox or using the Select All or Deselect All options. 3. Click Ok.
Chapter 3: Multi-Platform Client and Raritan Remote Client 4. Select the folder to save the macro file to, enter a name for the file and click Save. If the macro already exists, you receive an alert message. Select Yes to overwrite the existing macro or No to close the alert without overwriting the macro. Import/Export RRC Keyboard Macros To export RRC macros: 1. Choose Tools > Export Macros to open the Export Macros dialog. 2.
Chapter 3: Multi-Platform Client and Raritan Remote Client 4. Locate the macro file, click on it to select it and then click Save. If the macro already exists, you receive an alert message. Select Yes to overwrite the existing macro or No to close the alert without overwriting the macro. To import RRC macros: 1. Choose Tools > Import Macros to open the Import Macros dialog. By default, the macro exists on the desktop. 2. Click on the macro file and click Open to import the macro.
Chapter 3: Multi-Platform Client and Raritan Remote Client a. If too many macros are found in the file, an error message is displayed and the import terminates once OK is selected. b. If the import fails, an error dialog appears and displays a message regarding why the import failed. Select OK to continue the import without importing the macros that cannot be imported. 3. Select the macros to be imported by checking their corresponding checkbox or using the Select All or Unselect All options. 4.
Chapter 3: Multi-Platform Client and Raritan Remote Client 154 Click Yes to replace the existing macro with the imported version. Click Yes to All to replace the currently selected and any other duplicate macros that are found. Click No to keep the original macro and proceed to the next macro Click No to All keep the original macro and proceed to the next macro. Any other duplicates that are found are skipped as well. Click Cancel to stop the import.
Chapter 3: Multi-Platform Client and Raritan Remote Client b. If during the import process the number of allowed, imported macros is exceeded, a message appears. Click OK to attempt to continue importing macros or click Cancel to stop the import process. The macros are imported. If a macro is imported that contains a hot key that already exists, the hot key for the imported macro is discarded.
Chapter 3: Multi-Platform Client and Raritan Remote Client Accessing the MPC Diagnostic Interface (excluding KX II) To access a device's diagnostic console: 156 In the Navigator, scroll through the list of the targets associated with the device and then double-click the Diagnostic icon at the bottom of the target list.
Chapter 4 Virtual Media In This Chapter Overview ................................................................................................158 Using Virtual Media ...............................................................................163 Connecting to Virtual Media ..................................................................165 Disconnecting Virtual Media ..................................................................
Chapter 4: Virtual Media Overview Virtual media extends KVM capabilities by enabling KVM target servers to remotely access media from a client PC and network file servers. The supports virtual media access of hard drives and remotely mounted images. Virtual media sessions are secured using 256-bit AES or RC4 encryption. With this feature, media mounted on a client PC and network file servers is essentially "mounted virtually" by the target server.
Chapter 4: Virtual Media Open SUSE 10, 11 Fedora 13 and 14 The Virtual KVM Client (VKC) and Multi-Platform Client (MPC) can be used to mount virtual media types with the exception of Mac OS X 10.5, which is supported exclusively by MPC.
Chapter 4: Virtual Media Diagram key Desktop PC USB mass storage device PC hard drive CIM Audio speakers Target server Remote file server (ISO images) CD/DVD drive Note: Audio is not supported by the LX.
Chapter 4: Virtual Media Prerequisites for Using Virtual Media With the virtual media feature, you can mount up to two drives (of different types) that are supported by the USB profile currently applied to the target. These drives are accessible for the duration of the KVM session. For example, you can mount a specific CD-ROM, use it, and then disconnect it when you are done. The CD-ROM virtual media “channel” will remain open, however, so that you can virtually mount another CDROM.
Chapter 4: Virtual Media Virtual Media in a Linux Environment KX II 2.4.0 (and later) and LX 2.4.5 (and later) support virtual media in a Linux environment. Following is important information for Linux® users regarding using virtual media. Root User Permission Requirement Your virtual media connection can be closed if you mount a CD ROM from a Linux client to a target and then unmount the CD ROM. The connection also closes when a floppy drive has been mounted and then a floppy disk is removed.
Chapter 4: Virtual Media Mac users must unmount any devices that are already mounted in order to connect to a target server. Use >diskutil umount /dev/disk1s1 to unmount the device and diskutil mount /dev/disk1s1 to remount it.
Chapter 4: Virtual Media Upon completion of your tasks, disconnect the virtual media. See Disconnecting Virtual Media (on page 168). Virtual Media File Server Setup (File Server ISO Images Only) Note: This feature is only required when using virtual media to access file server ISO images. ISO9660 format is the standard supported by Raritan. However, other CD-ROM extensions may also work. Note: SMB/CIFS support is required on the file server.
Chapter 4: Virtual Media Connecting to Virtual Media Mounting Local Drives This option mounts an entire drive, which means the entire disk drive is mounted virtually onto the target server. Use this option for hard drives and external drives only. It does not include network drives, CD-ROM, or DVD-ROM drives. This is the only option for which Read/Write is available.
Chapter 4: Virtual Media WARNING: Enabling Read/Write access can be dangerous! Simultaneous access to the same drive from more than one entity can result in data corruption. If you do not require Write access, leave this option unselected. 4. Click Connect. The media will be mounted on the target server virtually. You can access the media just like any other drive. Mounting CD-ROM/DVD-ROM/ISO Images This option mounts CD-ROM, DVD-ROM, and ISO images.
Chapter 4: Virtual Media a. Choose the ISO Image option. Use this option when you want to access a disk image of a CD, DVD, or hard drive. ISO format is the only format supported. b. Click Browse. c. Navigate to the path containing the disk image you want to use and click Open. The path is populated in the Image Path field. d. Click Connect. 4. For remote ISO images on a file server: a. Choose the Remote Server ISO Image option. b. Choose Hostname and Image from the drop-down list.
Chapter 4: Virtual Media Disconnecting Virtual Media To disconnect the virtual media drives: For local drives, choose Virtual Media > Disconnect Drive. For CD-ROM, DVD-ROM, and ISO images, choose Virtual Media > Disconnect CD-ROM/ISO Image. Note: In addition to disconnecting the virtual media using the Disconnect command, simply closing the KVM connection closes the virtual media as well.
Chapter 5 Raritan Serial Console In This Chapter Overview ................................................................................................169 RSC System Requirements...................................................................169 Installing RSC on Windows ...................................................................173 Installing RSC for Sun Solaris and Linux ..............................................173 Opening RSC from the Remote Console ..................................
Chapter 5: Raritan Serial Console 2. Click the Advanced tab and then click Environment Variables. 3. In the System variables section, click New. 4. In the New System Variable dialog, add JAVA_HOME to the Variable name block and the path you wrote down earlier in the Variable value block. 5. Click OK. 6. Select the PATH variable and click Edit. 7. Add %JAVA_HOME%\bin to the end of the current Variable value. Ensure a semicolon (;) separates the new value from the last value in the string.
Chapter 5: Raritan Serial Console 8. Click OK. 9. Select the CLASSPATH variable and click Edit. 10. Ensure the CLASSPATH Variable value is configured properly; that is, its value must have a period (.) in it. If, for any reason, there is no CLASSPATH variable defined, create one.
Chapter 5: Raritan Serial Console Setting Linux OS Variables To set Java™ for a specific user, open and edit the .profile file located in the /home/Username folder. To set Java for all users, open the .profile file in your /etc folder: 1. Find the line where you set your path: export PATH=$PATH:/home/username/somefolder 2. Before that line you must set your JAVA_HOME and then modify your PATH to include it by adding the following lines: export JAVA_HOME=/home/username/j2sdk1.
Chapter 5: Raritan Serial Console Installing RSC on Windows You must have administrative privileges to install RSC. To install RSC on a Windows® operating system: 1. Log on to a Windows machine. 2. Download, or copy from a known location, the RSC-installer.jar installation file. 3. Double-click the executable file to start the installer program. The splash page appears. 4. Click Next. The installation path page appears. 5. Change the path, if desired. 6. Click Next. The installation progress page appears.
Chapter 5: Raritan Serial Console d. Click Next again. The installation is complete. The final page indicates where you can find an uninstaller program and provides the option to generate an automatic installation script. 6. Click Done to close the Installation dialog. Opening RSC from the Remote Console To open the Raritan Serial Console (RSC) from the Remote Console: 1. Select the Port Access tab. 2. Click the name of the serial port you want to access for the RSC.
Chapter 5: Raritan Serial Console Note: Download the standalone Raritan Serial Console from the Raritan website (www.raritan.com) on the Support page. To open RSC from the Windows® desktop: 1. Double-click the shortcut or use the Start menu to open the standalone RSC. The Raritan Serial Console Login connection properties window appears. 2. Enter the device's IP address, account information, and the desired target (port). 3. Click Start. RSC opens with a connection to the port.
Chapter 5: Raritan Serial Console Raritan Serial Console Interface Important: The Raritan Serial Console page usually opens in a separate window behind the Port page. With some versions of Java™ on the Windows® operating system, the page opens in front of the Port page.
Chapter 5: Raritan Serial Console Item Value Colors White foreground and black background Emulator 1. Change the default user Idle Timeout setting before launching the RSC for the first time or it times out in 10 minutes and display a host termination message. 2. Click the Emulator drop-down menu to display a list of topics.
Chapter 5: Raritan Serial Console Settings 1. Choose Emulator > Settings. The Settings page displays the General tab with the default settings. 2. Accept the Main Menu Shortcut default of None or choose one of the following from the Main Menu Shortcut drop-down menu: F10 Alt 3. Accept the Show Confirmation Dialog on Exit default or uncheck it. 4. Accept the Terminal Size default or choose a size from the Terminal Size drop-down menu. 5.
Chapter 5: Raritan Serial Console 7. Accept the Cursor type default of Block Cursor or select Line Cursor. 8. Click OK. Display Settings 1. Choose Emulator > Settings, and then click the Display tab. 2. Click Default to accept the Default settings. Then click Ok to close the Display Settings dialog. However, if you want to change the settings, perform the following steps: 3. Accept the Terminal Font Properties default of Lucida Console or choose a font from the scrolling list of Terminal Font Properties.
Chapter 5: Raritan Serial Console 5. Click the GUI Font Properties tab and accept the default of Lucida Console or choose a font from the scrolling list of GUI Font Properties. Note: For Simplified Chinese characters, Raritan Serial Console supports EUC-CN encoding system. 6. Choose the following from their drop-down menus: Foreground Color Background Color 7.
Chapter 5: Raritan Serial Console UTF-8 Shift-JIS EUC-JP EUC-CN EUC-KR 8. Choose one of the following from the Language drop-down menu: English Bulgarian Japanese Korean Chinese 9. Click Ok to close the Display Settings dialog. If you changed the Language setting, the RSC changes to that language when the Display Settings dialog is closed.
Chapter 5: Raritan Serial Console Note: If you experience unrecognized characters or blurry pages in the RSC window due to localization support, try changing the font to Courier New. Get History History information can be useful when debugging, troubleshooting, or administering a target device. The Get History feature allows you to view the recent history of console sessions by displaying the console messages to and from the target device.
Chapter 5: Raritan Serial Console Get Write Lock Choose Emulator > Get Write Lock. If the Get Write Lock is not available, a request rejected message appears. Write Unlock Choose Emulator > Write Unlock. Send Break Some target systems, such as Sun Solaris™ servers, require the transmission of a null character (break) to generate the OK prompt. This is equivalent to issuing a STOP-A from the Sun keyboard. Only users with Administrator privileges can send a break.
Chapter 5: Raritan Serial Console Connected Users The Connected Users command allows you to view a list of other users who are currently connected on the same port. 1. Choose Emulator > Connected Users, a Connected Users page is displayed. 2. A check mark appears in the Write access column after the name of the user who has Write access to the console. 3. Click Close to close the Connected Users window. Exit 1. Choose Emulator > Exit to close the Raritan Serial Console.
Chapter 5: Raritan Serial Console Edit Use the Copy, Paste, and Select All text commands to relocate and/or re-use important text. To copy and paste all text: 1. Choose Edit > Select All. 2. Choose Edit > Copy. 3. Position the cursor at the location where you want to paste the text. 4. Click once to make that location active. 5. Choose Edit > Paste.
Chapter 5: Raritan Serial Console Note: The copy-paste limit of text in Raritan Serial Console is 9999 lines. Keyboard shortcuts to highlight, copy, and paste all or partial lines of text: Click and drag your mouse over the text you wish to copy. Use Ctrl+C to copy text. Position the cursor where you want to paste the text and click in that location to make it active. Use Ctrl+V to paste text. Tools 186 Click the Tools menu to display a list of topics.
Chapter 5: Raritan Serial Console Start Logging The Start Logging function allows you to collect raw console data from the target device and save it to a file on your computer. When you start RSC, the Logging indicator on the status bar indicates whether logging is on or off. 1. Choose Tools > Start Logging. 2. Choose an existing file or provide a new file name in the Save RSC Log dialog. When an existing file is selected for logging, data gets appended to the contents.
Chapter 5: Raritan Serial Console Stop Logging Choose Tools > Stop Logging. The logging stops. Send Keystroke 1. Choose Tools > Send Keystroke. A Send Keystroke dialog appears: 2. Enter the keystroke combinations that you want and select a Key Code name from the drop-down menu. 3. Send the keystroke combinations. Send Text File 1. Choose Tools > Send Text File. A Send Text File screen appears. 2. Open the directory of the Text file. 3. Click on or enter the File Name of the Text file. 4. Click Open.
Chapter 5: Raritan Serial Console Toggle Power The Toggle Power function lets you power on or off the device that is connected to the associated outlet on a Power Distribution Unit (PDU). For example, if a router is connected to one of the outlets on the PDU, you can toggle the router‟s power on or off. You must configure the association of outlets to the target port of the device before you can use the Toggle Power feature.
Chapter 5: Raritan Serial Console Chat When using browser access over SSL, an interactive chat feature called Chat allows you and other users on the same port to communicate. The maximum length of a chat message is 300 characters. Note: When a chat is initiated, a chat window appears on the monitors of all SSL users logged on to the port. If a user is logged into a port multiple times, multiple chat messages do not appear to that user. To open chat: Choose Chat > Chat.
Chapter 5: Raritan Serial Console Help Help Topics include online assistance for operating the Raritan Serial Console and release information about Raritan Serial Console. Help Topics To access help topics: Choose Help > Help Topics. A list of help topics are displayed. About Raritan Serial Console The About Raritan Serial Console dialog displays the copyright and version information (name and revision number) of the console terminal emulation software.
Appendix A Informational Notes In This Chapter Overview ................................................................................................192 Java Runtime Environment (JRE) .........................................................192 IPv6 Support Notes ...............................................................................193 Keyboards .............................................................................................194 Fedora ...............................................
Appendix A: Informational Notes IPv6 Support Notes Java Java™ 1.6 supports IPv6 for the following: Solaris™ 10 (and later) Linux® kernel 2.1.2 (and later)/RedHat 6.1 (and later) Java 5.0 and above supports the IPv6 for the following: Solaris 10 (and later) Linux kernel 2.1.2 (and later), kernel 2.4.0 (and later) recommended for better IPv6 support Windows XP® SP1 and Windows 2003®, Windows Vista® operating systems The following IPv6 configurations are not supported by Java: J2SE 1.
Appendix A: Informational Notes Keyboards Non-US Keyboards French Keyboard Caret Symbol (Linux® Clients Only) The Virtual KVM Client and the Multi-Platform Client (MPC) do not process the key combination of Alt Gr + 9 as the caret symbol (^) when using French keyboards with Linux clients. To obtain the caret symbol: From a French keyboard, press the ^ key (to the right of the P key), then immediately press the space bar. Alternatively, create a macro consisting of the following commands: 1.
Appendix A: Informational Notes Tilde Symbol From the Virtual KVM Client and the Multi-Platform Client, the key combination of Alt Gr + 2 does not produce the tilde (~) symbol when using a French keyboard. To obtain the tilde symbol: Create a macro consisting of the following commands: Press right Alt. Press 2. Release 2. Release right Alt.
Appendix A: Informational Notes Note: The Keyboard Indicator should be used on Linux systems using Gnome as a desktop environment. When using a Hungarian keyboard from a Linux client, the Latin letter U with Double Acute and the Latin letter O with Double Acute work only with JRE 1.6. There are several methods that can be used to set the keyboard language preference on Fedora® Linux clients.
Appendix A: Informational Notes Fedora Resolving Fedora Core Focus Using the Multi-Platform Client (MPC), occasionally there is an inability to log in to an LX, KX II or KSX II device, or to access KVM target servers (Windows®, SUSE, and so forth). In addition, the Ctrl+Alt+M key combination may not bring up the Keyboard Shortcut menu. This situation occurs with the following client configuration: Fedora® Core 6 and Firefox® 1.5 or 2.0.
Appendix A: Informational Notes Number of Supported Audio/Virtual Media and Smartcard Connections Following are the number of simultaneous Audio/Virtual Media and Smartcard connections that can be made from a client to a target: 1 smartcard 1 virtual media 1 Smartcard and 1 virtual media 2 virtual media Audio Playback and Capture Issues Features that May Interrupt an Audio Connection If you use any of the following features while connected to an audio device, your audio connection may be in
Appendix A: Informational Notes Audio in a Linux Environment The following are known issues when using the audio feature in a Linux® environment. Linux® users, use the default audio device for playback. Sound may not come through if a non-default sound card is selected. SuSE 11 clients require Javas_1_6_0-sun-alsa (ALSA support for java-1_6_0-sun) to be installed via YAST. For Logitech headsets with a built in a mic, only the Mono Capture option is available.
Appendix A: Informational Notes USB Ports and Profiles Help for Choosing USB Profiles When you are connected to a KVM target server via the Virtual KVM Client (VKC), you can view information about USB profiles via the Help on USB Profiles command on the USB Profile menu.
Appendix A: Informational Notes USB profile help appears in the USB Profile Help window. For detailed information about specific USB profiles, see Available USB Profiles. Raritan provides a standard selection of USB configuration profiles for a wide range of operating system and BIOS level server implementations. These are intended to provide an optimal match between remote USB device and target server configurations.
Appendix A: Informational Notes Changing a USB Profile when Using a Smart Card Reader There may be certain circumstances under which you will need to change the USB profile for a target server. For example, you may need to change the connection speed to "Use Full Speed for Virtual Media CIM" when the target has problems with the "High Speed USB" connection speed.
Appendix A: Informational Notes Virtual Media via VKC and AKC in a Windows Environment Windows XP® operating system administrator and standard user privileges vary from those of the Windows Vista® operating system and the Windows 7® operating system. When enabled in Vista or Windows 7, User Access Control (UAC) provides the lowest level of rights and privileges a user needs for an application.
Appendix A: Informational Notes Only Windows Fat partitions are supported by Linux Windows FAT and NTFS supported by Mac Mac users must unmount any devices that are already mounted in order to connect to a target server. Use >diskutil umount /dev/disk1s1 to unmount the device and diskutil mount /dev/disk1s1 to remount it. Accessing Virtual Media on a Windows 2000 Server Using a D2CIMVUSB A virtual media local drive cannot be accessed on a Windows 2000® server using a D2CIM-VUSB.
Appendix A: Informational Notes CIMs Windows 3-Button Mouse on Linux Targets When using a 3-button mouse on a Windows® client connecting to a Linux® target, the left mouse button may get mapped to the center button of the Windows client 3-button mouse. Windows 2000 Composite USB Device Behavior for Virtual Media The Windows 2000® operating system does not support USB composite devices, like Raritan‟s D2CIM-VUSB, in the same manner as noncomposite USB devices.
Appendix A: Informational Notes CC-SG Virtual KVM Client Version Not Known from CC-SG Proxy Mode When the Virtual KVM Client is launched from CommandCenter Secure Gateway (CC-SG) in proxy mode, the Virtual KVM Client version is unknown. In the About Raritan Virtual KVM Client dialog, the version is displayed as “Version Unknown”.
Index A About the Active KVM Client • 5 About the Virtual KVM Client • 5 Absolute Mouse Mode • 26, 112, 113 Accessing the MPC Diagnostic Interface (excluding KX II) • 156 Accessing Virtual Media on a Windows 2000 Server Using a D2CIM-VUSB • 204 Activity Log for Generation 1 Devices • 145 Adjusting Video Settings • 18, 108 Administrative Functions • 131 Advanced Settings • 135 AKC Supported .
Index F Fedora • 197 French Keyboard • 194 Full Screen Mode • 32 G General Options • 133 General Options, Advanced Options, Client Launch Settings and Scan Settings • 128, 132 General Settings • 27 Generation 1 Devices • 94 Generation 2 Devices • 95 H Help • 191 Help for Choosing USB Profiles • 200 Help Options • 42, 128 I Import/Export Keyboard Macro Definitions • 148 Import/Export Keyboard Macros • 12, 148 Import/Export RRC Keyboard Macros • 151 Informational Notes • 192 Installing and Opening Standal
Index Opening RSC from the Remote Console • 174 Operation • 61 Options in MPC for KX II and KSX II • 132 Options in MPC for KX II-101 and KX G1 • 137 Options in RRC • 140 Overview • 1, 43, 158, 169, 192 Port Access Page Sort • 127 Prerequisites for Using AKC • 7 Prerequisites for Using Virtual Media • 161, 163 Proxy Mode and MPC • 206 Proxy Server Configuration for Use with MPC, VKC and AKC • 1 Single Mouse Mode • 26 Single Mouse Mode - Connecting to a Target Under CC-SG Control Via VKC Using Firefox • 2
Index Virtual Media Not Refreshed After Files Added • 202 Virtual Media via VKC and AKC in a Windows Environment • 203 VKC and MPC Smart Card Connections to Fedora Servers • 197 W Windows 2000 Composite USB Device Behavior for Virtual Media • 205 Windows 3-Button Mouse on Linux Targets • 205 210
U.S./Canada/Latin America Monday - Friday 8 a.m. - 6 p.m. ET Phone: 800-724-8090 or 732-764-8886 For CommandCenter NOC: Press 6, then Press 1 For CommandCenter Secure Gateway: Press 6, then Press 2 Fax: 732-764-8887 Email for CommandCenter NOC: tech-ccnoc@raritan.com Email for all other products: tech@raritan.com China Europe Europe Monday - Friday 8:30 a.m. - 5 p.m. GMT+1 CET Phone: +31-10-2844040 Email: tech.europe@raritan.com United Kingdom Monday - Friday 8:30 a.m. to 5 p.m.