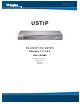
USTIP P2-USTIP1, P2-USTIP2 Release 1.2.1.5.3 User Guide Copyright © 2011 Raritan, Inc. USTIP-0F-v1.2.
This page intentionally left blank.
Copyright and Trademark Information This document contains proprietary information that is protected by copyright. All rights reserved. No part of this document may be photocopied, reproduced, or translated into another language without express prior written consent of Raritan, Inc. © Copyright 2011 Raritan, Inc. All third-party software and hardware mentioned in this document are registered trademarks or trademarks of and are the property of their respective holders.
Power Safety Guidelines To avoid potentially fatal shock hazard and possible damage to Raritan equipment: Do not use a 2-wire power cord in any product configuration. Test AC outlets at your computer and monitor for proper polarity and grounding. Use only with grounded outlets at both the computer and monitor. When using a backup UPS, power the computer, monitor and appliance off the supply.
CONTENTS i Contents Chapter 1: Introduction .................................................................. 1 USTIP Overview.........................................................................................................................1 Product Photos...........................................................................................................................2 Product Features.........................................................................................................
ii USTIP USER GUIDE Figures Figure 1 Front and Rear Views of the P2-USTIP ......................................................................................... 2 Figure 2 P2-USTIP1 Unit with Paragon UMTs ............................................................................................. 2 Figure 3 P2-EUST, P2-UST, and P2-USTIP1 Units..................................................................................... 2 Figure 4 Set Mouse Motion ...............................................
CHAPTER 1: INTRODUCTION 1 Chapter 1: Introduction USTIP Overview Thank you for purchasing Raritan’s USTIP, the industry-leading solution for multi-platform, high-performance, network-based, remote KVM console access. This product is a critical part of Raritan’s Paragon family, which is designed for managing multiple servers of different platforms.
2 USTIP USER GUIDE Product Photos Figure 1 Front and Rear Views of the P2-USTIP Figure 2 P2-USTIP1 Unit with Paragon UMTs Figure 3 P2-EUST, P2-UST, and P2-USTIP1 Units
CHAPTER 1: INTRODUCTION 3 Product Features Access Remote KVM access via the Internet, LAN/WAN, or dial-up modem Simultaneous switch or server access by up to two users Web browser accessible Remote access to serial devices (VT100) connected to USTIP serial port Performance Superior compression algorithm for exceptional performance No impact on target server performance Automatic sensing of video resolution for optimum display High-performance mouse tracking and synchronization Reliability
4 USTIP USER GUIDE Terminology This manual makes use of the following terms to indicate components of a typical USTIP configuration. While reading the manual, please refer to the diagram below for clarification when necessary. This manual uses the following terms. Target Server(s) Remote PC Local Access Console Local Admin Console Servers to be accessed remotely via USTIP and its connected KVM configuration. A Windows-based computer used to access and control target servers connected to USTIP.
CHAPTER 2: INSTALLATION 5 Chapter 2: Installation Configuring Target Servers Before installing USTIP, first configure any target servers that you wish to access via USTIP, in order to ensure optimum performance, as outlined below. Note that the following configuration requirements apply only to target servers, not to the computers that you will be using to access USTIP remotely.
6 USTIP USER GUIDE Windows 2000 / ME Settings On target servers running Microsoft Windows 2000 / ME, set the mouse pointer acceleration to “none” and the mouse motion speed exactly to the middle speed setting. These parameters are found in: Start Settings Control Panel Mouse Motion. Windows 95 / 98 / NT Settings On target servers running Microsoft Windows 95 / 98 / NT, set the mouse motion speed to the slowest setting in Start Settings Control Panel Mouse Motion.
CHAPTER 2: INSTALLATION 7 Note that KVM switch brands other than Raritan’s may or may not properly handle PS/2-to-Sun signals. On target servers running the Solaris operating system, set the mouse acceleration value to exactly 1 and threshold to exactly 1. Set this at the graphical user interface (shown below), or with the command line “xset mouse a t” where “a” is the acceleration and “t” is the threshold.
8 USTIP USER GUIDE Physical Connections Figure 5 P2-USTIP2 Rear Panel Connections Attaching a Local Console for Initial Configuration 1. Attach the included AC power cord to the USTIP unit and plug the other end into a nearby AC power outlet. 2. Connect the client PC to the USTIP ADMIN Port using a serial (DB9) cable. 3. Connect a standard Ethernet cable from the Network Port to an Ethernet switch, hub, or router. 4.
CHAPTER 2: INSTALLATION 9 Initial Configuration During initial configuration, the USTIP Setup Wizard helps you quickly set up USTIP for the first time. The USTIP Setup Wizard appears only when accessing the Administrative Menus on a non-configured USTIP, and guides you through initial configuration parameters. The easiest way to perform this initial configuration is by using the Local Admin Console (see ‘Physical Connection’ instructions in the previous sections). 1.
10 USTIP USER GUIDE Note: Network connections must be 10BASE-T or 100BASE-TX Ethernet Line Speed & Duplex: Enter the visual efficiency for the monitor: Auto detect 10 Mbps/Full Duplex 10 Mbps/Half Duplex 100 Mbps/Full Duplex 100 Mbps/Half Duplex Obtain IP address automatically (DHCP): YES: Enables dynamic IP addressing for USTIP. Each time USTIP boots, it requests an IP address from the local DHCP server.
CHAPTER 2: INSTALLATION 11 B. Click ASCII Setup. In the ASCII Setup window, ensure that only the option Wrap lines that exceed terminal width is checked. If any other options are checked, you may have display issues. C. Click OK. D. Click Terminal Setup. In the Terminal Settings window, ensure the option Keypad application mode is checked (this option must be specified for most laptop computers). 7. Click OK. 8. Click OK.
12 USTIP USER GUIDE You can install MPC as a standalone applet, described further in the Raritan Multi-Platform Client and Raritan Remote Client User Guide. Important: You must disable any pop-up blockers in order to launch MPC. Launching RRC Important: RRC works only with MS Internet Explorer. If you are using a different Web browser, MPC will load automatically. 1. Log on to any Windows-based computer with network access to USTIP. 2.
CHAPTER 2: INSTALLATION 13 Establishing a Connection When you double-click on your USTIP icon, its login screen appears. Log on with your username and password (default: admin/raritan) to connect to your USTIP unit. Use the Navigator, on the left side of the MPC or RRC window, to select and connect to a server port. Note: When changing the default password through RRC or MPC, make sure the new password consists of 8 or less characters because UMT only accepts a maximum of 8 characters for the password.
14 USTIP USER GUIDE Mouse Pointer Synchronization When controlling a target server, MPC and RRC display two mouse cursors: one belonging to your client workstation and the other belonging to the target server. When properly configured, the two mouse cursors will align. Should you experience difficulty with mouse synchronization, please refer to the section Configuring Target Servers, at the beginning of this chapter.
CHAPTER 3: OPERATION – ADMINISTRATIVE FUNCTIONS 15 Chapter 3: Operation – Administrative Functions Accessing the Administrative Functions Access and execute Administrative functions via local admin console, or via remote administration. Only administrators (users with administrative privileges) can access the USTIP Administrative Menus. Please note that users are not actually configured on the USTIP; the USTIP uses the Paragon user database and Paragon Administrator privileges.
16 USTIP USER GUIDE Remote Admin Console Another way to access USTIP administrative functions is to do so remotely, using MPC or RRC. Any administrative user logged on to USTIP at a Remote PC can perform administrative functions remotely to make changes to the system, as long as USTIP is set to allow remote administration privileges. Note: Only users with administrator privileges can access the Remote Admin feature.
CHAPTER 3: OPERATION – ADMINISTRATIVE FUNCTIONS 17 Network Configuration Use the TAB, , or key to highlight [C] Configure UST-IP on the Main Menu (or press C) and press ENTER. At the Configuration Menu, select [N] Network Configuration and press ENTER. Please note that after you have made changes to the Network Configuration, you must press CTRL+S to save your changes. Reboot after all changes are saved to apply them to your Network.
18 USTIP USER GUIDE Subnet Mask: Enter a Subnet Mask provided by your Network Administrator. Default Gateway: Enter the Default Gateway if your Network Administrator specifies one. Enable Modem Interface: Enables Dial-up Modem access (default: YES). For USTIP, an external serial modem must be connected in order for this function to work properly. Enable Web Browser Interface: Enables web browser access to USTIP (default: YES).
CHAPTER 3: OPERATION – ADMINISTRATIVE FUNCTIONS 19 If you set Port Priority to None, there is no capability to automatically terminate a user session. Instead, the first user to connect to either port maintains access to that port until the user is finished. Other users attempting to connect will be notified that the port is busy.
20 USTIP USER GUIDE Allow remote administration: NO: To keep access to all Administrative Functions available only from the USTIP Admin Console, and not from a Remote PC. YES (default): Allows remote access to all Administrative USTIP Functions by administrators logged on at a Remote PC. Logout idle users: This option is not available for configuration. Whether the idle remote users will be disconnected will be based on the setting defined in the Paragon system.
CHAPTER 3: OPERATION – ADMINISTRATIVE FUNCTIONS 21 Performance Settings Select [P] Performance Settings on the Configuration Menu to set up USTIP’s video data transfer and bandwidth parameters. Figure 17 USTIP Performance Settings Screen Pause video stream for idle users: Pausing the flow of video data during periods of prolonged inactivity will prevent an inactive user from needlessly consuming bandwidth.
22 USTIP USER GUIDE Time and Date Select [T] Time and Date on the Configuration Menu to view and adjust current date and time on the USTIP unit. Once saved, Time and Date changes will not take effect until USTIP is restarted. Figure 18 Time and Date Screen New Date / New Time: To manually input changes to current date and time values. Adjust for daylight savings time: Toggle between YES and NO to reflect whether your country or state follows the daylight savings time procedure.
CHAPTER 3: OPERATION – ADMINISTRATIVE FUNCTIONS 23 Access Control List Select [A] Access Control List on the Configuration Menu to set accessibility in the Access Control List (ACL) and allow or deny specific IP Addresses or ranges of IP Addresses to connect to the USTIP unit. If entering a range of IP Addresses, type the starting and the ending IP Address values in the Start and End columns; use the TAB key to navigate through the fields. Use the and keys to select Allow or Deny for each line item.
24 USTIP USER GUIDE Remote Syslog Select [L] Remote Syslog on the Configuration Menu to allow remote users to save the server logs. Use the and keys to select Yes or No. Figure 20 Remote Syslog Configuration Screen If you select Yes, type the IP Address to which you want to save the Syslog in the Remote Syslog Server IP field, specify the information to save in Syslog Priority Threshold (for example, Notices, Debugs, Emergency messages, etc.
CHAPTER 3: OPERATION – ADMINISTRATIVE FUNCTIONS 25 View USTIP Status The USTIP Event Log screen shows a log file containing information about USTIP log-in and connection activities.
26 USTIP USER GUIDE Restart or Shutdown the USTIP You can restart or shut the USTIP unit down from the Main Menu. Restart R, Shutdown S, or Cancel Esc the restart or shutdown command. R Restarts the USTIP unit and brings the USTIP Admin Console back to the USTIP Initialization screen. Figure 24 USTIP Main Menu Diagnostics To view the USTIP Diagnostic Console, press D at the Main Menu.
APPENDIX A: SPECIFICATIONS 27 Appendix A: Specifications ITEM DIMENSIONS (WXDXH) WEIGHT POWER P2-USTIP1 1U 19” Rackmount Case: 17.2” (W) x 11.46” (D) x 1.72” (H) 440mm (W) x 291mm (D) x 44 mm (H) 8.05 lbs. (3.65 kg) 115V/230V 50/60 Hz 0.3A P2-USTIP2 1U 19” Rackmount Case: 17.2” (W) x 11.46” (D) x 1.72” (H) 440mm (W) x 291mm (D) x 44 mm (H) 8.16 lbs. (3.7 kg) 115V/230V 50/60 Hz 0.
28 USTIP USER GUIDE Cable Specifications Category 5e UTP cable to connect to network. Paragon download cable to connect from Admin Port to local PC port. KVM Switch Specifications Supports KVM switches utilizing an On-Screen User Interface, including Raritan’s Paragon, ZSeries, MasterConsole MX4, and MasterConsole II product lines.
APPENDIX B: FREQUENTLY ASKED QUESTIONS 29 Appendix B: Frequently Asked Questions QUESTION: What is USTIP? How does USTIP work? ANSWER: USTIP is the easiest, fastest, most reliable way to remotely access and manage multiple servers connected to a Paragon II - no matter where you are or where your servers are located. USTIP connects to the Cat5 Paragon switch.
30 QUESTION: Is USTIP easy to install? How Is USTIP administration carried out? Are there security features to protect my Target Servers from an unauthorized remote connection? Is there a double login using USTIP? Is there Web-Based Access? How does USTIP handle a local and remote user when trying to access USTIP? USTIP USER GUIDE ANSWER: USTIP is very easy to install. Just connect it to a user port on an existing KVM configuration and assign an IP address and/or telephone number for modem access.
APPENDIX B: FREQUENTLY ASKED QUESTIONS 31 QUESTION: Can I use USTIP in a VPN? ANSWER: Yes. USTIP fits most network configurations utilizing standard TCP/IP. The network administrator simply adds USTIP as a node on the network via the USTIP Admin Console. What is the slowest connection USTIP can handle? USTIP offers scalable performance based on bandwidth available, down to 20kbps. Can I perform a Dialup modem connection to USTIP over a PBX line? No. Modems require an analog telephone line.
32 USTIP USER GUIDE This page intentionally left blank.
APPENDIX C: TROUBLESHOOTING 33 Appendix C: Troubleshooting Problems and Suggested Solutions REMOTE CONNECTION PROBLEM I cannot connect to USTIP via dial up modem. SOLUTION Ensure that you have specified the modem device for your Remote PC in the Add Connection Window (Dial-up type connection) modem field.
34 USTIP USER GUIDE DIRECT ANALOG USER CONSOLE PROBLEM SOLUTION The Direct Analog User Console does not function. Make sure the KVM switch is functioning properly. Make sure that USTIP is turned on. USTIP must be powered on for the Direct Analog User Console to function. The cable located inside USTIP that connect the Direct Analog User Console port(s) may have disconnected – Contact Raritan Technical Support for assistance.
APPENDIX C: TROUBLESHOOTING 35 KEYBOARD PROBLEM SOLUTION USTIP is not accepting keyboard commands from the Remote PC. The USTIP window of TRC must be the active window for proper keyboard control. Ensure the window in which you are typing is active. Try clearing the keyboard signals to ensure that the release or breakcode signal has been received alternately press the CTRL, Shift and Tab keys rapidly a few times on your keyboard. Ensure the remote user has keyboard and mouse privileges.
36 USTIP USER GUIDE KVM ON-SCREEN USER INTERFACE (OSUI) PROBLEM SOLUTION Log out of KVM on disconnect is set to YES in the Security Configuration screen, but USTIP is not logging out of the KVM upon remote user disconnection. Make sure that the Hotkey set in the Options window is the same Hotkey that commands the OSUI of the base KVM switch attached to USTIP. MOUSE PROBLEM SOLUTION Target Server Mouse Pointer tracks too slowly after USTIP Mouse Pointer.
APPENDIX C: TROUBLESHOOTING 37 MOUSE PROBLEM SOLUTION USTIP is not accepting my mouse. USTIP will not support a serial type mouse or nonstandard mouse drivers. It does support a PS/2 style mouse and standard Windows mouse drivers. Other mouse drivers may function with USTIP, but will require extensive changes to the mouse settings until a functioning mix of motion settings is found.
38 USTIP USER GUIDE VIDEO PROBLEMS SOLUTION After switching to a different Target Server channel the video is not clear. Sometimes there is a black edge at the boundary of the Target Server’s screen. Click Auto-sense Video or simultaneously press the keys CTRL-ALT-A. USTIP will adjust the video settings. If the video does not become clear, additional manual video setting adjustments may be necessary. Contact Raritan Technical Support to discuss changes to the Video Settings window.
APPENDIX C: TROUBLESHOOTING 39 Event Log File and On-Screen Error Codes USTIP will display or log an error code in the USTIP Event Log Screen in the event of a problem occurring. Error codes are eight-digit hexadecimal numbers, containing two parts: the first four denote error type; and the second four digits denote a location code. These last four digits of the USTIP error code are the most useful in determining what has caused a system failure.
40 ERROR CODE (LAST 4 DIGITS) 000C – 000F USTIP USER GUIDE MEANING RECOMMENDATION Memory allocation error. Reboot USTIP. Make sure the BIOS memory test recognizes at least 64MB of RAM. If the problem persists, restore the software and file system from the Recovery CD-ROM. 0011 The Ethernet controller could not be found. There is a problem with the USTIP hardware. 0012 The modem could not be found. Power off the system and make sure the frame grabber card is inserted firmly.
APPENDIX C: TROUBLESHOOTING MEANING 41 ERROR CODE (LAST 4 DIGITS) 0021 RECOMMENDATION TCP listen process failed. Reboot USTIP. Make sure the BIOS memory test recognizes at least 64MB of RAM. If the problem persists, restore the software and file system from the Recovery CD-ROM. 0022 UDP listen process failed. Reboot USTIP. Make sure the BIOS memory test recognizes at least 64MB of RAM. If the problem persists, restore the software and file system from the Recovery CD-ROM. 0023 SSL write failed.
42 USTIP USER GUIDE This page intentionally left blank.
APPENDIX C: TROUBLESHOOTING 43 This page intentionally left blank.
U.S./Canada/Latin America Monday - Friday 8 a.m. - 8 p.m. ET Phone: 800-724-8090 or 732-764-8886 For CommandCenter NOC: Press 6, then Press 1 For CommandCenter Secure Gateway: Press 6, then Press 2 Fax: 732-764-8887 Email for CommandCenter NOC: tech-ccnoc@raritan.com Email for all other products: tech@raritan.com China Europe Europe Monday - Friday 8:30 a.m. - 5 p.m. GMT+1 CET Phone: +31-10-2844040 Email: tech.europe@raritan.com United Kingdom Monday - Friday 8:30 a.m. to 5 p.m.