
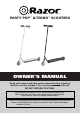
User Manual


3
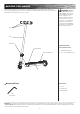
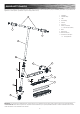
Assembling the Handlebars Assembling the Handlebars
ASSEMBLY AND SET-UP
WARNING: Failure to
properly engage the spring-loaded
buttons may cause the handlebars
to dislodge while riding and may
cause rider to lose control and
fall. When correctly engaged, the
handlebars will not rotate nor move
sideways, and the spring-loaded
buttons will be clearly visible in the
holes on the T-bar.
WARNING: Check hand
grips regularly for wear or damage,
as grips are designed to aid in
gripping handlebars and to provide
some protection against possible
impact. Replace immediately if
worn, torn, damaged or missing.
Assembling the T-bar
Tool required: 5 mm Allen wrench
Activating the Batteries
WARNING: Failure to
properly install and tighten the
pivoting mechanism and the
plastic cover may cause the rider
to lose control and fall. If you do
not understand these instructions,
contact Razor customer care for
assistance.
WARNING: Do not
attempt to thread the handle bar
into the front fork thread. Tighten
clamp securely.
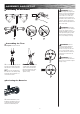
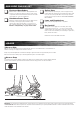
1 Loosen the collar clamp and slide
it upward. Insert T-bar into the fork
until it bottoms out on the headset
locknut.
Note: If necessary, carefully twist
the T-bar side to side while pushing
downward until T-bar bottoms out
on the headset locknut.
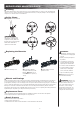
1 To activate the batteries, locate
the battery compartment on the top
of the deck and remove the plastic
tab from under the battery cover.
2 With the front wheel pointed
straight ahead, the handlebars
square to the front wheel and
the Razor logo facing the front,
tighten the clamp as shown.
Tighten securely.