&IND )NSIDE s 2EMOTE #ONTROL PAGE s #ONNECTING PAGE s #HANNEL ,IST PAGE 2 s 2ECORDING PAGE s 0ARENTAL #ONTROLS PAGE s 4ROUBLESHOOTING PAGE 5V40101C [E]Cover 1 15`03`06, 10:55
CAUTION RISK OF ELECTRIC SHOCK DO NOT OPEN CAUTION: TO REDUCE THE RISK OF ELECTRIC SHOCK, DO NOT REMOVE COVER (OR BACK). NO USER-SERVICEABLE PARTS INSIDE. REFER SERVICING TO QUALIFIED SERVICE PERSONNEL. The lightning flash with arrowhead symbol, within an equilateral triangle is intended to alert the user to the presence of uninsulated dangerous voltage within the product's enclosure that may be of sufficient magnitude to constitute a risk of electric shock to persons.
IMPORTANT SAFEGUARDS 1. READ INSTRUCTIONS All the safety and operating instructions should be read before the unit is operated. 2. RETAIN INSTRUCTIONS The safety and operating instructions should be retained for future reference. 3. HEED WARNINGS All warnings on the unit and in the operating instructions should be adhered to. 4. FOLLOW INSTRUCTIONS All operating and use instructions should be followed. 5. CLEANING Unplug this unit from the wall outlet before cleaning.
IMPORTANT SAFEGUARDS (continued) 13. LIGHTNING To protect your unit from a lightning storm, or when it is left unattended and unused for long periods of time, unplug it from the wall outlet and disconnect the antenna or cable system. This will prevent damage to the unit due to lightning and power line surges. 14.
IMPORTANT SAFEGUARDS (continued) 25. LASER BEAM Do not look into the opening of the disc tray or ventilation opening of the product to see the source of the laser beam. It may cause sight damage. 26. DISC Do not use a cracked, deformed, or repaired disc. These discs are easily broken and may cause serious personal injury and product malfunction. 27.
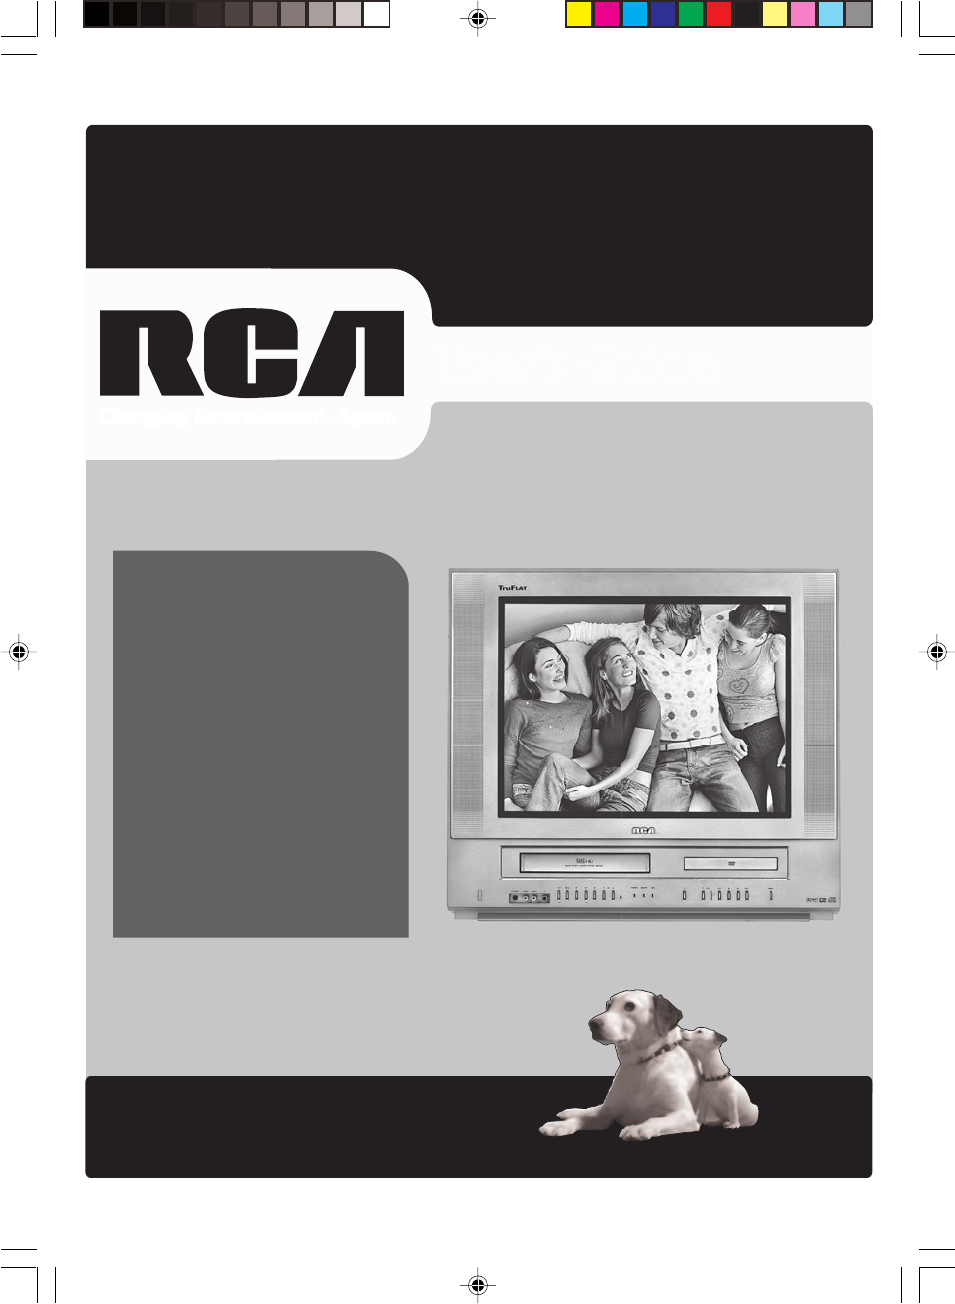
Features Color TV with DVD/CD Player/Video Cassette Recorder • Color TV with DVD/CD player with Video Cassette Recorder - Unique space saving design combines a color TV, a DVD/CD player and a Hi-Fi Video cassette recorder. A DVD disc has much more capacity, but is the same size as an audio CD disc. The picture quality is higher than Super VHS video cassettes. The audio quality is higher than an audio CD. The DVD PLAYER can play back audio CDs.
Contents Before using your unit Disc playback operation IMPORTANT SAFEGUARDS .......................... 3 Power source ................................................... 5 Features ........................................................... 6 Contents ........................................................... 7 Parts and functions .......................................... 8 Remote control ................................................. 9 Antenna connections .....................................
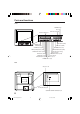
Parts and functions Front POWER button Disc tray SKIP buttons (DVD) Cassette loading slot PLAY button (DVD) PHONES jack VIDEO IN jack STOP button (DVD) VOL ▲/▼ buttons (TV) AUDIO IN (L/R) jacks OPEN/CLOSE button (DVD) REW (Rewind) button (VCR) T.REC (Timer Recording) indicator (VCR) STOP/EJECT button (VCR) PLAY button (VCR) REC/OTR indicator (VCR) F.
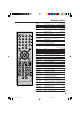
Remote control Page POWER TV/VCR DVD CH +/– 0-9 Power on/off 10,15,16,19,43,44 Press to operate TV/VCR 10,15,33,35,36,38,39 Press to operate DVD 10,38,43,44,55,57~59 Select channel 10,20,36,38 Direct channel selection of TV 10,19,23,36,38 Input setting 50,52 Enter a password 24,26,58~60 VOL +/– Adjust volume of TV 19,20 MUTE Switch off the sound 20 DISPLAY/CALL Display TV/VCR or DVD operation status 16,20,25,34,35,37,39,43 JUMP Locating desired scene 50 QUICK VIEW Switch between present/last channel 20 / /
Remote control (continued) Inserting Batteries the battery 1 Open compartment cover in the two “AAA” batteries 2 Install (supplied), paying attention to direction of the arrow. the polarity diagram in the battery compartment. the compartment 3 Replace cover. Battery precautions The precautions below should be followed when using batteries in this device: 1. Use only the size and type of batteries specified. 2.
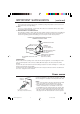
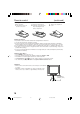
Antenna connections If you are using an indoor or outdoor antenna, follow the instructions below that correspond to your antenna system. If you are using a Cable TV service (CABLE), see page 12 for Cable TV connections. Combination VHF/UHF antenna (Single 75 ohm cable or 300 ohm twin-lead wire) Connect the 75 ohm cable from the combination VHF/UHF antenna to the RF IN jack.
Cable TV connections This unit has an extended tuning range and can tune most Cable TV channels without using a Cable TV Converter box. Some Cable TV companies offer “premium pay channels” in which the signal is scrambled. Descrambling these signals for normal viewing requires the use of a descrambler device which is generally provided by the Cable TV company.
Connections to other equipment The exact arrangement you use to interconnect various video and audio components to the unit is dependent on the model and features of each component. Check the Owner's Manual provided with each component for the location of video and audio inputs and outputs.
Connections to other equipment (continued) Using the audio/video inputs If you connect the TV/VCR/DVD to a camcorder or Video Game Console, you can select different modes by pressing INPUT SELECT. Press INPUT SELECT repeatedly to select the desired mode. “LINE” or TV channel will display on the screen for 4 seconds. TV Channel LINE LINE (Front) NOTE: In the DVD mode this key will not operate. 1. To connect the unit to a camcorder To playback from a camcorder, connect the camcorder to the unit as shown.
Setting the on screen display language You can choose from three different languages (English, Spanish and French) for the on-screen displays. 1 Press POWER to turn on the TV/VCR/DVD. 2 Press TV/VCR to select the TV/VCR mode. MENU. Press 3 Pressor SETUP/TV to select option. CH or to select 4 Press “LANGUAGE”, then press .
Auto clock setting The Auto clock function will automatically set the built-in clock (Month, Day, Year and Time) when the TV/VCR/DVD is connected to an Antenna or Cable TV system and it is turned off. As the TV/VCR/DVD searches for a receivable station in your area and it receives a broadcast signal for Auto clock, the Auto clock needs several minutes to set itself. Auto clock setting the Antenna or Cable system. 1 Connect • If you use a cable box, turn it on. 2 Plug the AC Power cord to the AC outlet.
Auto clock setting (continued) To set standard time In the rare event that you live within broadcast range of two stations in two different time zones, the TV/VCR/DVD may recognize the wrong station for the Auto clock set. To correct the situation: SETUP/TV MENU in the TV/VCR mode. 1 Press The TV/VCR menu screen will appear. 2 Press 3 Press 4 Press or to select option. or to select “STANDARD TIME”, then press or to select your time zone, then press ENTER. .
Manual clock setting You must set the date and time manually for Timer Recordings, ON/ OFF Timer and Daylight Saving Time if the Auto clock process did not set them correctly. EXAMPLE: Setting the clock to “8:30 AM” March, 25 (SAT), 2006. SETUP/TV MENU in the TV/VCR mode. 1 Press The TV/VCR menu screen will appear. 2 Press option. or to select the CH CLOCK SET ON/OFF TIMER AUTO CLOCK STANDARD TIME DAYLIGHT SAVING TIME / Press or to select the 3 “CLOCK SET” option, then press .
TV operation 1 To turn on the TV/VCR/DVD, press POWER. the volume level by 2 Adjust pressing VOL + or – . The volume level appears. VOLUME the TV/CABLE menu 3 Set option to the appropriate 32 TV - VHF/UHF channels CABLE - Cable TV channels position. (See page 22.) the number buttons to 4 Press select the channel. +0 Channels can be instantly selected by using two buttons. (for example, to select channel 2, press 0, then 2. If you press only 2, channel selection will be delayed for a few seconds.
TV operation (continued) CHANNEL +/– Press and release CH + or –. The channel automatically stops at the next channel set into memory. For proper operation, before selecting channels, they should be set into the memory. See pages 22 and 23 “Memorizing channels”. CALL Press DISPLAY/CALL to display the current information on the screen. Press DISPLAY/CALL again to clear the call display.
Closed caption What is closed captioning? This television has the capability to decode and display Closed Captioned television programs. Closed Captioning will display text on the screen for hearing impaired viewers or it will translate and display text in another language. Captions: This closed caption mode will display text on the screen in English or another language (depending on the setting of the closed captions CH 1/2).
Memorizing channels This TV/VCR/DVD is equipped with a channel memory feature which allows channels to skip up or down to the next channel set into memory, skipping over unwanted channels. Before selecting channels, they must be programmed into the unit’s memory. In addition to normal VHF and UHF channels, this TV/VCR/DVD can receive up to 113 Cable TV channels. To use this TV/VCR/DVD with an antenna, set the TV/CABLE menu option to the TV mode.
Memorizing channels (continued) Automatic memory tuning SETUP/TV MENU in the TV/VCR mode. 1 Press The TV/VCR menu screen will appear. 2 Press option. or to select CH CH TV/CABLE AUTO CH MEMORY ADD/ DELETE or to select “AUTO 3 Press CH MEMORY”. / / / / MENU CH TV/CABLE AUTO CH MEMORY ADD/ DELETE Press . The TV will begin 4 memorizing all the channels CABLE / / CABLE / MENU AUTO CH 002 available in your area. This will take a few seconds.
Setting the V-Chip An age limitation can be set to restrict children from viewing or hearing violent scenes or pictures that you may choose to exclude. The restriction applies to “TV RATING” and “MOVIE RATING” if this data is transmitted. You may set this restriction separately. To use the V-Chip function, you must register a password. To register a password SETUP/TV MENU in the TV/VCR mode. 1 Press The TV/VCR menu screen will appear. or to select 2 Press option, then press or CH to select “PASSWORD”.
Setting the V-Chip (continued) To set the V-Chip SET menu, press 1 In theor V-CHIP to select “V-CHIP SET”, then press . CH V-CHIP V-CHIP SET CHANGE PASSWORD / 2 Press or to select “TV RATING”, then press or display the desired setting.
Setting the V-Chip (continued) To change password SETUP/TV MENU in the TV/VCR mode. 1 Press The TV/VCR menu screen will appear. 2 Press option. or to select CH / / / / MENU or to select the 3 Press “PASSWORD”. CH 0-9/ENTER/CANCEL/MENU the Password using number 4 Enter buttons (0-9), then press ENTER. • If you put a wrong number, press CANCEL. CH or to select 5 Press “CHANGE PASSWORD”, then press CH .
Setting the on timer This feature allows you to have the TV/VCR/DVD automatically turn on at a predetermined time. If you program the ON TIMER once, the TV/VCR/DVD will turn on on the programmed day (daily/weekly) at the same time to the same channel. Remember the clock feature must be set before you can make adjustments to the ON/OFF TIMER feature. EXAMPLE: Turning on the TV to channel 12 at 7:00 AM, MONDAY-FRIDAY. SETUP/TV MENU in the TV/VCR mode. 1 Press The TV/VCR menu screen will appear.
Setting the off timer This feature allows you to have the TV/VCR/DVD turn off automatically at a predetermined time. If you program the OFF TIMER once, the TV/VCR/DVD will automatically turn off at the same time everyday. EXAMPLE: Turning off the TV at 11:30 PM. SETUP/TV MENU in the TV/VCR mode. 1 Press The TV/VCR menu screen will appear. 2 Press option.
Picture control adjustment Picture controls are factory preset but you can adjust them individually as follows: SETUP/TV MENU in the TV/VCR mode. 1 Press The TV/VCR menu screen will appear. 2 Press option. or to select CH or to select 3 Press “PICTURE”, then press CH . or to select the item 4 Press you want to adjust. Press or CH to adjust the setting.
Adjusting the picture preference You can select four picture modes— STANDARD, SPORTS, MOVIE, and MEMORY—as described in the following table: SETUP/TV MENU in the TV/VCR mode. 1 Press The TV/VCR menu screen will appear. 2 Press option. or to select CH or to select 3 Press “PICTURE PREFERENCE”, then press . CH or to select the item 4 Press you want to adjust.
Stereo recording and playback / Second Audio Program (SAP) Stereo recording and playback The VHS Hi-Fi audio system permits high fidelity recording of MTS STEREO TV broadcasts. When an MTS STEREO broadcast is received, the word STEREO will appear on the screen and the program can be viewed or recorded in stereo. The Hi-Fi STEREO recording procedure is the same as for normal recordings. STEREO NOTE: When using a Cable TV system, stereo TV programs may be transmitted over a mono cable channel.
Loading and Unloading a cassette tape Use only video cassette tapes marked . Loading Push the center of the tape until it is automatically inserted. Insert the cassette tape with its labeled side facing up and the erase prevention tab positioned at your left. An inverted cassette tape cannot be inserted. Erase prevention tab Automatic power ON When you insert a cassette tape the TV/VCR/DVD power will turn ON automatically.
Cassette tape playback Preparation: Press TV/VCR to select the TV/VCR mode. a prerecorded tape (When 1 Load loading a cassette tape without the erase prevention tab, playback will start automatically). 2 To start playback Press PLAY. Playback will start. “ ” will appear on the screen for about 4 seconds. To stop playback Press STOP once. The tape will stop but remain fully loaded and ready to play. “ ” will appear on the screen for about 4 seconds.
Special playback Picture Search Repeat playback Reverse picture search function Press REW x 1 or x 2 during the playback. Forward picture search function Press F.FWD x 1 or x 2 during the playback. To return to playback: Press PLAY. The entire video tape will be played until its end. The tape will then automatically rewind to the beginning and the playback will be repeated. SPEED SEARCH TIMES TAPE SPEED PICTURE SEARCH SPEED SETUP/TV 1 Press MENU. Press or to select option.
ZERO RETURN function / Video index search system ZERO RETURN function This function makes tape-rewinding stop at the counter 00:00:00 position automatically. Preparation: Press TV/VCR to select the TV/VCR mode. DISPLAY/CALL. 1 Press The counter display shows the TV/VCR 8:40AM THU tape running time during playback or recording. 00:30:50 SP COUNTER RESET at the 2 Press desired tape position. The counter TV/VCR 8:40AM THU display will be reset to the “00:00:00” position (e.g. the beginning of recording).
Recording a TV program Recording and viewing the same TV program Preparation: Press TV/VCR to select the TV/VCR mode. a cassette tape with the 1 Load erase prevention tab intact. The TV/VCR/DVD will automatically turn on. SPEED to select the 2 Press desired tape speed SP or SLP. The tape counter and SP or SLP will appear on the screen for about 4 seconds. 00 : 00 : 00 SP the TV/CABLE option to the appropriate position (See 3 Set page 22).
Recording a TV program (continued) To stop recording Press STOP to stop recording. “ ” will appear on screen for about 4 seconds. To stop recording temporarily Press PAUSE/STILL to avoid recording unwanted material. Press again to continue the recording. “ ” will appear on screen for about 4 seconds. NOTES: • The pause function will be released after 5 minutes to prevent damage to the tape or the TV/VCR/DVD. The TV/VCR/DVD will change to the STOP mode.
One-touch Timer Recording (OTR) The One-touch Timer Recording feature provides a simple and convenient way to make a timed recording. Preparation: Press TV/VCR to select the TV/VCR mode. EXAMPLE: One-touch Timer Recording for 30 minutes. a cassette tape with the 1 Load erase prevention tab intact. The TV/VCR/DVD will automatically turn on. SPEED to select the desired 2 Press tape speed SP or SLP. The tape counter and SP or SLP will appear on the screen for about 4 seconds.
Timer recording Timer recording can be programmed on-screen with the remote control. The built-in timer allows automatic unattended recording of up to 8 programs within 1 month. Preparation: • Press TV/VCR to select the TV/VCR mode. • Load a cassette tape with the erase prevention tab intact. • Press DISPLAY/CALL to verify that the time and date are correct (see page 37). EXAMPLE: Program a timer recording for the 23rd day, channel 125 (CABLE), 7:00 - 9:30 PM on timer program number 1 (Tape speed: SLP).
Timer recording (continued) Timer recording special case To confirm the settings Weekly (e.g. WKL-TUE: each Tuesday) or daily (e.g. MON-SAT: Monday to Saturday) Timer recording Press PROGRAM once. The TV screen displays the timer program list. Press PROGRAM again. The TV screen displays the ON/OFF TIMER setting. (once) (twice) Follow the procedure of timer recording on the previous page. At picture 4 press repeatedly until the desired setting appears. Then press ENTER.
Duplicating a video tape Duplicating a video tape If you connect the TV/VCR/DVD to another VCR or camcorder, you can duplicate a previously recorded tape. Make all connections before turning on the power. a blank cassette tape with the erase 1 Load prevention tab intact into the recording unit. REC/OTR on the recording unit, then press 4 Press PAUSE/STILL. Load a previously recorded tape into the playback VCR or CAMCORDER. SPEED to select the desired tape speed 2 Press SP or SLP.
Disc This TV/VCR/DVD applies to DVD discs from Region 1 or ALL. The loaded Disc (DVD, Audio-CD and mp3/WMA/JPEG CD) will be recognized automatically. The suitable Disc-formats are: DVD, CD, CD-R/RW and DVD-R/RW (Video format only). Some CD-R/RW and DVD-R/RW discs may be incompatible. Do not play DVD-ROM, DVD-Audio, CDV, Video-CD or CD-G to prevent accidental erasure of prerecorded material.
Preparation / Status display of disc The following pages describe the setup/operation in DVD mode. Preparation Before DVD/CD operation, please make preparations as follows. the AC cord plug into a standard 120V 60Hz polarized 1 Insert AC outlet. • If the AC cord plug is plugged in for the first time, wait for about 5 seconds before pressing POWER. NOTE: When connecting to other equipment, unplug the TV/ VCR/DVD from the AC outlet.
Playback procedure DVD to select DVD mode. 1 Press Press OPEN/CLOSE on the TV/ VCR/DVD or the remote control. The disc tray will open. a disc onto the tray. 2 Place Position it with the printed label side up, align it with the guides, and place it in its proper position. OPEN/CLOSE or PLAY. 3 Press The disc tray closes automatically. The TV-screen, “ ” changes to “Reading” and then playback commences. • A menu screen will appear on the TV screen, if the disc has a menu feature.
Special playback NOTE: There may be a slight delay between when you press the button and the function activating. Fast Forward Playback Press SEARCH during normal playback. will increase the speed of the search Each press of SEARCH (x 2), (x 4), (x 8), (x 15). (CD: (x 2), (x 4), (x 8), (x 20)) • To resume normal playback, press PLAY. Review Playback Press SEARCH during normal playback. Each press of SEARCH will increase the speed of the search (x 2), (x 4), (x 8), (x 15).
mp3/WMA/JPEG playback mp3/WMA/JPEG CD Information mp3/WMA CD playback This player can play back mp3/WMA/JPEG files recorded on a CD-R or CD-RW. OPEN/CLOSE. 1 Press The disc tray will open. mp3 is an audio file format, which compresses recorded music. It was developed by Fraunhofer Gesellschaft in collaboration with Thomson Inc. The main advantage of the mp3 format is that it means CD-quality music tracks can be stored on a personal computer.
mp3/WMA/JPEG playback (continued) JPEG CD playback 1 Press OPEN/CLOSE. The disc tray will open. Place a disc on which JPEG files have been recorded onto the tray. Press OPEN/CLOSE or PLAY. 2 The disc tray closes automati- Reading cally. On the TV-screen, “Reading” will appear. Reading will take as much time as the number of file. screen will appear 3 Aonfilethemenu TV screen. Press / to select folder. Press / or / or 4 number buttons (0-9) to select the desired file.
Setting the JPEG interval You can continuously play back all JPEG files automatically. 1 Press SETUP/TV MENU in the stop mode or No disc. / to select Press option. /Enter/Setup/Return 2 Press press or ENTER, then or to select “JPEG Interval”. 3 Press or sired time. TV Screen 4:3 Display On Picture Mode Auto JPEG Interval OFF Screen Saver On /Setup/Return to select your de- Off: Plays back one file at a time.
Setting the select files When playing back a CD containing a mixture of mp3, WMA and JPEG files, only mp3/WMA or JPEG files can be displayed on the file menu. 1 Press SETUP/TV MENU in the stop mode. / to select Press option. /Enter/Setup/Return 2 Press or ENTER, then press or to select “Select Files”. Password Parental Select Files ---Off All /Setup/Return or to select your Press 3 desired file type. Password ---Parental Off Select Files Pictures Only All: Displays all files.
Zooming / Locating desired scene Zooming This TV/VCR/DVD will allow you to zoom in on the frame image. You can then make selections by switching the position of the frame. ZOOM during playback. 1 Press The center part of the image will 1 be zoomed in. Each press of ZOOM will change the ZOOM magnification 1 (x 1.3), 2 (x 1.5) and 3 (x 2.0). Press / / / to view a different part of the frame. 2 You may move the frame from the center position UP, DOWN, LEFT or RIGHT. 3 Inviewthe( zoomOff).
Repeat playback Title, Chapter, Track Playback 1 Press PLAY MODE during playback or stop mode. DVD Audio-CD Repeat : Off : Off Play Mode : Off Repeat : Off /Enter/Play Mode ENTER to select “Chapter” or “Title”. 2 •Press In case of Audio-CD, first press to select “Repeat” and then press ENTER to select “Track” or “All”. DVD Audio-CD Repeat : Chapter Play Mode : Off Repeat : All /Enter/Play Mode 3 Press PLAY MODE again to make the screen disappear. • Press PLAY to start Repeat playback.
Program playback/Random playback (only CD) Program playback You can arrange the order of tracks on the disc. PLAY MODE in the stop 1 Press mode. 2 Press or to select “Play Mode”, then press ENTER to select “Program”. In case you wish to 3 Example: program in order of 7, 3, 11: Enter as 7 ,3 • If you input a wrong number, press CANCEL. / or / to select “Program Playback” and press ENTER. “Program Playback” will appear on the screen.
Changing soundtrack language / Subtitles Changing soundtrack language You can select the language when you play a multilingual disc. AUDIO SELECT during 1 Press playback. 1/8 Eng D The current soundtrack language will appear. AUDIO SELECT repeat2 Press edly until the desired language is selected. 2/8 Fra D The on-screen display will disappear after a few seconds. Subtitles Turning the subtitles on and off When playing back a disc recorded with subtitles, you can turn the subtitles on or off.
Changing angles / Title selection / DVD menu Changing angles When playing back a disc recorded with multi-angle facility, you can change the view angle. ANGLE during playback. 1 Press The current angle will appear. 1/9 NOTE : In case of JPEG-playback, the JPEG-image is rotated 90 degrees to the right. 2 Press ANGLE repeatedly until the desired angle is selected. Title selection Two or more titles are recorded on some discs. If the title menu is recorded on the disc, you can select the desired title.
Setting the aspect ratio of TV screen / Setting on screen display Setting the aspect ratio of TV screen You can select the aspect ratio of the picture. DVD to select DVD mode. 1 Press Press SETUP/TV MENU in the stop mode or No Disc. Press or to select option. /Enter/Setup/Return 2 Pressor or ENTER, then press to select “TV Screen”. TV Screen 4:3 Display On Picture Mode Auto JPEG Interval Off Screen Saver On /Setup/Return Press or to select your 3 desired screen type.
Setting the Picture mode/Screen saver function There are two types of source content in pictures recorded in DVD video discs: film content (pictures recorded from films at 24 frames per second) and video content (video signals recorded at 30 frames per second). Make this selection according to the type of content being viewed. Setting the Picture mode SETUP/TV MENU in the stop 1 Press mode or No Disc. Press or to select option.
Dynamic Range Control DRC (Dynamic Range Control) enables you to control the dynamic range so as to achieve a suitable sound for your equipment. DVD to select DVD mode. 1 Press Press SETUP/TV MENU in the stop mode or No Disc. Press or to select option. /Enter/Setup/Return Press 2 DRC”. or ENTER to select “ DRC On /Setup/Return or to select “On” or 3 Press “Off”, then press ENTER. DRC Off /Setup/Return On: Loud sounds (such as an explosion, etc) are toned down slightly when played back.
Parental control setting Some discs are specified as not suitable for children. Playback of such discs can be restricted with this unit. DVD to select DVD mode. 1 Press Press SETUP/TV MENU in the stop mode or No Disc. Press or to select option. /Enter/Setup/Return 2 Press Press or ENTER. to select “Parental”, then press or until the level you require appears. Password Parental Select Files ---3 All /Setup/Return • Level Off : The parental control setting does not function.
To change the parental level DVD to select DVD mode. 1 Press Press SETUP/TV MENU in the stop mode or No Disc. Press or to select option. Then press or ENTER. Number buttons (0-9) to 2 Press enter the password you have stored. • If you input a wrong number, press CANCEL. ENTER. 3 Press The rating is now unlocked.
Temporary disabling of rating level by DVD disc Depending on the DVD disc, the disc may try to temporarily cancel the rating level that you have set. It is up to you to decide whether to cancel the rating level or not. a DVD disc and press 1 Load PLAY or OPEN/CLOSE (see page 44). the DVD disc has been designed to temporarily cancel the 2 Ifrating level, the screen which follows the “Reading” screen will change, depending on which disc is played.
Setting the language You can select the language of the disc menu messages of DVDs. The same language can always be selected even if you replace the disc or turn the power off. SETUP/TV MENU in the 1 Press stop mode. Press option. or to select /Enter/Setup/Return or ENTER. 2 Press Then press or to select desired option. Menu Subtitle Audio English English English /Setup/Return or to select your Press 3 desired language (e.g. English).
Language code list Enter the appropriate code number for the initial settings “Menu”, “Subtitle” and/or “Audio” (see page 61).
Problems and troubleshooting Use the following check list for troubleshooting when you have problems with your TV/VCR/DVD. Consult your local dealer or service outlet if problems persist. Be sure all connections are properly made when using with other units. SYMPTOMS CAUSE POSSIBLE SOLUTIONS PAGE POWER No power. The AC power cord is not connected. Although the power is on, the Cassette or disc is not inserted. TV/VCR/DVD does not operate. The TIMER REC buttons are depressed.
Problems and troubleshooting (continued) / Video head cleaning SYMPTOMS CAUSE POSSIBLE SOLUTIONS PAGE Eject the disc and clean it. Some times a small amount of picture distortion may appear. This is not a malfunction. Insert a disc. Insert a playable disc (Check the disc type and region Number). This is a Region 1 player. Place the disc with the playback side down. Place the disc correctly inside the guide on the disc tray. Clean the disc.
Specifications GENERAL Power supply: Power consumption: Weight: Dimensions: TELEVISION Picture tube: Tuner type: Receiving channels: 20F502TDV AC 120 V 60 Hz Operation: 110W Stand by: 4W 59.5 lbs (27.0 kg) Width: 22-9/16 inches (573 mm) Height : 20-3/8 inches (517 mm) Depth : 19-1/8 inches (485 mm) 20 inches (508 mm diagonal) Quartz PLL Frequency Synthesized 24F502TDV 135 W 79.4 lbs (36.
Limited Warranty RCA TruFlat TV/DVD/VCR Combination Limited Warranty What your warranty covers: • Defects in material or workmanship. For how long after your purchase: • One year from date of purchase for labor charges. • One year from date of purchase for parts. • Two years from date of purchase for picture tube. The warranty period for rental units begins with the first rental or 45 days from date of shipment to the rental firm whichever comes first.
Limited Warranty (continued) Product Registration: Please complete the online Product Registration on www.rca.com/television or complete and mail the Product Registration Card packed with your unit. It will make it easier to contact you should it ever be necessary. The return of the card is not required for warranty coverage. Limitation of Warranty: THE WARRANTY STATED ABOVE IS THE ONLY WARRANTY APPLICABLE TO THIS PRODUCT.
Visit the RCA web site at www.rca.com/television Please do not send any products to the Indianapolis address listed in this manual or on the carton. This will only add delays in service for your product. TTE Technology, Inc. 101 West 103rd Street Indianapolis, IN 46290 ©2006 TTE Technology, Inc. RCA and associated marks are trademarks of THOMSON S.A. used under license to TTE Corporation.