
TV/DVD User's Guide


Table Of Contents
- Key Features Overview
- Front Audio/Video Inputs
- Multi-Language Capability for TV and DVD
- Programmable Sleep Timer
- Things to Consider Before You Connect
- Protect Against Power Surges
- Protect Components from Overheating
- Position Cables Properly to Avoid Audio Interference
- Important Stand and Base Safety Information
- Use Indirect Light
- Connection Pictures
- Types of Discs Your TV/DVD will Play
- Choose Your Connection
- Cables Needed to Connect Components to Your TV/DVD
- TV/DVD Only
- TV/DVD + VCR
- TV/DVD + Dolby Digital or Amplifier/Receiver
- Plug in the TV/DVD
- Turn on the TV/DVD
- Initial Setup
- Set the TV’s Menu Language
- Set the TV/CATV Signal
- Complete Auto Channel Search
- Add or Delete Channels
- Set DVD’s Menu Language
- Setting Up Other Features
- The Buttons on the Remote Control
- Regional Coding
- Using Different Menus
- Loading and Playing Discs
- To Load and Play a Disc
- Using a Disc Menu
- Playback Features
- Selecting a Title
- Turning Subtitles On and Off
- Selecting a Chapter or Track
- Using the Repeat Feature
- Program/Random Playback for Audio CDs
- Using Bookmarks
- Changing the Camera Angle
- Using the ZOOM Feature
- Basic Playback Features Using the Remote or Front Panel
- How to Use Your TV’s Menu System
- Accessing Menus
- Exiting from a menu
- Picture Quality Menu
- Audio menu
- Channel Menu
- Setup Menu
- V-CHIP SET Feature
- How V-Chip Works
- Set the V-Chip Password
- Set the V-Chip TV Rating and Movie Rating
- Turn On V-Chip
- Change V-Chip Password
- Set the TV’s Menu Language
- Using the Sleep Feature
- Using the Audio Features
- Using Closed Captioning
- The DVD’s Menu System
- Language Menu
- Picture Menu
- Using the On-Screen Info Display
- Parental Menu
- Other Menu
- Code List
- The Front of Your TV/DVD
- Accessory Order Form
- Care and Cleaning
- Handling Cautions
- Formation of Condensation
- Handling Discs
- Cleaning Discs
- RCA TV/DVD Limited Warranty
- Troubleshooting
- Index
Connections & Setup
12 Chapter 1
Plug in the TV/DVD
Plug the end of the power cord into the wall outlet. Match the wide blade of the plug with the
wide slot in the outlet. Insert the plug completely into the outlet.
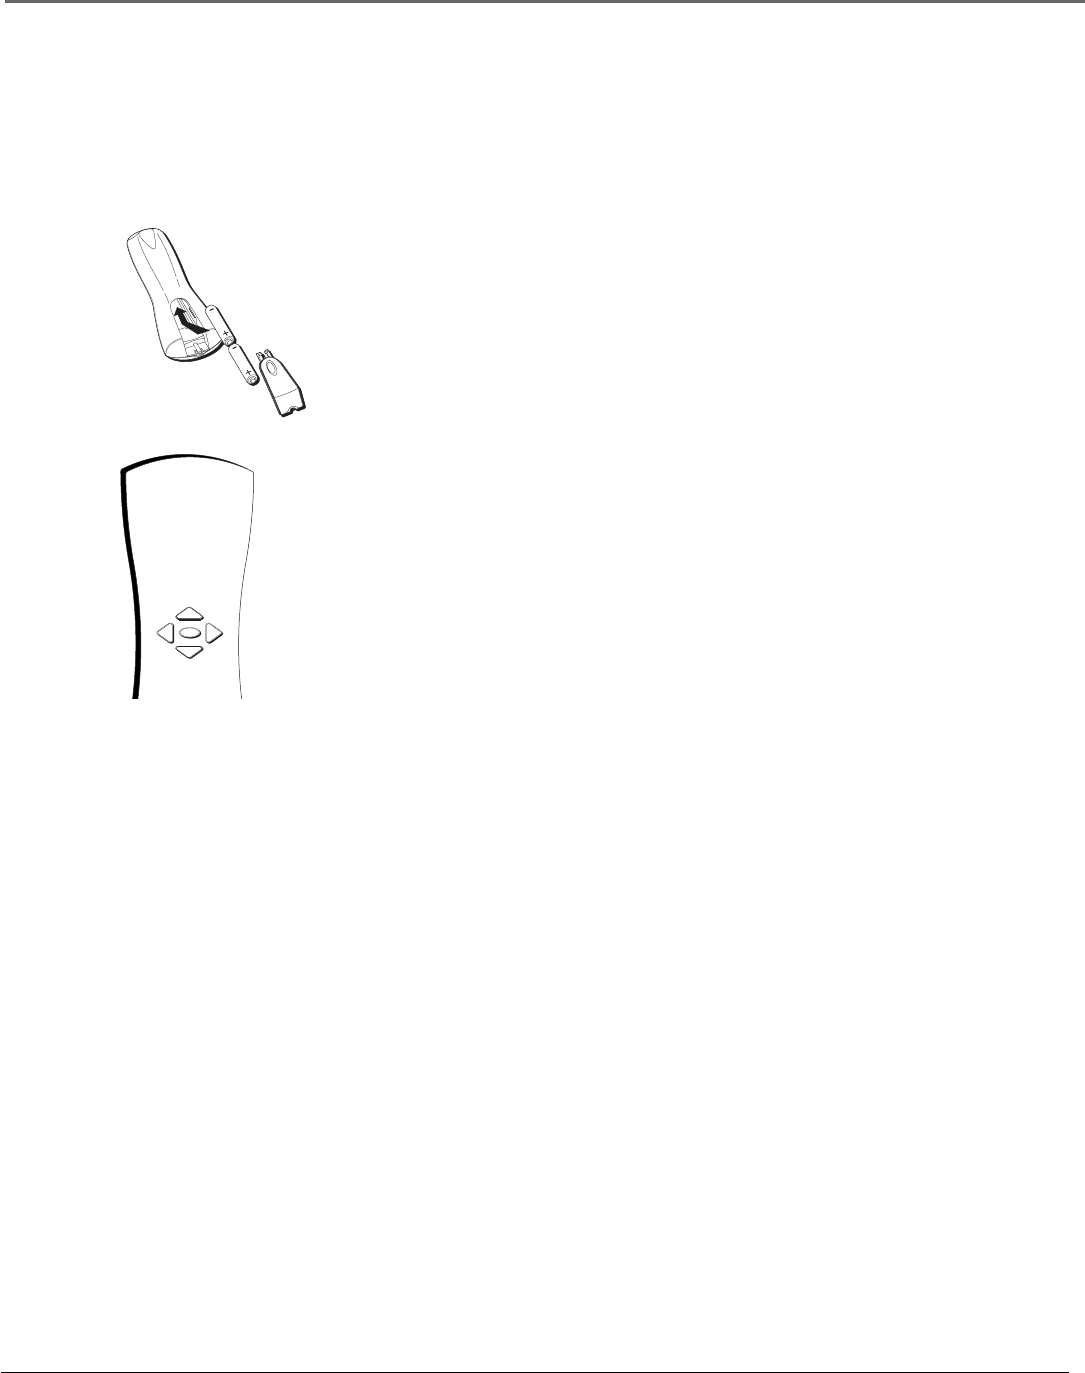
Use the arrow buttons and the
ENTER button to move through
the menu system.
ENTER
Put Batteries in the Remote
1. Remove the battery compartment cover on the remote.
2. Insert new batteries. Match the polarities (+ and -) on the batteries with the
diagram on the remote.
3. Put the battery compartment cover back on the remote.
How to Use the Remote Control to Move
Through the Menus
The technical term is “Navigation” – how you move through the on-screen
menus. The theory is the same throughout the menu screens: highlight your
choice and select it.
To highlight a menu item on the screen, press the arrow buttons on the remote
to highlight one of the items listed on the screen. Use the up or down arrow
button to move up or down. Use the right or left arrow button to move right or
left.
Note: Highlighted means that the menu item stands out from other menu items on
the list (appears darker, brighter, or a different color).
Turn on the TV/DVD
Press the ON/OFF button on the remote control or the POWER button on the
TV/DVD’s front panel.
Note: Pressing the ON/OFF button not only turns on the TV, but puts the remote into TV mode. “TV
mode” means that the buttons on the remote control operate the TV’s functions.
Initial Setup
The first time you turn on your TV/DVD, you’ll want to set a few menu screens so that you
get the optimum performance from your TV/DVD. Complete the following steps to set up
your TV/DVD.