
Manual


Exposure Control (continued)
.
.
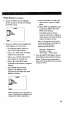
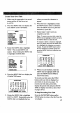
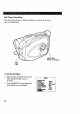
Press the MENU dial in to display the
main MENU in the viewfinder.
MENU
I, MENU END
FOCUS _u;ro,
A O
ii_ "NO_ 1"8.98
DATE/TIME
TELE MACRO OFF
TAPE LENGTH T30
M.W.B. AUTO
ZOOM SPEED FAST
k NEXT
Rotate the MENU dial to highlight
EXPOSURE and press the dial in to
display the EXPOSURE menu.
EXPOSURE
AUTO
EXIT
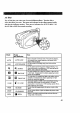
The exposure indicator (00) appears in
the viewfinder.
5. Adjust the exposure for a dark or
bright subject.
• To brighten the image, rotate the
MENU dial up. You can adjust the
exposure to +06.
• To darken the image, rotate the
MENU dial down. You can adjust
the exposure to --06.
6. Press the MENU dial in to select an
.
exposure.
Press MENU again to remove the
main MENU.
Notes: To return to auto exposure, select
AUTO in the EXPOSURE menu or set the
AE dial to AUTO.
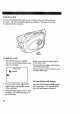
4. Rotate the MENU dial to highlight
MANU (manual) and press the dial in.
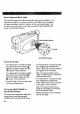
Conditions Requiring Manual Exposure
• When recording with a bright back-
ground or reverse lighting.
• When recording with a very dark
background or very bright subject.
• When recording a reflective natural
background m such as a beach or
when skiing.
41