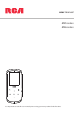
user manual M45 series M46 series It is important to read this user manual prior to using your new product for the first time.
Important safety instructions IMPORTANT SAFETY INSTRUCTIONS PLEASE READ AND SAVE FOR FUTURE REFERENCE Some of the following information may not apply to your particular product; however, as with any electronic product, precautions should be observed during handling and use. • • • • • • • • • • • • • • • • • • • • • • • • • • Read these instructions. Keep these instructions. Heed all warnings. Follow all instructions. Do not use this apparatus near water. Clean only with dry cloth.
This equipment is a Class II or double insulated electrical appliance. It has been designed in such a way that it does not require a safety connection to electrical earth. Important battery information Warning: Your product contains a battery and charging system which is designed to work in temperatures that do not exceed 50°C (122°F). Leaving this product in a closed automobile or the trunk of an automobile where temperatures may exceed 50°C may result in permanent battery damage, fire, or explosion.
FCC Information This equipment has been tested and found to comply with the limits for a Class B digital device, pursuant to Part 15 of FCC Rules. These limits are designed to provide reasonable protection against harmful interference in a residential installation. This equipment generates, uses, and can radiate radio frequency energy and, if not installed and used in accordance with the instructions, may cause harmful interference to radio communications.
Contents Important safety instructions IMPORTANT SAFETY INSTRUCTIONS ................................................................................................1 Important battery information ..........................................................................................................2 Ecology........................................................................................................................................................2 Precautions for the unit .....................
Videos Playing video files ...................................................................................................................................20 Video viewing ...........................................................................................................................................20 Pictures Playing picture files ................................................................................................................................21 Picture viewing ................
Settings Changing the player’s settings ...........................................................................................................28 Shuffle ........................................................................................................................................................28 Repeat .........................................................................................................................................................28 Equalizer ..........................
End user license agreement This is a copy of the EULA that you need to agree to in order to use this product.
accessed through use of the Program is the property of the respective content owner and may be protected by applicable copyright or other intellectual property laws and treaties. This license grants you no rights to use such content. All rights not expressly granted are reserved by AUDIOVOX or its Licensors. 6.
Before you begin Dear RCA Customer, Thank you for purchasing the Player. This product will play mp3 and Windows Media™ audio (WMA) content as well as content purchased from most online music download services. RCA easyRip™ Media Software, installed automatically when you connected this player to your PC, lets you import music files from CDs and other sources, organize your music library, and transfer unprotected MP3 and WMA files to and from this player.
Connecting to the computer • • Connect the player to your computer with the USB cable provided. The player will turn on automatically. The player will be connected in MSC (Mass Storage Class) mode. It will appear as a drive letter on your computer and behave as a detachable drive for file transfer in one or both directions. The RCA easyRipTM Media Software installer is stored in the player, go to MyComputer in the Start menu, find and open the drive letter associated with the player (i.e.
Managing files on your RCA Player Before you begin using your RCA player, you’ll want to copy your media files to the player. You can use any of the following methods to transfer content: • • • RCA easyRip Drag and drop files in Windows Explorer Software provided by online music stores To transfer DRM-protected content, use the software provided by the online music store. The following sections explain how to copy unprotected files to the player.
Using Windows Explorer To copy files in Windows XP with Windows Media Player 10 installed: 1. Open the player in Windows Explorer. 2. Drag and drop music files onto the Music folder. To copy files in Windows Vista or Windows® 7 or Window XP with Windows Media Player 11 installed: 1. Open the player in Windows Explorer 2. Open Internal Storage. 3. Drag and drop music files.
General controls Display Return Navigate or scroll up/ increase volume RESET MIC Power on/off, Lock/Unlock Option menu Navigate to the right/skip forward/ fast forward/menu advance Play/pause/select menu option Navigate or scroll down/decrease volume Reset button Earphones Jack USB jack Microphone Navigate to the left/skip back/reverse/menu back Turning the player on and off To turn the player on, slide / downward. Slide downward again to turn the player off.
Using the menus Menu types The player has two types of menu: Player menu The player menu appears when you turn on the player or if you press and hold player. It lets you: • • • • while listening to the Browse for and play music, audiobook, video and picture files Listen to the radio Record and play back voice memos Change the player’s settings – language, display brightness, etc.
• If the highlighted item is playable (for example, an audio file), press to start playback. Press • If the highlighted item indicates the current setting (for example, the repeat mode setting), press change the setting.
The Home menu The top-level or “Home” menu is always displayed when you press and hold . The menu options are: Music Press to enter the Music menu and choose an artist, album, genre or individual title. Videos Press to enter the Videos menu and choose a particular video for viewing. Pictures Press to enter the Pictures menu and choose a particular image for viewing. Audiobooks Press to enter the Audiobook menu and choose a particular audiobook for listening.
Music Playing music files The player sorts your music files by track name (title), artist, album and genre. 1. In other modes, press and hold to display the Home menu. Press + or – and or to select Music. 2. Press to enter the Music menu. 3. Use + or – and or to navigate through the menus and select the desired item, then press start listening.
Music playback Skips to the previous file, press and hold to scan backwards within a file Skips to the next file, press and hold to scan forward within a file Starts/ pauses playback + or – Increases or decreases the volume during playback Shows/hides option menu Back to previous navigation level. Press and hold to enter Home menu Option menu (music playback) Press at the playback (Now playing) screen to show the Option menu.
Music playback p y display p 1 9 8 2 3 4 5 1. 2. 3. 4. 5. 6. 7. 8. 9. 7 6 Current file number/total number of files Song name Artist name Album name Elapsed playback time File total time Playback progress bar File bitrate File type The information provided in the playback screen depends upon the ID3 tags that have been set up for the music file.
Videos Playing video files 1. In other modes, press and hold Videos. to display the Home menu. Then press + or – and or to select 2. Press to enter Videos. 3. Use + or – and or to navigate through the menus and select the desired item, then press start viewing. or to Video viewing Goes back, skips backward. Press and hold to scan backwards within a file Advances, skips forward.
Pictures Playing picture files 1. In other modes, press and hold Pictures. to display the Home menu. Then press + or – and or to select 2. Press to enter Pictures. 3. Use + or – and or to navigate through the menus and select the desired item, then press to start viewing. or Picture viewing Goes back, skips backward Advances, skips forward Starts/pauses slideshow if it is activated Shows/hides option menu Back to previous navigation level.
Audiobooks Playing audiobooks Audiobook playback is similar to music playback. 1. In other modes, press and hold Audiobooks. to display the Home menu. Then press + or – and or to select 2. Press to enter Audiobooks. 3. Use + or – and or to navigate through the menus and select the desired item, then press to start listening.
Skipping through audiobook sections If the currently playing audiobook contains sections, you can choose to skip forward and back between sections when you press or , instead of skipping between files. To choose section-by-section skipping: 1. Press to pause playback and press to display the Option menu. 2. Press + or – to select Skip, then press to switch to Section. 3. Press to resume playback. • Section-by-section skipping is indicated by Sect on the display. Press • or to resume playback screen.
Radio The radio uses the earphones as an antenna. For better reception, extend the earphone cable as far as possible. Playing FM radio To turn the radio on: 1. In other modes, press and hold 2. Press + or – and or to display the Home menu. to select Radio and press 3. While Listen is highlighted, press or to enter the radio menu. to start listening. The frequency screen appears. To tune the radio: • Press and hold or to start scanning through the frequency range.
Improving FM radio sound If stereo reception is noisy, you can often reduce the noise by switching to mono. To switch between stereo and mono: 1. While the radio is playing, press to display the Option menu. to switch between Stereo and Mono. 2. Press + or – to highlight Mode and then press 3. Press or to exit the menu. Recording FM radio You can record the radio and play back recordings as well as copy the recordings (WAV files) to your PC. To record the currently playing radio station: 1.
Favorites Creating a "Favorites" playlist You can create a playlist of your favorite music by adding new files to the playlist as you listen to them. This function is not available for other media formats such as videos, pictures, audiobooks and recordings. To add the currently playing music file in the playlist: 1. Press to display the Option menu. 2. Press + or – to highlight Add to Favorites and then press • Added Successfully shows on the display. • Repeat the above steps for adding more music files.
Voice Memo Recording voice memo You can record voice and play back recordings as well as copy the recordings (WAV files) to your PC. To record voice: 1. In other modes, press and hold 2. Then press + or – and 3. Press • • or or to display the Home menu. to select Voice Memo, and press to highlight Start Recording and press or to enter the Voice Memo menu. to start recording. Press to pause or resume recording. The microphone is located at the back of the player. 4.
Settings Changing the player’s settings To change the player settings: 1. In other modes, press and hold 2. Press + or – and or to display the Home menu. to select Settings and press 3. Press + or – to select a setting and then press to enter the settings menu. to change it. Shuffle • • Press repeatedly to select shuffle on or off. Music files (mp3/wma/wav) will be played randomly when shuffle is activated. The shuffle icon ( ) shows on display when shuffle is on.
RecDur (Record duration) To change the duration (Max, 5 minutes, 30 minutes, 1 hour) for radio and voice memo recording. FreqStep (Frequency Step) To changes the way that the player scans through the radio frequencies. Switch to EU if you bring the player to Europe; switch back to US when you return to North America. Language To change the language of the player menus. Protocol To switch between MSC (Mass Storage Class) and MTP (Media Transfer Protocol) modes when connected to your PC.
Additional information Tips and troubleshooting Cannot delete files on the player. • For any files you have transferred to the player, you may delete them while you have connected the player with your computer. Highlight the unwanted file in the player’s file directory on your computer and press the delete key on your computer to delete the file. Subscribed files are best to be removed through Windows Media® Player. • For deleting files from the player, refer to Option menu from page 17-27 for details.
Song information is not showing correctly. • Song information may not match your current player’s language setting. Change the language setting. Cannot view picture files. • The player only supports .jpg extension file, and do not support other formats like .bmp, .tiff, .jpeg. Cannot play video files. • All video contents must be converted by RCA easyRip software which comes with the player. Other format of video file will not be supported. Cannot play audible files. • Make sure the file format is correct.
For your records Keep your sales receipt for proof of purchase to obtain warranty parts and service. In the event that service should be required, you may need both the model number and the serial number. In the space below, record the date and place of purchase, and the serial number: Model No. Date of Purchase Place of Purchase Serial No. Visiting RCA website Please visit www.rcaaudiovideo.
Warranty information Limited warranty 12 Month Limited Warranty Applies to RCA Audio/Video Products AUDIOVOX ELECTRONICS CORP.
• • Properly pack your unit. Include any remotes, memory cards, cables, etc. which were originally provided with the product. However DO NOT return any removable batteries, even if batteries were included with the original purchase. We recommend using the original carton and packing materials. Include evidence of purchase date such as the bill of sale. Also print your name and address and a description of the defect. Send via standard UPS or its equivalent to: Audiovox Electronics Corp.
Illustrations contained within this publication are for representation only and subject to change. The descriptions and characteristics given in this document are given as a general indication and not as a guarantee. In order to provide the highest quality product possible, we reserve the right to make any improvement or modification without prior notice. Audiovox Electronics Corp. 150 Marcus Blvd., Hauppauge, NY 11788 © 2010 Audiovox Electronics Corp.