DVD User's Changing aln.
Important Information WARNING This symbol indicates "dangerous voltage" inside the product that presents a risk of electric shock or personal injury FCC NOTE To reduce the risk of fire or shock hazard, do not expose this DVD player to rein or moisture. No objects filled with liquids, such as vases, shall be placed on the apparatus. This symbol indicates important instrections accompanying the product. (for U.S.A.
Introduction Introduction Your DVD player is equipped with some special features. The On-Screen Information The following information summarizes some of these features. Display The lnfo Display is a menu bar that you can bring up to access certain features while discs are playing. Icons in the display represent the different features supported by your DVD player.
Table Introduction Chapter .............................................................................................. 1: Connections of 1 & Setup Things to Consider Before You Connect ......................................................................... Protect Against Power Surges ................................................................................... Protect Components from Overheating ...................................................................
Table Disc Playback Features Using the Remote .................................................................... Fast Motion Playback (Picture Scan) ....................................................................... Freeze Frame and Frame Advance .......................................................................... Slow Motion Playback .............................................................................................. Chapter Advance ..................................................
Table Chapter of Contents 6: The DVD Player's Menu System The DVD Player Menu System ....................................................................................... 66 The Play Mode Menu ..................................................................................................... Selecting a Play Mode .............................................................................................. How to Create a Program ...................................................................
Chapter Connections Chapter 1 & Setup Overview: • Things to Consider Before You Connect • Choose Your Connection • The Jacks on the Back of the DVD Player • Installing • How to Find Your TV's Video Input Channel • How to Move Around the DVD Player's Menu System • Set the Menu Language • The Remote Control Batteries in the Remote Changing 31n.
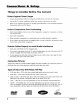
Connections Ik Setup Things to Consider Before You Connect Protect Against Power Surges • Connect all components before you plug any of their power cords into the wall outlet. • Turn off the TV and/or • Make sure all antennas and cables are properly sheet packed with your DVD player. components Protect Components before you connect or disconnect grounded. any cables. Refer to the Important Safeguards from Overheating • Don't block ventilation can circulate freely.
Connections & Setup Choose Your Connection There are several ways to connect your DVD player. Please use the following chart to determine which connection is best for you. Turn to the appropriate page and connect your DVD player, Cables Needed Components • Coaxial Connection "IV + DVD • Audio/video Go to...
Connections Setup Cables Needed to Connect Components to Your TV The pictures below show the cables needed for the connections represented Note: Audio/Video cables (A/V cables for sbort) are usually sold as a bundled show each cable separately for better visibility. Audio/Video Component 8 cables RF coaxial cable in this book.
Connections & Setup TV AUDIO OUT R S-VIDEO VIDEO IN L CABLE OR OFF-AIR SIGNAL AUDIO IN R L ANT IN DVD PLAYER DVD Player + TV with Audio/Video 1. 2. Input Jacks Connect the audio cables to the AUDIO OUT FRONT L (left - white) and R (right - red) jacks on the back of your DVD Player, and to the corresponding Audio Input jacks on your TV. Connect the video cable.
Connections ik Setup TV AUDIO OU_ AUDIO IN _o _,o;; _,_ _ OFF-AIR VCR 10 °°'3,? o R v; ,.
Connections & Setup DVD Player + TV + VCR 1. 2. Connect the audio cables to the AUDIO OUT FRONT L (left - white) and R (right - red) jacks on the back of your DVD Player, and to the corresponding Audio Input jacks on your TV. Connect • the video cable. Basic video connection - Connect the video cable (yellow) to the VIDEO the back of your DVD Player, and to the Video Input jack on your TV.
Connections & Setup TV AUDIO OUT R I_ AUDIO IN S-VIDEO PLAYER DVD VIDEO PN R L ANT IN CABLE OR OFF-AIR SIGNAL I- ® L.p DOLBY DIGITAL DTS RECEIVER -- or Dolby Digital ® and DTS e Both Dolby Digital and DTS are audio formats used to record 5.1-channel audio signals onto the digital track of film (while the film is being made). Both of these formats provide up to six separate channels: left, right, center, left rear, right rear, and common subwoofer. The disc will play 5.
Connections & Setup DVD Player + "IV + Dolby Digital or DTS Receiver To Connect the DVD Player 1. If you have a Dolby Digital or DTS receiver, insert an optical digital cable (not provided) to the DIGITAL AUDIO OUT jack on the DVD player to the Digital Input jack on the back of the receiver. You must also set the Digital Output setting in the Sound menu (see chapter 5). Note.. The connection illustration on the left shows a digital optical cable.
Connections 8= Setup CABLE OR OFF-AIR SIGNAL TV AUDIO OUT R L @ @ AUDIO IN S-VIDEO VIDEO IN R ANT IN L @ @ @ ® PLAYER DVD L mo PRO LOGIC OR STEREO RECEIVER )R 14 Chapter 1
Connections & Setup DVD Player + TV + Dolby Pro Logic or Stereo Receiver To Connect 1. 2. the DVD Player Connect tile left and right audio cables to your audio/video receiver and to the AUDIO OUT FRONT L (left - white) and R (right - red) jacks on the back of your DVD Player. Connect the video cable. • Basic video connection - Connect the video cable (yellow) to the VIDEO OUT jack on the back of your DVD Player, and to the Video Input jack on your TV.
Connections 8,: Setup CABLE OR OFF'AIR SIGNAL TV AUDIO OUT R L AUDIO IN S-VIDEO VIDEO IN R ANT IN L ® DVD PLAYER tl ® AUDIO/VIDEO RECEIVER 16 Chapter I
Connections & Setup DVD Player + TV + 5.1-channel Audio/Video Receiver To Connect the DVD Player Connect the audio cables from the AUDIO OUT FRONT R and L, SURROUND R and L, SUBWOOFER, and/or CENTER jacks on your DVD player to the corresponding Audio Input jacks on your audio/video receiver. Set up the speakers using the Speaker option from the Sound menu (see chapter 5). 1. 2.
Connections Ik Setup TV AUDIO OUT R L AUDIO IN E-VIDEO VIDEO IN R L ANT IN PLAYER DVD VCR SATELLITE RECEIVER _e 18 Chapter I
Connections 8t Setup DVD Player + TV + VCR + Satellite Receiver 1. 2. Connect the audio cables to the AUDIO OUT FRONT L (left - white) and R (right - red) jacks on the back of your DVD Player, and to the corresponding Audio Input jacks on your TV. Connect the video cable. • Basic video connection - Connect the video cable (yellow) to the VIDEO OUT jack on the back of your DVI) Player, and to the Video Input jack on your TV.
Connections & Setup The Jacks on the Back of the DVD Player When connecting, make sure you connect Output jacks to Input jacks, Video to Video, Right Audio to Right Audio, etc. f VIDEO OUT (Composite Video Ou_ut) Connect a video cable to this jack and to the Video Input jack on your TV.
Connections & Setup Installing Batteries in the Remote 1. Remove the battery compartment 2. Insert new batteries. Match the polarities (+ and -) on the batteries with the diagram on the remote. 3. Put the battery compartment Important cover on the back of the remote. cover back on the remote. Battery Information • If you're not going to use the remote for a month or more, be sure to remove the batteries because they can leak and cause damage.
Connections Ik Setup How to Find Your TV's Video Input Channel You need to tune your TV to the Video Input Channel (or S-Video Channel if you connected the S-Video cable to your TV and to your DVD Player) to see the DVD Player's menu and to see the content that's on a disc. The video channel on TVs varies for different brands and different models. In order for your DVD remote to work, your TV must be set on the correct video input channel. Below are some things to try.
Connections & How to Move Around 0 _ D the DVD Player's Menu System Tile technical term for how you move through systen-t is "Navigation." ,©,©,© '©'0'0 Setup the DVI) Player's menu Tl'ds [)()ok tells you how to select different menu items, hut you can explore the menu system on your own hy following a few "'navigational 17.les. ' Press the DVD button to put the remote into DVD mode.
Connections 8, Setup A Quick Tour of The Remote VCNa ON,OFF "iV DUO VGR2 AUX SAT-CABLE &&°&& MUTE You can use this remote to control compatible components. The component buttons are programmed to operate some PROSCAN, RCA and GE components. The buttons must be programmed to operate other brands of components. (See "Programming the Remote" in chapter 7.
Connections 8. Setup FORWARD Allows you to search forward through a disc while it is in play mode (or slow speed search in pause mode). Press repeatedly to increase speed. Press this button during playback GO BACK-AGAIN to reverse the disc one frame at a time. When you're using the DVD Player's menu system, press this button to return to the preceding menu screen. When you're watching button to go back 10 seconds to see/hear missed content.
This page left intentionally blank.
Chapter Playing Chapter 2 DVDs Overview: • Regional Coding • Using Different • Loading and Playing Discs • Using a Disc Menu • Using the On-Screen Info Display • Disc Playback Features Using the Remote Changing Menus Entertainment. Again.
Playing Regional DVDs Coding Both the DVD player and the discs are coded by region. These regional codes must match in order for the disc to play. If the codes don't match, the disc won't play. This player's code is region 1. Using Different Menus Each disc is programmed with different can use to access features: features. There are three separate menu paths that you • The Disc menu - The Disc menu is part of each disc and is separate from the DVD player's menu.
Playing DVDs To Load and Play a Disc Turn on the TV and your DVD Player (press ON-OFF the remote control). 1. 2 on tile player or press the DVD buuon on Press tile OPEN-CLOSE bulton on the l:ront of the DVI) Hayer or on the remote. The disc tray opens. Place a disc gently into the tray with the disc's label facing up (double-sided discs have content on both sides, so you can place either side up). This is an example of a one-sided disc. 3. o] PI.AY button. The disc uay closes. Press the OPEN.
Playing DVOs 2. Press the up/down nlenl.l you example arrow buttons to highlight tile section of tile disc choose, all(l press OK on tile relllOte. [11 tile on the left. //.tgaage has been selected. want to In this example, The Language setting is highlighted. To select this option, press OK on the remote. 3. 4. Press tile up/down remote. _{rro'_,sto select a language, and press OK on tile Press MENU on the remote or the front of tl_e player to resume playback.
Playing Using the On-Screen DVDs Info Display The on-screen Info Display contains many playback features. To see the Info Display, press the INFO button on the remote or the front of the player while a disc is playing. Tile Info Display appears across the top of tile screen. Each feature is represented by an icon. Use the left/right arrow buttons on the remote or the front of the player to move through tile different icons in the lnfo Display.
Playing DVDs Time Display This feature displays the audio/video time. For I)VD discs, the time displayed ic'__,lsto the current title time. For Audio CDs and MP3 discs, it refers t() tile curn_.nt track [inlt.. For DVD video discs, the Time Display also acts as a Time Search Ik'amle particular scene ill a movie by entering tile time that scene is played.
Playing DVDs Scene Snip Editing The Scene _nip l_.'ature lets y<)L.i edi( ()Lit select scen_s on a dis(. Otlce yoti have made _dils, Ihe disc's title is stored in the Scene Snip LibralT so you can play either the edited or unediied version of thai disc Editing 1. a Disc While the disc is playii-ig, press SNIP on the remote to bring up the ,S'_e*lg',S'zz//9 lnfo Display. Note.
Playing DVDs Using Scene Snip The DVD Player must be locked to play the edited version of a disc. If you play the disc in an unlocked state, it will play as if there are no edits. The player is locked and unlocked from the DVD player When edited Lock menu (see chapter the DVD Player is locked, version of a disc: 1. Make sure the DVD Player 2. When a disc including Play 6). you must enter the password to play the edited disc. To play the is locked.
Playing DVDs Turning Subtitles On and Off By default, subtitles are off. To turn subtitles on: 1. While the disc is playing, press INFO on the remote. 2. Highlight the Subtitles icon. The Subtitles icon acts as a toggle to turn subtitles on and off. When subtitles are on, the text box below the icons will display the current subtitle language. You can also turn on subtitles by pressing the SUBTITLE button on the remote control. When the lnfo Display comes up the Subtitles icon will be highlighted.
Playing DVDs Changing the Audio Language If the disc was created with different language tracks (recorded in different languages), use the Info Display to temporarily change the DVD Player's Audio Language setting. 1. While a disc is playing, press INFO on the remote Info Display. you can or the front of the player to bring up the Note: You can also bring up the info display by pressing the AUDIO button on the remote (the Audio icon will be highlighted). 2. Highlight the Audio icon.
Playing DVOs The Repeat Feature The default mode for the Repeat feature is Off. There are four Repeat options: • Disc - repeats the disc that is playing • Title - repeats the title that is playing Chapter - repeats the chapter that is playing • A•B - Set the beginning movie play repeatedly. To Use Title or Chapter (point A) and the end (point B) of a segment to make this part of the Repeat: 1. While a disc is playing, press INFO on the remote lnfo Display.
Playing DVDs Using Bookmarks The up booknlark t_att]re lo six booknlarks lets you per disc. mark When a point you on ttlri_ Ihc the disc player that you off or can go to quickly. relno\ c the' dis_, YoU can store bookmarks are ck, ared. Storing a Bookmark 1. While a disc is playing, press INFO on the remote. 2. l lighlight tile Booknlarh 3 The Br_okma*k Display appears [\VO a n'o\vs icon and press ()K.
Playing DVDs Changing the Camera Angle Some discs contain multiple angles of a particular scene or sequence. If the disc only has one angle, this feature won't work. When multiple angles are available, the Camera Angle icon appears in the upper right comer of the screen. To change the camera angle: 1. While a disc is playing, press INFO on the remote Display appears. or the front of the player. The Info 2. The Camera Angle icon will display the number of angles available.
Playing DVDs Disc Playback Features Using the Remote You can use the remote control to activate disc playback &&°_& m 9 Playback features aren't usually available during the opening credits of a movie. If a playback feature isn't available, the invalid symbol _ appears on the screen when you press that button. Fast Motion Playback To scan quickly through ,0,0,0 '0'0'0 '0,0,0 OOOO features. (Picture Scan) the disc when you're playing it, use the Picture Scan feature. 1.
Playing Scene Again DVDs TM When you're watching or listening to a DVD disc, press the GO BACK-AGAIN button on the remote to go back approximately 10 seconds to see and hear missed content. Subtitles will automatically be displayed until the end of the replayed scene (to select the subtitle options, see chapter 6). This feature only works if the disc is encoded with navigation control. Multiple presses of the GO BACK•AGAIN button will go back further.
Playing DVDs Zoom When playing DVD discs and Video CDs, you can magnify For DVD discs, Zoom has 3 levels (1.5x, 2x, 4x). For video magnifies by using from the center the arrow of the screen. Once in Zoom the screen during normal playback. CDs, Zoom has 2 levels (lx, 2x). Zoom mode, you can pan right, left, up or down buttons. 1. Press ZOOM on the remote control to magnify. (The zoom level will be displayed in the corner of the screen.
Chapter Playing Chapter Audio 3 COs Overview: • Using the Info Display • Using the Time Display • Selecting a Specific Track • Selecting a Play Mode • The Repeat Feature • Using IntroScan • The Bookmark • Dub Assist Feature DIGITAL AUDIO Changing Entertainment. Again.
Playing Audio CDs Using the Info Display Your DVD player has many of the same features as an audio CD player. The player's on-screen lnlT_ Display lets you choose various playback features. This section explains how to play audio CDs in your DVD player and how to use the player's features. For instructions on loading and playing your CDs, see Chapter 2. To access the Info Display while the CD is playing, press INFO on the remote or the front of the player.
Playing Selecting TilL, ft. :IL'L' I)Dti(_i/n: IhI'L'L' tl/u. tl:l_.'l.;., pl:t_ Random: fl_u t_;tt ks on dvl:mh i in Ill,.. _rch..i ill,.' _.:1) pLt\ li_t ill the" Ph O' Uode _l;ll_ditld CDs a Play Mode St;llldard: I_lo_r;in/ Audio (!hu, I)l¢[u.r INu.cl nu ot thv \\ ith Itac b. l/ <,tdc'_. 1)\ I) PLl_'r lislu,_! ()ll Ihu' 111)1 in lilL" _]_'!,_ull s m;lm nu'ltil!_ mu'nu l_lt _lll l_l;I\c'I 'I'<> cl_;m_' thu' St'triLlS: l>t_.
Playing Audio CDs Editing a Playlist 1. If the disc is playing, press STOP to stop playback. 2. Highlight Play Mode and press OK (the Play Mode nrenu appears). 3. Highlight Edit Program and press OK (the Edit Program screen appears). 4. Highlight the item in the playlist you want to delete. 5. Highlight Delete, and press OK. 6. When you've rearranged the program list and/or The DVD player main menu appears. deleted all the tracks necessary, press OK.
Playing How are three ways • Press STOP • Go to the Repeat • Eject the disc. to cancel The IntroScan feature that's 1. Press 2. Highlight icon system on many plays If you the IntroScan want and select the first ten seconds car radios). INFO on the remote The current • in the Info Display Off TM • After the IntroScan • Repeat: twice. Using IntroScan 3 CDs to Cancel Repeat There Chapter Audio or the front of the player icon.
Playing Audio CDs The Bookmark Feature The bookmark I_ature lets you mark a p(_int on the disc that you can go to quickly. "/ou can store up lo (_ I_()kmai'ks per disc When you (tlrn the player off or r_.nlove the2
Playing Audio CDs Clearing a Bookmark The booknlarks are cleared each time a disc is rem()ved fl-onl the p]ayc't or when the p(_\vc, r is turned off, If you \\'ant to clear a I)ooklllarl-; \_ililc tile disc is playing: 1, Press INFO on Ihe rellll)l12i11 the 1]()111 (if lilt' 2. ffighlight the Bo+Jkmark icon and press ()K, 3.
This page left intentionally blank.
Chapter Playing Chapter MP3 4 Files Overview: • What is MP3? • Using the Info Display • The MP3 Display • Selecting a Play Mode • Using the Program Play Feature • The Repeat Feature • Using IntroScan • The MP3 Screen Saver Changing Entertainment. Again.
Playing MP3 Files What is MP3? MP3 is a format for storing digital audio. An audio CD-quality song can be compressed format with very little loss of quality, while taking up much less space. into MP3 CD-R or a CD-RW discs that have been encoded in MP3 format can be played on your DVD player. In this manual, CD-R and CD-RW discs will be referred to as MP3 discs. MP3 files, or songs, are referred to as titles.
Playing MP3 Files Using the Info Display '['(t _I<(.'ess die playel lhe Info I)i_pla_ x_Idle ;ll_ The hdo I)i_ptay :ll_p_.':ll', I'UpIC_Ullt_'d icon ]]a_h the II()I11Ill h\ :Ill _I_I[[IIL' lllu Time I_1)11 "lit _1__c,'s-, lhal Ilu (.all _.[P_ di'_< a¢ rl!,,,, :1 _L':IILIr_'. At l¢.'5N_'d holll i" Ifla\in_, Ihl.. (lip ill ptc_ lhe Ll'_' Ih_.' alIi_\% I}1_' ()11%( [Nl:t) :_cIL'el_ htlltOll_ l(,C.,ll Inh_ iin lhc 1"_1_II i!f (111 thc ])i>pl:l,. iuII/O[_.' (ll [h_.
Playing MP3 Files Using the Time Display The Clock part of the Info l)isplay shows tile cun'ent title time, Press INFO to clear the screen. Note: 7"0 see lbe h{/b Dt_'plr(l' tebile plc(t,ittg MP3 CDs, ),ou it tr_its 17deo Dqmt Cl._aHmq. For more it{ft.'marion see Chgqger 1. Selecting 111HSI tilth Oil yottr 7M alld lttHe about the TI'_" Video l_q_ttl Channel, a Title Prc.ss PI.AY to begin playl_ack.
Playing Using the Program Creating "['oLIS()the MP3 Files Play Feature a Program Program /qc(l'opllon, die tides on the dis( _otI tlm'q ClCatc a 1)lOg[';LIll IislIo SOL lhc (rider hl \\hi_h VOLl X\;LIII to pl;l_ Creating I a Program List for an MP3 Disc IIthe dis
Playing Editing Files a Program Deleting "111 dc'lt'k' IVlP3 Titles rifle', high/ Ihc I_la_ Ii',l: I II Ill,.' di_,t i_, iiI;l_ N/_. 2 Ili_hli,,4]ll /'hi1 I ligh]ighl I:}h!/_qcr{sm I [[iR]lli_}ll lilt _, Iligll[i_l_t /,_q_,h _ :rod pru,_ <, t)E 0 \\hun ',_u ph ".
Playing MP3 Files The Repeat Feature The default mode for the Repeat feature is Off. There are two Repeat options for MP3 discs: • Disc - repeats the disc or playlist (if you've created • Title - repeats the title (song) that is playing one) that is playing To Use Repeat: 1. While a disc is playing, press INFO on the remote Info Display. 2. Highlight the Repeat icon. The text in the text box below the icons will read Repeat Mode.. Off 3.
This page intentionally left blank.
Chapter Playing Chapter Video 5 CDs Overview: • What is Video CD? • The Video CD Disc menu • The Video CD Info Display • Selecting a Specific Track • Selecting a Specific Index • The Repeat Feature • Skipping Tracks VIDEOCD Changing Entertainment.
Playing Video CDs What is a Video CD? Like DVD video discs, Video CDs contain picture and sound content. Video CDs (VCDs) are encoded in a different format. VCDs don't hold as much information as DVD discs and the picture quali W is not as high. VCDs are divided into tracks, and each track is divided into indexes. A track is similar to a title and an index is similar to a chapter.
Playing Video CD Information lnfo 1)isplay top of the screen when a disc is playing)L Each the diftOrent icons contains tnany playl'_ack yotl press tile INF() !_atLue is represcllted features CDs, including skipping Th,., lnlo l appears across tile button on thu remote or file front of the player (while by an iCon. |'se lhe ano\v buttons to move through Index Track When an icon is highlighted, in the text box.
Playing Video CDs Selecting a Specific Track 1. Press INFO on the remote 2. t'st.' the arrow 3 t s,.., the nunabcr button(s) on the remote to c'nter the tlack nttllll_er y(_u want t(, play. (+r tt_,t++ the t.lpidown ano\\' bt.]ttc)ns t¢) sen)l] tlu'ougl+_ the track mLmb,+'rs. When a t++L*\\" track nunlbLr is entered, that track ,.,,'ill hcgin pktying. I)uttons to brirlg up the lnfo on the tcmotc Disp[a,,. to highlight the 7)'ack icon from the Inl(i I)isplay Selecting a Specific Index I.
Playing Video CDs Changing the Audio Channel Output If you are playing a stereo Video CD, you can change the channel output from the player. 1. Press AUDIO (or INFO) on the remote to bring up the Info Display. 2. Highlight the Audio Channel 3. The audio channel choices appear in the text box. Use the up/down arrow keys to scroll through the choices: Stereo, Left, Rightor Mono. Whatever choice is displayed becomes the active choice. icon on the Info Display.
This page intentionally left blank.
Chapter Using Menu Chapter the DVD System 6 Player's Overview: • The DVD Player Menu System • The Play Mode Menu • The Lock Menu • The Display Menu • The Sound Menu • The Languages Menu • The Glossary Changing 65
Using the DVD Player's Menu System The DVD Player Menu System The DVD player menu system is not the same as the disc menu or the lnfo Display• The DVD player menu comes up when there is no disc playing. If you are playing a disc, press STOP on the remote control to stop playhaek and bring up the DVD player menu. Two Types of Menu Items: Path and Action Path Items A path menu item has an arrow on the right side to let you know this item is a path to MORE options.
Using the DVD Player's Menu System The Play Mode Menu The DVI) Players Pit O' Mode menu lets you choose difl_'rent .ll()+le tnenu options, a dis,: must I',c in the l)Vl) player ways to play thu disc, To see 1)l_(I ' Selecting a Play Mode The first three options on a disc it1 tilt.' l'k O' Mode tll+._+l]t.i detemline in what ofdef the" titles or tfacks \\ i[l pla_+ Standard Play: pla_.
Using the How to Create DVD Player's Menu System a Program To use tile l"roj4ran_ IqcO' opcion, you must create a pn)gram list to set the order in which you want the tracks (or titles and chapters on a I)VI) vMeo disc and titles on ;u'J MP3 disc) on the disc to play.
Using Creating a Program the DVD Player's Menu System List for an Audio CD 1. If the disc is playing, press STOP to stop playback (the DV1) player main menu a])pears). 2. Highlight PigO' Mode and press OK (tile PIc(t' Mode menu appears). 3. Highlight Edit t:'rogratn and press OK (the EditPro, qra*_ screen 4. The Track box is highlighted, tse the up/dov,'n arrows or tile number to eilter the track you want to play first. Press OK. 5. Tile highlight will move to the Add box.
Using the DVD Player's Menu Editing a Program Deleting Items from To deh-'t,-' items lrotn tht. If tilt.' disc Main i i I is pktying, metal System the playlisl: press lJho ' Mode.' and 3. 1lighlight Edit 2. 4. appears}. 5. Highlight Dek,W. al'ld 6. X,Vhen yotl To delete an entry from the Program List, highlight it, then highlight Delete and press OK. and press Inserting SIOP to +hip p!:tylxtck (lilt' pit.,_,_, ()N (the /Y
Using the DVD Player's Menu System Autoplay You can set the Autoplay option to play your disc automatically 1. From the DVD player's option and press OK. 2. The Play Mode selections option on/off. 3. Press the left arrow button to return to the previous return to tile main menu. after you close the disc tray. main menu (player ON, no disc playing) highlight the Pl(41'Mode appear. Highlight the Autoplay option and press OK to toggle the menu or press GO BACK,.
Using the DVD Player's Menu System The Lock Menu Tile padlock unlocked. icon on the fi'ont of your DVD player shows whether your player is locked or _ A password Locked: is needed in order to play discs that aren't included in the raling limits you have set. When the player is locked, no one can access the Lock Menu items without entering the password. I_ Unlocked: A password isnt required to play discs. Locking Use the numbers on the remote to enter a password. Your DVD Player 1.
Using the DVD Player's Menu System Editing Your Scene Snip Disc Library The Disc Library consists of a munbered list of titles that have been edited. If no disc title is available, tire title will he DVD. If you play a disc flom tile disc library he player must he locked in order for the edits to take aflk_,ct. How to Edit the Disc Library to lake effect _Remove & Reetore ] 'YOU here 5 discs avnitable fotsce_e snip 1. If the disc is playing, press STOP (the I)\q) Player's main menu appears).
Using the DVD Player's Menu System Rated Titles The Rated Titles option lets you determine how your player ,,viii react to discs tbat contain movies that are rated (in the U.S.A., the Motion Pictures Association of America (MMPA) rates movies as G, PG, PG-13, etc.). You decide which ratings require a password and which ones do a t. Th's system ranks the ratings 1 through 8 in order to accommodate different countries' ratings systems (1 is considered a movie title with tbe least offensive material).
Using Unrated the DVD Player's Menu System Titles Some titles (movies) aren't rated, but may contain material that is unsuitable for children. You decide how you want the Ratings Limits feature of your player to handle these discs: free access or password required. To set the Unrated Titles option: 1. From the Lock Menu, highlight Ratings Limits and press OK. 2. Highlight appear. 3. Use the up/down arrow buttons to highlight your choice: Free Access or Password Required. Press OK.
Using the DVD Player's Menu System The Display Menu The Display tnunu contait-_s the settings that affL'ct how the ft(mt display panel of the DVD player looks dis+. content looks on your TV and how TV Image Tl+u.` ]+V Image Dep,.nding on mc]++u adjusts the th+++ way t_. p__+ of tel€+\ ision a movit_ + appears you have. on yot.i may yot.ir want +I__, Standard to adjt.lst the TVs screen aru ½ × 3 for]flat. settit+_g (also caltcd thu aspect t'alio). l, From the DVI) F'layt.
Using the DVD Player's Menu System Front Display This i_atnre lets you choose 1. Fronl the I)VI) Playc(s OK (the l)is/)l_(l, menu 2. Highlight l')'ottt l)i,q)lt(l' how the n'tain menu appears). front display (player (m your I)VI) Playe_r appears. ON, no disc playing), and press OK. You can choose I)im for Moxies {dims when disc Off |or Movies (no display when Ahvays Bright Always l)im The default pand highlight l)is[)l((l'and prt.
Using the DVD Player's Menu System The Sound Menu The Sound menu [ets you select different connected to your I)VD l)]ayer. sound settings to match the eqtlipn]ent you ha\c' Digital Output Digital OIAtpLI[lets you choose you'\,..' usc'd an optical cabk! which type of digital audio is output frona your D\q) to connect IllLISlselect a digital OUtl_Ut\\ilh this I)olby l)igit:tl: Choose • a I)olbv setting Prc_ Logic.
Using the DVD Player's Menu System TruSurround ® The TmSurround _ option can be used to simulate a six-speaker listening experience on or off. The default is off. To turn the TruSurround + option on: 1. From the Sound menu, highlight the 7)7tSum'ound option and press OK. 2. Highlight 3. Press the left arrow key to return to the previous through two speakers. It can be turned On and press OK. menu.
Using the DVD Player's Set the Distance of the Attached Menu System Speakers Use tile l)i._tance option to set the distam:e of the attached speakers. By setting the distance, you are letting the speakers know how far the sound has to travel to reach your set listening point. This allows the SOLind frol/1 L'ach speaker to reach the listener at the same time. 1. 2. 5peake_ Level Use the 3.
Using the DVD Player's Menu System Enhancements The Enhancements feature compresses the dynamic range (quietest sound to loudest sound) of a disc's soundtrack. For example, action scenes t'night be ve D" loud, while whispered dialog is quiet. The Enhancements feature evens out the range of tile volume by making loud sountls quieter and soft sounds louder. The Enhancenlents feature has three options. • None - No change to tire range.
Using the DVD Player's Menu System The Languages Menu The Languages menu enables you to choose different language options for audio, subtitles, Disc Menu items and DVD player menu items. The default for all language menu items is English. Changing the Player Menus Language Preferences You can choose one of three languages for the text that appears within the on-screen menu system. The default is English.
Using the DVD Player's Menu System Changing the Audio Language Preference The Audio Language movie in. menu enables you to choose which language you want to listen to the 1. From the main menu, highlight and select the Languages option (the Languages displayed). 2. Highlight Audio and press OK (the audio language 3. Highlight tile language you want to use for the audio portion of the discs and press OK. Press the le_ arrow button. The menu appears with your selection shown next to Audio. 4.
Using the DVD Player's Menu System Changing the Subtitle Language Preference The Subtitles menu lets you choose a preferred language for the subtitles. The default is Auto. The Auto preference defaults to the same language that has been set as the audio language preference. To change the subtitle language preference: 1. From the main menu, highlight Languages menu is displayed). 2, From the Languages menu, highlight Subtitles and press OK (the Subtitle menu is displayed).
Using the DVD Player's Menu System Glossary The glossary contains del'initions and in[ornlation ;d_out tilL' lt";tttlt't'S _lnt[ t'tlnlr,)l,, _tl "xt>tll 1)\1) Player. If 1hr. di,,,, is pl _x iJ_. 2. Hixllli_ht +,'/++,+,;<'u_r ;ultl lUU'_-,_ )t,. (tlw /), I St+' lhk' _ttt t;r,_+_,_,", I(')l' \\ l)tLtitJll_,(>il \(+t+I ulk' D\ l) I>l:lx_'l':_ lll,lil_ I//t.'lltl _ih v+,_,,u>:q_Uu;tI'_ I_+tll(+It.' t(l hixhtg i dill<+Ic'131 tt+]lll3. "l'ht.
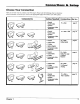
Code Don't Language List forget to press the OK button Code langtmge after you enter Oxle the code. langtmge Code Abkhazian ........................................... 6566 Dutch .................................................. 7876 Japanese .............................................. 7465 Afar ..................................................... 6565 English ................................................ 6978 Javanese .............................................. 7487 Afrikaans .....
Code Don't forget to press the OK button Language Language Code after you enter Code List the code. Lartgtmge Code Occitan ................................................ 7967 Sesotho ............................................... 8384 Thai ..................................................... 8472 Oriya ................................................... 7982 Setswana ............................................. 8478 Tibetan ................................................
This page left intentionally blank.
Chapter Other Chapter 7 Information Overview: • Troubleshooting • Care and Maintenance • The Universal Remote • Front Panel Controls • Front Panel Display • Limited Warranty • Accessory Ordering Information ,ging Entertainment.
Other Information Troubleshooting If you are experiencing product operation problems, please review the troubleshooting to the Limited Watrantyfi)r information on how to obtain repair service. section before you call for service. Refer Player won't work Reset the DVD Player by unplugging the AC power cord and plugging it back in. No Power Plug in the DVD Player. Make sure both ends of the AC power cord are securely plugged into the player and into an AC outlet.
Other Information Troubleshooting Remote control won't If you are using you press Insert • any other new batteries the Remove any obstacles cabinet, the glass remote remote the remote. to reset remote, buttons. you If you're control at a distance between doors be in the wrong the TV, press of no more the remote Remove it. Reinstall than the remote To operate your DVD Player, press DVD on the remote before first, etc. 20 feet.
Other Information Troubleshooting No forward or reverse scan Some discs have se_,lions that pu_hibit rapid scanning, If you're flying to skip tluough the movie is ot_en ploglammed Camera angle cannot Some discs dont or title and chapter skip. lhe warning information and credits at the beginning t_ ptohil_il skipping through h. of a movie, you won't be able to. This part of be changed ha_e the r_lulli-cln_eta arl_t_.s, and sonle discs only have it in certain parts of the movie.
Other Information Handling Cautions • Before connecting other components to this player, be sure to turn all components • Don't move the player while a disc is being played. The disc may get scratched parts may be damaged. • Don't put any container • Be careful not to put your hand into the disc tray. • Don't place anything other than the disc in the disc tray. off. or broken, and the player's internal filled with liquid or any small metal objects on the player.
Other Information Universal Remote ¥CRI DVD ON'OFF VCR_ W _IJX SAI.CAllLE MUTE The universal remote can be programmed to control most brands of remote controllable TVs, VCRs, satellite receivers and cable boxes. The remote is already programmed to control most RCA, PROSCAN, and GE TVs, VCRs, and satellite receivers. ZOOM The AUX button can be programmed to control most brands of an additional remote controllable TV, VCR, satellite receiver, or cable box.
Other If the component 1. 2. Information you want to control does turn off: Press and release REVERSE, then wait 2 seconds. back ON. Repeat this step until the device turns Important To finish, press and hold STOP until the red light on the remote turns off. Direct Entry 1. Turn on the component to be programmed. 2. Look up the brand and code number(s) section. l_0rthe component on the code list in tiffs Tips! You must continue pressing the component button while you enter the code.
Code List Codes Abex ............................................................................. Admiral .............................................................. Adventura ...................................................................... Aiko ............................................................................ Mleron ............................................................................. Amtron .......................................................................... Akai .....
Code VCR Codes Ernemon .............. 2002, 2012, 2014, 2015, 2021, 2024, 2025, ............................ 2026, 2029, 2030, 2032, 2033, 2054, 2035, ...................................... 2036) 2037, 2038, 2039, 2040, 2041, ...................................... 2042, 2044, 2045, 2047, 2065, 2105 .......................................................... 2113, 2116, 2117, 2130 Fisher .......................................................... 2011, 2023, 2048, ..............................................
Other Information Front Panel Controls PLAY button OPEN.CLOSE button SKIP BACK SKIP FWD button / Shuttle button t I I PAUSE button / , _,,,7 , f ON.
Other Information Front Panel Display Display lights listed from left to right (top row first) 1. NO DISC There isn't a disc in the disc tray. 2. DVD Lights when you play a DVD disc. 3. AUDIO Lights when you play an MP3 disc. 4. VIDEO Lights when you play a video CD. 5. CD Lights when you play an audio CD or a video CD. 6. TrrLE 7. PROGRAM The disc is playing the chapters, tracks, indexes 8. CHAPTER 9. PBC Lights when the Video CD disc currently 10. ,_| |_ 11.
Other Information Limited Warranty RCA Digital Video Disc (DVD) Player What your warranty covers: • Any defect in materials or workmanship. For how long after your purchase: • 90 days - Unit exchange, • • 91 days to 1 year - Unit exchange, which includes parts only; you pay the labor. The warranty for rental units begins with the first rental or 45 days from date of shipment whichever comes first. What which includes parts and labor.
Other Option I1: 1. We will send a replacement unit to our exchange Information point. 2. The exchange 3. Take your unit and evidence of purchase date, such as a bill of sale, to the exchange location and you will be provided the new or refurbished unit. Please retain all accessories such as the remote control hand unit. location will notify you of its arrival. 4. If the repairs are covered by your warranty, you will not be billed.
This page left intentionally blank.
Other Accessories and Order Form Information Accessory for Order Your DVD Plug to Optical Plug DV3 (3 ft.) DV6 (6 ft.) Plug to Optical Plug (3 ft.) DV3 515.95 Optical Plug to Optical Plug (6 ft.) DV6 $19.95 Optical Plug to Mini Plug (3 ft.) DV3M 515.95 Optical Plug to Mini Plug (6 ft.) DV6M $19.95 246773 $19.95 5CTV160 $49.95 Control (CRK76DG1) Surge Protector Plug to Mini Plug DV3M (3 ft.) DV6M Qty Optical Remote Optical Player Pa_ No.
Other Information ToPlacean Order Charge your order on your VISA, MasterCard, or Discover Card by filling in below USE YOUR CREDIT IMPORTANT: To place your order by phone, have your Visa, MasterCard or Discover Card ready and call the toll-free number listed below. CARD Copy complete account number from your VISA card Use this number only to place on order for accessory listed on this order form.
This page left intentionally blank.
Index Index Symbols 16 x 9 Widescreen 77 2-channel stereo 80 4 x 3 Letterbox 77 4 x 3 Standard 77 5.1-Channel out audio 16, 20, 80 A A'B Repeat 37, 46, 57 AC IN jack 20 Accessories 103 Analog Output 2-channel 80 5.
Index Front panel display 99 Front panel icons angle 99 locked 99 play direction 99 repeat 99 unlocked 99 Front tray lock feature 75 G Glossary 85 GO BACK*AGAINbutton 25, 41 Grayed out 31, 61 GUIDE button 25 H Handling cautions 93 discs 93 DVD Player 93 How to find your TV's video input channel 23 I Icons 31, 61 Image 4x3 letterbox 76 4x3 standard 76 16x9 widescreen 76 Index selecting, video CD 62 INFO button 25 Info Display Audio CD 44, 52 using 31 video CD 61 lntroScan Audio CDs 47 MP3 discs 58 Install
Index Rated Titles 74 Rating Limits 73 Recalling bookmarks 38, 48 Regional Coding 28 Remote 24 cable box codes 97 component buttons 24, 94 direct entry 95 DVD buttons 24 installing batteries 21 pointing 21 program 94 satellite receiver codes 97 test 94 tour 24 TV codes 96 VCR codes 97 Repeat 37, 46, 57, 62 A-B 37, 46, 57, 62 Chapter 37, 46, 57, 62 Title 37, 46, 57, 62 cancelling 37, 47, 57, 62 Repeat icon 99 REVERSE button 25 S-VIDEO jack 20 SAT-CABLE button 24 Satellite receiver codes 97 Scene Again 41 Sc
Please do not send any products to the Indianapolis address listed in this manual or on the carton. This will only add delays in service for your product. fo_"II'IOMSON CONSUMER ELECTRONICS 10330 North Meridian Indianapolis, Street IN 46290 ©2000 Thomson Consumer Electronics, Inc.