DVD Player User's Manual Changing Entertainment. Again.
Important Information WARNING RISK OF ELECTRIC SHOCK DO NOT OPEN To reduce the risk of electric shock, do not remove cover (or back). No user serviceable parts inside. Refer servicing to qualified personnel. This symbol indicates “dangerous voltage” inside the product that presents a risk of electric shock or personal injury. This symbol indicates important instructions accompanying the product. FCC NOTE (for U.S.A.
Table of Contents Contents Chapter One: Setup and Connections Things to Consider Before You Connect ......................................................................... 6 Protect Against Power Surges ................................................................................... 6 Protect Components from Overheating ................................................................... 6 Position Cables Properly to Avoid Audio Interference ............................................
Table of Contents Chapter Two: Playing DVDs (continued) Changing the Camera Angle ................................................................................... 33 Using the Marker Feature ........................................................................................ 33 Play Mode ....................................................................................................................... 34 Random ......................................................................................
Table of Contents Chapter 4: The DVD Player Menu System (continued) The Preferences Menu .................................................................................................... 52 Setting the Rating .................................................................................................... 53 Dimming the Front Display ...................................................................................... 53 Defaults .......................................................................
This page intentionally left blank.
Chapter 1 Connections & Setup Chapter Overview: • Things to Consider Before You Connect • Choose Your Connection • The Jacks on the Back of the DVD Player • Inserting Batteries in the Remote • How to Find Your TV’s Video Input Channel • How to Move Around the DVD Player’s Menu System • Set the Menu Language • The Remote Control Changing Entertainment. Again.
Connections & Setup Things to Consider Before You Connect Protect Against Power Surges • Connect all components before you plug any of their power cords into the wall outlet. • Turn off the TV and/or components before you connect or disconnect any cables. • Make sure all antennas and cables are properly grounded. Refer to the Important Safeguards sheet packed with your DVD player. Protect Components from Overheating • Don’t block ventilation holes on any of the components.
Connections & Setup Choose Your Connection There are several ways to connect your DVD player. Please use the following chart to determine which connection is best for you. Turn to the appropriate page and connect your DVD player. Components Cables needed • Coaxial Connection Go to...
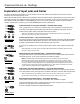
Connections & Setup Explanation of Input Jacks and Cables This section describes the jacks and cables you can use to make connections (the cables aren’t provided with your television). There are several ways to connect components to your TV. Different jacks and cables provide a different level of performance (this book categorizes these levels as Excellent, Very Good, and Good). It’s important to remember, we’re talking about degrees of picture improvement for comparison.
Connections & Setup TV AUDIO OUT R L AUDIO IN S-VIDEO VIDEO IN L ANT IN R TV 3 1 2 DVD PLAYER SUBWOOFER COMPOSITE CENTER 1 Y Y Pb Pb Pr Pr SURROUND OPTICAL 2 COAX. Pb FRONT MIXED R DIGITAL AUDIO OUT L 5.1 CHANNEL AUDIO OUT COMPONENT PROG. SCAN S-VIDEO VIDEO OUT DVD CABLE OR OFF-AIR SIGNAL VCR R L OUT TO TV OUT AUDIO VIDEO IN FROM ANT IN L VCR 4 R DVD Player + TV + VCR 1. Connect the audio cables to the 5.
Connections & Setup TV AUDIO IN S-VIDEO VIDEO IN L ANT IN R TV CABLE OR OFF-AIR SIGNAL 3 DVD PLAYER SUBWOOFER COMPOSITE CENTER 1 Y Y Pb Pb Pr Pr SURROUND OPTICAL 2 COAX. Pb DVD FRONT MIXED R DIGITAL AUDIO OUT L 5.1 CHANNEL AUDIO OUT COMPONENT PROG. SCAN S-VIDEO VIDEO OUT 2 AUDIO/VIDEO RECEIVER DIGITAL IN AUDIO IN 1 m ste Sy tal L R i y olb Dig D Dolby Digital® and DTS® Both Dolby Digital and DTS are audio formats used to record 5.
Connections & Setup DVD Player + TV + Dolby Pro Logic, Dolby Digital or DTS Receiver To Connect the DVD Player 1. Connect the left and right audio cables to your audio/video receiver and to the 5.1 CHANNEL AUDIO OUT L (left – white) and R (right – red) jacks on the back of your DVD Player. 2. If you have a Dolby Digital or DTS receiver, insert an optical digital cable (not provided) to the DIGITAL AUDIO OUT jack on the DVD player to the Digital Input jack on the back of the receiver.
Connections & Setup CABLE OR OFF-AIR SIGNAL TV AUDIO OUT R L AUDIO IN S-VIDEO VIDEO IN L ANT IN R TV 1 2 DVD PLAYER SUBWOOFER COMPOSITE CENTER 1 Y Y Pb Pb Pr Pr SURROUND OPTICAL 2 COAX. Pb FRONT MIXED R DIGITAL AUDIO OUT DVD L 5.1 CHANNEL AUDIO OUT COMPONENT PROG. SCAN S-VIDEO VIDEO OUT DVD Player + TV with Audio/Video Input Jacks 1. Connect the audio cables to the 5.
Connections & Setup TV ANT IN TV 3 RF MODULATOR CABLE OR OFF-AIR SIGNAL ANT IN AUDIO IN r lato RF du Mo VIDEO IN TO TV 1 DVD PLAYER SUBWOOFER 2 COMPOSITE CENTER 1 Y Y Pb Pb Pr Pr SURROUND OPTICAL 2 COAX. Pb FRONT MIXED R DVD DIGITAL AUDIO OUT L 5.1 CHANNEL AUDIO OUT COMPONENT PROG.
Connections & Setup TV AUDIO OUT R L TV AUDIO IN S-VIDEO VIDEO IN L 1 2 DVD PLAYER ANT IN R SUBWOOFER COMPOSITE CENTER 1 Y Y Pb Pb Pr Pr SURROUND OPTICAL 2 COAX. Pb DVD FRONT MIXED R DIGITAL AUDIO OUT L COMPONENT PROG. SCAN 5.
Connections & Setup DVD Player + TV + VCR + Satellite Receiver 1. 2. Connect the audio cables to the 5.1 CHANNEL AUDIO OUT L (left – white) and R (right – red) jacks on the back of your DVD Player, and to the corresponding Audio Input jacks on your TV. Connect the video cable. • Basic video connection – Connect the video cable (yellow) to the COMPOSITE jack on the back of your DVD Player, and to the Video Input jack on your TV.
Connections & Setup The Jacks on the Back of the DVD Player When connecting, make sure you connect Output jacks to Input jacks, Video to Video, Right Audio to Right Audio, etc. SUBWOOFER COMPOSITE CENTER 1 Y Y Pb Pb Pr Pr SURROUND OPTICAL 2 COAX. Pb FRONT MIXED R DIGITAL AUDIO OUT L 5.1 CHANNEL AUDIO OUT COMPONENT PROG.
Connections & Setup PLAY/PAUSE button Disc tray POWER button STOP OPEN/CLOSE button open/close stop skip rev skip fwd power Headphones jack Front panel display Headphones volume SKIP REV button SKIP FWD button Shuttle Front Panel Controls POWER – Turns the player on and off. The ON•OFF indicator lights when the player is on. Disc tray – Press OPEN•CLOSE to open and close the disc tray. OPEN•CLOSE – Press to open and close the disc tray. PLAY/PAUSE – Press to begin playback.
Connections & Setup Install Batteries in the Remote 1. Remove the battery compartment cover on the back of the remote. 2. Insert new batteries. Match the polarities (+ and –) on the batteries with the diagram on the remote. 3. Put the battery compartment cover back on the remote. Important Battery Information • If you’re not going to use the remote for a month or more, be sure to remove the batteries because they can leak and cause damage.
Connections & Setup How to Find Your TV’s Video Input Channel In order to see what’s playing on your DVD recorder, you need to tune your TV to the Video Input Channel that corresponds to the jacks you used to hook up the recorder to the TV. The video channel on TVs varies for different brands and different models. In order for your DVD remote to work, your TV must be set on the correct video input channel. Below are some things to try.
Connections & Setup A Quick Tour of The Remote ON•OFF DVD TV SUBTITLE AUDIO ANGLE MUTE ZOOM You can use this remote to control compatible components. The component buttons are programmed to operate some Proscan, RCA and GE components. The buttons must be programmed to operate other brands of components. (See “Programming the Remote” in chapter 5.
Connections & Setup GO BACK Returns you to the previous menu. ON•OFF DVD TV SUBTITLE AUDIO ANGLE ZOOM GUIDE Accesses the DVD disc guide (if available). INFO Brings up the Info Display. OK/SELECT Begins disc play and selects menu items. MUTE PLAY MODE VOL VOL CH + Arrow buttons Use the arrow buttons (left, right, up, and down) to move through the on-screen menus. You highlight a menu item by pressing the arrow buttons and select a highlighted item by pressing the OK button.
Connections & Setup Programming the Remote to Operate Your TV The remote can be programmed to control most brands of remote controllable TVs. The remote is already programmed to control most RCA, Proscan, and GE TVs. Testing the remote To determine whether the remote needs to be programmed, turn the TV ON, point the remote at the TV, and press the TV button. Then press POWER or CH+ (channel up) or CH- (channel down) to see if the TV responds to the remote commands.
Connections & Setup TV Codes Admiral ............................................................... 1115, 1224 Adventura ..................................................................... 1224 Aiko .............................................................................. 1124 Akai ........................................................... 1063, 1090, 1116 Alba .............................................................................. 1033 Alleron ...............................................
This page intentionally left blank.
Chapter 2 Playing DVDs Chapter Overview: • Regional Coding • Using Different Menus • Loading and Playing a Disc • Using a Disc Menu • Using the On-Screen Info Display • Using the Marker Feature • Disc Playback Features • Playing Video CDs Changing Entertainment. Again.
Playing DVDs Regional Coding Both the DVD player and the discs are coded by region. These regional codes must match in order for the disc to play. If the codes don’t match, the disc won’t play. This player’s code is region 1. Using Different Menus Each disc is programmed with different features. There are three separate menu paths that you can use to access features: • The Disc menu – The Disc menu is part of each disc and is separate from the DVD player’s menu.
Playing DVDs To Load and Play a Disc CC Turn on the TV and your DVD Player (press ON•OFF on the player or press the POWER button on the remote control). t CCaattcchh UU an't pp 1. Press the OPEN•CLOSE button on the front of the DVD Player or the remote. The disc tray opens. 2. Place a disc gently into the tray with the disc’s label facing up (double-sided discs have content on both sides, so you can place either side up). 3. Press the OPEN•CLOSE or PLAY button. The disc tray closes.
Playing DVDs 2. Press the up and down arrow buttons to highlight the section of the disc menu you want to choose, and press OK. In the example on the left, Language has been selected. 3. Press the up and down arrows to select a language, and press OK. 4. Press MENU to resume playback. In this example, The Language setting is highlighted. To see language options, press OK on the remote. Note: Any settings you change on the disc menu only override the settings in the DVD Player’s menu temporarily.
Playing DVDs Using the On-Screen Info Display The on-screen Info Display contains many playback features. To see the Info Display, press the INFO button on the remote while a disc is playing. The Info Display appears across the top of the screen. Each feature is illustrated with an icon. Use the arrow buttons to move through the different icons in the Info Display.
Playing DVDs Time Display This feature displays the audio/video time. For DVD discs, the time displayed refers to the current title time. For Audio CDs, it refers to the current track time. For DVD video discs, the Time Display also acts as a Time Search feature. This lets you go to a particular scene in a movie by entering the time that scene is played. For example, if you like a particular scene in a movie, you can enter the elapsed time the scene plays and skip right to it.
Playing DVDs Turning Subtitles On and Off By default, subtitles are off. To turn subtitles on: 1. While the disc is playing, press INFO on the remote. 2. Highlight the Subtitles icon. Press the down arrow to turn subtitles on. When subtitles are on, the text box below the icons will display the current subtitle language. 3. To turn subtitles off, press the up or down arrow button to scroll to the Off option.
Playing DVDs Using the Repeat Feature The default mode for the Repeat feature is Off. There are three Repeat options: • Title – repeats the title that is playing • Chapter – repeats the chapter that is playing • A•B – Setting the beginning (point A) and the end (point B) to make this part of the movie play repeatedly. Repeating Titles or Chapters 1. While a disc is playing, press INFO on the remote to bring up the Info Display. 2. Highlight the Repeat icon.
Playing DVDs Using the Power-On Bookmark Feature The Marker feature lets you mark a point on the disc so that when you turn the player off and back on (without having ejected the disc), playback will start at the point you marked. Storing the Marker During DVD Playback 1. Press the INFO button on the remote (the info display will appear). 2. Use the right/left arrow buttons to highlight the Marker icon. Press OK. 3.
Playing DVDs Program The Program playback option allows you to enter the order you want chapters to play in. Program 11 1. Press STOP to stop playback. 2. Press PLAY MODE on the remote control (the Play Mode options appear). 3. Use the arrow buttons to highlight the Program option. 4. Press OK. The Program screen appears. The grid on the left is where you will list the chapters in the order you want them to play. The order moves from the top row, left to right. 5.
Playing DVDs Disc Playback Features You can use the remote control to activate disc playback features. Playback features aren’t usually available during the opening credits of a movie.. If a playback feature isn’t appears on the screen when you press that button. available, the invalid symbol Fast Motion Playback (Picture Scan) To scan through the disc when you’re playing it, use the Picture Scan feature. 1. Press the REVERSE or FORWARD button on the remote when you’re playing a disc. 2.
This page intentionally left blank.
Chapter 3 Playing Audio CDs and MP3 Discs Section Overview: • Using the Info Display • Selecting a Specific Track • Using the Repeat Feature • IntroScan • Playing MP3 Discs Changing Entertainment. Again.
Playing Audio CDs and MP3 Discs Using the Info Display Your DVD player has many of the same features as an audio CD player. The player’s on-screen Info Display lets you choose various playback features. This section explains how to play audio CDs in your DVD player and how to use the player’s features. For instructions on loading and playing your CDs, see Chapter 2. To access the Info Display while the CD is playing, press INFO on the remote. The Info Display appears across the top of the screen.
Playing Audio CDs and MP3 Discs Selecting a Specific Track 1. Press INFO on the remote (the Info Display appears). 2. Highlight the Track icon. 3. Use the number buttons on the remote to enter the track number you want to play or use the up/down arrow buttons to scroll through the track numbers. Using the Repeat Feature The default mode for the Repeat feature is Off.
Playing Audio CDs and MP3 Discs IntroScan The IntroScan feature plays the first few seconds of each track on the disc. 1. While a disc is playing, press INFO on the remote to bring up the Info Display. 2. Use the arrow buttons to highlight the IntroScan icon. 3. Press OK. The first few seconds of each track will play. To stop IntroScan, follow the instructions in the Info Display. Play Mode Discs are formatted to play tracks in a certain (standard) order.
Playing Audio CDs and MP3 Discs Playing MP3 Discs What is MP3? MP3 is a format for storing digital audio. An audio CD-quality song can be compressed into MP3 format with very little loss of quality, while taking up much less space. CD-R or a CD-RW discs that have been encoded in MP3 format can be played on your DVD player. In this manual, CD-R and CD-RW discs will be referred to as MP3 discs. MP3 files, or songs, are referred to as titles.
Playing Audio CDs and MP3 Discs The MP3 Display MP3 Menu ROOT GO BACK BAMBEE-ON 1 PLAY MODE: BARDOT 2 DOGSTAR-H 3 FASTBALL- 4 JA RULE-R 5 MP3 discs contain individual songs that can be organized into folders. When you play an MP3 disc, the MP3 screen appears. The Root folder is displayed on the left side of the screen. The contents of that folder are shown on the right side of the screen. The contents can either be songs or more folders (subdirectories).
Chapter 5 Using the DVD Player’s Menu System Chapter Overview: • The DVD Player Menu • The Main Menu • The Display Menu • The Sound Menu • The Languages Menu • The Preferences Menu Changing Entertainment. Again.
Using the DVD’s Menu System The DVD Player Menu System The DVD player menu system is not the same as the disc menu or the Info Display. The DVD player menu comes up when there is no disc playing. If you are playing a disc, press STOP on the remote control to stop playback and bring up the DVD player menu. Path Items A path menu item has an arrow on the right side to let you know this item is a path to MORE options. To see the path menu options, highlight the path menu item and press OK.
Using the DVD’s Menu System The Display Menu The Display menu contains the settings that affect how disc content looks on your TV and how the front panel of the DVD player looks. Image The Image option adjusts the way a movie appears on your TV. Standard TVs are 4 x 3 format. Depending on the type of television you have, you may want to adjust the screen setting (also called the aspect ratio). 4 x 3 Pan & Scan – Choose this setting if you want the movie to fill the entire screen of your TV.
Using the DVD’s Menu System Selecting the Video Output The Video Out option to select the setting that corresponds to which video out put you have connected. If you have connected the player using S-Video, select the Composite/S-Vid. option. If you used Component Y,PB, PR) select the Component option. 1. With the player on (no disc playing), press MENU (the main menu appears). 2. Use the up/down arrow buttons to highlight the Display option.
Using the DVD’s Menu System The Sound Menu The Sound menu lets you select different sound settings to match the equipment you have connected to your DVD Player. Digital Output If you have a receiver with a digital signal input, use this feature to select your player’s type of digital output. Display 1. With the player on (no disc playing), press MENU (the main menu appears). 2. Use the up/down arrow buttons to highlight the Sound option.
Using the DVD’s Menu System Selecting the Speakers Use the Speakers option in the Sound menu to select the speakers you have hooked up. 1. With the player on (no disc playing), press MENU (the main menu appears). 2. Use the up/down arrow buttons to highlight the Sound option. Press the right arrow button (the sound choices appear on the right). 3. Use the up/down arrows to highlight the Speaker option. Press the right arrow button (the Speaker options appear on the right). 4.
Using the DVD’s Menu System Set the Distance of the Attached Speakers Use the Distance option to set the distance of the attached speakers. By setting the distance, you are letting the speakers know how far the sound has to travel to reach your set listening point. This allows the sound from each speaker to reach the listener at the same time. 1 Center 0 ft 2 Rear Set the distance/delay Center Rear Set center delay to 6 ft 6 1.
Using the DVD’s Menu System Language Options Changing the Audio Language Preference The Audio Language menu enables you to choose which language you want to listen to the movie in. 1. With the player on (no disc playing), press MENU (the main menu appears). 2. Use the up/down arrow buttons to highlight the Language option. Press the right arrow button (the language choices appear on the right). 3. Use the up/down arrows to highlight the Audio option.
Using the DVD’s Menu System Creating a Password and Setting Ratings The Rating feature is a system sort of like movie ratings. It works with DVD discs that have been assigned a rating. This helps you control the types of DVDs that your family watches. Once you have set the ratings limit, you can lock the player so that a password is required to play discs with a rating over the limit you’ve set. Note: The player alerts you when you try to play a movie with a rating that exceeds the limit you’ve set.
Using the DVD’s Menu System The Preferences Menu The Preferences menu is only available when there is no disc in the player. If the Preferences menu is grayed out, remove the disc from the tray. Setting the Rating Rated Titles The Ratings option lets you determine how your player will react to discs that contain movies that are rated (in the U.S.A., the Motion Pictures Association of America (MMPA) rates movies as G, PG, PG-13, etc.). You decide which ratings require a password and which ones don’t.
Using the DVD’s Menu System Dimming the Front Display This feature lets you to choose how the front panel display on your DVD Player appears. There are three options: • Bright • Normal • Off The default is Bright. Bright Normal 1. With the player on (no disc playing), press MENU (the main menu appears). 2. Use the up/down arrow buttons to highlight the Preferences option. Press the right arrow button (the preferences appear on the right). 3.
This page intentionally left blank.
Chapter 6 Other Information Chapter Overview: • Troubleshooting • Care and Maintenance • Limited Warranty Changing Entertainment. Again.
` Other Information How to Resolve Product Performance Problems If you are experiencing product operation problems, please review the troubleshooting section before you call for service. Refer to the Limited Warranty for information on how to obtain repair service. Troubleshooting Player won’t work • Reset the DVD Player by unplugging the AC power cord and plugging it back in. No Power • Plug in the DVD Player.
Other Information Troubleshooting • Insert new batteries in the remote. • Operate the remote control at a distance of no more than 20 feet. • Remove any obstacles between the remote and the DVD Player or other component. If your DVD Player is in an entertainment cabinet, the glass doors may be obstructing the remote control from operating the unit. Open the doors. • Reset the remote.
` Other Information Troubleshooting (continued from previous page) No forward or reverse scan • Some discs have sections that prohibit rapid scanning, or title and chapter skip. • If you’re trying to skip through the warning information and credits at the beginning of a movie, you won’t be able to. This part of the movie is often programmed to prohibit skipping through it.
Other Information Handling Cautions • Before connecting other components to this player, be sure to turn all components off. • Don’t move the player while a disc is being played. The disc may get scratched or broken, and the player’s internal parts may be damaged. • Don’t put any container filled with liquid or any small metal objects on the player. • Be careful not to put your hand into the disc tray. • Don’t place anything other than the disc in the disc tray.
` Other Information Limited Warranty What your warranty covers: • Defect in materials or workmanship. For how long after your purchase: • • • 90 days from date of purchase - Unit exchange, which includes parts and labor. 91 days to 1 year from date of purchase - Unit exchange, which includes parts only; you pay the labor. The warranty for rental units begins with the first rental or 45 days from date of shipment to the rental firm, whichever comes first.
Other Information • • • • • Write the SR number on the outside of the carton used to return the unit. Make sure you insure your shipment in case of damage or loss. Carefully pack the unit using the original box and packing material if possible. Please retain all accessories that were included with your unit such as the remote control hand unit. Include with the shipment: 1. Evidence of purchase date, such as a bill of sale, to verify your unit’s warranty eligibility. 2.
This page left intentionally blank.
Other Information Accessory Order Form for Your DVD Player Accessories and Order Form Optical Plug to Optical Plug DV3 (3 ft.) DV6 (6 ft.) Description Part No. Price Optical Plug to Optical Plug (3 ft.) DV3 $15.95 Optical Plug to Optical Plug (6 ft.) DV6 $19.95 Optical Plug to Mini Plug (3 ft.) DV3M $15.95 Optical Plug to Mini Plug (6 ft.) DV6M $19.95 Remote Control (CRK16F1) 246772 $19.95 Surge Protector SCTV160 $49.95 Qty Optical Plug to Mini Plug DV3M (3 ft.) DV6M (6 ft.
` Other Information To Place an Order Charge your order on your VISA, MasterCard, or Discover Card by filling in below To place your order by phone, have your Visa, MasterCard or Discover Card ready and call the toll-free number listed below. USE YOUR CREDIT CARD ® IMPORTANT: Copy complete account number from your VISA card Use this number only to place on order for accessory items listed on this order form.
Index Symbols D J 4 x 3 Pan & Scan 45 4 x 3 Letterbox 45 16 x 9 Wide 45 Defaults 53 DIGITAL AUDIO OUT jack 8, 10 Digital output 47 Disc loading and playing 26 menu 26 Disc menu 27 Disc tray 17 Discs cleaning 59 digital video discs 27 handling 59 types you can play 26 types you can't play 26 Display menu 44 Dolby Digital 11 Dolby Digital receiver 8 Dolby Pro Logic 11 DTS 10 DVD Limits menu rated titles 52 DVD remote button 20 Jacks 8 A A•B Repeat 32, 39 Accessories 63 Angle, camera 33 Aspect ratio 45 A
Ìndex R S Random play mode 33 Rated Titles 52 Rating Limits 52 RCA-type cables 8 Remote control 20 component buttons 20 installing batteries 18 pointing 18 programming 22 TV codes 23 Repeat A•B 32, 39 cancelling 32, 39 REPEAT button 20 REVERSE button 20 SATELLITE IN jack 8 Selecting a chapter 30 Selecting play modes 31 Slow motion playback 35 Speaker distance 49 Speaker setup 48 Stereo 49 STOP button 21 SUBTITLE button 20 Subtitle language 31 Surround 49 66 T Time display 30 Title 30 Troubleshooting 5
visit us at www.rca.com Please do not send any products to the Indianapolis address listed in this manual or on the carton. This will only add delays in service for your product. Thomson multimedia Inc. 10330 North Meridian Street Indianapolis, IN 46290 ©2001 Thomson multimedia Inc. Trademark(s)® Registered Marca(s) Registrada(s) Printed in P.R.C.