RLED6515-UHD 65
4.3.Customizing theTIME Settings 4.4.Customizing the SETUP Settings 4.5.Customizing the LOCK Settings 4.6.Customizing the CHANNEL Settings TV Base Stand assemble PC Mode 20 21 24 27 30 31 33 Initial Setup 3.1. Initial Installation 3.2. Audio/Video Source Selection 3.3. DTV Mode Operations SETTINGS 4.1.Customizing the PICTURE Settings 4.2.
TV Base Stand assemble Short Short R L Long Long Panel side Screws(3) 4*18BMH Screws(3) 4*18BMH 3.Mounting on the wall This unit is VESA-complian,and is designed to be wall-mounted with a VESA-compliant 15.75"x15.75"(400mmx400mm)mounting kit designde for flat-panel TVs(not supplied).Mount this unit according to the instructions included in the monting kit. Length of screw should not exceed 12 mm NOTE Remove the base stand before mounting the unit on the wall.
0.5A 5V USB2/USB1(For Service) Headphone OPTICAL RF AUDIO OUT HDMI3/MHL CH+ VOL+ AC 100-120V~60Hz L AUDIO R VIDEO/Y MENU SOURCE POWER 1. USB (For Service) 8. 2. 9. 3. 4. OPTICAL 10. 5. 11. 6. AUDIO OUT: Output Audio L / R (left / right) 7.
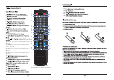
1. 2. sound from speakers 3. 4. ASPECT: Selects the screen size 5. 6. 7. 8. 9. 10. 11. 1 3 5 2 4 6 7 8 10 11 13 9 15 16 17 18 12 14 19 12. 20 13. PC: Press to switch to VGA signal source directly. 14. HDMI: Press to switch to HDMI signal source directly. 15. TV: Press to switch to TV signal source directly. 16. AV: Press to switch to AV signal source directly. 17. 21 22 23 24 26 27 25 28 18. 19. 20. 21. 22. 23. Universal Remote Code:20DF (Universal Rmote Control is not included) 24.
adaptor L AUDIO R VIDEO/Y Pb Pr VGA PC AUDIO Head AC 100-120V~60Hz HDMI3/MHL AUDIO OUT RF OPTICAL AC 100-120V~60Hz L AUDIO R VIDEO/Y Pb Pr VGA PC AUDIO
AC 100-120V~60Hz HDMI3/MHL AUDIO OUT RF Headphone OPTICAL L AUDIO R VIDEO/Y Pb Pr USB2/USB1(For Service) 5V 0.5A Note:Optical output VIDEO/Y Pb Pr VGA PC AUDIO OPTICAL R RF AUDIO AUDIO OUT L HDMI3/MHL AC 100-120V~60Hz HDMI3/MHL AUDIO OUT RF OPTICAL Headphone USB2/USB1(For Service) 5V 0.
4.1. Customizing the PICTURE 3. Initial Setup Select TV source for example. (Press SOURCE bu on to select TV mode) 1. Press the POWER bu on to turn the LED TV on. 2. Press the MENU bu on on the remote control to display the Main menu, and use the Ż/Ź to select the PICTURE. , use the Ż/Ź to 3. Use the Ÿ/ź bu ons to highlight an individual PICTURE and press the MENU to exit the menu. change the se 3.1.
4.2. Customizing the SOUND 4.3. Customizing the TIME Se ngs Select TV source for example. (Press SOURCE bu on to select TV mode) 1. Press the POWER bu on to turn the LED TV on. 2. Press the MENU bu on on the remote control to display the Main menu, and use the Ż/Ź to select the SOUND. 3. Use the Ÿ/ź bu ons to highlight an individual SOUND , use the Ż/Ź to change the se and press the MENU to exit the menu. Select TV source for example. (Press SOURCE bu on to select TV mode) 1.
4.4. Customizing the SETUP Se ngs Select TV source for example. (Press SOUCE bu on to select TV mode) 1. Press the POWER bu on to turn the LED TV on. 2. Press the MENU bu on on the remote control to display the Main menu, and use the Ż/Ź bu ons to select the SETUP. 3. Use the Ÿ/ź bu ons to highlight an individual SETUP , use the Ż/Ź to change the se and press the MENU to exit.
4.5. Customizing the LOCK Se ngs Select TV source for example. (Press SOURCE bu on to select TV mode) 1. Press the POWER bu on to turn the LED TV on. 2. Press the MENU bu on on the remote control to display the Main menu, and use the Ż/Ź bu ons to select the LOCK. 3. Use the ź bu on to highlight “Enter Password” item, use the numeric keys to input 4-digital ngs, press menu password. A er you that, the screen will display the junior menu. A er to exit. NOTE: The factory password is 0000.
U^ ZĂƟŶŐ Use the ź bu on to highlight the “U^ ZĂƟŶŐ͟ ŝƚĞŵ͕ ƚŚĞŶ ƉƌĞƐƐ ƚŚĞ Ź ďƵƩŽŶ entĞƌ into the following ŵenu. ĂŶĂĚĂ ZĂƟŶŐ Use theź bu on to highlight the “CanadĂ ZĂƟŶŐ͟ ŝƚĞŵ͕ ƚŚĞŶ ƉƌĞƐƐ Ź ďƵƩŽŶ ĞŶƚĞƌ ŝŶƚŽ ƚŚĞ ĨŽůůŽǁŝŶŐ ŵĞŶƵ͘ Exit TV Use the ź bu on to highlight the “TV͟ itĞŵ͕ then Ɖƌess Ź bu on to entĞƌ into the following ŵĞŶƵ͘ ĂŶĂda ŶŐlish Use the Ż/Ź bu ons to select ĂŵŽŶŐ͗ K&&͕ C͕ ϴн͕ G͕ PG͕ 14+ and 18+.
4.6. Customizing the CHANNEL Se ngs Select TV source for example. (Press SOUCE bu on to select TV mode) 1. Press the POWER bu on to turn the LED TV on. 2. Press the MENU bu on on the remote control to display the Main menu, and use the Ż/Ź bu ons to select the CHANNEL. , use the Ż/Ź to 3. Use the Ÿ/ź bu ons to highlight an individual CHANNEL change the se and press the MENU to exit. Exit The receivable channels will be stored automa cally. When searching channels, press MENU to stop.
5. PC Mode Se ng up your PC so ware (based on Windows XP) The Windows display-se ngs for a typical computer are shown below. But the actual screen on your PC will probably be diīerent, depending upon your par cular version of Windows and your par cular video card. But even if your actual screen looks diīerent, the same, basic set-up informa on will apply in almost all cases. Exit Use the Ÿ/ź bu ons to highlight the desired item, then press OK bu on to show or hide the highlighted channel. Channel No.
6 TV TV TV
7 RLED6515-UHD 3840x2160 350 5000:1 6ms 220W AC 100-120V~ 60Hz Audio output Stereo R / L Headphones Audio Output OPTICAL Digital Audio Output USB(For service) and 7