EN
EN CAUTION RISK OF ELECTRIC SHOCK DO NOT OPEN THE LIGHTNING FLASH AND ARROWHEAD WITHIN THE TRIANGLE IS A WA R N I N G S I G N ALERTING YOU OF "DANGEROUS VOLTAGE" INSIDE THE PRODUCT. CAUTION: TO REDUCE THE RISK OF ELECTRIC SHOCK, D O N OT R E M OV E C OV E R ( O R BAC K ) . N O U S E R S E RV I C E A B L E PA RT S I N S I D E . R E F E R S E RV I C I N G T O Q UA L I F I E D S E RV I C E PERSONNEL.
FCC Information FCC Information This device complies with Part 15 of the FCC Rules. Operation is subject to the following two conditions: (1) This device may not cause harmful interference, and (2) this device must accept any interference received, including interference that may cause undesired operation. In accordance with FCC requirements, changes or modifications not expressly approved by Thomson Inc. could void the user’s authority to operate this product.
Before you begin EN This clock radio is equipped with a memory holding system that can be powered with 9V battery (not included). The power failure protection circuit will not operate unless battery is installed. When normal household power is interrupted, or AC cord is unplugged, the battery will power the clock radio to keep track of time and alarm settings programmed into the memory.
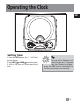
Operating the Clock EN SNOOZE Setting time: 1. Press the SET button, the “ : “ will flash on the display . or FWD to set the time. 2. Press REV 3. AM or PM icon will show beside the time. Tip: No icon will be flashing if all selectors are set, if you see any icon flashing on display, press the SET button repeatedly to confirm everything is set correctly.
Operating the Radio EN FM AM TUNING AM/FM Tuning the Stations Antennas 1. Press ON to turn on the radio. 2. Slide the FM/AM switch to the desired broadcast band. 3. Turn the TUNING knob to select a station. 4. Press OFF to turn off the radio. AM Antenna - A built-in ferrite rod antenna eliminates the need for an outside antenna for AM reception. Rotating the unit slightly may improve the reception of distant AM stations. Built-In AFC The Built In Automatic Frequency Control (AFC) works only on FM.
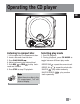
Operating the CD player EN SNOOZE Listening to compact disc Selecting play mode 1. Lift to open the CD compartment door. 2. Insert a disc and close the door. 3. Press PLAY/PAUSE . 4. Adjust volume to your desired level. or FWD to skip back5. Press REV ward and forward. 6. Press STOP to stop CD playback. 1. Start CD playback. 2. During playback, press CD MODE to toggle between different play mode. Note: REPEAT ONE - repeat the current track. - repeat the whole disc.
Operating the Alarm EN Setting the WAKE Time Waking by Selected Source Your digital clock operates on a 12 hour standard mechanism. You may be woken up by WAKE or CD . 1. Press the SET button until WAKE 1 / WAKE 2 icon is blinking. 2. Press REV or FWD to set the wake time. The time decrements or increments will follow by a faster rate when you press or FWD . and hold either REV 3. After the WAKE time is set, press SET repeatedly until no icon is blinking. 1. Select an AM or FM station. 2.
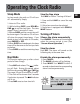
Operating the Clock Radio Sleep Mode In sleep mode, the radio or CD will turn off automatically. Simply: 1. Listen to CD or radio. 2. While holding SLEEP, press REV or to set the sleep time. The time FWD range is from 1 minute to 2 hours. 3. Release SLEEP and the current time will be shown again. The radio or CD will turn off when the preset time elapses. If you decide to turn off the radio or CD sooner, press SNOOZE or OFF. 4.
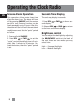
Operating the Clock Radio EN Snooze Alarm Operation Seconds Time Display This operation allows extra sleep time after the alarm is on. The alarm will turn off by pressing SNOOZE until the snooze period is over. Snooze function can be used repeatedly up to 2 hours. After this, the alarm will turn off until the next alarm conditions are met. Set the “quiet” period as follow: The unit may display in seconds. 1. Press and hold SNOOZE. or FWD to set the 2.
U.S. Limited Warranty What your warranty covers: • Defects in materials or workmanship. EN For how long after your purchase: • One year from date of purchase. The warranty period for rental units begins with the first rental or 45 days from date of shipment to the rental firm, whichever comes first. What we will do: • Provide you with a new, or at our option, a refurbished unit. The exchange unit is under warranty for the remainder of the original product’s warranty period.
U.S. Limited Warranty EN Limitation of Warranty: • THE WARRANTY STATED ABOVE IS THE ONLY WARRANTY APPLICABLE TO THIS PRODUCT. ALL OTHER WARRANTIES, EXPRESS OR IMPLIED (INCLUDING ALL IMPLIED WARRANTIES OF MERCHANTABILITY OR FITNESS FOR A PARTICULAR PURPOSE) ARE HEREBY DISCLAIMED. NO VERBAL OR WRITTEN INFORMATION GIVEN BY THOMSON INC., ITS AGENTS OR EMPLOYEES SHALL CREATE A GUARANTY OR IN ANY WAY INCREASE THE SCOPE OF THIS WARRANTY.
Canadian Limited Warranty Thomson Multimedia Ltd. warrants to the purchaser or gift recipient that if any manufacturing defect becomes apparent in this product within 1 year from the original date of purchase, it will be replaced free of charge, including return transportation. This warranty does not include damage to the product resulting from accidents, misuse or leaking batteries. Should your product not perform properly during the warranty period, either: 1.