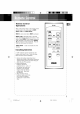
RCA Model: RS 1290
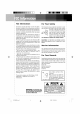
÷ FCC Information For Your This device complies with Part 15 of the FCCRules. Operation is subject to the following two conditions: (1) This device may not cause harmful interference, and (2) this device must accept any interference received, including interference that may cause undesired operation. In accordance with FCC requirements, changes or modifications not expressly approved by Thomson multimedia Inc. could void the user's authority to operate this product.
FCC Information inside cover Installation ................. .......................... 1 Tape Deck .................................. 5 CD Player ................................... 6 Troubleshooting 7 Tips ............... CD Micro System ................ 2 Maintenance Remote 3 More 4 Limited 4 Limited Warranty (Canada) ............................................. 11-12 Control Time Settings .................. ...................... Tuner ....................................
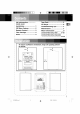
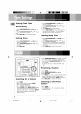
CD - switches to CD mode PHONES - connects headphones. Sound output will then be through the headphones instead of the speakers. POWER/STANDBY - turns on/off the unit. o i Remember to unplug the power cord from the power outlet if you are not going to use the system for some time.
Remote Control RS1290 Operations Most of the function keys on the remote control can be found on the unit except for MUTE, REPEAT l/ALL and TIMER ON/OFF. eomw STANDBY MUTE-the unit is silent when MUTE is activated. p..n. REPEAT llALL-a particular track or all tracks plays repeatedly by selecting this function, Press once to select REPEAT 1 for playing a particular track repeatedly. Presstwice to select REPEAT ALL for playing all tracks repeatedly. Press the third time to de-select this function. .
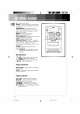
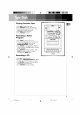
Setting Manual Clock Time 4. Press CLOCK/TIMER/SLEEP until OFF (timer off) icon is shown. 5. PressTUNINGISKIPISEARCH _4 or _H to set the time. Setting 1. Press CLOCK/TIMER/SLEEP shown. 2. Press TUNINGISKIPISEARCH until 6. Press PROG./SET to confirm setting. 7. Press TIMER ON/OFF at the remote control to turn on the time function. The red indicator CLK icon is M4 or _" to set wilt light when the timer function is on. time. 3. Press PROG.ISET Setting to confirm the seLLing. Setting Timer 1.
Playing Cassette Tape m 1. PressTAPE to select tape mode. 2. PressSTOPIEJECTto open the deck door. 3. Load a cassette tape into the deck. Then, lightly press the deck door closed. 4. PressPLAY to start tape play. 5. PressSTOPIEJECTto slop. Recording Program I' _T_y @ O O I"1"1-1-1_ a Radio o • ml _ euenw_ 1. PressTUNER to select tuner mode. L 2. Tune to the station you desire to record by pressing either PRESET ,,_ or v or TUNING/SKIPISEARCH _ or _H J 3. PressRECORD to start recording.
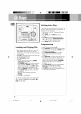
Setting O o Play Intro Play lets you enjoy the CD tracks for 10 seconds. When the last track has played for 10 seconds, the Intro Play stops. 1. Follow step 1 and 2 of "Loading and Playing CDs" above. 2. Press INTRO and the INTRO icon will be shown, @ _LE Intro i -,i- i-i-J: L lo / 3. Press PLAY to start playback form the first track. You may press TUNINGISKIP/SEARCH _'_ or _H to select a particular track. 4. Press iNTRO again to exit intro play. o Programming Loading ÷ and Playing CDs 1.
Problem Solution Problem Solution System will not turn on Check power cord for a secure connection. Distorted or Inspect the tape heads and clean and demagnetize. noisy tape recordings Unplug the unit for a moment, and then plug into power source again. Check the outlet by plugging in another device. No sound Increase the volume setting. Check connection to speakers. Check that you have selected the appropriate function: CD, TAPE, TUNER. Poor radio Check antenna connection. Move antenna.
CD Lens Care Important Information When your CD lens gets dirty it can also cause the system to output poor sound quality. To clean the lens you will need to purchase a CD lens cleaner which can maintain the output sound quality of your system. For instructions on cleaning the CD lens, refer to the ones accompanying the lens cleaner. • Remove the batteries to avoid leakage if you do not use your remote control for more than one month.
RCA AUDIO SYSTEMS LIMITED WARRANTY What your warranty covers: • Defects in materials or workmanship. For how long after your purchase: • One year from date of purchase for labor and parts • The warranty period for rental units begins with the first rental or 45 days from date of shipment to the rental firm, whichever comes first. What we will do: • Pay any Authorized RCA Audio Service Center the labor charges to repair your unit.
Limitation of Warranty: • THE WARRANTY STATED ABOVE IS THE ONLY WARRANTY APPLICABLE TO THIS PRODUCT. ALL OTHER WARRANTIES, EXPRESS OR IMPLED (INCLUDING ALL IMPLIED WARRANTIES OF MERCHANTABILITY OR FITNESS FOR A PARTICULAR PURPOSE) ARE HEREBY DISCLAIMED. NO VERBAL OR WRITTEN INFORMATION GIVEN BY THOMSON MULTIMEDIA INC.
RCA AUDIO SYSTEMS LIMITED WARRANTY What your warranty covers: • Defects in materials or workmanship. For how long after your purchase: • One year from date of purchase for labor and parts • The warranty period for rental units begins with the first rental or 45 days from date of shipment to the rental firm, whichever comes first. What we will do: • Pay any Authorized RCA Audio Service Center the labor charges to repair your unit.
÷ Limitation of Warranty: • THE WARRANTY STATED ABOVE IS THE ONLY WARRANTY APPLICABLE TO THIS PRODUCT• NO VERBAL OR WRITTEN INFORMATION GIVEN BY THOMSON MULTIMEDIA LTD., ITS AGENTS OR EMPLOYEES SHALL CREATE A GUARANTY OR IN ANY WAY INCREASE THE SCOPE OF THIS WARRANTY• • REPAIR OR REPLACEMENT AS PROVIDED UNDER THIS WARRANTY IS THE EXCLUSIVE REMEDY OF THE CONSUMER• THOMSON MULTIMEDIA LTD. SHALL NOT BE LIABLE FOR INCIDENTAL OR CONSEQUENTIAL DAMAGES RESULTING FROM THE USE OF THIS PRODUCT.
II ÷ ÷ II ÷