
Manual


(Con6nued from PreviousPage)
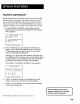
3. Press FORWARD (FWD) to forward the tape until the
time counter reads 0:30:00.
4. Press STOR This is the approximate end of the program.
(You may want to press PLAY to verify.) Now, you can
begin recording at this spot.
5. Press INFO twice to remove the time counter from the
screen and return to the normal display mode.
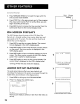
Hours Minutes
\ /
0:30:00 I
\
Seconds
ON-SCREEN DISPLAYS
The INFO button shows the status of the VCR (Stop, Play
Record, etc.), channel number, time counter, date, time, and
tape speed on the TV screen. The date and time must be set
before they can be displayed.
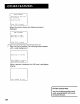
1. Press INFO to see the on-screen displays. The current
time is displayed in the VCR's display panel.
2. Press INFO again to have only the time counter remain
on the screen. The time counter is displayed in the
VCR's display panel.
3. Press INFO again to have no displays appear on the TV
screen. The time counter remains in the VCR's display
panel. This is useful for dubbing tapes.
4. Press INFO again to return to the normal display. The
current time is displayed in the VCR's display panel.
Turning off the VCR also resets the displays.
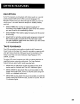
1
Stop Ch 03 0:30:00
11110199 Thu 01:30PM SLP
On-screen d_play (times ou_
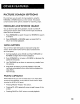
AUDIO SET-UP FEATURES
The audio setup features affect your tape playback and
recordings, The features in this section are accessed through the
AUDIO menu and are shown in the displays below.
1. Press MENU to bring up the VCR MAIN MENU.
2. Press 7 to display the AUDIO menu.
AUDIO
I Reception: STEREO
2 Tape Playback: HI-FI
0 Exit
Now you are ready to select an item from the menu to
set up.
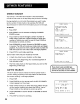
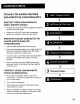
2
3
0:30:00
_me counter only (does not time out
NOdisplayswill appear (useful for dubbing)
54