
User's Manual
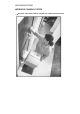
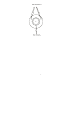
Table Of Contents
3
After finish setting the channel, screw the lens cover on.
5. The Camera (Transmitter) installation is now complete.
Night Vision///
The Camera includes IR LEDs, which allows viewing up to 12 feet in the dark
when used with the adapter. It can automatically turn to night vision in low light.
SETTING UP THE RECEIVER
1. Connect one end of the cable to the back of the receiver, the another end (RCA
cord) to your television's A/V inputs, the yellow plug to the VIDEO IN jack and
the white plug to the AUDIO IN jack.
2. Plug the receiver power adapter into the 9V DC power jack on the back of the
receiver and plug the power adapter into any 120 V power outlet.
3. Place the receiver either on top or near to your TV. Rotate the antenna to a
vertical position.
4. When just use the USB function, firstly, put the software CD into the CD-ROM
and install the USB driver software into your computer, then you will see “Soho
surveillance” and “AMCAP W” on your computer table. Secondly, open the “Soho
surveillance” and then connect the USB cable to the computer( there is no extra
power needed), now you can control the receiver by computer.
OPTIMIZING THE WIRELESS CAMERA SYSTEM
The 900MHz video signals pass easily through your home’s interior walls, but the
signal may be reflected by power wires or plumbing inside the wall. Usually a
slight adjustment of the Receiver and/or Camera antenna will improve reception.
Take care not to force the antennas past their lock positions.
The most common source of interference are microwave ovens. Try to avoid
mounting the Receiver near WiFi wireless network or other source of RF
interference such as cordless phones.
OPERATING THE SYSTEM
Set your TV to monitor the VIDEO INPUT designated for the Receiver.
The receiver can support up to three different camera/transmitter signals. You can