
Installation Guide


ENGLISH
5
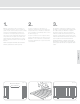
(Fig. 9) (Fig. 10) (Fig. 11)
7.
Open gate and drill three
3
/
32
" pilot holes
through the three screw slots in the sides of
the swing arms. Holes should be near vertical
centers of slots to allow vertical adjustments
of hinges (Fig. 9). Secure with three 1¼" pan
head screws .
Close gate and check alignment between
horizontal rails on gate and horizontal rails on
railing. If required, loosen hinge screws and
move up or down, as necessary. Re-tighten
screws when alignment is completed.
8.
NOTE: HINGE TENSION IS PRE-SET AT
THE FACTORY AND USUALLY DOES NOT
REQUIRE ADJUSTMENT. If you wish to
change tension setting/gate swing speed, or
completely disable the self-closing feature,
please see the following:
Remove cover from hinge. Place included
allen wrench into head of tension adjustment
pin in hinge. The head is at the end closest to
the + or - symbol on the hinge barrel (Fig. 10).
While holding the tension adjustment pin with
allen wrench, press the opposite end of the
pin into the hinge barrel (Fig. 10). This will
cause the head of the tension adjustment pin
to extend beyond the hinge barrel.
NOTE: DO NOT remove the allen wrench or
release the tension on the tension adjustment
pin at any time during the adjustment.
9.
Following the indicators on the + or -
symbol on the hinge barrel, turn the tension
adjustment pin toward the + to tighten, or
toward the - to loosen. DO NOT adjust by
more than ¼ turn, unless you want to disable
the self-closing feature .
Self-closing feature can be disabled by
loosening the tension adjustment pin one full
turn.
Do not over-tighten or over-loosen the tension
adjustment pin, as this may damage the
tension spring.
When you have set the desired tension, press
down on the head of the tension adjustment
pin to lock it back into the hinge barrel. Tabs
on pin head will t into notches in hinge barrel
when pin is in fully locked position (Fig. 11).