
Installation Guide


7
ENGLISH
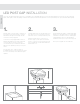
LED SIDE LIGHT INSTALLATION
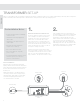
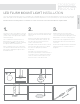
Crossover Product transformer, harnesses, and splitters are compatible with all Crossover Product lighted accessories (post caps, side/stair
lights, dome lights, under-rail lighting, and ush-deck lights) and Transform lighted accessories (Transform post caps, Transform dome lights).
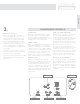
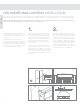
1.
Place the template (below) at the desired
location and pre-drill two /
16
" holes for
screws and one ½" hole for the wire.
Run a harness (not included) down the
inside of the post or post wrap with the male
connector hanging out of the ½" hole that
was just drilled (Fig. 1).
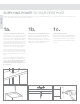
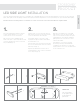
2.
Plug the male connector (from the harness
that exits the top of the post) into the female
connector attached to the side light.
Press rmly until the connection is fully
engaged. The light should be illuminated if
the transformer is on.
Push the wire and connection back through
the ½" hole until the back of the lens is ush
with the post (Fig. 2).
Align the pre-drilled holes and use the 2
included stainless steel screws to mount the
lens to the post (Fig. 3).
3.
Align the cover with the lens of the light
and snap the cover onto the lens (Fig. 4).
Only one cover will be used per lens (2 are
supplied). Each cover will give a different
lighting effect. The unused cover can be
saved or discarded.
If needed, the cover can be removed
by carefully inserting a small at blade
screwdriver near the latch on 1 side and
popping off the cover. Care should be taken
to not scratch the lens.
Follow instructions for wiring harness so that there is a male connector at each location that will have a light installed.
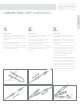
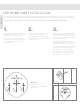
TEMPLATE
Cut out template
to lay against post
for pre-drill hole
placement.
Cover Outline
(Fig. 1) (Fig. 3) (Fig. 4)
(Fig. 2)