
Installation Guide


Attic Installation Tips:
Getting started:
Installing Reach Barrier in the attic is a great DIY project and with
the proper tools, a little practice and some professional tips most
people can do it and reap great financial benefits.
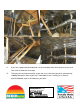
There are two typical ways to install Reach Barrier in the attic. One way is to cut the material in
sections and simply lay it out on top of the existing insulation (better for cold climate regions). The
more preferred method and the one covered in these instructions involve stapling the barrier to the
bottom of the roof joists creating a Reach Barrier “tent” inside your attic. This method is preferred for
several reasons:
1. The entire attic is made cooler/warmer (not just the living space below).
2. The attic space remains more “useable” after installation.
3. The Barrier is less effected by dust accumulation
4. Air Conditioning equipment and ductwork within the attic benefit from the more consistent
temperatures.
Must Have Tools:
• Staple Gun
• Utility knife & Scissors
• Light(s)
Good to Have Tools:
• Shop Light
• Head Lamp
• Measuring tape
• Dust Mask
• Safety Glasses
• Ladders
• Reach Pole
• Small sheets of plywood to walk on
General Tips:
Safety first: Use common sense when working on ladders or in attic spaces. Remember,
drywall is not strong enough to hold your weight. It is very easy to find yourself dangling in the
living room or worse!
Some find it easier unrolling sections of the Reach Barrier on the ground and cutting it into
specific lengths before taking it up into the attic. For some, smaller, lighter pieces may be
easier to manage in a tight attic space.
Working with a buddy makes the job go twice as fast and half as difficult. While one stretches
material the other can staple.
Be careful when working around electrical lines and power cords as aluminum conducts
electricity. Keep your eyes open for exposed wiring or uncapped electrical boxes.