
Replacement Part List


-5-
start again when you re-activate the
trigger gun (6).
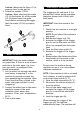
7.6 Adjustable Nozzle
The pressure can be adjusted by turning
the adjustable nozzle (12).
WARNING: Do not do this under
operation to avoid that the hand hits
the jet.
NOTE: Detergent is only applied at
1000psi and big volume of water
flow. The detergent can only be
dispensed when the lance is set to
low pressure by organizing
adjustment mechanism.
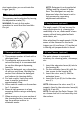
7.8 Angle Nozzle (optional)
The angle nozzle (14) can be used for
many applications e.g. cleaning the
underbody of a car, underneath a lawn
mower without being splashed back
with debris, etc.
After attaching the angle nozzle (14) be
aware of the moment on the lance
trigger gun (6) and lance (11) as the jet
is coming out perpendicular to these.
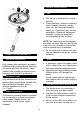
7.7 Detergent bottle 7.9 Patio Cleaner (optional)
1.
This pressure washer is fixed with a
detergent tank.
2.
To penetrate and remove the dirt
more effectively it is recommended
to use the detergent dispensing
function.
3.
Spray the detergent on a dry surface,
do not pre-sock area. Wetting the
surface first dilutes the detergent
and reduces its cleaning ability.
4.
For best results, limit your word
area to smaller sections of
approximately 25sq.
5.
Allow wash to remain on the surface
for 1-3 minutes.
6.
Rinse at high-pressure in a long
sweeping motion using a wide spray
pattern.
7.
When moving on to a new section of
the cleaning surface, be sure to over
tap the precious section to
eliminate marks.
The patio cleaner is a powerful
accessory for cleaning patio, driveways,
etc.
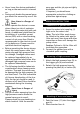
1.
Insert the extension lance (A) into to
the housing (B).
2.
Fix the extension lance (A) with the
two screws to the housing (B).
3.
Insert the rotor arm (C) into the
extension lance.
4.
Insert the U-pin (D) to fix the rotor
arm (C).
NOTE: Make sure the rotor arm (C) is
properly fixed to the extension lance (A)
with the U-pin (D).
NOTE: Do not use the Patio Cleaner (16)
as a broom but let it surf smoothly over
the surface.