
Owner`s manual

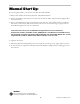

Initial Set Up Procedure
For your first lighting, follow this Initial Set Up Procedure.
Before starting your Rec Tec Grill, inspect the burn area inside the grilling area. It is a recommended
practice to go through the following procedure at initial start up.
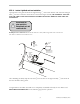
1. Open the main lid and remove the Stainless Steel Cooking Grates.
2. Remove the Stainless Steel Drip Pan and the Stainless Steel Flame Deflector.
3. Open the Pellet Hopper Lid found at the rear of your grill and check for any foreign objects.
4. Plug your Rec Tec Grill into the nearest 110 Volt AC GFI outlet. (Note: If your home does
not have a GFI outlet, you should have one installed by an electrician.)
5. Turn on your Rec Tec Grill by pressing the power button at the left of the panel.
6. Look in the fire pot and confirm that the auger is turning clockwise, hold your hand above the
fire pot to confirm the fan is blowing air through the fire pot, and then turn your grill off.
7. Pour pellets into your grill’s pellet hopper and restart your grill. The hopper will hold 40 lbs of pellets.
8. Reinstall the stainless steel Flame Deflector, Drip Pan and Cooking Grates.
9. Within a few minutes you will see white smoke, and your grill will light.
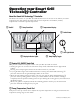
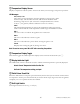
Familiarize yourself with the operation of the Smart Grill Technology™
control panel before continuing (see page 13).
12 ©2014, Rec Tec Industries, LLC
Main Power
Grill Light Switch
Questions?
Call our customer service at 1-855-696-0890
10am-8pm EST, M-F. Or visit RecTecGrills.com.