
Specifications

Copyright © 2015. Tenable Network Security, Inc. All rights reserved. Tenable Network Security and Nessus are registered trademarks of Tenable Network Security, Inc.
13
Processing the Nessus plugins...
[##################################################]
All plugins loaded
#
Notes
To upgrade Nessus on FreeBSD you must first uninstall the existing version and then
install the newest release. This process will not remove the configuration files or files
that were not part of the original installation.
Installation
Download the latest version of Nessus from the Nessus download page or through the Tenable Support Portal. Confirm
the integrity of the installation package by comparing the download MD5 checksum with the one listed in the product
release notes.
Unless otherwise noted, all commands must be performed as the system’s root user. Regular user accounts
typically do not have the privileges required to install this software.
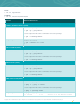
The following table provides installation instructions for the Nessus server on all supported platforms. Any special
installation instructions are provided in a note following the example.
Platform
Installation Instructions
Red Hat ES 5, CentOS 5, and Oracle Linux 5; Red Hat ES 6, CentOS 6, and Oracle Linux 6; Red Hat ES 7,
CentOS 7, and Oracle Linux 7 (64 bit)
Install Command
Use one of the appropriate commands below that corresponds to the version of Red
Hat you are running:
# rpm -ivh Nessus-6.1.0-es5.x86_64.rpm
# rpm -ivh Nessus-6.1.0-es6.x86_64.rpm
# rpm -ivh Nessus-6.1.0-es7.x86_64.rpm
Sample Output
# rpm -ivh Nessus-6.1.0-es7.x86_64.rpm
Preparing...
########################################### [100%]
1:Nessus
########################################### [100%]
nessusd (Nessus) 6.1.0 [build R20541] for Linux
(C) 1998 - 2014 Tenable Network Security, Inc.
Processing the Nessus plugins...
[##################################################]
All plugins loaded
- You can start nessusd by typing /sbin/service nessusd start
- Then go to https://localhost:8834/ to configure your scanner
#
Fedora 19 and 20 (64 bit)
Install Command
Use one of the appropriate commands below that corresponds to the version of
Fedora you are running: