
Installation manual


Appendix A. Locally installed clients
The locally installed client installs to a local disk. The client applet is loaded
directly into the default system browser, so there is no download from a server.
The most common reason to configure a local client is for users who connect
remotely over slow telephone lines, where download time can be an issue and
connectivity is unpredictable. You can also use the locally installed client to test
host access capabilities without installing the full Host On-Demand product.
Operating systems that support the locally installed client
Host On-Demand can be installed as a client on the following operating systems:
v Windows 95
v Windows 98
v Windows Millennium (Me)
v Windows NT 4.0 with SP3 or later
v Windows 2000
The locally-installed client requires 155MB of disk space.
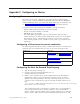
Installing Host On-Demand as a client
To install Host On-Demand on a Windows NT or 2000 workstation, you must be a
member of the Administrators group.
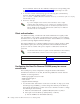
1. Insert the CD and run setup.exe lc from the \win32 directory of the CD.
2. Click Install.
3. Choose a Typical or Custom installation.
v Typical installs the Host On-Demand Java applets and the information
library in English and the native language of your workstation.
v Custom allows you to choose components to install: Host On-Demand Java
applets, the information library and the Host Access Class Library. In
addition to English, you can also select any of the other supported
languages.
4. Proceed through the rest of the windows.
5. If you have not already done so, read the readme available in the last window.
At the end of installation, the Host On-Demand Service Manager is configured and
started automatically. On Windows NT and 2000, the Service Manager is installed
as a Service; on Windows 95, Windows 98 and Windows Millennium (Me) it is
added to the Startup folder.
Starting the client
To start Host On-Demand as a client, click Start > Programs > IBM Host
On-Demand > Host On-Demand.
© Copyright IBM Corp. 1997, 2001 67