Linux Commands – Red Hat Specific Windows dir dir /ad attrib –h sorting dir filename* /s | more attrib md rd del deltree copy Linux General Commands ls ls filename or file* ls directory or dir* ls –l - Directory listing with long filenames, owner, and permissions ls –ld - Show only the directories matching the search ls – R - Show subdirectories also ( just like dir /s ) ls –al ls –Sharl – sort by size, all files, including hidden ls –lart – sort by date, reverse order (newest @ the bottom of list) -S
copy con edit type move ren cls help fdisk diskcopy ver whoami set Help Hard drive info Reboot Shutdown Working directory Compile binary Make Executable out of script Running Processes, Uptime, etc.
Login as another user Login as another user AND get their path – awesome! See bootup messages after booting Display a calendar Startup file Disk Space Directory Usage Install RPM GRUB boot files Path Net Send su username su – username dmesg cal month year /etc/rc.d/rc.local df –h du –h rpm –ivh rpm_name.
Directory Size How to find - Size of a directory & Free disk space This article explains 2 simple commands that most people want to know when they start using Linux. They are finding the size of a directory and finding the amount of free disk space that exists on your machine. The command you would use to find the directory size is ' du '. And to find the free disk space you could use ' df '. All the information present in this article is available in the man pages for du and df.
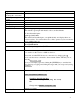
The first line would be the default last line of the 'du' output indicating the total size of the directory and another line displaying the same size, followed by the string 'total'. This is helpful in case you this command along with the grep command to only display the final total size of a directory as shown below. $ du -ch | grep total This would have only one line in its output that displays the total size of the current directory including all the subdirectories.
actually stored this as a script named 'usage' since I use it often. Example : I have my Linux installed on /dev/hda1 and I have mounted my Windows partitions as well (by default every time Linux boots). So 'df' by default shows me the disk usage of my Linux as well as Windows partitions. And I am only interested in the disk usage of the Linux partitions.
Grub Boot Loader Information Grub is an acronym for Grand Unified Bootloader. An excellent overview of Grub and how to use it is located at http://sdb.suse.de/en/sdb/html/fhassel_grub_overview.html For now, here is some general information on the configuration file, grub.conf: Edit the file /etc/grub.conf to add/remove menu items, and adjust the default. The default is indicated by the line default x, where x is the number of the title you want to boot, beginning with 0 (zero). Get it? Didn’t think so.
Regarding the entries of the operating systems that can be booted: • • • • • • The first entry ("title linux") boots SuSE Linux. The Linux kernel is located in the first logical partition of the first hard disk (hd0,4) (the boot partition in this example); the file name is vmlinuz. Kernel parameters (such as the specification of the root partition, vga, etc.) are appended directly. Attention: The root partition must be specified as a Linux device name, since it is sent to the Linux kernel as a parameter.
Boot Single-User Mode This is kind of like safe-mode in Windows – it skips a lot of startup files and services: 1. Power on the box 2. At the boot screen for Grub, select the version you want to boot and type e for edit 3. Select the line that starts with kernel and type e for edit 4. Go to the end of the line and type single 5. Hit [ENTER] 6.
Three-Finger Salute Remove Three-Finger Salute Edit /etc/inittab. Find the line: ca::ctrlaltdel:/sbin/shutdown -t3 -r now Remark it out by placing a pound sign (#) in front of it. Next time you boot, CTRL-ALT-DEL should do nothing! Or, point the line to something else, like script that will clear the screen and echo a remark to the user. For example: ca::ctrlaltdel:/salute.sh vi salute.sh clear echo echo echo “What are you doing, you IDIOT?!?!” echo echo VMware Workstation on SUSE 9.
Mount Floppy Mount CD-ROM Read a floppy or CD Mount Windows share using “mount” Mounting and Zipping FAT floppy’s = mount –t vfat /dev/fd0 /mnt/floppy Linux floppy’s = mount /dev/fd0 /mnt/floppy or mount through linuxconf: type linuxconf, navigate to File Systems, then Access local drive, select the floppy drive, Enter, tab to Mount and enter mount /dev/cdrom /mnt/cdrom If it’s a DOS FAT disk, Red Hat includes a set of programs called the mtools.
Mount Windows share using “smbmount” First, you need to create a mount point (directory).
You can verify what ports RPC (e.g.
format a: (floppy) as Linux --> as DOS --> Make a boot disk Zipped files Linux fdformat /dev/fd0 then mkfs –t ext2 /dev/fd0 DOS fdformat /dev/fd0 then mkfs –t msdos /dev/fd0 1. Check /etc/lilo.conf (or /etc/grub.conf) and right down the version of the image being loaded at boot. The line will look as follows: image = /boot/vmlinuz-x.x.x-x.x 2. Login as root 3. Insert a blank floppy – type mkbootdisk –device /dev/fd0 x.x.x-x.x 4. Reboot with floppy and see if works .
A: floppy B: floppy Master drive on primary IDE channel First partition on master drive on primary partition Third partition on master drive on primary partition Slave drive on primary IDE channel Master drive on secondary IDE channel Slave drive on secondary IDS channel SCSI target ID 0 SCSI target ID 1 Second partition on the hard disk at SCSI target ID 0 SCSI tape device CD-ROM Keyboard Modem Sound system Common Linux Device Names /dev/fd0 or /dev/floppy /dev/fd1 /dev/hda /dev/hda1 /dev/hda3 /dev/hdb /d
IP Configuration ipconfig IP configuration utilities route print route add route add –p (permanent) (option 1) route add –p (permanent) (option 2) route delete route add default gateway route add default gateway (permanent) DNS servers Hosts file hostname Change hostname ifconfig ifconfig netconfig (preferred) linuxconf (catch all) netconf (not preferred, use CTRL+X for pulldowns) route –n (the –n is no resolution and is faster) route add –net network netmask subnet_mask gw gateway_address Add the foll
Manually setup static IP and routing by hand TEMPORARY SETUP This will NOT last through a reboot Example: NIC Information: IP address = 192.168.0.10 Subnet Mask = 255.255.255.0 Gateway = 192.168.0.1 Hostname = mypc.acme.com DNS = 192.168.0.77 1. Configure the NIC and IP address with the ifconfig command: ifconfig eth0 192.168.0.1 netmask 255.255.255.0 broadcast 192.168.0.255 (If you’re dealing with a PCMCIA NIC, you be able to get a report of the IRQ and IO values by typing cardctl config) 2.
Static the Gateway DCHP Take interface up or down Restart Network Promiscuous mode Determine IP Status – including whether interface is in promiscuous mode Listening ports – netstat IP Information Either use the /etc/sysconfig/network-scripts/eth0 (preferred method) or use the /etc/rc.d/rc.local file dhcpcd eth0 ifup eth0 ifdown eth0 /etc/rc.d/init.
Recover root password Recover a Lost Root Password For LILO: 1. Boot linux 2. At the LILO prompt ( i.e. Boot: ) type linux single 3. At the command line#, type passwd root 4. Change the password 5. Reboot and try new password For GRUB: 1. Boot linux 2. At the GRUB menu, press e (for edit) 3. Add the word “single” at end of line 4. Press “b” to boot Pull a File PSCP – Secure Copy from Windows (using Putty tools) pscp root@source_ip:/full_source_path dest_path Example: pscp root@207.169.53.
Add a user Modify a user Delete a user Change password Group administration command Who is logged on What group(s) do I belong to? User login activity List last logged in users Manage user accounts User Administration useradd usermod userdel passwd username (if logged on as root, can change anyone’s password – if logged on as user, can only change own password, no need to type your username as the switch) groupadd groupmod groupdel gpasswd users groups last lastb who ac Last – shows the following infor
• • • • • • • • • • List user password settings Change user password settings Linux Security Admin Guide groupdel (8) - Delete a group groupmod (8) - Modify a group groups (1) - print the groups a user is in grpck (8) - verify integrity of group files pwconv (8) - convert to and from shadow passwords pwunconv (8) - convert to and from shadow passwords grpconv (8) - convert to and from shadow passwords grpunconv (8)- convert to and from shadow passwords vipw (8) - edit the password file vigr (8) - edit the
The third column is the owner of the file, in this case root. The fourth column is the group of the file, in this case the root group. The fifth column is the size of the file. The sixth is the time the file was last modified The seventh is naturally the name of the file. Changing Permissions there are three command that you need to learn. chmod /*change the ppermissions of a file*/ chown /*change the owner of the file*/ chgrp /*change the group that the file belongs to*/ example: chmod 777 somefile.
XWindows Configure XWindows from command line Cycle through video settings Leave XWindows NOW – handy when you can’t see the screen due to video resolution problems Shoot Xwindows back through your SSH session Xconfigurator [CTRL] + [ALT] + [+] [CTRL] + [ALT] + [BACKSPACE] Launching SSH with the –X switch will forward X-windows back through your SSH tunnel ssh -X 23
Open mysql command line from same server Open mysql command line from remote server Connect to database Query table names Query columns from a table Query the most recent data (field) in a column Misc. Backup Database MYSQL mysql –uuser –ppassword i.e. mysql –uroot –pwopnam mysql –uuser –ppassword –hip_address database_name i.e mysql –uroot –pwopnam –h207.169.53.5 snort connect database_name i.e. connect snort show tables; show columns from table_name; i.
DROP TABLE table_name; DROP DATABASE db_name; SHOW COLUMNS FROM table_name; select * from users; select * from systems; select * from changes; select select select select * * * * from from from from users users users users order order order order by by by by user_first_name; user_first_name desc; user_last_name; user_last_name desc; select select select select * * * * from from from from users users users users where where where where user_last_name = 'Westbrook'; user_last_name != 'Westbrook';
Vi - File Editor Batch file echo to email File Editing and Scripts vi filename Press Insert key to type in inert mode Press Escape key to leave insert and enter edit mode To search, type /string and Enter Search & replace on a line, type :s/oldpattern/newpattern/ Global search & replace, :%s/oldpattern/newpattern/g Add a c at end of line if you want to confirm each change :%s/oldpattern/newpattern/gc :wq = write file (save) and quit :q! = quit without saving .
Secure Default Firewall Ruleset As a brief explanation, the firewall rules for iptables are not really kept in any editable file. That is, the rules, once loaded, exist in memory and will overwrite the file they came from. So how do you configure iptables? And how does it load it’s ruleset after a reboot? * Explanation * Well, one way is to make changes to the ruleset in memory, on the fly. You then tell iptables to save the rules in memory to a file.
–i – Interface tells the kernel which interface should be filtered. –p – Protocol defines the protocol that the rule will apply to. Protocols are lised in the /etc/protocols file, and you can define rules for any of them. -s – Source IP address -d – Destination IP address –m – Match is a directive for matching. Commonly you can match state, protocol or both. -j – Jump to what to do if the packet matches the rule --dport – Destination Port. --sport – Source Port --state – defines packet state.
MySQL iptables -A INPUT -p tcp -m tcp --dport 3306 –j ACCEPT The very last rule we will put in is to drop all remaining packets that didn’t match any of our rules.
GPG √ Description Key Creation Under GPG, there is no GUI. To create a key under, perform the following steps at a command prompt: 1. 2. 3. 4. 5. 6. 7. 8. 9. 10. 11. 12. 13. 14. 15. 16. 17.
highlighed above. Using this example you can therefore use the key ID to delete a key, like this: gpg --delete-secret-key 2608ae83 gpg --delete-key 2608ae83 Generate (create) a key: gpg –-gen-key Export the public key of the designated name to a file: gpg --export –a keyname > keyname-pubkey.key Export the secret key of the designated name to a file: gpg --export-secret-key –a keyname > keynamepubkey.
Setup NTP for Synching Time For more information, all of the following have good information: • http://www.linuxhomenetworking.com/wiki/index.php/Quick_HOWTO_:_Ch24_:_The_ NTP_Server • http://www.brennan.id.au/09-Network_Time_Protocol.html • http://ntp.isc.org/bin/view/Support/AccessRestrictions • http://www.eecis.udel.edu/~mills/ntp/html/accopt.html Note that this configuration is for a protected, internal server, NOT an Internet accessible server.
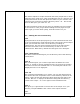
Now allow whatever hosts/networks you are going to allow to query your server for time – for example: # Allowed clients restrict 10.0.0.0 mask 255.0.0.0 nomodify restrict 172.16.0.0 mask 255.255.224.0 nomodify restrict 192.168.0.0 mask 255.255.0.0 nomodify restrict 207.169.53.0 mask 255.255.255.0 nomodify Set the logfile: #Logfile logconfig all logfile /var/log/ntpd Set the driftfile.
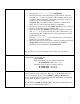
remote refid st t when poll reach delay offset jitter ============================================================================== LOCAL(0) LOCAL(0) 10 l 1 64 3 0.000 0.000 0.015 *navobs1.oar.net .USNO. 1 u 5 64 1 222.555 68.548 0.015 +darkcity.cerias .GPS. 1 u 60 64 1 44.732 -19.367 0.015 +ntp-2.gw.uiuc.e truechimer.cso. 2 u 61 64 1 22.875 -27.707 0.015 A telltale sign that you don’t have proper synchronization is when all the remote servers have jitters of 4000 with delay and reach values of zero.
Help File Library: Bash Scripting Cheat Sheet Written By: ph34r A quick cheat sheet for programmers who want to do shell scripting. This is not intended to teach programming, etc. but it is intended for a someone who knows one programming language to begin learning about bash scripting. Basics All bash scripts must tell the o/s what to use as the interpreter. The first line of any script should be: #!/bin/bash You must make bash scripts executable.
Quote Marks Regular double quotes ("like these") make the shell ignore whitespace and count it all as one argument being passed or string to use. Special characters inside are still noticed/obeyed. Single quotes 'like this' make the interpreting shell ignore all special characters in whatever string is being passed. The back single quote marks (`command`) perform a different function. They are used when you want to use the results of a command in another command.
-r filename Returns True if file, filename can be read by the process. -s filename Returns True if file, filename has a nonzero length. -w filename Returns True if file, filename can be written by the process. -x filename Returns True if file, filename is executable. Expression Comparisons !expression Returns true if expression is not true expr1 -a expr2 Returns True if expr1 and expr2 are true. ( && , and ) expr1 -o expr2 Returns True if expr1 or expr2 is true. ( ||, or ) If Statements If...
Case select case string1 in str1) commands;; str2) commands;; *) commands;; esac string1 is compared to str1 and str2. If one of these strings matches string1, the commands up until the double semicolon (; ;) are executed. If neither str1 nor str2 matches string1, the commands associated with the asterisk are executed. This is the default case condition because the asterisk matches all strings. Iteration (Loops) for var1 in list do commands done This executes once for each item in the list.
Debugging The shell has a number of flags that make debugging easier: sh -n command Read the shell script but don't execute the commands. IE. check syntax. sh –x command Display commands and arguments as they're executed. In a lot of my shell scripts you'll see # Uncomment the next line for testing # set -x See also: http://www.linux.org/docs/ldp/howto/Bash-Prog-Intro-HOWTO.
Test your Linux Skills 1. Create a new directory in your home directory 2. Make a file from scratch in this directory 3. Mount the floppy drive 4. Type out the file you created 5. Clear the screen 6. Edit the file, make some changes to it and save it 7. Copy the file to the floppy 8. Delete the file 9. Copy the file back from the floppy 10. Read a CD-ROM directory 11. Perform a search for the file linux.conf 12. Print the routing table 13. Check your IP address 14. Check your DNS servers 15.
Linux Shortcuts and Commands: Linux Newbie Administrator Guide by Stan and Peter Klimas This is a practical selection of the commands we use most often. Press to see the listing of all available command (on your PATH). On my small home system, it says there are 2595 executables on my PATH. Many of these "commands" can be accessed from your favourite GUI front-end (probably KDE or Gnome) by clicking on the right menu or button. They can all be run from the command line.
available options. THIS SHORTCUT IS GREAT! It even works at LILO prompt! Scroll and edit the command history. Press to execute. Scroll terminal output up. Work also at the login prompt, so you can scroll through your bootup messages. Scroll terminal output down. <+> (in X-windows) Change to the next X-server resolution (if you set up the X-server to more than one resolution).
command cd ~/my_dir will change my working directory to the subdirectory "my_dir" under my home directory. Typing just "cd" alone is an equivalent of the command "cd ~". . (dot) Current directory. For example, ./my_program will attempt to execute the file "my_program" located in your current working directory. .. (two dots) Directory parent to the current one. For example, the command cd .. will change my current working directory one one level up. 7.
can get GUI-based Ktop from "K"menu under "System"-"Task Manager" (or by executing "ktop" in an X-terminal). uname -a (= Unix name with option "all") Info on your (local) server. I can also use guname (in X-window terminal) to display the info more nicely. free Memory info (in kilobytes).
ls List the content of the current directory. Under Linux, the command "dir" is an alias to ls. Many users have "ls" to be an alias to "ls --color". ls -al |more List the content of the current directory, all files (also those starting with a dot), and in a long form. Pipe the output through the "more" command, so that the display pauses after each screenful. cd directory Change directory. Using "cd" without the directory name will take you to your home directory.
(on many American keyboards it shares the key with "\") The pipe makes the output stop after each screenful. For long files, it is sometimes convenient to use the commands head and tail that display just the beginning and the end of the file. If you happened to use "cat" a binary file and your terminal displays funny characters afterwards, you can restore it with the command "reset". less filename Scroll through a content of a text file. Press q when done.
Netscape (4.x) are known to be big and buggy. They occasionally crash by vanishing (no other harm done). Also, when not connected to the network , Netscape likes to refuse to do anything (looks like it hanged)-it revives when you connect. netscape -display host:0.0 (in X terminal) Run netscape on the current machine and direct the output to machine named "host" display 0 screen 0.
commands. The essential ftp command are: ls (see the files on the remote system), ASCII, binary (set the file transfer mode to either text or binary, important that you select the proper one ), get (copy a file from the remote system to the local system), mget (get many files at once), put (copy a file from the local system to the remote system), mput (put many files at once), bye (disconnect).
killall program_name Kill program(s) by name. xkill (in an xwindow terminal) Kill a GUI-based program with mouse. (Point with your mouse cursor at the window of the process you want to kill and click.) lpc (as root) Check and control the printer(s). Type "?" to see the list of available commands. lpq Show the content of the printer queue. Under KDE (X-Windows), you may use GUI-based "Printer Queue" available from "K"menu-Utilities. lprm job_number Remove a printing job "job_number" from the queue.
adduser user_name Create a new account (you must be root). E.g., adduser barbara Don't forget to set up the password for the new user in the next step. The user home directory is /home/user_name. useradd user_name The same as the command " adduser user_name ". userdel user_name Remove an account (you must be a root). The user's home directory and the undelivered mail must be dealt with separately (manually because you have to decide what to do with the files).
either "hard wired" (fast, non-removable), "module" (maybe slower, but loaded/removable on demand), or "no" (no support for this feature at all). insmod parport insmod ppa (as root) Insert modules into the kernel (a module is roughly an equivalent of a DOS device driver). This example shows how to insert the modules for support of the external parallel port zip drive (it appears to be a problem to get the external zip drive to work in any other way under RH6.0 ).
is also re-run every time you boot the computer, so if you reboot you don't have to run it manually.) mknod /dev/fd0 b 2 0 (=make node, as root) Create a device file. This example shows how to create a device file associated with your first floppy drive and could be useful if you happened to accidentally erase it. The options are: b=block mode device (c=character mode device, p=FIFO device, u=unbuffered character mode device). The two integers specify the major and the minor device number.
are available on your RedHat CD, display the info about the packages, and install them if you want (installation must be done as root). Accessing drives/partitions mount See here for details on mounting drives. Examples are shown in the next commands. mount -t auto /dev/fd0 /mnt/floppy (as root) Mount the floppy. The directory /mnt/floppy must exist, be empty and NOT be your current directory. mount -t auto /dev/cdrom /mnt/cdrom (as root) Mount the CD.
ifconfig (as root) Display info on the network interfaces currently active (ethernet, ppp, etc). Your first ethernet should show up as eth0, second as eth1, etc, first ppp over modem as ppp0, second as ppp1, etc. The "lo" is the "loopback only" interface which should be always active. Use the options (see ifconfig --help) to configure the interfaces. ifup interface_name (/sbin/ifup to it run as a user) Startup a network interface. E.g.
right button to get local menus, and learn how to use layers. Save your file in the native gimp file format *.xcf (to preserve layers) and only then flatten it and save as png (or whatever). There is a large user manual /usr/ gphoto (in X terminal) Powerful photo editor. giftopnm my_file.giff > my_file.pnm pnmtopng my_file.pnm > my_file.png Convert the propriatory giff graphics into a raw, portable pnm file.
Services in Fedora Core 5 The following is a brief explanation on usage and recommendations for some of the different services packaged with Fedora Core 5. (from http://www.mjmwired.net/resources/mjm-services-fc5.html) Understanding Services Please read the guide on managing services in Fedora. This includes an explanation for services/daemons, runlevels and various tools available to manage your services.
apmd Is used by some laptops and older hardware. If your computer supports acpi, then apmd should probably be disabled. auditd This saves audit records generated by the kernel. Not entirely sure how this information is used, however it is useful for diagnosing issues with SELinux. For now I have this enabled. This is optional, however it may useful for servers or machines with multiple users and highly recommended for SELinux users. autofs This mounts removable disks (such as USB harddrives) on demand.
firstboot This service is specific to Fedora's installation process meant to perform certain tasks that should only be executed once upon booting after installation. Even though it verifies it has been run before, it can be disabled. gpm This is the console mouse pointer (no graphics). If you do not use the text console (CTRL-ALT-F1,F2..) then disable this. However I leave this enabled for runlevel 3 and disabled for runlevel 5. hidd See bluetooth.
messagebus This is an IPC (Interprocess Communication) service for Linux. Specifically this communicates with dbus, a critical component. It is highly recommended to leave this enabled. netdump See diskdump. netplugd Netplugd can monitor network interfaces and executes commands when their state changes. This can be left to default disabled. netfs This is used for automatic mounting of any shared network file space such as NFS, Samba, etc on bootup.
SSH allows other users to log into or run applications on your computer from another computer on your network or remotely. This is a potential security issue. This is not needed if you have no other computers or no need to login from a remote location (work, school, etc.). Most likely this should be disabled. xinetd This is a special service. It can launch multiple services based on a request to a specific port. For example: telnet is typically connected to port 23.