Red Hat Cloud Foundations Deploying Private IaaS Clouds Scott Collier, RHCA Principal Software Engineer Version 2.
1801 Varsity Drive™ Raleigh NC 27606-2072 USA Phone: +1 919 754 3700 Phone: 888 733 4281 Fax: +1 919 754 3701 PO Box 13588 Research Triangle Park NC 27709 USA The following terms used in this publication are trademarks of other companies as follows: • • • • • • • • • Linux is a registered trademark of Linus Torvalds. Red Hat, Red Hat Enterprise Virtualization, JBoss, Red Hat Enterprise Linux and the Red Hat "Shadowman" logo are registered trademarks of Red Hat, Inc.
Table of Contents 1 Executive Summary........................................................................................ 6 2 Cloud Computing Standards........................................................................... 7 2.1 Cloud Provider – Service Models......................................................................................8 3 Red Hat and Cloud Computing..................................................................... 12 3.1 A Phased Approach to Cloud Computing.............
6.5.1 Deploy the Satellite Virtual Machine..........................................................................34 6.5.2 Configure Iptables .....................................................................................................36 6.6 Create Kickstart Profiles and Activation Keys.................................................................38 6.6.1 Create Activation Keys.............................................................................................. 38 6.6.
9 Deploy and Scale Applications...................................................................... 77 9.1 Deploy Java Application.................................................................................................. 77 9.1.1 Configure GPG and Sign the javaApp package........................................................78 9.1.2 Set up Software Channel on Satellite Server ...........................................................79 9.1.3 Upload Application ..................................
1 Executive Summary Cloud computing is quickly becoming the platform of choice for users and businesses that want to reduce operating expenses and be able to scale resources rapidly. There are several other advantages of moving resources to the cloud such as eased automation, flexibility, mobility, resiliency, and redundancy. Even though cloud computing is in the early stages, there are different types of cloud solutions available to businesses today.
2 Cloud Computing Standards Cloud computing is a model for enabling convenient, on-demand network access to a shared pool of configurable computing resources (e.g., networks, servers, storage, applications, and services) that can be rapidly provisioned and released with minimal management effort or service provider interaction.
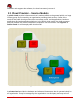
maintains and supports the software, the cloud consumer just uses it. 2.1 Cloud Provider – Service Models A public cloud provides infrastructure that is made available to the general public or a large industry group and is owned by an organization providing cloud services. Some of the services that public cloud providers host are storage, email, social applications, business applications and web application platforms.
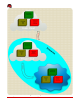
premise or off-premises. By utilizing a private cloud service model an organization is able to take advantage of the elasticity and cost effectiveness of cloud technologies as well as maintain complete control of the infrastructure. See Figure 2.2: Private Cloud for an example of a private cloud model. Figure 2.
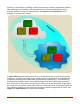
Figure 2.3: Hybrid Cloud www.redhat.
A community cloud is an infrastructure that is shared by several organizations and supports a specific community that has shared concerns (e.g., mission, security requirements, policy, and compliance considerations). It may be managed by the organization or a third-party and may exist on or off premise. 11 www.redhat.
3 Red Hat and Cloud Computing 3.1 A Phased Approach to Cloud Computing While virtualization is an important underlying technology with regards to cloud computing, it is inaccurate to equate cloud computing with virtualization. See Figure 3.1: Cloud Layers for the different levels of abstraction addressed by virtualization and cloud computing respectively. Figure 3.1: Cloud Layers www.redhat.
Figure 3.2: Phased Deployment illustrates a phased approach to technology adoption starting with server consolidation using virtualization, then automating large deployments of virtualization within an enterprise using private clouds, and finally extending private clouds to hybrid environments leveraging public clouds as a utility. Figure 3.2: Phased Deployment 3.
and cost-effective cloud computing. Red Hat's cloud vision is unlike that of any other IT vendor. Red Hat recognizes that IT infrastructure is composed of pieces from many different hardware and software vendors. Red Hat enables the use and management of these diverse assets as one cloud. Enabling cloud to be an evolution, not a revolution.
4 Red Hat Cloud Foundations Components 4.1 Red Hat Enterprise Linux 5 Red Hat Enterprise Linux is the world's leading open source application platform. On one certified platform, RHEL offers a choice of: • • • Applications - Thousands of certified ISV applications Deployment - Including standalone or virtual servers, cloud computing, and software appliances Hardware - Wide range of platforms from the world's leading hardware vendors Red Hat released the sixth update to RHEL 5: Red Hat Enterprise Linux 5.
ease of use • Unified logging and debugging simplifies administrative work • Virtualized KVM guests can be run as managed services, which enables fail-over, including between physical and virtual hosts Resource Management: • Cgroups organize system tasks so that they can be tracked and so that other system services can control the resources that cgroup tasks may consume • Cpuset applies CPU resource limits to cgroups, allowing processing performance to be allocated to tasks There are many other feat
• Microsoft® Windows® Guests (32-bit & 64-bit): Microsoft Windows 2003 server, Microsoft Windows 2008 server, Microsoft Windows XP, SVVP, and WHQL certified. Hardware support: • • All 64-bit x86 servers that support Intel VT or AMD-V technology and are certified for Red Hat Enterprise Linux 5 are certified for Red Hat Enterprise Virtualization. Red Hat Enterprise Virtualization supports NAS/NFS, Fibre Channel, and iSCSI storage topologies. 4.
and deploy rich web applications, enterprise applications and SOA services Enterprise Platforms: • • • • • • • JBoss Enterprise Application Platform: Everything needed to deploy, and host enterprise Java applications and services JBoss Enterprise Web Platform: A standards-based solution for light and rich Java web applications JBoss Enterprise Web Server: a single enterprise open source solution for large-scale websites and lightweight web applications JBoss Enterprise Portal Platform: Platform for buil
integrates JBoss Application Server, with JBoss Hibernate, JBoss Seam, and other leading open source Java technologies from JBoss.org into a complete, simple enterprise solution for Java applications. Features and Benefits: • • • • • • • • • • • • • Complete Eclipse-based Integrated Development Environment (JBoss Developer Studio) Built for Standards and Interoperability: JBoss EAP supports a wide range of Java EE and Web Services standards.
4.5.3 Red Hat Enterprise MRG Grid MRGvi Grid provides high throughput and high performance computing. Additionally, it enables enterprises to move to a utility model of computing to help them achieve both higher peak computing capacity and higher IT usage by leveraging their existing infrastructure to build high performance grids.
5 RHCF Proof of Concept Configuration Customers often have different requirements and standards when it comes to what can be deployed. This proof of concept provides one combination of the hardware and software versions that were tested in the Red Hat Reference Architecture labs. This section provides an overview of the software and hardware required to build a Red Hat Cloud Foundations solution. As shown in Figure 5.1: Infrastructure Overview, there are two clusters configured.
Figure 5.1: Infrastructure Overview By utilizing industry standard hardware for storage, servers and networking along with open source software that is fully supported and tested for compatibility one can deploy a Red Hat Cloud Foundations solution with confidence. The remainder of this chapter explores the details of how an environment needs to be prepared to deploy a Red Hat Cloud Foundations solution. www.redhat.
5.1 Operating Systems The operating systems that drive the Red Hat Cloud Foundations stack are detailed in Table 1: Operating Systems. The software stack provides a reliable and stable environment for customers to shift into the cloud. Server Operating System Physical or Virtual MGMT1 Red Hat Enterprise Linux 6 Physical MGMT2 Red Hat Enterprise Linux 6 Physical RHEV-H Red Hat Enterprise Linux 5.6 Physical RHEL-H Red Hat Enterprise Linux 5.6 Physical SAT-VM Red Hat Enterprise Linux 5.
5.1.1 Applications and Tools The applications and tools that drive the Red Hat Cloud Foundations stack are shown in Table 2: Applications. The host that the software is running on is shown in the “Host” column. Software Version Host jon-plugin-pack-eap 2.2.3-45.el15 JON-SERVER jon-plugin-pack-ews 3.5.4-68.el6 JON-SERVER jon-plugin-pack-soa 2.4.1 JON-SERVER jon-server 2.4.1 JON-SERVER jboss-seam-booking-ds.xml 2.4.1 JBOSS-EAP jboss-seam-booking.ear 2.4.1 JBOSS-EAP 1.0.
5.2 Hardware This case study used IBM servers and HP Fibre channel attached storage. Please review the following tables for details. 5.2.1 Servers The servers used in this case study are IBM BladeCenter servers with Quad Socket, Quad Core Intel Xeon processors with 64GB of RAM installed. See Table 3: Hardware Stack for more details. Hardware Systems Specifications MGMT{1,2} – RHCS Cluster Nodes [2 x IBM BladeCenter HS22] Quad Socket, Quad Core (24 cores) Intel® Xeon® CPU X5680 @ 3.
5.2.2 Storage Table 4: Storage Hardware Displays the storage hardware used in this environment. Please refer to the storage vendors documentation for proper configuration guidelines. Hardware Specifications Storage Controller: Code Version: M100R18 Loader Code Version: 19.
6 Deploying Red Hat Cloud Foundations – Infrastructure Services 6.1 Overview Figure 6.1: Overview shows the steps required to deploy the Red Hat Cloud Foundations infrastructure. The first step is to deploy the infrastructure indicated by the check box. The infrastructure consists of Red Hat High Availability cluster nodes, a Red Hat Network Satellite virtual machine, a DNS / DHCP server, an NFS server and finally the Red Hat Enterprise Virtualization hosts.
Figure 6.1: Overview 6.2 This section moves into the details of what needs to happen to deploy this infrastructure. At a high level, the steps that need to be accomplished. 1. Download the software 2. Deploy the first management server 3. Deploy the satellite virtual machine 4. Create the kickstart profiles and activation keys 5. Deploy the DNS / DHCP / Cobbler virtual machine 6. Deploy the RHEV-M virtual machine 7. Deploy the RHEV-H hypervisor 8. Deploy the RHEV-KVM hypervisor managed by RHEV 9.
6.3 Download Software Start by downloading the appropriate software from http://rhn.redhat.com to prepare the environment for a Red Hat Cloud Foundations build-out. The list of needed channels and software: 1. When logged into RHN, click on “Download Software” 2. In the “Red Hat Enterprise Virtualization” channel a) Click on the “Red Hat Enterprise Virt Manager for Servers (v.2 x86)” channel b) Download the following software 3. RHEV-M Microsoft Windows Installer 4. VirtIO Drivers VFD 5.
f) On the “Software Downloads” screen, select “JBoss ON for SOA-P” • Download the “SOA Plugin Pack for JBoss ON 2.4.1” 6.3.1 Download Scripts Find a temporary place to put the software, once mgmt1 is installed along with the sat-vm as discussed in Deploy the Satellite Virtual Machineix, the scripts and applications are placed there. Place the scripts and applications on the Red Hat Network Satellite server and place the installation ISOs on mgmt1 server.
Once the environment is set up, proceed with the deployment. 6.4 Deploy mgmt1 and Configure The mgmt1 server is the catalyst for the rest of the environment. This system will host virtual machines and become one node of a two node cluster which is covered in Configure High Availability Environment.
NETMASK=255.255.248.0 TYPE=Bridge 8. Disable netfilter on bridges by adding the following to /etc/sysctl.conf # Disable netfilter on bridges. net.bridge.bridge-nf-call-ip6tables = 0 net.bridge.bridge-nf-call-iptables = 0 net.bridge.bridge-nf-call-arptables = 0 9. Make the netfilter changes active # sysctl -p 10. Restart network services # service network restart 11. Check to make sure the bridge interface is up # brctl show 12.
| || || ``-+|||`- 2:0:2:3 sdh 8:112 active ready 1:0:3:3 sdi 8:128 active ready 2:0:3:3 sdj 8:144 active ready policy='round-robin 0' prio=10 1:0:0:3 sdc 8:32 active ready 2:0:0:3 sdd 8:48 active ready 1:0:1:3 sde 8:64 active ready 2:0:1:3 sdf 8:80 active ready running running running status=enabled running running running running 15. Restart multipathd # service multipathd restart # chkconfig multipathd on 16. Confirm the device is accessible via /dev/mapper or multipath -ll 17.
IP Port Number Protocol Component 5404, 5405 UDP corosync / cman (Cluster Manager) 11111 TCP ricci (part of Conga remote agent) 21064 TCP dlm (distributed lock manager) 50006, 50008, 50009 TCP ccsd (Cluster Configuration System Daemon) 50007 UDP ccsd Cluster Configuration System Daemon) 22 TCP / UDP Secure Shell Access 80 TCP / UDP HyperText Transport Protocol 443 TCP / UDP HyperText Transport Protocol over TLS / SSL Table 6: Iptables for Cluster Services # ./firewall-config.
6.4.1 Set up the Logical Volumes for the Virtual Machines For this section, a SAN LUN with at least 500GB of free space will need to be presented to mgmt1. 250GB will be more than enough space for this exercise. Using a SAN will allow for clustering this system later in the deployment. Target System: mgmt1 1. Create the physical volume # pvcreate /dev/mapper/rhcfdata 2. Create the volume group # vgcreate vg_rhcf /dev/mapper/rhcfdata 3.
1. Change “Memory (RAM)” to “8192” MB 2. Change “CPUs” to “8” 3. Click “Forward” 4. On “Step 4 of 5” 1. Select “Select managed or other existing storage” and browse out to the logical volume you created lv_satellite 2. Click “Forward” 5. On “Step 5 of 5” 1. Click “Finish” 3. Click the “Open” button on the top navigation pane to open a console to the virtual machine and perform the install using the following guidelines: • SELinux should be disabled Deploy Satellite Software Target System: sat-vm 1.
Channel Name Purpose rhel-x86_64-server-6 Red Hat Enterprise Linux (v. 6 for 64-bit AMD64 / Intel64 Operating System Server) rhn-tools-rhel-x86_64server-6 Red Hat Network Tools for Red Hat Enterprise Linux rhel-x86_64-server-5 Red Hat Enterprise Linux (v.
and place all custom rules in this chain. Please refer to the Red Hat Security Guide 1 for more information on using iptables IP Port Number Protocol Component 4545 TCP / UDP RHN Monitoring Funcionality 5222 TCP / UDP RHN Push Functionality 22 TCP / UDP Secure Shell Access 80 TCP / UDP HyperText Transport Protocol 443 TCP / UDP HyperText Transport Protocol over TLS / SSL Table 8: Iptables for Satellite Server # ./firewall-config.
6.6 Create Kickstart Profiles and Activation Keys 6.6.1 Create Activation Keys Target System: Browser with access to sat-vm Create a Red Hat Enterprise Linux 5 KVM Hypervisor Activation Key 1. Click the “Systems” tab on the upper navigation menu 2. Click “Activation Keys” on left navigation menu 3. Click “Create New Key” on upper navigation menu 4. Provide the following information 1. Description: “RHEV-H KVM Hypervisor” 2. Key: “RHEVKVMHYPER” 3.
• “RHN Tools for RHEL (v. 6 for 64-bit x86_64” • “RHEL Server Resilient Storage (v. 6 for 64-bit x86_64)” 2. Click “Update Key” 6.6.2 Create Kickstart Profiles Target System: Browser with access to sat-vm Create a Red Hat Enterprise Linux 5 Base Kickstart Profile 1. Click “Systems” in the top navigation pane 2. On the left navigation pane click “Kickstart” 3. In the “Kickstart Actions” pane click “Create a New Kickstart Profile” 4. On “Step 1” 1.
7. Click “Finish” Create a Red Hat Enterprise Linux 5 Base Virtual Machine Kickstart Profile 1. Click “Systems” in the top navigation pane 2. On the left navigation pane click “Kickstart” 3. In the “Kickstart Actions” pane click “Create a New Kickstart Profile” 4. On “Step 1” 1. Provide a “Label” for the kickstart “rhel5_base_virtual_machine” 2. On “Base Channel” select “Red Hat Enterprise Linux (v. 5 for 64-bit x86_64) 3. On “Kickstartable Tree” select “ks-rhel-x86_64-server-5-u6” 4.
Create a Red Hat Enterprise Linux 6 Clustering Kickstart Profile and Associate Activation Key 1. Click “Systems” in the top navigation pane 2. On the left navigation pane click “Kickstart” 3. In the “Kickstart Actions” pane click “Create a New Kickstart Profile” 4. On “Step 1” 1. Provide a “Label” for the kickstart “rhel6_clustering” 2. On “Base Channel” select “Red Hat Enterprise Linux (v. 6 for 64-bit x86_64) 3. On “Kickstartable Tree” select “ks-rhel-x86_64-server-6-6.0” 4. Click “Next” 5. On “Step 2” 1.
8. Click “Activation Keys” in the upper navigation menu 1. In the “Kickstart Details” screen, select the “RHEVKVMHYPER” key 2. Click “Update Activation Keys” 6.7 Deploy DHCP / DNS Virtual Machine Target System: mgmt1 1. Launch virt-manager and manually deploy a Red Hat Enterprise Linux 6.0 virtual machine and call it dnsdhcp-vm 1. Run virt-manager with the following command # virt-manager 2. Click the “New” button on the top navigation pane. 1. On the “Step 1 of 5 page” 1.
1. Use the example dhcp.conf file to get started with a template. # cat /usr/share/doc/dhcp-4.1.1/dhcpd.conf.sample > /etc/dhcp/dhcpd.conf See Appendix A for example dhcpd.conf 2. Make sure to backup any configuration files before making any changes. 6.7.2 Configure DNS Target System: dnsdhcp-vm 1. Configure DNS, see Appendix A for example zone files, place in correct directory # service named configtest 1. Test name resolution # host sat-vm sat-vm.rhcf.lab has address x.x.x.x 2.
# yum install virtio-win # virt-manager 3. Click the “New” button on the top navigation pane. 1. On “Step 1” 1. Provide a virtual machine name 2. Choose “Local install media (ISO image or CDROM) 3. Click “Forward” as shown in Figure 6.2:virt-manager for RHEVM-M Figure 6.2:virt-manager for RHEVM-M 2. On “Step 2” 1. Browse to the ISO image 2. Change “OS Type” to “Windows” 3. Change “Version” to “Microsoft Windows 2008” 4. Click “Forward” as shown in Figure 6.3: virt-manager for RHEVM-M 45 www.redhat.
www.redhat.
Figure 6.3: virt-manager for RHEVM-M 3. On “Step 3” 1. Change “Memory (RAM)” to “8092” MB 2. Change “CPUs” to “2” 3. Click “Forward” as shown in Figure 6.4: virt-manager Memory for RHEVM 47 www.redhat.
Figure 6.4: virt-manager Memory for RHEVM 4. On “Step 4” 1. Select “Select managed or other existing storage” and browse out to the logical volume that was created earlier: lv_rhevm 2. Click “Forward” as shown in Figure 6.5: RHEVM-M Volume www.redhat.
Figure 6.5: RHEVM-M Volume 5. On “Step 5” 1. Check the “Customize Configuration before install” check-box as shown in Figure 6.6: RHEVM-M Customize 49 www.redhat.
Figure 6.6: RHEVM-M Customize 2. Click “Finish” 1. On the “Basic Details” screen, click “Add Hardware” on the left navigation panel www.redhat.
Figure 6.7: RHEVM Add Hardware 2. Click “Forward” on Adding Virtual Hardware screen as shown in Figure 6.7: RHEVM Add Hardware 1. Browse to the virtio-win.vfd drivers 1. Click “Forward” 2. Click “Finish” as shown in Figure 6.8: RHEVM-M Add VirtIO Drivers 51 www.redhat.
Figure 6.8: RHEVM-M Add VirtIO Drivers 3. Close the “Add Hardware” window 6. Click the “Open” button on the top navigation pane to open a console to the virtual machine and perform the install. 4. Install Microsoft Windows 2008 R2 1. When the virtual machine is posting, hit “F12” and choose “CDROM” 2. In the console of virt-manager for the VM 1. Click “Next” on the opening screen of the install 3. Click “Install Now” 4. On the “Select the operating system you want to install” screen, click “Next” 5.
7. On the “Where do you want to install Windows” screen 1. Click “Load Driver” 8. On the “Load Driver” screen 1. Click “Browse” 9. On the “Browse for Folder” screen, select “Floppy Disk Drive (A:)” 1. Browse out to the drivers 1. amd64 | Win2008 2. Click “Ok” 10. On the “Select the driver to be installed” screen 1. Click “Next” 11. On the “Where do you want to install Windows” screen, click “Next” 12. The system will install and reboot and complete the installation 5.
7. Enable Remote Desktop on the Microsoft Windows virtual machine 8. Enable the appropriate ports via the Microsoft Windows Firewall configuration utility 9. Add rhevm-vm entries to the DNS / DHCP server 10. Connect to the rhevm-vm via rdesktop from a Linux host $ rdesktop -0 -u Administrator -p $password rhevm-vm -f & 11. Update the system and reboot 6.8.2 Install Red Hat Enterprise Virtualization Manager Software 6.8.2.1 Prepare the Microsoft Windows 2008 R2 server for RHEV Target System: rhevm-vm 1.
6.8.2.3 Install Red Hat Enterprise Virtualization Manager Target System: rhevm-vm 1. Copy the RHEV Manager software to the rhevm-vm server 1. winscpxi will work for this or a direct download from RHN 2. Browse to where the RHEV-M software was downloaded and launch the installer 3. Take the defaults until the “Select RHEV Manager domain and User” screen 1. Change “Select Local or Domain” to “Local” 2. Provide the username and password, click “Next” 4.
--distro="rhevh" \ --kopts="storage_init=/dev/sda storage_vol=::::: management_server=rhcfrhevm-vm.cloud.lab.eng.bos.redhat.com netconsole=rhcf-rhevmvm.cloud.lab.eng.bos.redhat.com rootpw= ssh_pwauth=1 firstboot local_boot" 5. Synchronize the new configuration # cobbler sync 6. Open the tftp ports in iptables as shown in Table 9: DNS / DHCP iptables IP Port Number Protocol Component 69 TCP / UDP TFTP 53 TCP / UDP DNS 123 TCP / UDP NTP Table 9: DNS / DHCP iptables # ./firewall-config.
1. PXE boot the RHEV-H server and install. 2. Add to DNS / DHCP 6.9.3 Approve RHEV Hypervisor Target System: RHEV-M Virtual Machine 1. On the “Hosts” tab 1. Right click on the host that was just PXE booted and click “Approve” 2. On the “Edit and Approve Host” screen 3. Click “Enable Power Management” 4. Provide the Appropriate information for the system 6.10 Deploy the RHEL KVM Hypervisor 6.10.1 Deploy Red Hat Enterprise Linux 5.6 Server with KVM The rhevh2 server will serve as the second RHEL Hypervisor.
5. Enable Power Management and provide appropriate entries • Power management tests will only work when there are at least two nodes in the cluster. The reason for this is because the test is based on fencing. There has to be at least two nodes in order for that to work. 6. Click “OK” as shown in Figure 6.9: RHEV New Host Figure 6.9: RHEV New Host The software will be installed and the system will be rebooted. 6.12 Configure RHEV Datacenter, Cluster, and Storage Domain Target System: rhevm-vm 1.
2. Click on the “New” button on the upper navigation menu 1. Provide a “Name” 2. Provide a “Description” 3. Change the type to “FCP” 4. Click “OK” 3. On the “New Data Center – Guide Me” Screen 1. Click “Configure Clusters” 2. Provide a “Name” 3. Provide a “Description” 4. Pick the correct “CPU Name” 5. Click “OK” as shown in Figure 6.10: New Cluster Configuration Figure 6.10: New Cluster Configuration 59 www.redhat.
4. On the “New Data Center – Guide Me” Screen 1. Click “Configure Storage” 2. Provide “Name” 3. Select the “Storage Type” of “FCP” 4. In the “Discovered LUNS” panel, select the shared LUN 5. Click “Add” 6. Click “OK” as shown in Figure 6.11: RHEV Storage www.redhat.
Figure 6.11: RHEV Storage 5. On the “New Data Center – Guide Me” Screen 1. Click “Attach Storage” 2. Select the “Storage Domain That Was Just Created” 3. Click “OK” At this point, the Data center should have a green arrow pointing upwards. This means that the RHEV environment is fully functional. Refer to the RHEV install guide xii for more information on configuration and troubleshooting. 6.
virtual machine. Use virt-manager to deploy Red Hat Enterprise Linux 6 NFS virtual machine via PXE using the rhel6_base_virtual_machine kickstart profile created above. The NFS export directory must be configured for read write access and must be owned by vdsm:kvm. If these users do not exist on the external NFS server, owner/group should be set to 36:36 for RHEV functionality: # chown 36:36 /mnt/nfs 1. Click on the “Storage” tab on the upper navigation menu 2.
www.redhat.
www.redhat.
Figure 6.12: RHEV ISO Domain 4. Attach the ISO domain to the data center 1. Click on the “Data Centers” tab in the upper navigation menu 1. Select the data center 2. Click the “Storage” tab on the lower navigation menu 3. Click the “Attach ISO” button 4. Select the ISO domain that was just created, click OK as shown in Figure 6.13: 65 www.redhat.
Figure 6.13: RHEV Attach ISO 5. Click the “Activate” button on the lower navigation menu Upload the RHEV Guest Tools ISO 1. Click on “Start” | “All Programs” | “Red Hat” | “RHEV Manager” | “ISO Uploader” 2. On the ISO Uploader tool 1. Click “Add” 2. Browse to the ISO files for • RHEV Guest Tools • Microsoft Windows Server 2008R2 • RHEL 5.6 3. Enter the password 4. Click “Upload” as shown in Figure 6.14: RHEV ISO Uploader www.redhat.
Figure 6.14: RHEV ISO Uploader 5. Close the ISO Uploader 67 www.redhat.
7 Deploy Tenant Virtual Machines 7.1 Overview This section provides the details on how to deploy Red Hat Enterprise Linux virtual machines via PXE, ISO and template. Also in this section details on how to deploy Microsoft Windows virtual machines via ISO and template are discussed. Figure 7.1: Installation Overview shows the current step in the overall process. Figure 7.1: Installation Overview 7.2 Deploy Red Hat Enterprise Linux 5.6 on RHEV VM Via PXE Target System: rhevm-vm 1.
menu 1. Provide a “Name” 2. Provide a “Description” 3. Change “Memory Size” to “1024 MB” 4. Change the “Operating System” to “Red Hat Enterprise Linux 5.x x64” 4. Click on the “High Availability” tab on the left navigation pane 1. Check the “High Availability” box 2. Click “OK” 5. Click “Configure Network Interfaces” button 1. Take the defaults and click “OK” 6. Click “Configure Virtual Disks” 1. Provide “Size” 2. Check “Wipe after delete” 3. Click “OK” 4. Click “Configure Later” 7.
1. Take the defaults and click “OK” 6. Click “Configure Virtual Disks” 1. Provide “Size” 2. Check “Wipe after delete” 3. Click “OK” 4. Click “Configure Later” 7. Right click the virtual machine and select “Run Once” 1. Click the box “Attach CD” and choose the Red Hat Enterprise Linux media 2. In the “Boot Sequence” panel, select “CD-ROM” and move it up 3. Click “OK” 8. Click the “Console” button in the top navigation menu and perform the ISO installation 7.4 Deploy Red Hat Enterprise Linux 5.
1. Click on the “Virtual Machines” tab on upper navigation menu 2. Click on the “New Server” button on upper navigation menu 3. On the “New Server Virtual Machine” screen, on the “General” tab on left navigation menu 1. Provide a “Name” 2. Provide a “Description” 3. Change “Memory Size” to “1024 MB” 4. Change the “Operating System” to “Windows 2008 R2” 1. This adds another tab on the left navigation pane, “Windows Sys. Prep.” 4. Click on the “High Availability” tab on the left navigation pane 1.
2. Open the console to the Microsoft Windows virtual machine 3. Browse to the CD-ROM using Microsoft Windows Explorer and launch the RHEVToolsSetup executable 1. Take the defaults and complete the install. • Instead, it will run when derived VMs first boot, injecting the desktop drivers and tools they required (SPICE, etc...) 7.5.1 Sysprep Microsoft Windows VM and Create a Template Target System: windows-vm 1.
2. Right click on the VM and choose “Console” 8 Configure High Availability Environment This section covers setting up the Red Hat Enterprise Linux High Availability environment. The overview is to install luci on a dedicated RHEV virtual machine, then install the second bare metal server and deploy the cluster software onto it. Once that is finished, cluster the virtual machines, make sure the XML cluster configuration files are on both nodes and test failover. Figure 8.
access to the fence devices. Please refer to the installation guide xiii for more information. Target System: rhevm-vm 1. Click on the “Virtual Machines” tab on upper navigation menu 2. Click on the “New Server” button on upper navigation menu 3. On the “New Server Virtual Machine” screen, on the “General” tab on left navigation menu 1. Provide a “Name” e.g., luci-vm 2. Provide a “Description” 3. Change “Memory Size” to “1024 MB” 4. Change the “Operating System” to “Red Hat Enterprise Linux 6.x x64” 4.
3. Configure iptables with the ports shown in Table 10: Luci Firewall IP Port Number Protocol Component 8084 TCP / UDP Luci 11111 TCP / UDP ricci Table 10: Luci Firewall # ./firewall-config.sh Please put the ports you would like to firewall here, separated by a space: 8084 11111 Please put the protocols you would like to firewall here, separated by a space: tcp udp iptables: Chain already exists.
Install second bare metal server The second bare metal server will serve as the second cluster node. This node provides a second host for the virtual machines to fail over to. Target System: mgmt2 1. PXE boot the second bare metal server and install with the cluster profile and use the rhel6_clustering kickstart profile created earlier. 2. Configure bridge networking for mgmt2 3.
# rhn-bootstrap --activation-keys 1-cluster --allow-config-actions --allow-remote-commands --script bootstrap_cluster_node.sh 1. This will produce some verbose output, with a path to bootstrap_cluster_node.sh, copy that path for the next command # cat /var/www/html/pub/bootstrap/bootstrap_cluster_node.
www.redhat.
www.redhat.
Figure 8.2: Luci Login 4. Click on “Manage Clusters” and click “Create” and add the nodes and click “Create Cluster” as shown in Figure 8.3: Luci Create Cluster www.redhat.
Figure 8.3: Luci Create Cluster 4. Once the cluster is added, click on the cluster name the nodes will be listed as shown in Figure 8.6: Luci Failover Domain 81 www.redhat.
Figure 8.4: Luci Node List 5. Configure fencing for the cluster 1. Click on “Fence Devices” on the upper navigation menu, click “Add” as shown in Figure 8.5: Luci Fence Device Figure 8.5: Luci Fence Device 6. Create a failover domain, click on “Failover Domain” in the upper navigation menu, click “Add” as shown in Figure 8.6: Luci Failover Domain www.redhat.
Figure 8.6: Luci Failover Domain 7. Share SSH keys between the two hosts (perform this on both nodes) 1. Target System: mgmt1 # ssh-keygen -t rsa # ssh-copy-id -i .ssh/id_rsa.pub mgmt2 2. Target System: mgmt2 # ssh-keygen -t rsa # ssh-copy-id -i .ssh/id_rsa.pub mgmt1 8.3 Cluster Virtual Machines Target System: Luci web interface and mgmt1 Create HA Service for sat-vm 1. Shut down the virtual machines and copy virtual machine XML files from mgmt1 to mgmt2 # # # # scp scp scp scp /etc/libvirt/qemu/nfs-vm.
5. Provide “Service Name” 6. Check the box “Automatically Start this Service” 7. Select the “Failover Domain” 8. Click “Add a Resource” 1. Select “Virtual Machine” 1. Provide “VM Configuration file path” 2. Click “Submit” 9. Repeat this process for each virtual machine 10. Check the virtual machines status on the command line www.redhat.
9 Deploy and Scale Applications This section discusses deploying and scaling three types of applications. The first application is a generic Java based application that is used to demonstrate ease of deployment and scaling of a simple application. The second software stack is the Jboss EAP framework. This application is a bit more complicated but using technologies like Red Hat Network satellite server and scripts the process can still be easy.
9.1.1 Configure GPG and Sign the javaApp package Target System: sat-vm 1. Create GPG key for RPM # gpg –gen-key 1. Take the defaults 2. DSA 3. 2048 Bits 4. Doesn't expire 5. Provide “Real Name” 6. Provide “Email Address” 7. Provide “Comment” 2. Get the GPG key # gpg --list-keys --fingerprint /root/.gnupg/pubring.
# gpg --export --armor C15579CF > APP-RPM-GPG-KEY 7. Import the key # rpm --import APP-RPM-GPG-KEY 8. Check the signature on the rpm again # rpm --checksig javaApp-2-0.noarch.rpm 9. Make the key available # cp APP-RPM-GPG-KEY /var/www/html/pub/. 9.1.2 Set up Software Channel on Satellite Server Target System: sat-vm RHN web interface 1. Click on the “Channels” tab in the upper navigation menu 2. On the left navigation bar, click “Manage Software Channels” 3.
--verbose javaApp-2-0.noarch.rpm 9.1.4 Create RHN Activation Key for Custom Channel On the RHN Satellite Server Target System: RHN web UI 1. On the upper navigation bar, click on “Systems” tab 1. On the left navigation bar, click on “Activation Keys” 2. On the right navigation bar, click on “Create New Key” 2. Provide information for • “Description” • Key • Select “Provisioning” and “Virtualization” from “Add-on Entitlements” 3. Click “Create Activation Key” 1.
12. Click “Update Activation Keys” button 13. Click “Scripts” in the upper navigation menu 1. Click “Add New Kickstart Script” on the upper navigation menu 1. Provide “Scripting Language: /bin/bash” 2. Provide the following for “Script Contents” wget http://x.x.x.x/pub/APP-RPM-GPG-KEY -O /etc/pki/rpm-gpg/APPRPM-GPG-KEY rpm --import /etc/pki/rpm-gpg/APP-RPM-GPG-KEY yum -y install javaApp 3. Change “Script Execution Time” to “Post Script” 4. Click “Update Kickstart” 9.1.
10. After the virtual machine is installed, log in and verify javaApp is running # pgrep javaApp 9.1.7 Create a Template from the javaApp Virtual Machine Target System: rhevm-vm 1. Make sure the virtual machine is stopped, right click on the virtual machine 1. Choose “Make Template” 2. Provide a “Name” 3. Provide a “Description” 4. Click “OK” 9.1.8 Scale the javaApp Virtual Machine Target System: rhevm-m 1. Open the RHEV-M Scripting library 2. Log in and launch script add-vms.ps1 Appendix A 3.
2. Click “Activation Keys” on left navigation menu 3. Click “Create New Key” on upper navigation menu 4. Provide the following information 1. Description: “jon-server” 2. Key: “jon” 3. Click “Create Activation Key” 5. On the jon-server Activation Key screen, click the “Packages” tab in the upper navigation menu 1. Add the following packages • postgresq • postgresql-server • java-1.6.0-openjdk.x86_64 2.
10. Click “Activation Keys” in the upper navigation menu 1. Select “jon-server” 2. Click “Update Activation Keys” 11. Add a new Post script 1. Click “Scripts” in the upper navigation menu 2. Click “Add new kickstart script” 1. Add the following to the “Script Contents” section (use the script that was downloaded in “Section 5.3 Downloading Software” wget http://sat-vm.rhcf.lab/pub/scripts/rhq-install.sh -O /tmp/rhqinstall.sh chmod +x rhq-install.sh ./rhq-install.sh 2.
5. On the “New Virtual Machine – Guide Me” screen, click “Configure Later” 6. Boot the “jon-server” virtual ma chine 7. On the top navigation bar, click the “Run” button 8. On the top navigation bar, Click on the “Console” button 9. When the virtual machine boots, select the appropriate entry from the PXE menu. 12. When the jon-server reboots, log in and check the rhq service # service rhq-server.sh status 13. Check the install log to ensure everything completed # cat ks-post.log 14.
ACCEPT iptables --append RHCF --protocol udp --destination-port 5432 --jump ACCEPT Remember to "service iptables save" Verify JBoss ON Server Operations and Cluster the JBoss ON Server Target System: Any machine with a browser 1. Open Browser, hit JON IP address “x.x.x.x:7080” 2. Log in with Username: rhqadmin Password: rhqadmin 9.3 Deploy JBoss Enterprise Application Platform Create a activation key for the JBoss Server Target System: Browser connected to RHN server 1.
3. On “Kickstartable Tree” select “ks-rhel-x86_64-server-5-u6” 4. On “Virtualization Type” select “KVM Virtualized Guest” 5. Click “Next” 5. On “Step 2” 1. Click “Next” 6. On “Step 3” 1. Provide a root password 7. Click “Finish” 8. Click “Activation Keys” in the upper navigation menu 1. In the “Kickstart Details” screen, select the “jboss-eap” key 2. Click “Update Activation Keys” Deploy JBoss Server With Application Automation Target System: rhevm-vm 1.
8. Click the “Run” button in the top navigation menu and perform the install 9. Click the “Console” button in the top navigation menu and monitor the PXE installation Automate the deployment of JBoss by Adding jbossas to Activation Key 1. Change the activation key 2. Click “Systems” on the upper navigation menu 3. Click “Activation Keys” on the left navigation menu 4. Select the “jboss-eap” activation key 1. Click “Packages” on the upper navigation menu 2.
Deploy JBoss Server Application Automatically Target System: rhevm-vm 1. Click on the “Virtual Machines” tab on upper navigation menu 2. Click on the “New Server” button on upper navigation menu 3. On the “New Server Virtual Machine” screen, on the “General” tab on left navigation menu 1. Provide a “Name” 2. Provide a “Description” 3. Change “Memory Size” to “1024 MB” 4. Change the “Operating System” to “Red Hat Enterprise Linux 5.x x64” 4. Click on the “High Availability” tab on the left navigation pane 1.
Target System: Browser with access to RHN 1. Click “System” on the upper navigation menu 2. Select “Kickstart” on the left navigation menu 3. Select the “jboss-eap” kickstart profile 1. Click “Clone Kickstart” on the upper navigation menu 2. Provide a new “Kickstart Label” 3. Click “Clone Kickstart” 4. Select the new Kickstart profile 1. Click “Scripts” in the upper navigation menu 2. Click “Delete Kickstart” in upper navigation menu 1.
9.4 Deploy and Scale Applications – MRG Manager The goal of this section is to install and configure MRG Grid and successfully run jobs on multiple nodes and then interpret the results. For this section, the files that are needed are the perfect_number.sub file which serves as the job submission file and the perfect.tgz file which has the code that will be run on the hosts. Create a activation key for the MRG Manager Target System: Browser with access to RHN 1.
1. Click “Systems” in the top navigation pane 2. On the left navigation pane click “Kickstart” 3. In the “Kickstart Actions” pane click “Create a New Kickstart Profile” 4. On “Step 1” 1. Provide a “Label” for the kickstart “rhel5_base_bare_metal” 2. On “Base Channel” select “Red Hat Enterprise Linux (v. 5 for 64-bit x86_64) 3. On “Kickstartable Tree” select “ks-thrl-x86_64-server-5-u6” 4. On “Virtualization Type” select “KVM Virtualized Guest” 5. Click “Next” 5. On “Step 2” 1. Click “Next” 6. On “Step 3” 1.
Deploy MRG Server using RHEV Target System: rhevm-vm 1. Click on the “Virtual Machines” tab on upper navigation menu 2. Click on the “New Server” button on upper navigation menu 3. On the “New Server Virtual Machine” screen, on the “General” tab on left navigation menu 1. Provide a “Name” 2. Provide a “Description” 3. Change “Memory Size” to “2048 MB” 4. Change “Total Cores” to “2” 5. Change the “Operating System” to “Red Hat Enterprise Linux 5.x x64” 4.
1. Open a browser on the MRG localhost and go to http://127.0.0.1:45672/login.html or from a remote machine and log in. 2. Confirm functionality by logging in as mrgmgr with the password set above Check functionality via CLI 1. Log in as the “admin” user and ssue the following command to look at the queue $ condor_status -any MyType TargetType DaemonMaster None Name mrgexec.rhcf.lab Create a MRG Execution Node Activation Key Target System: Browser with access to RHN 1.
1. Click “Systems” in the top navigation pane 2. On the left navigation pane click “Kickstart” 3. In the “Kickstart Actions” pane click “Create a New Kickstart Profile” 4. On “Step 1” 1. Provide a “Label” for the kickstart “mrg-exec-node” 2. On “Base Channel” select “Red Hat Enterprise Linux (v. 5 for 64-bit x86_64) 3. On “Kickstartable Tree” select “ks-rhel-x86_64-server-5-u6” 4. On “Virtualization Type” select “KVM Virtualized Guest” 5. Click “Next” 5. On “Step 2” 1. Click “Next” 6. On “Step 3” 1.
Deploy MRG Execution Nodes using RHEV Target System: rhevm-vm 1. Click on the “Virtual Machines” tab on upper navigation menu 2. Click on the “New Server” button on upper navigation menu 3. On the “New Server Virtual Machine” screen, on the “General” tab on left navigation menu 1. Provide a “Name” 2. Provide a “Description” 3. Change “Memory Size” to “2048 MB” 4. Change “Total Cores” to “2” 5. Change the “Operating System” to “Red Hat Enterprise Linux 5.x x64” 4.
1. Once these nodes are deployed, name them mrgexec{1-3} and make sure the IP addresses are static and the hosts are set up in DNS and that name resolution is working properly. 12.
Launch jobs on the MRG Execution nodes Target System: mrgmgr 1. Create the “admin” user and log in with the “admin” user account, generate a ssh public / private key pair. 2. Create a “admin” user on each of the MRG execute virtual machines 3. Share the public key created in step 1 with the other MRG execute nodes using sshcopy-id 4. Extract the perfect.tgz file in “admin” home directory $ tar xzvf perfect.tgz perfect/ perfect/perfect.py perfect/mk_jobs.sh perfect/output/ perfect/submit_jobs.
6. Submit the perfect number job to multiple hosts $ condor_submit perfect_number.sub Submitting job(s). Logging submit event(s). 1 job(s) submitted to cluster 101. 7. Verify the job is running in the GUI as shown in Figure 9.2: MRG Grid with Job Executing 107 www.redhat.
Figure 9.2: MRG Grid with Job Executing 8. Check the job queue via CLI $ condor_q -- Submitter: mrgmgr.rhcf.lab ID OWNER SUBMITTED 91.0 admin 4/23 21:29 92.0 admin 4/23 21:29 93.0 admin 4/23 21:29 94.0 admin 4/23 21:29 95.0 admin 4/23 21:29 www.redhat.com : <10.16.139.32:9675> : mrgmgr.rhcf.lab RUN_TIME ST PRI SIZE CMD 0+00:00:00 I 0 0.0 perfect1 1 1000000 0+00:00:00 I 0 0.0 perfect1 1 1000000 0+00:00:00 I 0 0.0 perfect1 1 1000000 0+00:00:00 I 0 0.0 perfect1 1 1000000 0+00:00:00 I 0 0.
9. While it is outside the scope of this paper to be a troubleshooting guide, if the job is submitted and it does not run, check what the problem is with condor_q -better-analyze $ condor_q -better-analyze -- Submitter: mrgmgr.rhcf.lab : <10.16.139.32:9675> : mrgmgr.rhcf.lab --096.000: Run analysis summary.
11 Appendix A 11.1 Configuration Files DNS Zone Files: rhcf.local.db $TTL 1H @ SOA dndsdhcp-vm www.redhat.com root.rhcf-sat-vm.rhcf.local.
3H 1H 1W 1H ) NS dndsdhcp-vm dnsdhcp-vm IN 1H A 192.168.0.100 mgmt1 IN 1H A 192.168.0.10 mgmt2 IN 1H A 192.168.0.11 rhevh1 IN 1H A 192.168.0.12 rhevh2 IN 1H A 192.168.0.13 sat-vm IN 1H A 192.168.0.14 luci-vm IN 1H A 192.168.0.15 rhevm-vm IN 1H A 192.168.0.16 nfs-vm IN 1H A 192.168.0.17 cobbler-vm IN 1H A 192.168.0.18 sat IN 1H CNAME sat-vm 192.168.0.db $TTL 1H @ SOA dnsdhcp-vm.rhcf.local. root.dnsdhcp.rhcf.local. ( 3H 1H 1W 1H ) NS dnsdhcp-vm.rhcf.local. 100 PTR dnsdhcp-vm.rhcf.local. 10 PTR mgmt1.rhcf.
# Use this to enble / disable dynamic dns updates globally. #ddns-update-style none; # If this DHCP server is the official DHCP server for the local # network, the authoritative directive should be uncommented. #authoritative; # Use this to send dhcp log messages to a different log file (you also # have to hack syslog.conf to complete the redirection). log-facility local7; subnet 192.168.0.0 netmask 255.255.255.0 { range 192.168.0.10 192.168.0.30; option domain-name-servers 192.168.0.
# # #} product "S/390.*" } ## Use user friendly names, instead of using WWIDs as names. defaults { user_friendly_names no } ## ## Here is an example of how to configure some standard options.
# # # # # # # # # path_selector failback rr_weight no_path_retry } multipath { wwid alias } multipath { wwid alias } "round-robin 0" manual priorities 5 1DEC_____321816758474 red 3600c0ff000d84a99659e414d01000000 rhcflun } #devices { # device { # vendor "COMPAQ " # product "HSV110 (C)COMPAQ" # path_grouping_policy multibus # getuid_callout "/lib/udev/scsi_id --whitelisted --device=/dev/%n" # path_checker readsector0 # path_selector "round-robin 0" # hardware_handler "0" # failback 15 # rr_weight prioriti
createrepo_flags: "-c cache -s sha" default_kickstart: /var/lib/cobbler/kickstarts/default.ks default_name_servers: [] default_ownership: - "admin" default_password_crypted: "$1$mF86/UHC$WvcIcX2t6crBz2onWxyac." default_virt_bridge: xenbr0 default_virt_file_size: 5 default_virt_ram: 512 default_virt_type: xenpv enable_menu: 1 func_auto_setup: 0 func_master: overlord.example.
redhat_management_server: "sat-vm.cloud.rhcf.lab" redhat_management_key: "" redhat_management_permissive: 0 register_new_installs: 0 reposync_flags: "-l -m -d" restart_dns: 1 restart_dhcp: 1 run_install_triggers: 1 scm_track_enabled: 0 scm_track_mode: "git" server: dnsdhcp-vm.rhcf.
# deploy the test app cd $JBOSS_DIR/jbossas/server/default/deploy wget http://rhcf-sat-vm.cloud.lab.eng.bos.redhat.com/pub/kits/jboss-seam-booking-ds.xml wget http://rhcf-sat-vm.cloud.lab.eng.bos.redhat.com/pub/kits/jboss-seam-booking.ear chown jboss.jboss jboss-seam-* # configure JBoss auto start chkconfig jbossas on service jbossas start # Copy startup script cd /etc/init.d wget http://rhcf-sat-vm.cloud.lab.eng.bos.redhat.
after=`expr $line + 1` sed -e "${after}d" -e "${before}d" agent-configuration.xml > agent-configuration.xml2 mv agent-configuration.xml2 agent-configuration.xml sed -e '/rhq.agent.configuration-setup-flag/s/false/true/g' agent-configuration.xml > agentconfiguration.xml2 mv agent-configuration.xml2 agent-configuration.xml sed -e "/rhq.agent.server.bind-address/s/value=\".*\"/value=\"ra-jonvm.cloud.lab.eng.bos.redhat.com\"/g" agent-configuration.xml > agent-configuration.xml2 mv agent-configuration.
# This does not implicitly enable Sigar native system # debug mode. You must explicitly enable # RHQ_AGENT_SIGAR_DEBUG in addition to enabling # RHQ_AGENT_DEBUG for Sigar logging to be enabled. # #RHQ_AGENT_DEBUG=true # RHQ_AGENT_SIGAR_DEBUG - Enables Sigar debug mode but only if agent debug # is also enabled. See RHQ_AGENT_DEBUG for more. #RHQ_AGENT_SIGAR_DEBUG=false # RHQ_AGENT_HOME - Defines where the agent's home install directory is.
# is not defined this script will pass in a # default value. If this is set, it # completely overrides the agent's default. # However, if this is set to "none", the # agent will not be passed the VM argument # to set the endorsed dirs. # #RHQ_AGENT_JAVA_ENDORSED_DIRS="${RHQ_AGENT_HOME}/lib/endorsed" # RHQ_AGENT_JAVA_LIBRARY_PATH - The RHQ Agent has a JNI library that # it needs to find in order to do things # like execute PIQL queries and access # low-level operating system data.
# #RHQ_AGENT_CMDLINE_OPTS="--daemon --nonative --cleanconfig" RHQ_AGENT_CMDLINE_OPTS="--daemon --cleanconfig" # RHQ_AGENT_IN_BACKGROUND - If this is defined, the RHQ Agent JVM will # be launched in the background (thus causing this # script to exit immediately). If the value is # something other than "nofile", it will be assumed # to be a full file path which this script will # create and will contain the agent VM's process # pid value.
# Also note that if your agent install directory # has spaces in its name, you might have to do # some special string manipulation to get the # agent script to start. See below for an # example of how to do this. #RHQ_AGENT_START_COMMAND="su -m -l user -c '${RHQ_AGENT_HOME}/bin/rhqagent.sh'" #RHQ_AGENT_START_COMMAND="su -m -l user -c '$(echo ${RHQ_AGENT_HOME}|sed 's/ /\\ /')/bin/rhq-agent.
#script default values: HOSTNAME=`hostname` IP=`ifconfig eth0 | grep 'inet addr' | sed 's/.*inet addr://' | sed 's/ .*//'` CURR_USER=`whoami` AUTOINSTALL_WAITTIME=300 UNINSTALL_ONLY=0 RECREATE_USER=0 # JON installation defaults (what user gets created, where JON lands) JON_ROOT=rhq/ JON_USER=rhq # Java defaults JAVA_HOME=/usr/lib/jvm/jre-openjdk # JON-specific defaults DB_CONNECTION_URL="jdbc:postgresql:\/\/127.0.0.1:5432\/rhq" DB_SERVER_NAME="127.0.0.1" HA_NAME=$HOSTNAME SAT_SERVER=http://rhcf-sat-vm.
for i in $SVC_SCRIPT; do for dir in `grep RHQ_SERVER_HOME= $i | sed 's/[-a-zA-Z0-9_]*=//'`; do if [ -a $dir ]; then JON_HOME=$dir; fi done if [ -z "$JON_HOME" ]; then echo " - JON/JOPR/RHQ home directory was not defined in the service script, uninstall failed." exit 1 else break fi done if [ -z "$JON_HOME" ]; then echo " - JON/JOPR/RHQ home directory was not defined in the service script, uninstall failed.
;; --licenseurl=*) JON_LICENSE_URL="`echo $i | sed 's/[-a-zA-Z0-9]*=//'`" ;; --db-connectionurl=*) DB_CONNECTION_URL="`echo $i | sed 's/[-a-zA-Z0-9]*=//'`" ;; --db-servername=*) DB_SERVER_NAME="`echo $i | sed 's/[-a-zA-Z0-9]*=//'`" ;; --ha-name=*) HA_NAME="`echo $i | sed 's/[-a-zA-Z0-9]*=//'`" ;; --uninstall*) UNINSTALL_ONLY=1 ;; --recreateuser*) RECREATE_USER=1 ;; *) # unknown option echo "You entered an option I didn't recognize." echo "" echo "If an option is not specified, a default will be used.
echo " - Specified JON local user does not exist; hence, it will be created." RECREATE_USER=1 fi # get jon and pop it into a new jon user directory echo " * Purging any old installs and downloading JON..." # jon_uninstall if [ $RECREATE_USER -eq 1 ]; then userdel -f $JON_USER rm -rf /home/$JON_USER useradd $JON_USER -p $1$1o751Xnc$kmQKHj6gtZ50IILNkHkkF0 # mkdir /home/$JON_USER/$JON_ROOT # chown ${JON_USER}.${JON_USER} /home/$JON_USER/$JON_ROOT fi echo wget $SOA_PI_URL -O ./jon_soa_plugin.
# IPv4 local connections: host all all 127.0.0.1/32 host all all 10.0.0.1/8 # IPv6 local connections: host all all ::1/128 " > /var/lib/pgsql/data/pg_hba.conf trust md5 trust chkconfig postgresql on service postgresql restart echo " * Unzipping and configuring JON..." # unzip jon su - $JON_USER -c 'unzip jon.zip' su - $JON_USER -c 'rm jon.zip' su - $JON_USER -c "mv jon-server-* $JON_ROOT" su - $JON_USER -c "mv rhq* $JON_ROOT" # configure jon's autoinstall sed -i "s/rhq.autoinstall.enabled=false/rhq.
# install JON license echo " * Downloading JON license..." wget $JON_LICENSE_URL -O /home/$JON_USER/ $JON_ROOT/jbossas/server/default/deploy/rhq.ear.rej/license/license.xml echo " * Starting JON for the first time..." service rhq-server.sh start # install JON plugins echo " * Waiting until server installs..." sleep $AUTOINSTALL_WAITTIME #wait for autoinstall to finish echo " * Installing plugins..." for i in /home/$JON_USER/*.zip ; do unzip -d /tmp/rhq-plugins $i *.jar ; done find /tmp/rhq-plugins -name "*.
fi # Loop through the satellite_channels.list file and construct list of channels for satellite-sync SAT_CHANNELS="" for channel in $(cat satellite_channels.list) do SAT_CHANNELS="${SAT_CHANNELS} --channel=${channel}" done # Handle options passed to script while getopts ":er" opt; do case $opt in e ) echo About to run: satellite-sync ${SAT_CHANNELS} ;; r ) satellite-sync ${SAT_CHANNELS} ;; \?) help_func exit 1 ;; * ) echo 'Use -e or -r' exit 1 esac done shift $(($OPTIND - 1 )) add-vms.
$my_temp = select-template -SearchText $tempName if ($my_temp -eq $null) { Write-host "No matching templates found!" exit } elseif ($my_temp.count -gt 1) { Write-host "Too many matching templates found!" exit } elseif ($my_temp.name -eq "Blank") { Write-host "Can not use Blank template!" exit } #search for matching basenames #search for matching basenames $matches = select-vm -searchtext "$baseName" | where {$_.
$my_vm.DisplayType = 'VNC' $uv = update-vm -vmobject $my_vm $sv = start-vm -VmObject $my_vm } else { $my_vm = add-vm -name $baseName$i -templateobject $my_temp -HostClusterId $my_clusId -copytemplate -Vmtype server -Async #Until BZ 617730 and 617725 are addressed, use this work around $my_vm.DisplayType = 'VNC' $my_vm.DisplayType = 'VNC' $uv = update-vm -vmobject $my_vm } } firewall-config.
echo echo "Remember to \"service iptables save\"" echo mrgMgr-config.sh # register system with satellite rpm -ivh http://RHCF-sat-vm.cloud.lab.eng.bos.redhat.com/pub/rhn-org-trusted-ssl-cert-1.01.noarch.rpm rhnreg_ks --activationkey=1-mrg-manager --serverUrl=https://10.16.139.
COMMIT EOF #tie down nfs ports cat <>/etc/sysconfig/nfs RQUOTAD_PORT=875 LOCKD_TCPPORT=32803 LOCKD_UDPPORT=32769 MOUNTD_PORT=892 STATD_PORT=662 STATD_OUTGOING_PORT=2020 EOF # setup export for rendering mkdir /home/admin/render chown admin:admin /home/admin/render cat <>/etc/exports /home/admin/render *.cloud.lab.eng.bos.redhat.
# Fields in comments reflect the default values [common] # database: dbname=cumin user=cumin host=localhost # brokers: localhost:5672 log-level: debug [web] # log-file: $CUMIN_HOME/log/web.log # host: localhost ('0.0.0.0' binds to all local interfaces) # port: 45672 # operator-email: [none] # update-interval: 10 host: 0.0.0.0 ssl: yes [data] # log-file: $CUMIN_HOME/log/data.log # expire-interval: 3600 # expire-threshold: 86400 # vacuum-interval: 3600 # packages: [all] #packages: com.redhat.grid, com.redhat.
IN_LOWPORT = 9600 # Plugin configuration MASTER.PLUGINS = $(LIB)/plugins/MgmtMasterPlugin-plugin.so QMF_BROKER_HOST = mrgmgr.rhcf.lab MRG Manager Configuration File # This config disables advertising to UW's world collector. Changing # this config option will have your pool show up in UW's world # collector and eventually on the world map of Condor pools.
# Give access to relayed communication # ALLOW_WRITE = $(ALLOW_WRITE), $(PRIVATE_HOST) CONDOR_HOST = $(FULL_HOSTNAME) COLLECTOR_NAME = RHCF Grid # COLLECTOR_HOST = $(CONDOR_HOST) NEGOTIATOR_HOST = $(CONDOR_HOST) UID_DOMAIN = rhcf.lab FILESYSTEM_DOMAIN = rhcf.lab START = TRUE SUSPEND = FALSE PREEMPT = FALSE KILL = FALSE ALLOW_WRITE = *.rhcf.lab, $(PRIVATE_HOST) ALLOW_READ = *.rhcf.
i http://csrc.nist.gov/groups/SNS/cloud-computing/ ii http://csrc.nist.gov/groups/SNS/cloud-computing/cloud-def-v15.doc iii http://www.redhat.com/rhel/server/ iv http://www.redhat.com/red_hat_network/ v http://www.redhat.com/jboss/ vi http://www.redhat.com/mrg/ vii http://www-03.ibm.com/systems/bladecenter/hardware/servers/hs22/index.html? viii http://docs.redhat.com/docs/en-US/Red_Hat_Enterprise_Linux/96/html/Security_Guide/index.html ixhttps://access.redhat.