Upgrade Instructions: Web Security Gateway Upgrade Instructions | Web Security Gateway | Version 7.8.x These instructions describe how to upgrade Websense Web Security Gateway server components (Windows, Linux, or appliance) from v7.7.x to v7.8.x. Important Because Content Gateway and Websense appliances must be at v7.7.x to upgrade to v7.8.x, it is not possible to upgrade directly from v7.6.x to v7.8.x. If you are currently running a Web Security Gateway version earlier than v7.7.x, upgrade to v7.7.
Upgrade Instructions: Web Security Gateway been upgraded and their dependent components continue to function normally at v7.8.3. Please see the new Incremental Upgrade guide for details. Important Before you start the upgrade process, the SQL Server Agent jobs associated with the Log Database must be stopped as described in Step 1: Prepare for upgrade, page 2. Please coordinate with your database administrator, if needed, before beginning the upgrade process.
Upgrade Instructions: Web Security Gateway On Websense appliances, be sure to perform a full appliance configuration backup. 4. Before upgrading Websense Filtering Service, make sure that the Filtering Service machine and the TRITON management server have the same locale settings (language and character set). After the upgrade is complete, Filtering Service can be restarted with any locale settings. 5. Back up your current Log Database and stop Log Server.
Upgrade Instructions: Web Security Gateway If you have SQL Server Express, use the Windows Services tool to restart the MSSQLSERVER service prior to upgrade, in order to ensure that the Service Broker jobs are not running. 7. If Websense Log Server uses a Windows trusted connection to access the Log Database, be sure to log on to the Log Server machine using the trusted account to perform the upgrade. To find out which account is used by Log Server: a. Launch the Windows Services tool. b.
Upgrade Instructions: Web Security Gateway 2. Under Appliance Controller, click Restart Appliance. Restarting the appliance takes from 5 to 8 minutes. The appliance has successfully restarted when you’re returned to the Appliance manager logon page. Repeat this process for each appliance that you intend to upgrade to v7.8.x. Note that each appliance must be upgraded to v7.8.1 before upgrading to v7.8.2. Content Gateway hotfix Content Gateway upgrades from v7.7.x to v7.8.
Upgrade Instructions: Web Security Gateway In this case, record your Network Agent settings (configured in the Web Security manager) before performing the upgrade. Go to the Local Settings page for each Network Agent instance (Settings > Network Agent > agent_IP_address) and record all of its settings. The following local settings are not preserved.
Upgrade Instructions: Web Security Gateway The Certificate Authority Tree is retained (trusted Root CA tree). SSLv2 is no longer enabled by default. If it is enabled prior to upgrade, the setting is retained. CRL and OCSP revocation statistics (on Monitor > SSL > CRL Statistics) are retained. Customized certificate failure and connect error message pages are not retained. SSL inbound*.log and outbound*.log files are deleted. After upgrade, transaction logging is sent to extended.log or squid.
Upgrade Instructions: Web Security Gateway IP addresses and ranges on the Global Authentication Options Multi-user IP Exclusions list are moved to the cookie cache IP address list. If cookie caching is enabled in a Multiple Realm rule, the source IP addresses from that rule are copied to cookie cache IP address list. Integrated Windows Authentication (IWA) After upgrade, always check and, if necessary, rejoin IWA domains. Upgrade to version 7.8.1 should preserve exiting IWA domain joins.
Upgrade Instructions: Web Security Gateway WebsenseAdmin restart Linux: Navigate to the Websense directory (/opt/Websense/, by default) and enter the following command: ./WebsenseAdmin restart On Windows machines, if you have configured the Recovery properties of any Websense service to restart the service on failure, use the Windows Services dialog box to change this setting to Take No Action before upgrading.
Upgrade Instructions: Web Security Gateway Policy Broker: Appliance upgrade instructions Before you begin: Make sure you have finished installing Hotfix 90, as described in the preparation steps at the start of the upgrade instructions. Log on to the Appliance manager directly, rather than using single sign-on from the TRITON console. This avoids potential timeout problems while the upgrade patch is being loaded onto the appliance.
Upgrade Instructions: Web Security Gateway 10. Navigate to the Administration > Patches/Hotfixes > Patches page. 11. Under Patch History, for version 7.8.1, verify that an Upgrade Succeeded status appears in the Comments section. 12. Navigate to the Configuration > System page and confirm the Time and Date settings, paying particular attention to the time zone setting. Make adjustments if needed. When the appliance upgrade is complete, continue with Step 6: Upgrade additional Policy Server machines.
Upgrade Instructions: Web Security Gateway Note the Installer Dashboard remains on-screen, behind the installer screens mentioned in the remaining steps. 8. On the Websense Upgrade screen, select Start the upgrade, then click Next. 9. When you click Next, a Stopping All Services progress message appears. Wait for Websense services to be stopped. The Pre-Upgrade Summary screen appears when the services have been stopped. In some cases, the installer may be unable to stop the Websense services.
Upgrade Instructions: Web Security Gateway ./install.sh 8. On the Introduction screen, click Next. Note These instructions refer to the graphical installer screens. If you are using the command-line installer, the same prompts appear. Enter the menu-item number or character, corresponding to the button described in each step. 9. On the Subscription Agreement screen, click I accept the terms of the Subscription Agreement and click Next. 10.
Upgrade Instructions: Web Security Gateway A RHEL 6.
Upgrade Instructions: Web Security Gateway 7. Review the subscription agreement, then mark the I accept this agreement check box and click Continue. 8. A confirmation message tells you that during the upgrade, you are logged out of the Appliance manager and the appliance restarts twice. Click OK to begin the upgrade. The upgrade process may take up to 2 hours to complete. 9. After the appliance has automatically restarted twice, log on to the Appliance manager. 10.
Upgrade Instructions: Web Security Gateway Installer files occupy approximately 2 GB of disk space. 5. Right-click WebsenseTRITON78xSetup.exe and select Run as administrator to launch the installer. A progress dialog box appears, as files are extracted. 6. The installer detects Web Security components from an earlier version and asks how you want to proceed. Click OK. 7. On the installer Introduction screen, click Next.
Upgrade Instructions: Web Security Gateway 6. Download the Web Security Linux installer from the Downloads page at mywebsense.com. The installer file is called WebsenseWeb78xSetup_Lnx.tar.gz. 7. Uncompress the installer file and use one of the following commands to launch it: To launch the graphical installer (available only on English versions of Linux): ./install.sh -g To launch the command-line installer, omit the -g switch: ./install.sh 8. On the Introduction screen, click Next.
Upgrade Instructions: Web Security Gateway Step 7: Upgrade additional Filtering Service, Network Agent, and User Service machines If you have additional Filtering Service, Network Agent, or User Service instances, upgrade them next, regardless of what other services reside on the machines. Filtering Service, Network Agent, and User Service may reside on: A Windows Server 2008 R2 or R2 SP1, or 2012 (64-bit) machine A RHEL 6.
Upgrade Instructions: Web Security Gateway 5. After the check succeeds, if you skipped the preparation step of backing up your files, click Back Up. If you are performing the backup now: a. Provide the connection information for the remote machine where the backup files will reside, then click Test Connection. b. Click Run Backup Now. Wait for the backup process to complete. 6. Click Install Patch. 7. Review the subscription agreement, then mark the I accept this agreement check box and click Continue. 8.
Upgrade Instructions: Web Security Gateway 3. Close all applications and stop any antivirus software. Warning Be sure to close the Windows Event Viewer, or the upgrade may fail. 4. Go to the Downloads tab of mywebsense.com to download the TRITON Unified Installer. The installer file is WebsenseTRITON78xSetup.exe. Installer files occupy approximately 2 GB of disk space. 5. Right-click WebsenseTRITON78xSetup.exe and select Run as administrator to launch the installer.
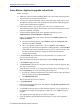
Upgrade Instructions: Web Security Gateway Filtering Service, Network Agent, or User Service: Linux upgrade instructions 1. Make sure no administrators are logged on to the TRITON console. 2. Log on the installation machine with administrator privileges (typically, as root). 3. Close all applications and stop any antivirus software. 4. Check the etc/hosts file. If there is no host name for the machine, add one. 5. Create a setup directory for the installer files, such as /root/Websense_setup. 6.
Upgrade Instructions: Web Security Gateway 14. Reboot the machine. Important The machine must be rebooted to complete the upgrade process. 15. If you stopped your antivirus software, restart it. Step 8: Upgrade Websense Log Server Next, upgrade the Websense Log Server machine. Any other services on the machine are also upgraded. Log Server runs on Windows Server 2008 R2 or R2 SP1, or 2012 (64-bit) machines. To upgrade Log Server: 1. Make sure that no administrators are logged on to the TRITON console. 2.
Upgrade Instructions: Web Security Gateway Note the Installer Dashboard remains on-screen, behind the installer screens mentioned in the remaining steps. 8. On the Websense Upgrade screen, select Start the upgrade, then click Next. 9. When you click Next, a Stopping All Services progress message appears. Wait for Websense services to be stopped. The Pre-Upgrade Summary screen appears when the services have been stopped. In some cases, the installer may be unable to stop the Websense services.
Upgrade Instructions: Web Security Gateway Warning Be sure to close the Windows Event Viewer, or the upgrade may fail. 4. Go to the Downloads tab of mywebsense.com to download the TRITON Unified Installer. The installer file is WebsenseTRITON78xSetup.exe. Installer files occupy approximately 2 GB of disk space. 5. Right-click WebsenseTRITON78xSetup.exe and select Run as administrator to launch the installer. A progress dialog box appears, as files are extracted. 6.
Upgrade Instructions: Web Security Gateway Step 10: Upgrade software instances of Content Gateway Content Gateway runs on Websense full policy source, user directory and filtering, and filtering only appliances (all of which should already have been upgraded at this point). Content Gateway is also: Certified on Red Hat Enterprise Linux, updates 4 and 5 Kernel version for 6.5: 2.6.32-431 (not recommended for v7.8.3 Content Gateway) Kernel version for 6.4: 2.6.
Upgrade Instructions: Web Security Gateway In addition, to support transparent proxy deployments: Router —or— Layer 4 switch Must support WCCP v2. A Cisco router must run IOS 12.2 or later. The latest version is recommended. Client machines, the destination Web server, and Content Gateway must reside on different subnets. You may use a Layer 4 switch rather than a router. To support WCCP, a Cisco switch requires the EMI or IP services image of the 12.2SE IOS release (or later).
Upgrade Instructions: Web Security Gateway Upgrade Red Hat Enterprise Linux 5-series to 6-series during the Content Gateway upgrade” below. Important At the beginning of the upgrade procedure, the installer checks to see if the partition that hosts /opt has enough space to hold a copy of the existing Content Gateway log files (copied to /opt/WCG_tmp/logs). If there’s not enough space, the installer prints an error message and quits.
Upgrade Instructions: Web Security Gateway c. After upgrade, restart the firewall. In the firewall, be sure to open the ports used by Content Gateway on this machine. See Websense TRITON Enterprise default ports for more information. 4. Download the Content Gateway version 7.8.x installer from mywebsense.com and save it to a temporary directory. For example, place it in: /tmp/wcg_v78 5.
Upgrade Instructions: Web Security Gateway To make it easier to install the needed packages, the Content Gateway distribution includes a Linux “rpm” containing the needed packages. To install its contents, ensure that the operating system has access to the Red Hat Linux distribution library (for example the DVD), and enter: yum install wcg_deps-1-0.noarch.rpm Upon successful completion, a list of updated packages is displayed and then the word “Complete!”.
Upgrade Instructions: Web Security Gateway Enter y to keep the proxy settings as they are. Enter n to restore Websense default settings for the proxy. Caution: If you answer n (no), the current installation of Content Gateway is removed, and a fresh install of 7.8.x begins. See Installing Websense Content Gateway for a detailed description of the installation procedure. This is not an upgrade, but rather a fresh install. 14.
Upgrade Instructions: Web Security Gateway Analytics Server Important If Content Gateway fails to complete startup after upgrade, check for the presence of the no_cop file. Look for: /opt/WCG/config/internal/no_cop If the file exists, remove it and start Content Gateway: /opt/WCG/WCGAdmin start To finish the upgrade, be sure to perform the post-upgrade instructions at the end of this document.
Upgrade Instructions: Web Security Gateway tar -xvzf c. In /tmp/wcg_v78 unpack lx86inst.tar: tar -xvf lx86inst.tar This tar command does not use the ‘z’ flag because the tar file is not a gzip. d. Change directory to scripts: cd ./scripts/ e. Using wcg_config_utility.sh create a backup of Content Gateway v7.7.x and save it to a trusted location on the network: ./wcg_config_utililty.sh create WCGbackup This creates WCGbackup.tar.gz in the current directory. 3.
Upgrade Instructions: Web Security Gateway 7. In the directory where you downloaded the WebsenseCG78Setup_Lnx.tar.gz tar archive, begin the installation, and respond to the prompts to configure the application. ./wcg_install.sh The installer installs Content Gateway in /opt/WCG. It is installed as root. Note Up to the configuration summary, you can quit the installer by pressing CTRL-C. If you choose to continue the installation past the configuration summary and you want to quit, do not use CTRL-C.
Upgrade Instructions: Web Security Gateway To create a strong password (recommended), use 8 or more characters, with at least 1 each of the following: capital letter, lower case letter, number, special character. Important The password length must be 16 characters or less.
Upgrade Instructions: Web Security Gateway '4' '5' '6' '7' '8' '9' 'N' 'M' Process manager port Logging server port Clustering port Reliable service port Multicast port HTTPS inbound port HTTPS outbound port HTTPS management port 8084 8085 8086 8087 8088 8070 8090 8071 Enter the port assignment you would like to change: ‘1-9,N,M,D’ - specific port changes ‘X’ - no change ‘H’ - help [X] > Change a port assignment if it will conflict with another application or process on the machine.
Upgrade Instructions: Web Security Gateway Enter the cluster network interface: > Enter a multicast group address for cluster . Address must be between 224.0.1.27 - 224.0.1.254: [] > 17. For Content Gateway to act as a web cache, a raw disk must be present on this machine. If no raw disk is detected, the following prompt appears: No disks are detected for cache. Websense Content Gateway will operate in PROXY_ONLY mode.
Upgrade Instructions: Web Security Gateway Option: > A [ ] (1) /dev/sdb 146778685440 0x0 c. Specify which disk or disks to use for the cache. Enter number to add item, press 'F' when finished: [F] >1 Item '1' is selected [F] > d. Your selections are confirmed. Note the “x” before the name of the disk. Here is the current selection [X] (1) /dev/sdb 146778685440 0x0 e. Continue based on your choice in Step b, pressing X when you have finished configuring cache disks.
Upgrade Instructions: Web Security Gateway ******************* CACHE DISKS LISTED ABOVE WILL BE CLEARED DURING INSTALLATION!! CONTENTS OF THESE DISKS WILL BE COMPLETELY LOST WITH NO CHANCE OF RETRIEVAL. Installer CANNOT detect all potential disk mirroring systems. Please make sure the cache disks listed above are not in use as mirrors of active file systems and do not contain any useful data.
Upgrade Instructions: Web Security Gateway ~/WCG/Current/ 25. Restore the configuration archive. As root: cd ~/WCG/Current/ ./wcg_config_utility.sh restore WCGbackup.tar.gz 26. Check Content Gateway status with: /opt/WCG/WCGAdmin status All services should be running. These include: Content Cop Websense Content Gateway Content Gateway Manager Analytics Server Important If Content Gateway fails to complete startup after upgrade, check for the presence of the no_cop file.
Upgrade Instructions: Web Security Gateway 3. Go to the Downloads tab of mywebsense.com to download the TRITON Unified Installer. The installer file is WebsenseTRITON78xSetup.exe. Installer files occupy approximately 2 GB of disk space. 4. Right-click WebsenseTRITON78xSetup.exe and select Run as administrator to launch the installer. A progress dialog box appears, as files are extracted. 5. The installer detects Web Security components from an earlier version and asks how you want to proceed.
Upgrade Instructions: Web Security Gateway 5. Download the Web Security Linux installer from the Downloads page at mywebsense.com. The installer file is called WebsenseWeb78xSetup_Lnx.tar.gz. 6. Uncompress the installer file and use one of the following commands to launch it: To launch the graphical installer (available only on English versions of Linux): ./install.sh -g To launch the command-line installer, omit the -g switch: ./install.sh 7. On the Introduction screen, click Next.
Upgrade Instructions: Web Security Gateway Step 12: Post-upgrade activities for Content Gateway After you have finished upgrading components, perform the following steps to ensure that your Content Gateway upgrade is complete. 1. If at the start of the upgrade process you manually moved your existing log files to a temporary location, move them back to /opt/WCG/logs and delete the files in the temporary location. 2.
Upgrade Instructions: Web Security Gateway • For Multiple Realm Authentication rules that used Cookie Mode Caching, the Source IP address list will have been copied to the cookie list on the Global Authentication Option page. • Check that the expected domain is in the Auth Sequence list. Important: The Rule-Based Authentication feature is very rich and can satisfy many user authentication requirements. To make best use of it, please read Rule-Based Authentication. 8.
Upgrade Instructions: Web Security Gateway from the list of Data Security system modules or the deployment will fail. Go to the Data Security > Settings > Deployment > System Modules page, click on the affected Content Gateway instance to open its Details page, click Delete and then Deploy.