REDRING EXPRESSIONS 500S SMART TECHNOLOGY ELECTRIC SHOWER Installation and User Guide IMPORTANT: This booklet should be left with the user after installation and demonstration
CONTENTS Section Page Introduction _ _ _ _ _ _ _ _ _ _ _ _ _ _ _ _ _ _ _ _ _ _ _ _ _ _ _ _ _ _ _ _ _ _ _ _ _ _ _ _ _ 2 Important Safety Information _ _ _ _ _ _ _ _ _ _ _ _ _ _ _ _ _ _ _ _ _ _ _ _ _ _ _ _ _ _ _ _ 2 How to use your Expressions 500S Shower (Detailed) _ _ _ _ _ _ _ _ _ _ _ _ _ _ _ _ _ _ _ _ 3 How your Expressions 500S Shower Works _ _ _ _ _ _ _ _ _ _ _ _ _ _ _ _ _ _ _ _ _ _ _ _ _ _ 4 How to maintain your Expressions 500S Shower _ _ _ _ _ _ _ _ _ _ _ _ _ _ _ _ _ _ _ _ _ _ _ 5 What to do if thing
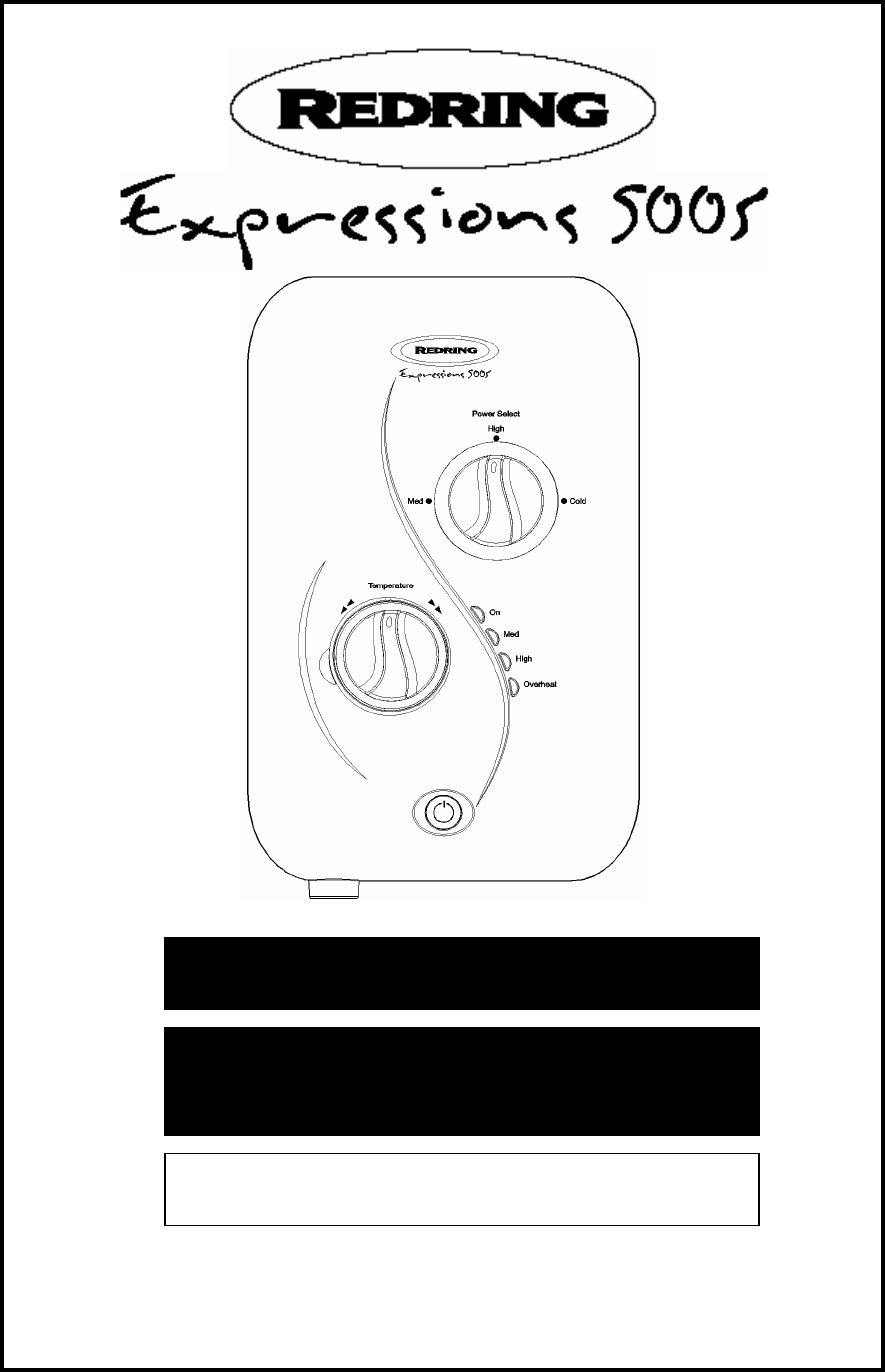
HOW TO USE YOUR EXPRESSIONS 500S SHOWER (DETAILED) 1. Ensure the electricity and water are turned on to the unit. 2. Your shower has 2 control knobs (see diagram 1). Knob “A” controls the 3 power settings. The most popular is “High”. There are also options for a “Med (medium)” or “Cold” shower (see notes 8 and 9). Knob “C” controls the temperature of the water, and as a helpful guide the knob position is indicated by a number being displayed in Window “D”.
WARNING: CONSIDERATION SHOULD BE GIVEN TO SUPERVISING THE YOUNG, ELDERLY AND THE INFIRM WHILST THEY USE THIS SHOWER. HOW YOUR EXPRESSIONS 500S SHOWER WORKS 1. Water is heated instantaneously as it flows over the heating elements in the copper cylinder (diagram 2). 2. The heaters are only switched on when sufficient water is flowing. This is done automatically with a switch which works on water pressure and is indicated by 2 or 3 lights illuminating depending on knob “A” power selection. 3.
will turn off the power to the heating elements, resulting in a cold shower. HOW TO MAINTAIN YOUR EXPRESSIONS 500S SHOWER This will be indicated by the middle power setting indication lights flickering and going out. It is recommended that the shower unit and hose etc. be cleaned using a soft cloth and that the use of abrasive or solvent cleaning fluid be avoided. We recommend that before any cleaning, the isolating switch be turned off, thus avoiding accidentally switching on the shower.
Water continues to flow when button “B” pressed This is normal. The shower includes a shutdown feature that means the water will continue to flow for up to 7 seconds after button “B” has been pressed to stop the shower. Broken parts Please contact our spares department on 08709 000420 (UK only). Fitting instructions are provided with most spares WHAT TO DO IF THINGS GO WRONG (2) PROFESSIONAL SERVICE If the previous “Self Help” checks fail to restore the performance, you should seek professional help.
The model and serial number are located on the bottom face of the shower. Make a note of those numbers here, and be sure to quote them if you call for advice. Model Number: 53-67_ _ _ _ _ _ _ _ _ _ _ _ _ Serial Number: _ _ _ _ _ _ _ _ _ _ _ _ _ _ _ _ HOW TO INSTALL YOUR EXPRESSIONS 500S SHOWER WARNING: ALL WIRING AND INSTALLATION MUST BE SUPERVISED BY A SUITABLY QUALIFIED PERSON.
6. Decide the position of entry of the cold water pipe into the unit. If top, cut away the backplate. If rear, please read the section on plumbing. If bottom, remove the front cover (complete with knobs) and cut away the detachable corner section as shown. 7. If you have not yet done so, remove the front cover assembly by undoing the retaining screws at the top and bottom of the unit and lifting the cover off. Your shower is provided with 2 fixing positions in the backplate (see diagram 4).
7. The shower is designed to have an open outlet and should only be used with ”Redring” recommended fittings. Do not connect the handset until after the shower front cover and corner section are fitted. WARNING: DO NOT FIT A TAP ON THE SHOWER OUTLET. WARNING: TAKE CARE TO AVOID RESTRICTING THE OUTLET OF THE PRESSURE RELIEF DEVICE c) ELECTRICAL WARNING: THIS SHOWER MUST BE EARTHED. The electrical installation must be in accordance with the current BS.
5. Re-Fit the front cover (see diagram 9) a. Ensure knob “A” is aligned to the “High” position. b. Ensure knob “C” is aligned to “12 o’clock. c. In the main body of the shower, turn the “Camshaft” as shown. d. In the main body of the shower, turn the “Numbered Dial” fully clockwise until it is at the position shown. Note:- this instruction should be used if the “Drive Dial” becomes accidentally dislodged. e. Fit the front cover of the shower to the main body.
ADDITIONAL ACCESSORIES SPARE PARTS Please Note:- The fitting White 2 metre Shower Hose WRAS Water Isolating Valve Chrome Standard Accessories Chrome Multi-Mode Accessories Chrome Curved Accessories Curtain and Rail Pack Curtain and Rail Pack with Non-Slip Mat of Spare Parts must be supervised by a suitably qualified person. Cat No. 83792578 Front Cover Cat No. 93597863 Cat No. 93792452 Tank-Base Assy (7.2kW) Cat No. 93597848 Cat No. 83595317 Tank-Base Assy (8.5kW+) Cat No. 93597849 Cat No.
Full details of terms and conditions are available on request from:- APPLIED ENERGY PRODUCTS LIMITED MORLEY WAY, PETERBOROUGH PE2 9JJ TEL: +44 (0) 1733 456789 FAX: +44 (0) 1733 310606 Website: www.redring.co.uk HOW TO USE YOUR EXPRESSIONS 500S SHOWER (SUMMARY) 1. Ensure the electricity and water are turned on to the unit. 2. Press the start / stop button “B”. This will turn the shower on, the water will flow and the indicator lights will glow showing chosen Power Selection. 3.
• During normal operation, if an overheated water temperature is sensed then the heater will switch off and the “Overheat” light will illuminate. The water will continue to flow and cool down before the heater switches back on again. IMPORTANT WARNINGS! DO NOT SWITCH THE APPLIANCE ON IF YOU SUSPECT IT OF BEING FROZEN. WAIT UNTIL YOU ARE SURE IT HAS THAWED OUT. DO NOT OPERATE THE APPLIANCE IF WATER LEAKS FROM THE PRESSURE RELIEF VALVE. MAINTENANCE IS REQUIRED BEFORE THE APPLIANCE CAN BE SAFELY USED.