
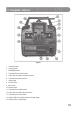
User manual

33
Since a protective diode is integrated in the transmitter, no chargers can be used that briefly interrupt the charging
current in order to measure the voltage of the rechargeable battery. In this case, remove the rechargeable batteries
from the transmitter for charging.
Attention!
Only connect the charger when you have inserted rechargeable batteries (1.2 V/cell) in the transmitter.
Never try to recharge batteries (1.5 V/cell) with a charger.
In order to avoid damage to the internal conductor paths and connections, please do not use any quick
chargers. The maximum charging current must not exceed 300 mA!
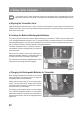
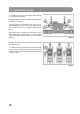
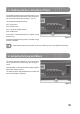
d) Switching on the Transmitter
When new batteries or freshly charged rechargeable
batteries have been inserted, switch on the transmitter with
the function switch (see figure 1, item 8) for test purposes.
Push the operating button from the bottom to the top position.
First, the red LED for voltage supply will light up (also see
figure 1, item 15).
A short term later, the remote control emits a signal and the
green LED for the binding function and undervoltage (also
see figure 1, item 14) starts to light up.
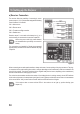
If the voltage supply drops to less than 4.2 V, the green LED for undervoltage (also see figure 1, item 14) starts flashing
quickly and the transmitter will emit short signal sounds at the same rhythm. In this case, stop operation of your model
as quickly as possible.
To continue operating the transmitter, recharge the batteries or insert new batteries.
After you have verified the correct function of your transmitter, switch it off again.
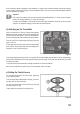
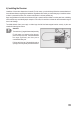
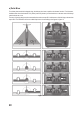
e) Setting the Control Levers
You can adjust the length of the control sticks, depending
on your steering habits.
To do so simply hold the bottom part of the grip (1) and turn
the upper part (2) up anti-clockwise.
You can now set the length of the control lever by turning
the bottom part of the grip.
Finally, tighten the upper part of the grip back up.
Figure 4
Figure 5