reflecta Super 8 Scanner User Manual 1
FEDERAL COMMUNICATIONS COMMISSION (FCC) STATEMENT This Equipment has been tested and found to comply with the limits for a class B digital device, pursuant to Part 15 of the FCC rules. These limits are designed to provide reasonable protection against harmful interference in a residential installation. This equipment generates uses and can radiate radio frequency energy and, if not installed and used in accordance with the instructions, may cause harmful interference to radio communications.
Index TABLE OF CONTENTS Getting Started-------------------------------------------------------------------------------------------4 General Guidence---------------------------------------------------------------------------------------5 Components----------------------------------------------------------------------------------------------6 Quick Installation Guide (QIG) -----------------------------------------------------------------------7 Installing Software and Driver-----------------------------------
Getting Started Check the package content before getting started. For Quick Installation please refer to Quick Installation Guide. (Ref. Pg. 6) Important! Save the original box, receipt and packing material for future shipping needs. Package Contents • Super 8 Scanner. • Film Reel. • Power Adapter Warning! Using any other power adapter may severely damage the scanner and will void the product warranty. • Power Cord. • USB 2.0 Cable.
• Only use the supplied USB-Cable. Connect the computer to the scanner directly using the USB 2.0 cable. • Do not use a hub or extension cable. Only use the USB ports on the rear of desktop computers. • If there are any other devices (multifunction device, printers, scanners, webcam) connected to the computer through USB, disconnect them. • A minimum of 4GB RAM is required. Operating Ambient Temperature Range 50º to 104ºF (10º to 40ºC) Note: Do not turn on the scanner unless it is within this range.
Components Front (Figure 1): 1) Supply Reel (Arm) 2) Take-up Reel (Arm) 3) Feed Sprocket 4) Forward Button • Short push(1 sec)—feeding frame one by one, • Long push(more than 3 second)--- Continuous feeding frame 5) Stop Button 6) Rewind Button • Short push and release(1 sec)—feeding frame one by one, • Long push and release (more than 3 second)--- Continuous feeding frame 7) Film Rollers 8) Film Cleaner 9) Power Button Back (Figure 2): 10) DC power 11) USB 2.
Quick Installation Guide (QIG) Please check Hard Copy or PDF File in CD Installing Software and Driver Before Installing the Scanner Driver... Check your Super 8 Film Reel, Film and Hard Disk Space Film Reel : Super 8 Scanner support 1”~8” standard Super 8 film reel Film: 1. Please make sure your film is smooth, if not please use cutter to repair and maintain to smooth 2.
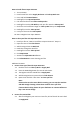
Installing Hardware Connect the Super 8 Pro Scanner to a power source. 1. Locate the power switch on the lower left side of the scanner. 2. Plug the AC adapter into an AC power source FIRST before plugging it into the scanner. 3. Attach the USB cable to the computer using the standard USB adapter end. Attach the USB adapter end of the cable to back panel of the scanner. 4. Open the reel arm. Ensure the scanner does NOT have a film reel loaded, turn the scanner ON.
How to install film to Super 8 Scanner 1. Turn on Power 2. Install movie film reel to Supply Reel Arm and Take-up Reel Arm 3. Press and hold Forward Button 4. Feeding film into Up Feed Sprocket 5. Film auto feeds out from Down Feed Sprocket 6. Feeding film into the Film Rollers, Lock your film onto the Take-up Reel 7. Scroll film until a sufficient length to Take-up Reel then press Stop Button 8. Feeding film into the Take-up Reel 9. Lock your film onto the Take-up Reel 10.
2.2 Take the film from Supply Reel to Take-up Reel, lock your film on Take-up Reel. 2.3 Press Rewind Button, until all the film is reel rolled to Take-up Reel.
CyberView S8 introduction User Interface List I. Setting Window Area II.
III.
How to Scan Super 8 Movie by CyberView S8 Software STEP 1 -Create a New Movie project 1. Choose “Create Your Movie Project name” 2. Type the Project name 3. Choose the default export folder 4. Click the “Start Your Project” to start digitizing STEP 2- Capture Super 8 Film Image 1. After inserting your film, check the preview window. Click “up” and /or “down” to align your first frame of film adjustment the crop area, to fit the film frame.
2. Choose Film type and adjustment exposure time, then Click “Capture” to start digitizing S8 movie. 3. After finishing the digitization of the S8 movie, the software will stop automatically. Click Next to preview and combine your movie. STEP 3 – Preview and Set Frame Rate 1. Check the preview window 2. Choose your super 8 movie Frame Rate(18 or 24 frame rate/ sec) 3.
2 Click “Combine” to transfer frame to your movie 2.1.
How to Calibration Light Plate Note: Please do calibration when you fist install CyberView S8. Reinstall software or scanner already use more than 6 months please do calibration 1. 2. 3. 4. 5. 6. 7. 8.
Technical Support CyberView S8 For information regarding the fi lm scanner and CyberView S8 driver, please visit www.refl ecta.de. Transportation For safety purposes, follow the procedure below before transporting the scanner (i.e. before moving the scanner from one location to another or packing and shipping the unit): 1. Plug in the power adaptor. Turn on the power switch. 2. Wait for the scanner to warm up (around 50 seconds). The LED indicator will always blink during warm up. 3.