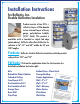
Installation Instructions Instructions for Reflectix, Inc. Double Reflective for Reflectix, Inc. Insulation Product consists of two, 94% + reflective layers of film bonded to two internal layers of heavy gauge polyethylene bubbles (5/16” thick). The product is available with a standard or staple tab edge (photo above). Reflectix offers their Reflective Insulation in 16”, 24” and 48” widths by 25’ and 100’ lengths.
Attic |(Radiant Barrier) Reflectix® Installation Instructions 1. Reflectix® Product 2. 2”x 6” Rafter 3.
Reflective/Woven Fabric Radiant Barrier Installation Instructions: (There are 2 options) 1. Underside of Rafter Method (depicted in illustration) • Check the attic area and make any needed repairs before installing Reflectix®. • Unroll the Reflectix® as you work and cut it to suitable lengths (8’ to 12’) with scissors or utility knife. • If a helper is available, rolling out longer lengths of product with one person stapling and the other holding the end of the product makes for a quicker installation.
Staple the product to the rafters at 2” to 3” intervals. • Leave a 2” to 3” gap on each side of the roof peak and a gap at the lower edge of the roof line (within 18” OK depending on roof pitch). • Staple to the face of the studs on gables and insure at least a 1” gap around all vents. 2.
Please Note: The intention of these Installation Instructions and 3-D renderings are for the sole purpose of illustrating the correct location and relative position of the Reflectix® products in specific building assemblies. The correct construction methods and techniques are the responsibility of the installer or contractor. The methods outlined are recommendations on location of the Reflectix® products as a guideline. There are no claims on the part of Reflectix, Inc.
Behind Hot Water Radiator |(R-3.0) R-3.0 and a Radiant Reflector Reflectix® Installation Instructions 1. Reflectix® Insulation 2. Wall 3. Hot Water Radiator 2 1 Tools Required: Safety Glasses Tape Measure Utility Knife/Scissors 3 Recommended Products: Reflective/Bubble/Bubble/Reflective - Roll: BP24025 (24”x 25’), BP48025 (48”x 25’) Installation Instructions: • Measure the width and height of the hot water radiator.
Review These Important Safety Guidelines Prior to Installation: • • • • • • • • • ALWAYS check local building codes before installing Reflectix®. ALWAYS check the area you are insulating and make any needed repairs. Any worn wiring should be replaced before you begin installing Reflectix®. ALWAYS make sure work areas are well ventilated and well lighted. ALWAYS use eye protection when operating a staple gun. ALWAYS use caution and common sense when using a staple gun.
Cathedral Ceiling Reflectix® Installation Instructions 5 6 7 2 4 Tools Required: Safety Glasses Staple Gun Tape Measure Utility Knife/Scissors 3 1 1 6 5 2 3 4 Northern Zone of the USA With Reflectix® Below the Mass Insulation • R-7.0 Summer & R-1.0 Winter and a Vapor/ Moisture Barrier 1. Reflectix® Insulation 2. Continuous 0.75” Air Space (minimum) 3. Sheet Rock 4. Fiberglass Insulation (non-compressed) 5. Rafter 6. Roof Decking 7.
Recommended Products: Reflective/Bubble/Bubble/Reflective - Roll: BP24025 (24”x 25’), BP48025 (48”x 25’) Staple Tab, Reflective/Bubble/Bubble/Reflective - Roll: ST16025 (16”x 25’) Radiant Barrier, Reflective/Woven Fabric/Reflective - Roll (Heavy Duty): RB4812550 (48”x125’) There are two methods for installing Reflectix products in a Cathedral Ceiling.
2. Staple the product directly to the underside of the rafter every 2 to 3 inches fully enclosing the rafter cavity. Nail 1”x 2” (nominal) furring strips to the underside of the rafter (creating a continuous 0.75” cavity). • Install interior panel per local codes and manufacturer’s installation instructions.
Crawl Space|(R-21) Reflectix® Installation Instructions 1. 2. 3. 4. 5.
Insert the Reflectix® half way up into the joist cavity and staple (at approximately 3” to 4” intervals) the edge of the product to the side of the joist. The goal is to split the joist cavity into two approximately equal enclosed air spaces. It is easiest to utilize the Reflectix® Reflective/Bubble/ Bubble/Reflective, Staple Tab product for this step.
Duct Insulation |(R-4.2) Reflectix® Installation Instructions 1. Reflectix® Insulation 2. Metal Duct 3. UL 181 Tape 3 2 Tools Required: Safety Glasses Tape Measure Utility Knife/Scissors 1 Recommended Products: Reflective/Bubble/Bubble/Reflective - Roll: BP48025 (48”x 25’) Installation Instructions: (There are 2 options) 1. Spiral Wrap Directly Against Duct (Reflective/Bubble/Bubble/Reflective, Duct Insulation - Roll product) • Make sure all metal joints, seams and penetrations are sealed.
• Wrap the product around the duct and securely tape the linear and circumference seams (overlapping 1”- 2”) with a UL 181 Tape (goal is an air-tight, snug seam seal). Do not leave any exposed duct or space where air can enter between the duct and the Reflectix®. Review These Important Safety Guidelines Prior to Installation: • • • • • • • • • ALWAYS check local building codes before installing Reflectix®. ALWAYS check the area you are insulating and make any needed repairs.
Duct Insulation |(R-6.0) Reflectix® Installation Instructions 1. Reflectix® Insulation 2. Reflectix® Insulation Spacer Strips 3. UL 181 Tape 4. Duct 3 1 2 4 Tools Required: Safety Glasses Tape Measure Utility Knife/Scissors Recommended Products: Double Reflective/Bubble Insulation - BP48025 (48”x 25’) Installation Instructions: • Make sure all metal joints, seams and penetrations are sealed.
Review These Important Safety Guidelines Prior to Installation: • • • • • • • • • ALWAYS check local building codes before installing Reflectix®. ALWAYS check the area you are insulating and make any needed repairs. Any worn wiring should be replaced before you begin installing Reflectix®. ALWAYS make sure work areas are well ventilated and well lighted. ALWAYS use eye protection when operating a staple gun. ALWAYS use caution and common sense when using a staple gun.
Garage Door |(R-3.0) R-3 (Also Provides a Radiant Barrier Benefit in Warmer Climates) Reflectix® Installation Instructions 1. Reflectix® Insulation 2. Garage Door Frame 3. Garage Door Panel Tools Required: Safety Glasses Tape Measure Utility Knife/Scissors 3 1 2 Recommended Products: Reflective/Bubble/Bubble/Reflective - Roll: BP24025 (24”x 25’), BP48025 (48”x 25’) Installation Instructions: • Measure the door panels of the garage.
Review These Important Safety Guidelines Prior to Installation: • • • • • • • • • ALWAYS check local building codes before installing Reflectix®. ALWAYS check the area you are insulating and make any needed repairs. Any worn wiring should be replaced before you begin installing Reflectix®. ALWAYS make sure work areas are well ventilated and well lighted. ALWAYS use eye protection when operating a staple gun. ALWAYS use caution and common sense when using a staple gun.
Knee Wall |(R-16, R-19) Reflectix® Installation Instructions 1 4 3 2 1. Reflectix® Insulation 2. R-13 Fiberglass Batt 3. Vapor Barrier (Polyethylene) if Code Required 4.
• Install a Vapor Barrier on the inside of the Knee Wall if your Building Code dictates. • Finish interior of Knee Wall. 2. Product Installed in the Back of the Knee Wall Cavity - R-19 and a Radiant Reflector (with R-13 Fiberglass Batt and 0.75” furring (on the back of the Knee Wall)) • Prior to placing the Knee Wall and nailing it to the floor and rafters, attach a 1”x 2” (nominal) furring strip to the back of each Knee Wall Stud. • Install Reflectix® per instruction in Method #1 (above).
Pipe Wrap |(R-2.0) Reflectix® Installation Instructions 1. Reflectix® Insulation 2. Water Pipe 2 Tools Required: Safety Glasses Tape Measure Utility Knife/Scissors 1 Recommended Products: Reflective/Bubble/Bubble/Reflective - Roll: BP24025 (24”x 25’), BP48025 (48”x 25’) Installation Instructions: 1. Spiral Pipe Wrap • When utilizing the “SPW” product, spiral wrap the product overlapping a minimum of 1/2” inch. Securely tape the seams with a Reflectix® Foil Tape (goal is an air-tight, snug seam seal).
Review These Important Safety Guidelines Prior to Installation: • • • • • • • • • ALWAYS check local building codes before installing Reflectix®. ALWAYS check the area you are insulating and make any needed repairs. Any worn wiring should be replaced before you begin installing Reflectix®. ALWAYS make sure work areas are well ventilated and well lighted. ALWAYS use eye protection when operating a staple gun. ALWAYS use caution and common sense when using a staple gun.
Radiant Floor - Wood Joists |(R-21) Up to R-21 and a Radiant Reflector (Maximum Benefit Application) Reflectix® Installation Instructions 5 3 2 4 1 1. 2. 3. 4. 5.
• Repeat for each joist that contains the Radiant Floor System. 2. Product Installed to Underside of Floor Joist - R-16 and a Radiant Reflector • Begin at one end of a joist cavity (that contains the Radiant Floor System) and install the product “end” with staples to the sub-floor or band board. Proceed down the joists by stapling each edge (or middle of the Reflective/Bubble/Bubble/Reflective 48” wide product) to the face of each joist. Staple at intervals of approximately 3” to 4”.
Review These Important Safety Guidelines Prior to Installation: • • • • • • • • • ALWAYS check local building codes before installing Reflectix®. ALWAYS check the area you are insulating and make any needed repairs. Any worn wiring should be replaced before you begin installing Reflectix®. ALWAYS make sure work areas are well ventilated and well lighted. ALWAYS use eye protection when operating a staple gun. ALWAYS use caution and common sense when using a staple gun.
Storage Building Reflectix® Installation Instructions 1. 2. 3. 4. 1 2 3 Reflectix® Product Exterior Panel 2”x 4” Stud Interior Panel Tools Required: Safety Glasses Staple Gun Tape Measure Utility Knife/Scissors 4 Recommended Products: Reflective/Bubble/Bubble/Reflective - Roll: BP24025 (24”x 25’), BP48025 (48”x 25’) Staple Tab, Reflective/Bubble/Bubble/Reflective - Roll: ST16025 (16”x 25’) Radiant Barrier, Reflective/Woven Fabric/Reflective - Roll: RB4812550 (48”x125’) Installation Instructions: 1.
• • • • 3. Wall - 2”x 4” R-6.1 (no fiberglass) • Determine if studs are 16” or 24” on center (This will determine whether the Reflectix® 16” or 24” product is needed). • Place one corner edge of the Reflectix® in an upper corner of the stud cavity. At a point that splits the stud cavity; staple the product to the side of the stud (creating a 3/4” tab on the product). • Proceed “down”, stapling to the side of the stud every 2”- 3”. Repeat procedure on opposite stud.
“My kids joke that my hobbies are recycling & insulating -- but it’s no joke!” Ellen Boling Albuquerque, NM Unique Applications for Reflectix® Reflectix® Installation Instructions Unique Applications: Cooler Liner • Green House • Mini Storage Facilities • Mobile Home Crawl Space • Sauna • Metal Buildings • Mechanic Floor Mat • Hot Tubs • Poultry / Pole Barns • Sill Seal • Shed • Tent Pad • Pull Down Attic Stairs • Cargo Trailer • Light Reflector • Firewall Insulator • Custom Food Containers • RV Generator
Review These Important Safety Guidelines Prior to Installation: • • • • • • • • • ALWAYS check local building codes before installing Reflectix®. ALWAYS check the area you are insulating and make any needed repairs. Any worn wiring should be replaced before you begin installing Reflectix®. ALWAYS make sure work areas are well ventilated and well lighted. ALWAYS use eye protection when operating a staple gun. ALWAYS use caution and common sense when using a staple gun.
Wall - Exterior 2”x 4” |(Total R-14) (R-3.9 and a Vapor/Moisture Barrier for the Reflectix®) Reflectix® Installation Instructions 4 2 1 3 1. 2. 3. 4.
Review These Important Safety Guidelines Prior to Installation: • • • • • • • • • ALWAYS check local building codes before installing Reflectix®. ALWAYS check the area you are insulating and make any needed repairs. Any worn wiring should be replaced before you begin installing Reflectix®. ALWAYS make sure work areas are well ventilated and well lighted. ALWAYS use eye protection when operating a staple gun. ALWAYS use caution and common sense when using a staple gun.
Wall - Exterior 2”x 6” |(Total R-21) (R-3.9 and a Vapor/Moisture Barrier for the Reflectix®) Reflectix® Installation Instructions 4 2 1 3 1. 2. 3. 4.
Review These Important Safety Guidelines Prior to Installation: • • • • • • • • • ALWAYS check local building codes before installing Reflectix®. ALWAYS check the area you are insulating and make any needed repairs. Any worn wiring should be replaced before you begin installing Reflectix®. ALWAYS make sure work areas are well ventilated and well lighted. ALWAYS use eye protection when operating a staple gun. ALWAYS use caution and common sense when using a staple gun.
Wall - Masonry |(R-3.7, R-4.2, R-6.1) Reflectix® Installation Instructions 1. Reflectix® Insulation 2. 1”x 2” (nominal) Furring Strip 3. Concrete Block Wall 2 1 3 Tools Required: Safety Glasses Staple Gun Tape Measure Utility Knife/Scissors Recommended Products: Staple Tab, Reflective/Bubble/Bubble/Reflective - Roll: ST16025 (16”x 25’) Installation Instructions: (There are 3 “levels of benefit” options) 1. R-3.
3. R-6.1 (2”x 2” nominal furring) • Same as above, except the product is not stapled to the face of the furring strip. • Staple the product to the side of the furring strip at a depth of 3/4”. The goal is to split the cavity (in two) into approximately equal air spaces. • The two air spaces created are: one between the Reflectix® and the masonry wall, and the other between the new interior panel and the Reflectix®.
Water Heater|(R-4.5) Reflectix® Installation Instructions 1. Reflectix® Insulation 2. Reflectix® Insulation Spacer Strips 3. Water Heater 3 Tools Required: Safety Glasses Tape Measure Utility Knife/Scissors 1 2 Recommended Products: Reflective/Bubble/Bubble/Reflective - Roll: BP48025 (48”x 25’) Installation Instructions: • Cut three 2” wide strips of the Reflectix® Reflective/Bubble/Bubble/Reflective product at twice the circumference of the water heater (to be utilized as spacers).
• Note: Electric Water Heaters Only - Cut a circular section of the product the size of the top of the water heater - trim to accommodate wires, pipes and relief valve. Tape (foil) the circular product section to the top of the water heater. DO NOT USE PRODUCT ON TOP OF GAS WATER HEATERS. • Note: Electric Water Heaters - Check to insure heater is wired to meet local codes.
Wine Room |(R-3.7, R-4.2, R-6.1) Reflectix® Installation Instructions 1. 2. 3. 4. 1 Reflectix® Insulation Interior Panel Furring Strip Pre-existing Sheetrock 4 3 2 Tools Required: Safety Glasses Staple Gun Tape Measure Utility Knife/Scissors Recommended Products: Reflective/Bubble/Bubble/Reflective - Roll: BP24025 (24”x 25’) Staple Tab, Reflective/Bubble/Bubble/Reflective - Roll: ST16025 (16”x 25’) Installation Instructions: 1. R-3.
3. R-6.1 (2”x 2” furring with 2 air spaces) • Attach 2”x 2” (nominal) furring strips vertically directly over the 2 x 4 studs (behind the sheetrock) on the wall. • It is easiest to utilize the Staple Tab (16” or 24” depending on stud spacing) Reflectix® Reflective/ Bubble product, although the standard edge product will also provide the same level of benefit. • Cut the Reflectix® Insulation (with scissors or a utility knife) into lengths equal to the height of the wall (floor to ceiling).
Work Shop Reflectix® Installation Instructions 1. Reflectix® Product 2. Furring Strip 3. Masonry Wall Tools Required: Safety Glasses Staple Gun Tape Measure Utility Knife/Scissors 2 1 3 Recommended Products: Reflective/Bubble/Bubble/Reflective - Roll: BP24025 (24”x 25’), BP48025 (48”x 25’) Staple Tab, Reflective/Bubble/Bubble/Reflective - Roll: ST16025 (16”x 25’) Radiant Barrier, Reflective/Woven Fabric/Reflective - Roll: RB4812550 (48”x125’) Installation Instructions: 1.
• • • • 3. Wall - 2”x 4” R-6.1 (no fiberglass) • Determine if studs are 16” or 24” on center (This will determine whether Reflectix® 16” or 24” product is utilized). • Place one corner edge of the Reflectix® in an upper corner of the stud cavity. At a point that splits the stud cavity; staple the product to the side of the stud (creating a 3/4” tab on the product). • Proceed “down”, stapling to the side of the stud every 2”- 3”. Repeat procedure on opposite stud.