E18 Gas Insert Owners & Installation Manual www.regency-fire.com MODELS: E18-NG Natural Gas E18-LP Propane WARNING: If the information in these instructions are not followed exactly, a fire or explosion may result causing property damage, personal injury or loss of life. FOR YOUR SAFETY What to do if you smell gas: Do not try to light any appliance Do not touch any electrical switch: do not use any phone in your FOR YOUR SAFETY building.
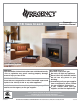
CONGRATULATIONS! You are the owner of a state-of-the-art Gas Insert by: FPI FIREPLACE PRODUCTS INTERNATIONAL LTD. The Regency® Gas Fireplace Series has been designed to provide you with all the warmth and charm of a fireplace, at the flick of a switch. The models E18-NG and E18-LP of this series have been approved by Warnock Hersey for safety. As it also bears our own mark, it promises to provide you with economy, comfort and security for many trouble free years to follow.
DIMENSIONS UNIT DIMENSIONS PP PP PP PP PP PP PP PP PP PP PP Diagram 1.
TABLE OF CONTENTS DIMENSIONS Unit dimensions .................................................................. 3 INSTALLATION Before You Start .................................................................. 7 Important Message ........................................................... 7 Save these instructions ...................................................... 7 General Safety Information ................................................. 7 Installation Checklist ...................................
SAFETY LABEL This is a copy of the label that accompanies each Regency® Gas Insert. We have printed a copy of the contents here for your review. The safety label is located on the front inside base of the unit visible when the bottom louver is open. 415 Duplicate Serial number Note: Regency® units are constantly being improved. Check the label on the unit and if there is a difference, the label on the unit is the correct one. DO NOT REMOVE THIS LABEL / NE PAS ENLEVER CETTE ETIQUETTE 415 Serial No.
REQUIREMENTS MA Code - CO Detector (for the State of Massachusetts only) 5.08: Modifications to NFPA-54, Chapter 10 (2) Revise 10.8.
INSTALLATION BEFORE YOU START Safe installation and operation of this appliance requires common sense, however, we are required by the Canadian Safety Standards and ANSI Standards to make you aware of the following: INSTALLATION AND REPAIR SHOULD BE DONE BY AN AUTHORIZED SERVICE PERSON. THE APPLIANCE SHOULD BE INSPECTED BEFORE USE AND AT LEAST ANNUALLY BY A PROFESSIONAL SERVICE PERSON. MORE FREQUENT CLEANING MAY BE REQUIRED DUE TO EXCESSIVE LINT FROM CARPETING, BEDDING MATERIAL, ETC.
INSTALLATION POLICY FOR SOLID FUEL BURNING & FACTORY BUILT FIREPLACES The Regency® E18 may be installed and vented into any solid fuel fireplace that has been installed in accordance with the National, Provincial and local building codes and is constructed of noncombustible materials. 1. Installer must mechanically attach the supplied label to the inside of the firebox of the fireplace into which the gas fireplace insert is installed. INSTALLATION CHECKLIST 1. Locate your appliance.
INSTALLATION GAS PIPE PRESSURE TESTING The appliance must be isolated from the gas supply piping system by closing its individual manual shut-off valve during any pressure testing of the gas supply piping system at test pressures equal to or less than 1/2 psig. (3.45 kPa). Disconnect piping from valve at pressures over 1/2 psig. The manifold pressure is controlled by a regulator built into the gas control, and should be checked at the pressure test point.
INSTALLATION INSTALLATION CHECKLIST 1. Verify the model of the existing appliance you are installing into is one of the following approved units: Montigo EP28-2 Montigo EP28-4 Montigo EP28-5 Montigo EP28-S2 Montigo 36SR (Non powervent unit) Montigo 28F-2 Montigo 28-F Firesong 220N Firesong 120N 2. Verify all clearances are at least the specified clearances. 3. Inspect existing venting and appliance for signs of wear and durability. 4. Determine the route for the electrical for the circulation fan.
INSTALLATION MINIMUM FIREPLACE CLEARANCES TO COMBUSTIBLES Diagram shows the minimum clearances to any combustible material. Installer must check that all installs maintain at least these clearances.. The minimum clearance from the side of the appliance to a combustible side wall is 6" (229mm). The minimum clearance from the bottom edge of the front trim above the window to a combustible mantel is 17- 7/8 " (454 mm).
INSTALLATION ZERO CLEARANCE FRAMING 1. When installing the E18 as a zero clearance, you will use the framing clearances in the following diagrams. Mantel and inside corner clearances can be found in Minimum Clearances to Combustibles. PP PP 0LQ PP 0LQ 2. Attach the E18 to the Zero Clearance Kit. 3. Attach the Zero Clearance Kit to the Framing. 4. Install the Surround as per manual. &HLOLQJ +HLJKW +HDGHU +HLJKW PP 0LQ Diagram 4.
INSTALLATION ZERO CLEARANCE KIT INSTALLATION 616-900 E18 ZC Kit contains the following: 8. Disconnect venting from existing unit - remove carefully to avoid damage. 1 ZC Left Section 9. Remove existing unit from framed opening.
INSTALLATION 12. When framing is complete, ensure wiring is installed by an electrician prior to installing ZC kit. 16. Install the remaining side of the ZC kit. Bring the electrical box to the inside of the ZC kit. Fasten side and back sections with (904-576) screws provided. 13. Install the base of the ZC kit first. Knockout may need to be removed to accommodate gas line - see below for example. Base install 17. Assemble ZC kit surround with 8 (904-897) screws provided in locations shown below. 14.
INSTALLATION 19. ZC box and surround installed into framed opening. 20. Separate E18 inner and outer fireboxes - see E18 installation manual for details. 22.Follow instructions in the manual for installation into a EP28-2 for exact measurements for installation of the outside firebox to the surround. (3 )LUHER[ PP PP PP $ /HJ 21. Set E18 outside firebox legs as shown below. Set to this hole 23.
INSTALLATION 25. Install lower trim piece with 2 (904-897) screws to the bottom of the ZC surround before installing faceplate.
INSTALLATION REQUIRED STEPS AND PROCEDURES FOR E18 INSTALLATION 1. Locate model on existing ZC box - locate corresponding section in this manual. 2. Make necessary alteration to the ZC firebox as per manual. 3. Separate inner and outer fire box (see procedure in manual). 4. Remove flue adaptor for outer firebox. 5. Make necessary adjustment to flue adapter mounting plate as per manual. 6. Cut flex to required length and secure to top plate using 3 screws and washers. 7.
INSTALLATION E18 SEPARATING THE OUTER FIREBOX SHELL FROM INNER FIREBOX 1. Lay fireplace insert on flat surface (use a drop sheet to protect surface). 2. Remove Glass Door by removing 2 x Phillips screws at the bottom of Glass Door Frame. 3. Remove burner by removing 2 x Phillips screws, take note of how aeration adjustment rod is routed. Aeration adjustment Rod Burner 4. Remove 2 Phillip screws from top left and right side (Thermodisc bracket).
INSTALLATION MODIFICATION OF MONTIGO EP28-2, EP28-4 OR EP28-5 8. Remove Hood and Inner Baffle (See Diagram 5.3). *Units could have any of the following Log Sets Installed: 2LB (2 Log Set), MB (2 Log Set), 4LB (4 Log Set) 1. Turn off unit, disconnect Gas and Power. 2. Remove Upper and Lower Louvers. 3. Remove Optional Doors or Screen Mesh. 4. Remove Logs. 5. Remove Bottom Door Rail (See Diagram 5.1). 6. Remove Burner Assembly (See Diagram 5.1). Diagram 5.3 9.
INSTALLATION E18 INSTALLATION SPECIFICATIONS See Installation of E18 into Existing Units for General Installation Guidance - for vent connection configuration. This install of the E18 uses Vent Connection Type A. The length of 4" Flex needed is 4 -1/8" semi-expanded. Secure flue adapter top plate to under side of existing firebox using 4 self tapping screws. The height of the unit installed is shown below.
INSTALLATION MODIFICATION OF MONTIGO EP28-S2 5. Remove Front Bar (See Diagram 6.3). *S2 Comes with a 6 piece Log Set. 1. Turn off unit and Disconnect Gas. 2. Remove Top and Bottom Louvers. 3. Remove Glass Door (See Diagram 6.1). Diagram 6.3 6. Remove Primary and Secondary Limit Switches (See Diagram 6.4). Diagram 6.1 4. Remove Side Filler Plates and Front Hood (See Diagram 6.2). Diagram 6.4 7. Remove Insert (See Diagram 6.5). Diagram 6.2 Regency® E18 Gas Fireplace Insert Diagram 6.
INSTALLATION 8. Remove Efficiency Collar (See Diagram 6.6). 11. Bend Down the Three Flanges at the Bottom of the Firebox or Cut them Off (see Diagram 6.9). Diagram 6.6 9. Remove Fan (See Diagram 6.7). Diagram 6.9 Edges must be flush to allow proper seating of the E18 outerbox. E18 INSTALL SPECIFICATIONS See Installation of E18 into Existing Units for General Installation Guidance. This install of the E18 uses Vent Connection Type A. The Length of 4" Flex needed is approximately 4-1/8" semi-expanded.
INSTALLATION MODIFICATION OF MONTIGO 28F-2 OR 28-F 6. Disconnect Pilot Gas Line and Pilot Thermopile from the Valve. Disconnect Thermostat wires from valve. 1. Turn off unit, disconnect gas and power. 2. Remove Top and Bottom Louvers. 3. Remove Screen Mesh (See Diagram 7.1) or Bifold Doors. Diagram 7.3 7. Disconnect Valve from the Main Burner Line (See Diagram 7.3). Diagram 7.1 4. Remove Logs and Sand from Sand Pan. 5. Remove Front Bar. (See Diagram 7.2). Diagram 7.4 8.
INSTALLATION 9. Remove Sand Pan and Pilot Assembly. 12. Bend Top Face Down (See Diagram 7.9). Diagram 7.9 13. Measure and draw a line 1" the bottom of the exhaust collar (See Diagram 7.10). Diagram 7.6 10. Cut out the Bottom of the Firebox (See Diagram 7.7) Cut must be clean - with Max. 1/4" of material left. Diagram 7.10 14. Cut the Sides of the Top of the Firebox Flush with the Sides of the Firebox and Cut the Top of the Firebox 1” below the bottom of the Exhaust Collar (See Diagram 7.11 and 7.12).
INSTALLATION 14. Bend the Louver Mounts Flat. (See Diagram 7.13) Diagram 7.13 Regency® E18 Gas Fireplace Insert 15. Final Firebox Should Look Like Diagram 7.14. Diagram 7.14 Modified edges must be flush to allow proper seating of the E18 outerbox.
INSTALLATION 28 F / 28 F2 INSTALLATION SPECIFICATIONS E18 INSTALL SPECIFICATIONS See Installation of E18 into Existing Units for General Installation Guidance for Vent Configuration. This install of the E18 uses Vent Connection Type A. The Length of 4" Flex needed is 2-5/8" semi-expanded. Secure flue adapter top plate to under side of existing firebox using 4 self taping screws.
INSTALLATION MODIFICATION OF MONTIGO 36SR 6. Remove Air Inlet Strip (See Diagram 8.3). 1. Turn off and Disconnect Gas and Power. 2. Remove Top and Bottom Louvers. 3. Remove Glass Doors and Screen Mesh (See Diagram 8.1). Diagram 8.3 7. Remove Brick Liner Panels (See Diagram 8.4). Diagram 8.1 4. Remove Logs and Sand from Sand Pan. 5. Remove Top Rail securing the Bifold Doors (See Diagram 8.2). Diagram 8.4 8. Unscrew and Remove Trim Around Sand Pan (See Diagram 8.5). Diagram 8.
INSTALLATION 9. Disconnect Pilot Gas Line and Pilot Thermopile from Valve. 14. Unscrew the Bottom of the Firebox. (See Diagram 8.8) 10. Disconnect Valve from Main Burner Gas Line. 11. Remove Plate On the Bottom of the Firebox where Pilot Enters. (See Diagram 8.6) Diagram 8.8 Diagram 8.6 12. Unscrew Left and Right Nuts Underneath the Firebox Holding Down the Sand Pan. (See Diagram 8.7) 15.
INSTALLATION 16. Remove Louver Supports in all 4 corners of the Appliance (See Diagram 8.11). Diagram 8.11 Regency® E18 Gas Fireplace Insert 17. Final firebox should look like Diagram 8.12. Diagram 8.12 Modified edges must be flush to allow proper seating of the E18 outerbox.
INSTALLATION E18 INSTALL SPECIFICATIONS See Installation of E18 into Existing Units for General Installation Guidance. This install of the E18 uses Vent Connection Type A. The Length of 4" Flex needed is 3" semi-expanded. Secure flue adapter top plate to under side of existing firebox using 4 self taping screws. /HJ 6HWWLQJ 2XWHU 6KHOO 3RVLWLRQ ( ,QVHUW 65 )LUHER[ Secure top plate to firebox w/4 screws.
INSTALLATION MODIFICATION OF FIRESONG 220N 4. Unscrew and Remove Front Inner Baffle (See Diagram 9.3). 1. Turn off and Disconnect Gas and Power. 2. Remove Valve Cover (See Diagram 9.1). Diagram 9.3 5. Cut the Sides of the Rear Inner Baffle at the Back of the Firebox (See Diagram 9.4). Diagram 9.1 3. Remove the Bottom of the Firebox and Sand Pan in one assembly (See Diagram 9.2). Diagram 9.4 6.
INSTALLATION 7. Cut The Top Front Flange of the Firebox (See Diagram 9.5). Diagram 9.5 32 8. Cut off support tab at the top of the firebox and final firebox should look like Diagram 9.6. Diagram 9.6 Modified edges must be flush to allow proper seating of the E18 outerbox.
INSTALLATION E18 Install Specifications See Installtion of E18 into Existing Units for General Installation Guidance. This install of the E18 uses Vent Connection Type A.. The Length of 4" Flex needed is 1-15/16" semi-expanded. Secure flue adapter top plate to under side of existing firebox using 4 self taping screws.
INSTALLATION MODIFICATION OF FIRESONG 120N 1. Turn off gas supply, if unit has a fan - turn off and disconnect power. 5. Shut off and disconnect gas line from valve. 6. Unscrew and Remove Trim Around Sand Pan (See Diagram 1.4). 2. Remove Top Trim Pieces and Glass Doors- if installed (See Diagram 1.1). Diagram 1.4 7. Remove Logs (See Diagram 1.5). Diagram 1.1 3. Remove Lower Trim piece and Bottom Panel. (See Diagram 1.2). Diagram 1.5 8. Remove screw on right side to remove sand pan and base.
INSTALLATION 11. Remove Top Front Flange of Firesong firebox. (See Diagram 1.8). Remove tabs on right and left side of firebox. 14. Cut out right side of existing Firesong firebox. (See Diagrams1.11,1.12 and 1.13). Left and right cutout begins on front face - see diagram 1.12 IMPORTANT: Cut out Firesong firebox and install support one side at a time. Diagram 1.8 12. Cut out mid section of Firesong firebox . (See Diagram 1.9). Cut off bar at back of firebox. Diagram 1.11 Back bar Diagram 1.9 13.
INSTALLATION 15. Install supplied support section with 8 screws to reinforce Firesong firebox. (See Diagram 1.13). 18. Final modified firebox should look like Diagram 1.15 NOTE: Shown with flue collar and 6" flex installed. Firesong decal affixed Diagram 1.15 Diagram 1.13 IMPORTANT NOTE: Separate inner and outer firebox on E18 (see instructions in this manual) Before installing outer firebox - lay on a flat surface and trim off 1-1/4" of each firebox fastening flange as shown below. 16.
INSTALLATION E18 INSTALLATION SPECIFICATIONS See Installation of E18 into Existing Units for General Installation Guidance - for vent connection configuration. The length of 4" Flex needed is 6" semi-expanded. Remove top flue adaptor from unit by removing 1 Philips screw and slide backward. Adjust flue adaptor length by resetting screw from Set 4 to Set 8 - see Diagram below. Attach 4" flex to flue adaptor and insert into existing 5" vent - shown below.
INSTALLATION INSTALLATION OF THE E18 INTO EXISTING UNITS STEP #1: VENT CONNECTION TYPE A Adaptor Plate Gasket 1. Attach the Flex Vent Section to the Adaptor Plate using a Ring Clamp and/or 3 self drilling sheet metal screws. 2. Using 4 Sheet Metal Screws, attach the Adaptor Plate, Vent Section and Adaptor Plate Gasket to the top of the existing Fire Box. See specific instructions to your installation to determine what position the Adaptor Plate should be located. Adaptor Plate Sheet Metal Screws 3.
INSTALLATION STEP #2: OUTER SHELL INSTALLATION ([LVWLQJ )LUHER[ 9HQW 6OLGH 3ODWH DWWDFKHPHQW VFUHZ 9HQW 6OLGH 3ODWH 1. Slide outer shell back into the existing firebox, ensure the vent slide plate is properly engaged with the outer shell. Move the outer shell back until the left and right flanges contact the existing firebox. 2. Adjust the outer shell legs to the setting noted for your specific installation. If these settings are not adhered to, the surround will not fit correctly. 3.
INSTALLATION STEP #4: SURROUND INSTALLATION ONLY TRIM KIT SUPPLIED BY THE MANUFACTURER SHALL BE USED IN THE INSTALLATION OF THIS APPLIANCE. 5. Attach control box to left mounting bracket with 2 screws - reattach mounting bracket. 1. Remove glass door from unit (see instructions in manual). 2. Remove control box from rear surround by removing 2 screws. Disassemble control box, insert switches; reassemble. Control Box 3. 6. Tuck wire harness on left top groove and secure with wire clips. 7.
INSTALLATION REMOTE CONTROL INSTALLATION Remote controls approved for use with this appliance: Part # Remote 910-368 Basic Remote ON/OFF 910-399 Firegenie Remote ON/OFF + 7 day programmable thermostat 946-680 GT Proflame Remote ON/OFF + Thermostat control 4. Disconnect red wire from TH terminal on valve - see Diagram 3. Function NOTE: Remove bottom control panel on the surround prior to installing the remote control. Diagram 3 - Red TH wire disconnected 1.
INSTALLATION 7a. Basic or FireGenie remote : Attach the other black wire from the remote receiver to TH on the valve, see Diagram 7. 7b. GT remote control: Attach the green wire from the wiring harness labeled TH and attach wire to TH on the valve, see Diagram 7. 12. Snap ON/OFF switch into position. Note: Ensure when snapped into position—the empty terminal on the back side of the switch is facing upward, see Diagram 9. 13. Code remote control.
INSTALLATION CONVERSION KIT 616-969 - NATURAL GAS TO PROPANE THIS CONVERSION MUST BE DONE BY A QUALIFIED GAS FITTER IF IN DOUBT DO NOT DO THIS CONVERSION !! This conversion kit shall be installed by a qualified service agency in accordance with the manufacturer's instructions and all applicable codes and requirements of the authority having jurisdiction.
INSTALLATION GLASS BURNER INSTALLATION 1. Angle the Glass Burner up on left side and slide the mixing tube over the orifice. 3. Screw down the Glass Burner with two screws. Diagram 11.3 Diagram 11.1 4. Hang the Front Burner Cover on the front edge. 2. Make sure to feed the Air Shutter Bar through the lower hole in the valve tray, just above the ignitor as you place the Glass Burner in. Diagram 11.4 Diagram 11.
INSTALLATION ENAMEL PANEL INSTALLATION Black Enamel Panels • Black Enamel panels must be inspected for scratches and dimples prior to installation. All claims to be recorded at this time. Claims for damage after installation will not receive consideration. • Black Enamel panels will discolor a little during normal operation. This is normal and should not be considered a defect. * All hand and finger marks MUST be cleaned off with a soft cloth. Use an ammonia based cleaner (ie.
INSTALLATION GLASS CRYSTALS AND OPTIONAL CERAMIC SPA OR VOLCANIC STONES INSTALLATION ON BURNER AND FIREBOX FLOOR Evenly spread the Glass Crystals or optional Ceramic Spa Stones over the burner. Ensure the crystals (or stones) do not overlap too much as this will effect the flame pattern. IMPORTANT NOTE: Only the supplied approved Glass Crystals and Ceramic Spa Stones are to be used with these fireplaces.
INSTALLATION BRICK PANEL INSTALLATION 1. Position back brick panel on the back wall of the firebox. 5. Repeat steps 2-4 on other side. 2. Slide in side panel. Final Install 3. Positon panel so that grout line in the panel lines up with screw in the baffle. 4. If required, lower screw to secure panel in position. Line up screw and grout line.
INSTALLATION LOG TRAY INSTALLATION 1. Remove the Log Burner Tray from the box. Hang the front burner cover on the front edge of the burner tray. Place the Log Burner Tray on the Glass Burner Tray. LOG SET INSTALLATION Installation of Panels must be completed before installing the log set. * Log instructions shown with Black Enamel Panels Read the instructions below carefully and refer to the images. If the are broken do not use the unit until they are replaced. Broken logs interfere with pilot operation.
INSTALLATION 3. Place Log C at the front right of the log tray. 6. Place Log E on the right pin on Log A and on top of Log C. E A C 4. Place ember lava, platinum embers, and embaglow on the burner, being careful not to cover the pilot or the gas ports. A E D Ember Lava, Embaglow, Platinum Embers C B 5. Place Log D on the left pin of Log A and the groove in Log B.
INSTALLATION OPTIONAL LOG SET INSTALLATION Read the instructions below carefully and refer to the images. If the logs are broken do not use the unit until they are replaced. Broken logs can interfere with pilot operation. Improper positioning of the logs may create carbon build-up and can alter the unit's performance which is not covered under warranty. *Satin black paint is included if touch ups are required. 6.
INSTALLATION 1 1 2 4 5 10" 2 Right Log piece(4) positioned on glass 10. Install Log 3 by matching pin locator on Log 3 with right pin on Log 1 as shown below. Log 5 in position 13. Place lava embers/rocks on glass - ensure rocks do not block pilot. Do not place lava rocks/embers too close to logs as this may cause carboning. 14. Adjust aeration, see unit manual for setting. 1 15. Reverse Steps 2 and 1. 2 3 4 Installing Log 3 11.
INSTALLATION GLASS DOOR INSTALLATION 'RRU )UDPH 7DE 1. Hang Glass Door over the Door Frame Tabs. 'RRU )UDPH 2. Two Screws tighten the door on the two lower Glass Door Tabs. WARNING: Do not operate appliance with the glass front removed, cracked or broken. Replacement of the glass should be done by a licensed or qualified service person. Diagram 13.1 'RRU 5HWDLQHUV 6FUHZV &RQWURO &RYHU Diagram 13.2 :LQGRZ )UDPH SAFETY SCREEN REPLACEMENT )DVWHQHUV SODFHV 1.
INSTALLATION DRAFTHOOD CHECK A "spillage" test must be made before the installed unit is left with the customer. Follow the procedure below: 1. Start all exhaust fans in the home and then close all external doors and windows in the house. Remove the Front Trim from the E18 to gain better access to the Drafthood Opening. Make sure the Glass Door is on properly. The thermally actuated safety switch will automatically reset after it has cooled off.
INSTALLATION SAFETY SWITCHES The E18 uses two safety switches to maintain proper operation. The first is a Spill Switch which will shut off the appliance if continuous spilling of exhaust gas from the drafthood occurs. The spill switch will shut off the Main Burner but not the Pilot. This switch is resets automatically, if the problem persists the appliance will cycle on and off. If this occurs. shut the unit off and contact a technician. The second is a Primary Limit Switch.
OPERATING INSTRUCTIONS INSTALLATION FINAL CHECK LIGHTING PROCEDURE 7. Turn gas control knob counter clockwise to "ON". Before leaving this unit with the customer, the installer must ensure that the appliance is firing correctly. This includes: NOTE: For all propane units and units equipped with electric spark boxes, see "Copy of Lighting Plate Instructions" section for more details. 8. Use the rocker switch to operate main burner.
OPERATING INSTRUCTIONS FIRST FIRE The first fire in your stove is part of the paint curing process. To ensure that the paint is properly cured, it is recommended that you burn your fireplace for at least four (4) hours the first time you use it with the fan on. When first operated, the unit will release an odour caused by the curing of the paint, the burning off of any oils remaining from manufacturing. Smoke detectors in the house may go off at this time.
MAINTENANCE OPERATION The fan operates automatically, turn the knob on the side of the faceplate to adjust to the desired speed. The fan will turn on as the stove comes up to operating temperature. After the unit has been turned off and the unit cooled to below a useful heat output range the fan will shut off automatically. This fan is required for normal operation, If the fan stops working at anytime the unit will automatically turn off after a delay of approximately 15-30 minutes.
MAINTENANCE VALVE REPLACEMENT 1. Shut off the gas and electrical supply. 2. Remove Faceplate Control Cover (see instructions in manual). 3. Remove Glass Door (see instructions in manual). INSTALLING VALVE 1. Place new valve tray and gasket into position. 2. Reverse Steps 10-1. 3. Check for gas leaks. 4. Remove Log Set and Embers or crystals and stones (if installed). 5. Remove Burner and Panels (see instructions in this manual). 6. Unplug the TH and TN/TP wires on the front of the Valve. Diagram 17.1 7.
MAINTENANCE REMOVING THE FAN IMPORTANT Disconnect power supply before servicing. 1. Shut off the gas and electrical supply. 2. Remove Control Cover. (see instructions in manual) 3. Remove Glass Door.(see instructions in manual) 4. Remove Log Set and Embers or crystals and stones (if installed). 5. Remove Burner and Panels (see instructions in manual) 6. Remove Valve Tray - see previous page. 7. Disconnect Ground Wires and unclip Safety Circuit Wires and remove through Grommet . Diagram 18.1 8.
MAINTENANCE WIRING DIAGRAMS This heater requires a 120V A.C. supply for operation of the circulation fan which is required for operation of the fireplace. In case of a power failure, the fireplace can be turned on but a thermal safety switch will cut out the appliance before it gets to hot. The unitl will cycle on and off as required to stay within temperature specifications. Caution: Ensure that the wires do not touch any hot surfaces and are away from sharp edges. codes the current CSA C22.
PARTS LIST 0DLQ $VVHPEO\ Part # 1 Description E18 Body 13 Diagram 20.
PARTS LIST (3 ,QVWDOODWLRQ .LW Diagram 21.
PARTS LIST 0RQWLJR ) ) ,QVWDOODWLRQ .LW Diagram 22.
PARTS LIST 0RQWLJR 65 ,QVWDOODWLRQ .LW Diagram 23.
PARTS LIST )LUHVRQJ 1 ,QVWDOODWLRQ .LW Regency® E18 Gas Fireplace Insert Diagram 24.
PARTS LIST Firesong 120N Installation Kit 4 11 3 5 6 11 10 Item 66 Part # 8 Description 7 Item Part # Description 8 Faceplate panel Front 3 Ring Clamp 9 Magnet Bracket (not shown) 4 Flex section 10 Control Cover 5 Adaptor Slide Plate 11 Firesong 120N Firebox supports 6 E18 Chassis 7 Faceplate panel Rear Regency® E18 Gas Fireplace Insert
WARRANTY Regency Fireplace Products are designed with reliability and simplicity in mind. In addition, our internal Quality Assurance Team carefully inspects each unit thoroughly before it leaves our facility. FPI Fireplace Products International Ltd. is pleased to extend this limited lifetime warranty to the original purchaser of a Regency Product. This warranty is not transferable.
Register your Regency® warranty online www.regency-fire.com Reasons to register your product online today! • View and modify a list of all your registered products. • Request automatic email notification of new product updates. • Stay informed about the current promotions, events, and special offers on related products.