
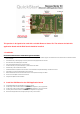
Ethernet & USB Application Board Quick Start Guide

This product is designed to be used with a suitable Renesas Starter Kit. The software for both this
application board and the RSK board should be installed.
1. Installation
Do not connect the E10A to the host PC until the software support has been installed.
1. Insert the CD into your computer’s CD-ROM drive. The CD should automatically run the installation program. If the installer does not start, browse to the CD root folder and double
click on ‘setup.exe’.
2. The installer will ask you which language is to be used, please choose the appropriate one and click <OK>.
3. On the first screen of the installer proper, click <Next>.
4. The License Agreement will be shown, read and click <Yes>.
5. The next screen asks you to pick the world region – please select and click <Next>.
6. Select the RSK you wish to install and click <Next>.
7. The destination folders are specified on the next screens. It is recommended to accept the default settings. Click <Next> to continue
8. Click <Next> on all screens until the Installation process commences.
9. After the installation the machine’s site code will be shown, this is not important at this stage, click <Next>.
10. Ensure ‘Launch AutoUpdate’ is selected and click <Finish>
11. Configure Auto-Update to finish the installation.
2. Install the RSK Board on the RSK Application board
12. This RSK Application Board is provided with a set of expansion sockets.
13. The two 24 way sockets should be soldered on the underside of the target RSK in JA5 and JA6 positions.
14. The two 26 way sockets should be soldered on the underside of the target RSK in JA1 and JA2 positions.
15. The 50 way socket should be soldered on the underside of the target RSK in the JA3 position.
16. Fit the RSK to the Application Board, ensuring all pins align correctly in all 5 connectors.