Bedienungsanleitung TB230WW Soundbar mit Subwoofer Best.-Nr. 1407499 Seite 2 - 19 Operating Instructions TB230WW Soundbar with subwoofer Item No. 1407499 Page 20 - 37 Notice d’emploi Barre de son avec Subwoofer TB230WW N° de commande 1407499 Page 38 -55 Gebruiksaanwijzing TB230WW Soundbar met subwoofer Bestelnr.
Inhaltsverzeichnis Seite 1. Einführung............................................................................................................................................................... 3 2. Bestimmungsgemäße Verwendung................................................................................................................... 4 3. Lieferumfang....................................................................................................................................................
1. Einführung Sehr geehrte Kundin, sehr geehrter Kunde, wir bedanken uns für den Kauf dieses Produkts. Dieses Produkt entspricht den gesetzlichen, nationalen und europäischen Anforderungen. Um diesen Zustand zu erhalten und einen gefahrlosen Betrieb sicherzustellen, müssen Sie als Anwender diese Bedienungsanleitung beachten! Diese Bedienungsanleitung gehört zu diesem Produkt. Sie enthält wichtige Hinweise zur Inbetriebnahme und Handhabung.
2. Bestimmungsgemäße Verwendung Die Soundbar mit Subwoofer dient zum Verstärken und Wiedergeben des Klangs vom TV und von anderen Audioquellen. Die Soundbar ist mit Bluetooth® und NFC ausgestattet und kann somit die Musik von geeigneten Smartphones wiedergeben. Die Soundbar kann bequem mit der mitgelieferten Fernbedienung gesteuert werden. Eine Aufstellung mit allen Merkmalen und Eigenschaften des Produkts finden Sie in Kapitel 5.
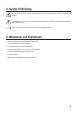
4. Symbol-Erklärung Dieses Symbol wird verwendet, wenn Gefahr für Ihre Gesundheit besteht, z.B. durch elektrischen Schlag. Das Symbol mit dem Ausrufezeichen weist Sie auf besondere Gefahren bei Handhabung, Betrieb oder Bedienung hin. Das „Pfeil“-Symbol steht für spezielle Tipps und Bedienhinweise. 5.
. Sicherheitshinweise Lesen Sie sich die Bedienungsanleitung aufmerksam durch und beachten Sie insbesondere die Sicherheitshinweise. Falls Sie die Sicherheitshinweise und die Angaben zur sachgemäßen Handhabung in dieser Bedienungsanleitung nicht befolgen, übernehmen wir für dadurch resultierende Personen-/Sachschäden keine Haftung. Außerdem erlischt in solchen Fällen die Gewährleistung/Garantie. • Das Produkt ist kein Spielzeug. Halten Sie es von Kindern und Haustieren fern.
• Beachten Sie, dass das Netzkabel nicht gequetscht, geknickt, durch scharfe Kanten beschädigt oder anders mechanisch belastet wird. Vermeiden Sie eine übermäßige thermische Belastung des Netzkabels durch große Hitze oder große Kälte. Verändern Sie das Netzkabel nicht. Wird dies nicht beachtet, kann das Netzkabel beschädigt werden. Ein beschädigtes Netzkabel kann einen lebensgefährlichen elektrischen Schlag zur Folge haben.
7. Batteriehinweise •• Achten Sie beim Einlegen der Batterie auf die richtige Polung. •• Entfernen Sie die Batterie, wenn Sie das Gerät längere Zeit nicht verwenden, um Beschädigungen durch Auslaufen zu vermeiden. Auslaufende oder beschädigte Batterien können bei Hautkontakt Säureverätzungen hervorrufen. Beim Umgang mit beschädigten Batterien sollten Sie daher Schutzhandschuhe tragen. •• Bewahren Sie Batterien außerhalb der Reichweite von Kindern auf.
8 AUX-Anzeige (AUX 1, grün stetig / AUX 2, grün blinkend) 1 Ein-/Ausschalter 2 Taste SOURCE (Audioquelle) 3 Taste ►II / PAIR (Wiedergabe, Pause, koppeln) 9 Bluetooth-Anzeige (Bluetooth Modus: blau stetig) 4 Tasten VOL + / VOL – 11 USB Service Anschluss (keine Funktion) 5 Fernbedienungssensor 12 Buchse AUX 1 6 NFC Sensorbereich 13 Buchse AUX 2 7 Standby-Anzeige 14 Schrauben für Wandhalter 10 Anschluss AC ~ für Netzkabel Fernbedienung 15 Tasten VOL + / VOL – 16 Tasten für Audioquellen 18 17 17
9. Inbetriebnahme a) Fernbedienung Die Reichweite der Fernbedienung beträgt max. 8 m. Achten Sie darauf, dass sich keine Objekte (wie z.B. Möbel) zwischen Fernbedienung und Fernbedienungssensor (5) befinden, da hierdurch das Übertragungssignal gestört werden könnte. Vermeiden Sie die Benutzung der Fernbedienung in der Nähe anderer Produkte, die Infrarotstrahlen erzeugen, da hierdurch die Funktionsweise der Fernbedienung gestört werden könnte.
b) Aufstellen und Wandbefestigung Für die Soundbar können Sie zwischen Aufstellen auf einem TV-Schrank (Option A) oder einer Wandbefestigung (Option B) wählen. Dies ist in erster Linie abhängig von der derzeitigen Position Ihres TV-Gerätes. Stellen Sie den Subwoofer auf eine ebene und waagerechte Oberfläche mit einem Abstand zur Soundbar von max. 6 Meter. Option - A Option - B Decken Sie die Soundbar und den Subwoofer nicht mit Tischdecken oder ähnlichen Produkten ab.
•• Markieren Sie die Bohrlöcher in einem Abstand von 764 mm. Verwenden Sie eine Wasserwaage, um eine möglichst waagerechte Befestigung zu gewährleisten. Der Durchmesser der Bohrlöcher ist abhängig von der Wandbeschaffenheit und der verwendeten Dübel. Im Lieferumfang befinden sich Dübel (Ø 6 mm x 25 mm) und Schrauben (Ø 5 mm x 30 mm). Prüfen Sie vor den Arbeiten, ob diese für die entsprechende Wandbefestigung geeignet sind. •• Stecken Sie je einen Dübel in das Bohrloch.
Verwenden Sie das mitgelieferte Cinch-Kabel mit 3,5 mm Klinkenstecker, um eine entsprechende Audioquelle mit den Buchsen AUX 1 oder AUX 2 zu verbinden. TV AUX 1 AUX 2 Anschluss AC ~ für Netzkabel Prüfen Sie vor dem Anschluss an das Stromnetz, ob die Anschlusswerte am Typenschild des Produktes mit denen Ihrer Hausstromversorgung übereinstimmen. •• Stellen Sie sicher, dass Sie vor Anschluss der Netzkabel alle anderen Verbindungen ordnungsgemäß ausgeführt haben.
b) Manuelle Kopplung •• Stellen Sie sicher, dass alle Kabelverbindung ordnungsgemäß durchgeführt wurden und sich das Gerät im Standby-Modus befindet. •• Halten Sie die Kopplungstaste PAIR (24) an der Rückseite des Subwoofers für ca. 3 - 4 Sekunden gedrückt. Der Subwoofer schaltet in den manuellen Kopplungsmodus und die Kopplungs-Kontrollleuchte blinkt schnell. •• Schalten Sie die Soundbar mit dem Ein-/Ausschalter (1, 17) am Gerät oder an der Fernbedienung ein.
b) Audioquellen auswählen Drücken Sie die Taste SOURCE (2) wiederholt oder eine der Tasten für Audioquellen (16), um die gewünschte Audioquelle auszuwählen. Die LED-Anzeigen leuchten im gewählten Modus wie folgt: AUX 1 grün, leuchtet stetig AUX 2 grün, blinkend BT (Bluetooth ) ® blau, leuchtet stetig c) Lautstärke und Stummschaltung (Mute) •• Drücken Sie die Tasten VOL + / VOL– (4, 15), um die Lautstärke einzustellen. •• Wenn Sie den Klang stumm schalten möchten, drücken Sie die Taste MUTE (18).
f) Bluetooth®-Modus Wenn Sie das erste Mal Ihr Bluetooth® aktiviertes Gerät mit der Soundbar verwenden, müssen beide Geräte gekoppelt werden. Nach dem Koppeln erkennt die Soundbar Ihr Bluetooth®-Gerät automatisch, wenn der Bluetooth®-Modus eingeschaltet ist. Beachten Sie jedoch, dass die Verbindungsherstellung mehrere Sekunden dauern kann. Wird innerhalb von 2 Minuten keine Verbindung hergestellt, schaltet die Soundbar auf die vorher verbundene Audioquelle. Die Übertragungsreichweite beträgt ca.
g) NFC-Modus NFC steht für Near Field Communication und bedeutet Nahfeld- bzw. Nahbereichs-Kommunikation. Beachten Sie, dass NFC mit dieser Soundbar nur funktioniert, wenn Ihr Mobilgerät mit NFC ausgestattet ist. •• Schalten Sie die Soundbar ein. •• Drücken Sie die Taste SOURCE (2) wiederholt oder die Taste BT (16), um den Bluetooth®-Modus einzuschalten. •• Aktivieren Sie NFC an Ihrem Mobilgerät. •• Legen Sie Ihr Mobilgerät auf den NFC Sensorbereich. Siehe nebenstehende Abbildung.
13. Wartung und Reinigung •• Es sind keinerlei für Sie zu wartende Bestandteile im Inneren des Produkts, öffnen/zerlegen Sie es deshalb niemals. •• Verwenden Sie auf keinen Fall aggressive Reinigungsmittel, Reinigungsalkohol oder andere chemische Lösungen, da dadurch das Gehäuse angegriffen oder gar die Funktion beeinträchtigt werden kann. •• Schalten Sie die Soundbar vor jeder Reinigung aus. •• Wischen Sie die Soundbar gelegentlich mit einem trockenen Tuch ab, um Staub zu entfernen.
16. Technische Daten a) Soundbar Stromversorgung.......................................220-240 V/AC, 50/60 Hz Leistungsaufnahme...................................30 W Leistungsaufnahme Standby...................<0,5 W Anschlüsse.................................................AUX 1, AUX 2 Bluetooth®-Standard.................................3.0 Frequenzgang ............................................200-20000 Hz Ausgangsleistung .....................................2 x 30 W Impedanz.........................
Table of contents Page 1. Introduction.......................................................................................................................................................... 21 2. Intended use......................................................................................................................................................... 22 3. Delivery content.............................................................................................................................
1. Introduction Dear customer, Thank you for purchasing this product. This product complies with the statutory national and European requirements. To maintain this status and to ensure safe operation, you as the user must observe these operating instructions! These operating instructions are part of this product. They contain important notes on commissioning and handling. Also consider this if you pass on the product to any third party.
2. Intended use The Soundbar and Subwoofer are intended for amplifying and playing sound from TV and other audio sources. The Soundbar features Bluetooth® and NFC technology for playing music from suitable smartphones. The Soundbar can be operated easily via provided remote control. You can find a list of the product's features and characteristics in chapter 5. Unauthorized modifications and/or alterations to the product are not permitted due to safety and approval reasons (CE).
4. Explanation of symbols This symbol indicates a health hazard, e.g. electric shock. The exclamation mark indicates specific risks associated with handling, function and use. The “arrow” symbol indicates special tips and operating information. 5.
6. Safety instructions Read the operating instructions carefully and especially observe the safety information. If you do not follow the safety instructions and information on proper handling in theses operating instructions, we assume no liability for any resulting personal injury or damage to property. Such cases will invalidate the warranty/guarantee. • The device is not a toy. Keep it out of the reach of children and pets. • Do not leave packaging material lying around carelessly.
• Make sure that the mains cable is not squeezed, bent, damaged by sharp edges or put under mechanical stress. Avoid excessive thermal stress on the mains cable from extreme heat or cold. Do not modify the mains cable. Otherwise the mains cable may be damaged. A damaged mains cable can cause a deadly electric shock. • To prevent risks, damaged power cables may only be replaced by the manufacturer, a professional workshop appointed by the manufacturer, or a similarly qualified person.
7. Information on batteries •• Ensure the correct polarity when inserting the battery. •• The battery should be removed from the device if it is not used for a long period of time to avoid damage through leaking. Leaking or damaged batteries might cause acid burns when in contact with skin, Therefore use suitable protective gloves to handle corrupted (rechargeable) batteries. •• Batteries must be kept out of reach of children.
9 Bluetooth indicator (Bluetooth mode: steadily blue) 1 On/off switch 2 SOURCE button (audio source) 10 AC ~ port for mains cable 3 ►II / PAIR button (play, pause, pairing) 11 USB service port (without function) 4 VOL + / VOL – button 12 AUX 1 socket 5 Remote control sensor 13 AUX 2 socket 6 NFC sensor area 14 Screws for wall bracket 7 Standby indicator 8 AUX indicator (AUX 1, steadily green / AUX 2, flashing green) Remote control 15 VOL + / VOL – buttons 16 Buttons for audio sources 18 17 17
9. Operation a) Remote control The remote control has a range of up to 8 m. Make sure there are no objects (e.g. furniture) between the remote control and remote control sensor (5), as those could interfere with the transmission signal. Avoid using the remote control near other products that generate infrared radiation, as such can affect the operation of the remote control. At the same time, other remote controls could be affected by this remote control if used in its near proximity.
b) Stand-alone installation and wall mounting You can choose to install the Soundbar on a TV shelf (option A) or to a wall (option B). The choice of installation method depends on the current position of your TV. Place the Subwoofer on an even and level surface and within a range of max. 6 metre to the Soundbar. Option - A Option - B Do not cover the Soundbar and Subwoofer with tablecloths or similar objects. The product could otherwise become very hot during use and cause fire, damage or injury.
•• Mark the boreholes with a distance of 764 mm in between. Use a water level in order to ensure a horizontal installation. The borehole diameter depends on the wall structure and dowels used. The delivery scope contains dowels (Ø 6 mm x 25 mm) and screws (Ø 5 mm x 30 mm). Check before installation whether those are suitable for proper wall mounting. •• Insert one dowel each into the boreholes. Make sure the wall is suitable for this kind of installation. 764 m m Dowel Suitable: solid walls (e.g.
Use the provided RCA cable with 3.5 jack plug to connect a suitable audio source to the AUX 1 or AUX 2 sockets. TV AUX 1 AUX 2 AC ~ port for mains cable Before plugging in the device, verify that the information on the product's rating plate correspond with your household power supply. •• Make sure to carry out all connections before connecting the mains cables. •• Connect the mains cables to the AC ~ port (10, 23) and suitable wall sockets.
b) Manual Pairing •• Ensure that all the cables are well connected and the main unit is in Standby mode. •• Press and hold the PAIR button (24) on the rear of the subwoofer for 3 – 4 seconds. The subwoofer will enter the pairing mode and the Pair Indicator will blink quickly. •• Switch the main unit on with the on/off switch (1, 17) on the main unit or on the remote control. •• After the wireless connection succeeded, the Pair Indicator will light up.
c) Volume and mute settings •• Press the VOL + / VOL– buttons (4, 15) to set the volume. •• To mute the sound, press the MUTE button (18). Press the MUTE button again or the VOL + / VOL– buttons to turn the sound on again. •• The respective LED indicator flashes quickly while setting the volume. •• When the maximum volume setting has been reached and you continue to press the VOL +, the LED indicator will flash once.
f) Bluetooth® mode When connecting your Bluetooth®-activated device to the Soundbar for the first time, it is necessary to pair both devices. After pairing, the Soundbar will recognize the Bluetooth® device automatically once you switch on the Bluetooth® mode. Please note though, that establishing the connection might take several seconds. If the connection cannot be established within 2 minutes, the Soundbar will switch to the previously connected audio source. The transmission range is approx.
g) NFC mode NFC is the abbreviation for Near Field Communication. Please note that NFC only works if your mobile device is equipped with NFC as well. •• Turn on the Soundbar. •• Press the SOURCE button (2) repeatedly or the BT button (16) to activate the Bluetooth® mode. •• Activate NFC on your mobile device. •• Place the mobile device on the NFC sensor area; see adjacent picture. Your mobile device will vibrate or show a message in the display.
13. Maintenance and cleaning •• There are no components located inside the product you need to maintain. Never open/dismantle the product. •• Do not use any aggressive cleaning agents, rubbing alcohol or other chemical solutions as they can cause damage to the housing and malfunctioning. •• Turn off the Soundbar before each cleaning. •• Occasionally wipe the Soundbar with a dry cloth to remove dust.
16. Technical data a) Soundbar Power supply..............................................220-240 V/AC, 50/60 Hz Power consumption..................................30 W Standby power consumption...................<0.5 W Connections................................................AUX 1, AUX 2 Bluetooth® standard..................................3.0 Frequency response..................................200-20000 Hz Power output..............................................2 x 30 W Impedance.......................
Table des matières Page 1. Introduction.......................................................................................................................................................... 41 2. Utilisation prévue................................................................................................................................................. 42 3. Contenu d’emballage...........................................................................................................................
1. Introduction Chère cliente, cher client, Nous vous remercions de l’achat du présent produit. Ce produit est conforme aux exigences légales, nationales et européennes. Afin de maintenir l’appareil en bon état et d’en assurer un fonctionnement sans danger, l’utilisateur doit impérativement respecter le présent mode d’emploi ! Le présent mode d’emploi fait partie intégrante du produit. Il contient des remarques importantes pour la mise en service et la manipulation du produit.
2. Utilisation prévue La barre de son avec subwoofer sert à renforcer et lire le son de la télévision et d'autres sources audio. La barre de son est équipée avec Bluetooth® et NFC et peut même lire la musique des Smartphones compatibles. La barre de son peut être commandée facilement avec la télécommande fournie. Une liste de toutes les fonctions et les caractéristiques du produit se trouve au chapitre 5.
4. Explication des symboles Ce symbole est utilisé afin de signaler un danger pour votre santé, par ex., par une décharge électrique. Le symbole avec un point d‘exclamation attire l‘attention sur les risques spécifiques lors du maniement, du fonctionnement et de l‘utilisation du produit. Le symbole de la « fleche » renvoie aux conseils et aux consignes d’utilisation particuliers. 5.
6. Consignes de sécurité Lisez le mode d’emploi avec précaution tout en étant particulièrement attentif aux consignes de sécurité. En cas de non-respect des consignes de sécurité et des indications pour une manipulation adéquate données dans ce mode d'emploi, nous déclinons toute responsabilité en cas de dommages aux biens et aux personnes qui en résulteraient. En outre, la responsabilité/ garantie sera alors annulée. • Ce produit n’est pas un jouet.
• Veillez à ce que le câble d’alimentation ne soit pas écrasé, plié, endommagé par des arêtes vives ou ne soit exposé à d’autres contraintes mécaniques. Évitez les sollicitations thermiques excessives du cordon d’alimentation liées à une chaleur ou à un refroidissement extrême. Ne transformez pas le cordon d’alimentation. Le cas contraire, vous risqueriez d’endommager le cordon d’alimentation. Un cordon d’alimentation endommagé peut occasionner une électrocution mortelle.
7. Informations sur les piles •• Respecter la polarité lors de l’insertion de la pile. •• Retirer la pile de l’appareil s’il n’est pas utilisé pendant longtemps afin d’éviter les dégâts causés par des fuites. Des piles qui fuient ou qui sont endommagées peuvent provoquer des brûlures acides lors du contact avec la peau ; l’utilisation de gants protecteurs appropriés est par conséquent recommandée pour manipuler les piles corrompues. •• Garder les piles hors de portée des enfants.
8 Affichage AUX (AUX 1, vert en continu/AUX 2, vert clignotant) 1 Interrupteur marche/arrêt 2 Touche SOURCE (source audio) 3 Touche ►II / PAIR (lecture, pause, coupler) 4 Touche VOL + / VOL – 9 Affichage Bluetooth (mode Bluetooth : bleu en continu) 10 Raccordement AC ~ pour câble secteur 5 Capteur de la télécommande 11 Raccordement service USB (aucune fonction) 6 Zone du capteur NFC 12 Prise AUX 1 7 Affichage en mode veille 13 Prise AUX 2 14 Vis pour support mural Télécommande 15 Touches VOL + / VO
9. Mise en service a) Télécommande La portée de la télécommande s'élève à 8 mètres maxi. Veillez à ce qu'aucun objet (comme p. ex. des meubles) ne se trouve entre la télécommande et la capteur de la télécommande (5) car cela pourrait gêner le signal de transmission. Évitez l'utilisation de la télécommande à proximité d'autres produits qui produisent des rayons infrarouges, car ceux-ci pourrait gêner son mode de fonctionnement.
b) Positionnement et fixation au mur Pour l'installation de la barre de son, vous pouvez choisir entre un positionnement sur un meuble télé (option A) ou une fixation murale (option B). Cela dépend principalement de la position actuelle de votre téléviseur. Option - A Option - B Ne recouvrez pas la barre de son et le subwoofer avec des nappes ou tout autre article semblable.
•• Marquez les trous à percer à une distance de 764 mm. Utilisez un niveau à bulle, pour vous assurer que la fixation est aussi horizontale que possible. Le diamètre des trous percés dépend des matériaux de construction et des chevilles utilisées. Dans le contenu de l'emballage, il y a des chevilles (Ø 6 mm x 25 mm) et des vis (Ø 5 mm x 30 mm). Vérifiez avant les travaux si celles-ci sont appropriées pour la fixation dans le mur correspondante. •• Insérez une cheville par trou percé.
Utilisez le câble RCA fourni avec sa fiche jack de 3,5 mm pour connecter une source audio correspondante aux prises AUX 1 ou AUX 2. TV AUX 1 AUX 2 Raccordement AC ~ pour câble secteur Vérifiez avant de brancher l'appareil sur le réseau électrique que les indications de raccordements électriques sur l’étiquette signalétique du produit correspondent bien à celles de votre alimentation domestique.
b) Couplage manuel •• Assurez-vous que toutes les connexions câblées soient correctement effectuées et que l’appareil se trouve en mode veille. •• Appuyez sur la touche PAIR (24) au dos du subwoofer pendant environ 3 - 4 secondes. Le subwoofer passe au mode de couplage manuel et le voyant de contrôle de couplage clignote rapidement. •• Allumez la barre de son avec son interrupteur marche/arrêt télécommande.
b) Sélection des sources audio Appuyez sur la touche SOURCE (2) à plusieurs reprises ou l'une des touches pour les sources audio (16), afin de sélectionner la source audio souhaitée. Les voyants à LED s'allument dans le mode sélectionné comme suit : AUX 1 vert, s'allume en continu AUX 2 vert, clignote BT (Bluetooth ) ® bleu, s'allume en continu c) Volume et muet (Mute) •• Appuyez sur les touches VOL + / VOL– (4, 15), pour régler le volume.
f) Mode Bluetooth® Si vous utilisez pour la première fois votre appareil activé Bluetooth® avec la barre de son, les deux appareils doivent être couplés. Après le couplage, la barre de son détecte automatiquement votre appareil Bluetooth®, si le mode Bluetooth® est en marche. Notez toutefois que l'établissement de la connexion peut durer plusieurs secondes. Si dans un délai de 2 minutes aucune connexion n'est établie, la barre de son passe sur la source audio précédente.
g) Mode NFC NFC veut dire Near Field Communication et signifie une communication en champ propre - CCP. Notez que NFC fonctionnement avec cette barre de son seulement lorsque votre appareil portable est équipé de la technologie NFC. •• Allumez la barre de son. •• Appuyez sur la touche SOURCE (2) à plusieurs reprises ou la touche BT (16), pour activer le mode Bluetooth. •• Activez NFC sur votre appareil portable. •• Mettez votre appareil portable sur la zone du capteur NFC. Voir l'illustration ci-contre.
13. Entretien et nettoyage •• Vous n'avez pas besoin d’ouvrir ou de démontez l'appareil car celui-ci ne comprend pas des éléments qui sont sujet à une maintenance. •• N'utilisez en aucun cas des produits de nettoyage agressifs, à base d'alcool ou toute autre solution chimique, car ceux-ci pourraient endommager le boîtier et nuire au bon fonctionnement de l'appareil. •• Éteignez la barre de son avant chaque nettoyage.
16. Données techniques a) Barre de son pour télévision Alimentation électrique............................220-240 V/CA, 50/60 Hz Puissance absorbée..................................30 W Consommation d'énergie en veille .........<0,5 W Raccordements..........................................AUX 1, AUX 2 Standard Bluetooth®.................................3.0 Courbe de fréquence ...............................200-20000 Hz Puissance de sortie...................................2 x 30 W Impédance.................
Inhoudsopgave Pagina 1. Inleiding................................................................................................................................................................. 57 2. Beoogd gebruik.................................................................................................................................................... 58 3. Leveringsomvang...............................................................................................................................
1. Inleiding Geachte klant, Hartelijk dank voor de aanschaf van dit product. Dit product voldoet aan de wettelijke nationale en Europese normen. Volg de instructies van de gebruiksaanwijzing op om deze status van het apparaat te handhaven en een ongevaarlijke werking te garanderen! Deze gebruiksaanwijzing hoort bij dit product. Deze bevat belangrijke instructies voor de ingebruikname en bediening. Let hierop, ook wanneer u dit product aan derden doorgeeft.
2. Beoogd gebruik De Soundbar met subwoofer dient voor het versterken en weergeven van het geluid van TV's en andere geluidsbronnen. De Soundbar is voorzien van Bluetooth® en NFC en kan daardoor muziek van daarvoor geschikte smartphones weergeven. De Soundbar kan gemakkelijk met de meegeleverde afstandsbediening worden bediend. Een overzicht van alle productkenmerken en -eigenschappen vindt u in Hoofdstuk 5.
4. Vervan pictogrammen Dit symbool geeft aan wanneer er gevaar bestaat voor uw gezondheid, bijv. door een elektrische schok. Het symbool met het uitroepteken wijst op bijzondere gevaren bij de hantering, gebruik en bediening. Het “pijl”-pictogram staat voor speciale tips en bedieningsaanwijzingen. 5.
6. Veiligheidsinstructies Lees de gebruiksaanwijzing goed door en let vooral op de veiligheidsinstructies. Indien u de veiligheidsinstructies en de aanwijzingen voor een juiste bediening in deze gebruiksaanwijzing niet opvolgt, kunnen wij niet aansprakelijk worden gesteld voor de daardoor ontstane schade aan apparatuur of personen. Bovendien vervalt in dergelijke gevallen de garantie. • Het product is geen speelgoed. Houd het uit de buurt van kinderen en huisdieren.
• Zorg dat het netsnoer niet wordt afgekneld, geknikt, door scherpe randen wordt beschadigd of op andere wijze mechanisch wordt belast. Vermijd overmatige thermische belasting van het netsnoer door te hoge of te lage temperaturen. Verander het netsnoer niet. Indien u hier niet op let, dan kan het netsnoer beschadigd raken. Een beschadigd netsnoer kan een levensgevaarlijke elektrische schok tot gevolg hebben.
7. Batterijtips •• Zorg ervoor dat de batterij met de juiste polariteit in het product worden gelegd. •• Verwijder de batterij uit het apparaat als u dat voor langere tijd niet denkt te gebruikt om beschadiging door lekken te voorkomen. Lekkende of beschadigde batterijen kunnen bij contact met de huid verwondingen opleveren door brandend zuur. Bij het werken met beschadigde batterijen moet u daarom veiligheidshandschoenen dragen. •• Bewaar batterijen buiten bereik van kinderen.
9 Bluetooth®-aanduiding (Bluetooth®-modus: blauw continu) 1 Aan-/uitschakelaar 2 Toets SOURCE (audiobron) 3 Toets ►II / PAIR (weergave, pauze, koppelen) 4 Toets VOL + / VOL – 10 AC ~ aansluiting voor het netsnoer 11 USB-service aansluiting (geen functie) 12 Bus AUX 1 5 Afstandsbedieningssensor 13 Bus AUX 2 6 NFC-sensorbereik 14 Schroeven voor muurbevestiging 7 Standby-aanduiding 8 AUX-aanduiding (AUX 1, groen continu / AUX 2, groen knipperend) Afstandsbediening 15 Toetsen VOL + / VOL – 16 Toetsen vo
9. Ingebruikname a) Afstandsbediening Het bereik van de afstandsbediening bedraagt max. 8 m. Let erop dat er zich geen voorwerpen (bijv. meubels) bevinden tussen afstandsbediening en afstandsbedieningssensor (5) omdat de signaaloverdracht hierdoor kan worden gestoord. Gebruik de afstandsbediening niet in de buurt van andere producten die infraroodstraling uitzenden omdat dit de werking van de afstandsbediening kan storen.
b) Opstellen en bevestiging aan de muur Voor het installeren van de Soundbar kunt U kiezen voor plaatsen op een TV-kastje (optie A) of bevestigen aan de muur (optie B). Dit is op de eerste plaats afhankelijk van waar u TV-apparaat nu staat. Option - A Option - B Dek de soundbar en de subwoofer niet af met een tafelkleed of een dergelijk voorwerp. Het product zou daardoor tijdens gebruik erg heet kunnen worden wat tot brand-, product- en persoonlijke schade kan leiden.
•• Geef de positie van de boorgaten aan op een onderlinge afstand van 764 mm. Gebruik een waterpas om te zorgen voor een horizontale bevestiging. Hoe groot de boorgaten moeten zijn, hangt af van de eigenschappen van de muur en de gebruikte pluggen. Meegeleverd zijn pluggen (Ø 6 mm x 25 mm) en schroeven (Ø 5 mm x 30 mm). Controleer voordat u begint, of deze voor een passende muurbevestiging geschikt zijn. •• Doe de pluggen in de boorgaten. Let erop dat de muur voor bevestiging geschikt is.
Gebruik de meegeleverde cinchkabel met 3,5 mm klinkstekkers om een passende audiobron met bus AUX 1 of AUX 2 te verbinden. TV AUX 1 AUX 2 AC-aansluiting ~ voor het netsnoer Controleer voor het apparaat op het elektrische net aan te sluiten of het voltage en het vermogen van het net overeenkomen met de gegevens vermeld op het typeplaatje van het product. •• Controleer voordat u de netsnoeren aansluit of alle andere verbindingen correct zijn gemaakt.
Druk tijdens het automatische koppelproces niet op de toets PAIR (24) aan de achterkant van de subwoofer. Als de automatische koppeling mislukt en er geen verbinding kan worden gemaakt, koppel de subwoofer dan handmatig met de soundbar. b) Handmatig koppelen •• Controleer of alle kabelverbindingen correct zijn gemaakt en of het apparaat in de stand-bystand staat. •• Houd de koppeltoets PAIR (24) aan de achterkant van de subwoofer ongeveer 3 - 4 seconden ingedrukt.
b) Audiobronnen kiezen Druk herhaaldelijk op toets SOURCE (2) of één van de andere toetsen voor audiobronnen (16) om de gewenste audiobron te kiezen. De LED-indicatielampjes lichten in de gekozen modus als volgt op: AUX 1 groen, brandt continu AUX 2 groen, knippert BT (Bluetooth ) ® blauw, brandt continu c) Geluidssterkte- en stomschakeling (Mute) •• Druk op toetsen VOL + / VOL– (4, 15), om de geluidssterkte in te stellen. •• Als u de stomschakeling wilt activeren, druk dan op toets MUTE (18).
f) Bluetooth®-modus Als u voor het eerst uw apparaat met geactiveerde Bluetooth® gebruikt in combinatie met de Soundbar, moeten beide apparaten gekoppeld worden. Daarna herkent de Soundbar uw Bluetooth®-apparaat automatisch vooropgesteld dat de Bluetooth®-modus aan is gezet. Let wel: het leggen van de verbinding kan een aantal seconden duren. Is er na 2 minuten nog geen verbinding gelegd, dan schakelt de Soundbar over naar de audiobron waarmee het product daarvoor in contact stond.
g) NFC-Modus NFC betekent Near Field Communication en betekent communicatie over korte afstand. Let wel: NFC werkt alleen met deze Soundbar als uw mobiele apparaat ook met NFC is uitgerust. •• Zet de Soundbar aan. •• Druk herhaaldelijk op toets SOURCE (2) of op toets BT (16) om de Bluetooth®-modus aan te zetten. •• Activeer NFC van uw mobiele apparaat. •• Zet uw mobiele apparaat of het NFC-sensorbereik. Zie de afbeelding hiernaast. Uw mobiele apparaat trilt of er verschijnt een melding op het beeldscherm.
13. Onderhoud en schoonmaken •• Er bevinden zich binnenin het product geen onderdelen die onderhoud vergen: open het product dus nooit. •• Gebruik in geen geval agressieve schoonmaakmiddelen, schoonmaakalcohol of andere chemische oplosmiddelen omdat die de behuizing kunnen beschadigen of zelfs het functioneren kunnen beïnvloeden. •• Zet de Soundbar voor iedere schoonmaakbeurt uit. •• Wrijf de Soundbar af en toe af met een droog doekje om stof te verwijderen.
16. Technische Gegevens a) Soundbar Stroomvoorziening.....................................220-240 V/AC, 50/60 Hz Vermogensverbruik...................................30 W Vermogensverbruik Standby....................<0,5 W Aansluitingen..............................................AUX 1, AUX 2 Bluetooth®-standaard...............................3.0 Frequentiebereik........................................200-20000 Hz Uitgangsvermogen....................................2 x 30 W Impedantie.......................
Impressum Dies ist eine Publikation der Conrad Electronic SE, Klaus-Conrad-Str. 1, D-92240 Hirschau (www.conrad.com). Alle Rechte einschließlich Übersetzung vorbehalten. Reproduktionen jeder Art, z. B. Fotokopie, Mikroverfilmung, oder die Erfassung in elektronischen Datenverarbeitungsanlagen, bedürfen der schriftlichen Genehmigung des Herausgebers. Nachdruck, auch auszugsweise, verboten. Die Publikation entspricht dem technischen Stand bei Drucklegung. © Copyright 2016 by Conrad Electronic SE.