4
Copyrlyht Notice: No part of this guido may ha reproduced, transcribed, transmitted. Dr Irans!ated in any language, in any form Dr by any means. except duplication of documentation by the pur chaser rar backup purpose. withaut whtten consent ofAsRock Inc. Products and corporate names appeadng in this guido may er may not be registered trademarks Dr copyrights of their respective companies, and are used only for identifica tion Dr explanation and to the owners‘ benefit. without intent ta infringe.
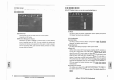
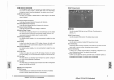
UEFI SETUP UTILITV 1 Introduction This section explairs hcw to use the UEFI SETUP UTILIfl to configure your sys tem. The SPI Memary an the motherboard stores the UEFI SETUP UTILIW. Vau may run the UEFI SETUP UTILIW when you start up the computer Please press or during Hie Power-On-SeIf-Test (POST) to enter the UEFI SETUP UTILITY, otherwise, POST will continue with its test rautines.
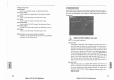
2 Main Screen When you enter the UEFI SETUP UTILITY, the Main screen will appear and display the system overview. d.d4 3 OC Tweaker Screen In the CC Tweaker screen, you can set up overclocking features. UEFIul!y A System Browser System Browser can let yeti easily check your current system configuration in UEFI setup. OMG (Onhine Management Guard) Administrators are able to establish an internet curfew er restrict Internet access at specified times via OMG.
AMD Turbo Core Technology This item appears only when the processor you adopt supports this fea ture. Usa this to select enable or disable AMD Turbo Core Technology. Configuration options: [Auto] and [Disabled]. The default value is [Auto]. AMD 10 C-State Suppoh This allows you ta enable or disable AMD 10 C-State Support. The default value 5 [Enabled]. Processor Maximum Frequency lt will display Processor Maximum Frequency for reference.
Voltage Configuration DRAM Voltage Use this to select DRAM Voltage. The default vatue is [Auto]. CPU Voltage Offset Use this to select CPU Voltage Offset. The default value is [Auto]. NR Voltage Use this to select NR Voltage. The default value is [Auto]. HT Voltage Use this to select HT Voltage. The default value is [Auto]. Cpu VODA Voltage Use this to select Cpu VDDAVoItage. The default value is [Auto]. PCIE VDDA Voltage Use this to select PCIE VDDAVoItage. The default value is [Auto].
4.1 cpu Configuration CoeI n‘ Qulet Use this item to enable or disable AMDs CooI n QuiettM technology. The default value is [Enabled]. Configurabon options: [Enabled] and [Disabled]. If you install Windows 8 / 7 / Vista‘° ard want to enable this function. please set ffiis item to [Enabled]. Please note that enabling this funation may reduce CPU voltage and memory frequency. and Iead to system sta bflity or compatibility issue with some memory modules or power supplies.
4.3 South Bridge Configuration 4.4 Storage Configuration Onboard HD Audio SATA Controller Select (Auto], [Enabled] or (Disabled] for the onboard HD Audio feature. lt you select [Auto]. the onboard 1-ID Audio will be disabled when PCI Sound Card is plugged. Front Panel Select (Auto] Dr (Disabled] tor the onboard 1-ID Audio Front Panel. On/Off PIay Usa this item to enable or disable On/Off Play Technology. The default val ue is [Enabled]. When On/Off PIay is enabted, Deep Sx will be disabled.
4.5 Super 10 Configuration Serial Port Use this item to enable Dr disable the onbaard serial part. Serial Port Address Use this item to set the address for the onboard serial part. Configuration options: [3F8h / IRQ4] and [3EBh / 1R04]. Infrared Port Use this item ta enable Dr disable the onboard infrared port. Infrared Poh Address Use this item to set the address for the onboard infrared port. Configura tion options: [2F8 / lR03] and [2E8 / IRQ3]. 4.
USa KeyboardlRemote Pawer an Use this item ta enable or disab!e the system to watte from 55 using USA Keyboard/Remote. 4.7 USB Configuration USS Mouse Power an Use this item to enable Dr disable the system to wake from 55 using USB Mouse. CSM Please disable CSM when you enable Fast Boot option. The default value is [Enabledj. USB 2.0 Controller Usa this item to enable or disable the use of USA 2.0 controller Usa 3.0 Controller Use this item to enable or disable the use of USA 3.0 controtter.
4.8 Network Configuration 5 Hardware Health Event Monitoring Sereen In this section, it allows you to monitor the status of the hardware on your system, including the parameters of the CPU temperature, motherboard temperature, CPU fan speed, chassis fan speed, and the critical voltage. Internet Setting Use this item to set up the internet connection mode. Configuration options: [DHCP (Auto IP)] and [PPPOE]. UEFI Download Server Use this item to seleat UEFI firmware download server for Internet Flash.
Full Screen Logo 6 Boot Screen In this section, lt will display the available devices an your system for you to config ure the boot settings and the boot phority. Use this item to enable or disable OEM Loga. The default value is [En abled]. Addon ROM Display Use this option to adjust AddOn ROM Display. lt you enable the option “Full Screen Logo“ but you want to See the AddOn ROM Information when the system boots, please select [Enabled]. Configuration options: [Enabled] and [Disabled].
7 Security Screen 8 Exit Screen In this seetion, you may set Dr change the supervisor/user password tor the system. For the user password, you may also clcar it.
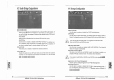
ASRock EXTREME TUNING UTILITY 1 Introduction ASRock Extreme Tuning Utility (AXTU) is an all-in-one tool Lo fine-tune different system functions in a user-friendly interface, which is inc(uding Hardware Monitor, Fan Control, Overciocking, OC DNA, IES and Xrast RAM. In Hardware Monitor, it shows Hie major readings of your system. In Fan Control. ii shows Hie fan speed and temperature for you to adjust. In Overdocking, you are allowed to overclock CPU frequency for optimal system performance.
Overciocking In the Cverclocking section, there are Ciock and Voltage chapters tor parameter settings adjustment in pursuit of optimal system performance. You are able to fire tune the Cpu ratio, CPU frequency, ard respective voltages by clicking the +/-“ at the display panel. After confirmation of the settings, please dick on the APPLY“ button. /?\ Overciocking and over.voltage may affect your system stability, or even Lause damago to your hardware devices. lt should be done at your own risk ard expense.