#30113D APEX Scion FR-S Drift #30114D APEX Scion tC Drift
:: Introduction Thank you for purchasing this Team Associated Qualifier Series product. This manual contains instructions and tips for maintaining your new APEX RTR. Please take a moment to read through it and familiarize yourself with these steps as they will help you to understand each component’s function and show you some tips for getting the most out of your APEX RTR. We are continually changing and improving our designs; therefore, actual parts may appear slightly different than the illustrations.
7/14 :: Table of Contents 1....................Cover 12-14..........Front Diff Access 2....................Introduction 14.................Diff Maintenance 3....................Table of Contents 14-15..........Shock Maintenance 4....................Blueprint of the APEX 16.................Motor Manual 5-7................Quick Start Guide 17................. ESC Manual 8....................Electronics Wiring / Camber & Toe Settings 18-27..........Catalog 9...................
:: Blueprint of the APEX Front Bumper Front Body Mount Front Arm Front Shock Caster Block Steering Block Molded Front Camber Link Front Shock Tower Molded Front Servo Link Molded Front Steering Link Drive Shaft Servo Receiver Chassis Electronic Speed Control Battery w/T-Plug Connector Motor Battery Strap Pinion Rear Arm Rear Hub Rear Shock Spur Gear Rear Shock Tower Molded Rear Camber Link Rear Body Mount
:: Quick Start Guide Battery Charging Steps and Safety: NiMH Wall Charger: (Part #29177 Wall Charger AC 120V 400MaH) Remove the battery from the vehicle before charging. Be sure to select the correct charging mode for the type of battery you are charging. When the #29177 Wall Charger is plugged into an AC outlet, a green light will indicate that it is on. You can now plug in your NiMH battery. A red light will indicate the battery is charging. A green light will indicate when the battery is done charging.
:: Quick Start Guide - (cont.) Change the speed control to NiMH or LiPo battery modes. Battery Management System - A choice of either LiPo mode or NiMH mode adjusts the low voltage cutoff point. This is critically important when using LiPo batteries that should not, for performance and safety reasons, be discharged below 3.0V per cell. In LiPo mode, the ESC detects whether you are using 2 or 3 cells and adjusts the cutoff accordingly.
:: Quick Start Guide - (cont.) Radio System Tuning and Controls: 4 RULE: Transmitter on First/Vehicle on Second, Vehicle off First/ Transmitter off Last! 1) 2) 3) 4) Slide the battery cover in the direction shown to remove cover. Install six (6) alkaline or rechargeable AA size batteries into the battery holder. Slide the battery cover back into place making sure it is completely closed and secore. Turn the power ON.
:: Wiring Diagrams Motor and Receiver Wiring: 1. 2. If motor runs in reverse when you apply throttle, unplug any two of the motor wires and switch them. Your Receiver has multiple channel ports for plugs. Channel 1 - you should always plug your steering servo into this channel port. Channel 2 - you should always plug your speed control (ESC) into this channel port. Channel 3 - Used for optional equipment such as fans, lights, ect...
:: Gear Mesh Gear Mesh: To correctly set your gear mesh, follow the steps below: 1. Remove the Chassis Brace. Loosen the set screw on the motor’s pinion gear. Slide the pinion on the motor shaft until the gear face of the pinion is entirely aligned with the gear face of the spur gear (see diagram). Tighten the set screw while ensuring it is aligned with the flat face on the motor shaft. Pinion Spur Gear 2. Loosen the motor clamp screw until the motor is able to move freely.
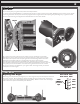
:: Spur Gear Access :: Spur Gear Access - (cont.
:: Spur Gear Access - (cont.) Rear Shock Tower Removal: Loosen the ball studs highlighted in order to remove the shock tower with the shocks and camber turnbuckles attached as one complete piece. Make sure you re-install the CVA bones into the diff outdrives when re-installing the rear shock tower! :: Spur Gear Access - (cont.
:: Spur Gear Access - (cont.) :: Spur Gear Access - (cont.) Spur Gear Maintenance: When accessing your spur gear, check for wear on the teeth of the gear. The teeth should be nice and sharp. Replace if necessary. Also, check the slipper pads for wear. Replace if necessary. A good starting point for slipper setup is to have 3.5 to 4.0mm of thread showing on the shaft. :: Front Diff Access - (cont.
:: Front Diff Access - (cont.) :: Front Diff Access - (cont.) Front Shock Tower Removal: Loosen the ball studs highlighted in order to remove the shock tower with the shocks and camber turnbuckles attached as one complete piece.
:: Front Diff Access - (cont.) :: Diff Maintenance Differential Maintenance: Once you have removed the Diff gear, you can now drain the existing diff fluid from the differential. Stock Shock Fluid Setting: Check the diff gasket for wear or damage. Replace if necessary Front: black grease Fill the diff to the top of the cross pin with your choice of diff fluids. Rear: black grease Front Diff: Dif f flui d Thicker oil will get less low speed steering and better acceleration out of turns.
:: Shock Maintenance - (cont.) Bladder Installation t 35w luid ck f Sho Stock Shock Fluid Setting: Front: 35wt Rear: 35wt A B C As you install the shock cap with the bladder, it will force out any extra fluid. If you install the cap with the shaft fully extended, you are running FULL REBOUND.This means the shaft will fully rebound when compressed. To run less rebound, unthread the cap 1-2 turns and compress the shaft to the desired position and re-tighten the cap with the shaft compressed.
:: Motor Manual 540R BRUSHLESS MOTOR • Connect the three leads exiting the motor to the three motor leads from your Electronic Speed Control (ESC). If the motor runs backwards when giving it forward throttle, reverse any two motor leads. The motor will now turn in the desired direction. • To clean your motor, lightly brush dirt away on a regular basis paying particularly close attention to the areas around the ball bearings. DO NOT spray cleaners or solvents into the motor.
:: ESC Manual Throttle/Brake Calibration Your new ESC must be calibrated before use. Before calibration, be sure to set your radio’s throttle and brake EPAs to 100% and your throttle trim to neutral. Then follow the steps outlined below. Signal From ESC Procedure Battery Management System - A choice of either LiPo mode or NiMH mode adjusts the low voltage cutoff point. This is critically important when using LiPo batteries that should not, for performance and safety reasons, be discharged below 3.
:: Shocks 3941 3942 3943 3945 3946 3952 3953 3954 3988 5407 7146 7148 7149 25231 31438 :: Servo Saver/Mount TC Green Spring 12.0 LB - Kit TC Silver Spring 14.5 LB TC Blue Spring 17.0 LB TC Red Spring 22.0 LB TC Copper Spring 25.0 LB TC Purple Spring 30.0 LB TC Yellow Spring 35.0 LB TC White Spring 40.0 LB TC Spring Set, Complete Red Silicone O-Ring Shock Bladders Pistons, 1.2, 1.3, 1.4 w/E-Clips Shock Clips w/Spring Retainer (4), Spring Cup (4), & Rod Ends (4) E-Clip, 2.5mm APEX Shock Set Pr. Pr. Pr.
:: Front and Rear Gear Differential 7134 7732 25607 31350 31412 31413 2 6 4 6 1 1 Diff Outdrive w/Set Screw M4x4mm Set Screw Bearing, 8x14x4 M2.5x10mm FHCS APEX Diff Ring Gear APEX Diff - Complete 25607 7134 7134 -OR7732 31412 31350 25607 7134 7134 -OR7732 :: Battery Strap :: Lubes & Adhesives / Decals / Misc.
:: Front Gearbox 4675 7163 7166 25202 25215 25231 25710 31412 31414 31416 31417 31434 31435 89202 6 1 10 20 20 20 2 1 1 1 1 1 1 10 M2.5x6mm FHCS Ball Stud, (3 short/7 long) Set 4mm E-Clip M3x10mm FHCS M3 Locknut, black E-Clip, 2.
:: Rear Gearbox 4675 7163 25202 25215 31415 31434 31435 89202 M2.
:: Front Bumper and Chassis 21173 25201 25202 25211 31411 31418 31410 31423 31424 31448 31531 31532 89204 Small Body Clips M3x8mm FHCS M3x10mm FHCS M3x10mm BHCS APEX Chassis Braces APEX Front Bumper Set APEX Chassis APEX Center Bulkhead APEX Body Mount Set M2.
:: Front and Rear Shock Towers 7163 21173 25211 31420 31424 31532 Ball Stud, (3 short/7 long) Set Body Clips, small M3x10mm BHCS APEX F/R Shock Towers APEX Body Mount Set M3x8mm BHCS 1 12 20 1ea 1 6 21173 31532 31424 31424 7163 31424 25211 7163 21173 31424 7163 25211 :: Motor Mount :: Turnbuckles M2.5x6mm FHCS Motor Mount Set Washer, 3x6x0.
:: Slipper, Spur Gear, Pinion, and Drive Shaft 3862 3921 3922 3924 7166 8260 8261 8263 8264 8265 8266 8267 8268 8269 8270 8271 8272 25231 25710 31412 31416 31417 31422 31531 5-40x1/8 Set Screw 69T 48P Spur Gear 72T 48P Spur Gear 66T 48P Spur Gear - Kit 4mm E-Clip 23T 48P Pinion 24T 48P Pinion 26T 48P Pinion 27T 48P Pinion 28T 48P Pinion - Kit 29T 48P Pinion 30T 48P Pinion 31T 48P Pinion 32T 48P Pinion 33T 48P Pinion 34T 48P Pinion 35T 48P Pinion E-Clip, 2.
:: Reedy Accessories :: Body / Decals 1734 1735 1736 6332 31436 31437 31447 31458 31459 31460 31461 31462 31463 31464 FT Body Clips, Metallic Blue, 4 long, 6 short FT Body Clips, Metallic Blue, long FT Body Clips, Metallic Blue, short Body Clips APEX Wing Set V-Type RTR Body Set APEX Decal Sheet Lexus RC F Body, Clear Lexus RC F Body, White Lexus RC F Body, Blue Scion FR-S Body, Clear Scion FR-S Body, Painted Scion tC Body, Clear Scion tC Body, Painted 1 4 6 6 1 1 1 1 1 1 1 1 1 1 :: Factory Team and
:: Reedy Motors and ESC’s 231 232 233 234 235 236 237 238 239 240 241 242 243 244 245 246 908 920 921 922 923 924 925 954 955 956 957 958 965 966 967 983 984 985 986 987 Sonic 540 Mach 2 21.5 Competition Brushless Motor Sonic 540 Mach 2 17.5 Competition Brushless Motor Sonic 540 Mach 2 13.5 Competition Brushless Motor Sonic 540 Mach 2 10.5 Competition Brushless Motor Sonic 540 Mach 2 9.5 Competition Brushless Motor Sonic 540 Mach 2 8.5 Competition Brushless Motor Sonic 540 Mach 2 8.
:: Apparel SP23** AE Splash T-shirt - Black (S, M, L, XL, 2-5XL) SP24** AE Splash T-shirt - Blue (S, M, L, XL, 2-5XL) SP31** 27 Time WC T-shirt - Black (S, M, L, XL, 2XL, 3XL) SP32** AE Kids T-shirt - Blue (S, M, L) SP37** Reedy 2012 T-shirt - Black (S, M, L, XL, 2XL, 3XL) SP38 Reedy Trucker Hat SP39 Reedy Patch SP77** AE 2012 T-Shirt, Blue (S, M, L, XL, 2XL, 3XL) SP78** AE 2012 T-Shirt, White (S, L, XL, 3XL) SP79** AE 2012 T-Shirt, Black (S, M, L, XL, 2XL, 3XL) SP84** Reedy 3D T-Shirt, Black (S, M, L, X
:: Hardware - 1:1 Scale View Cap Head (shcs) Button Head (bhcs) Flat Head (fhcs) 3x10mm (25620) 3x12mm w/hole (31427) 4x12mm (31426) 2.5x6mm (4675) 2x6mm (4672) 2.5x8mm (31448) 2.5x6mm (31520) 2.5x10mm (31350) 3x4mm(91158) 3x8mm (25201) 3x6mm (31531) 3x10mm (25202) 3x8mm (31532) 3x16mm (89224) 3x10mm (25211) 3x18mm (89209) 3x12mm (89202) 3x22mm (89455) 3x14mm (25187) Setscrew 3x3mm (25225) 4x3mm (25223) 4x4mm (7732) 4x10mm (31449) Shims and Washers Nylon Spacer .
:: Notes
:: Trouble Shooting Description Problem Solution Receiver LED remains red. Charge battery. Plug in battery. Reset speed control using your instruction manual. Re-bind transmitter to the receiver. No Throttle Motor not plugged in............ Speed control out of ............ adjustment. Motor failure............................ Plug in motor. Reset speed control using your instruction manual. Replace motor. No Steering Servo not plugged in............. Locked up steering linkage. Servo failure....