
Instructions / Assembly

Pivot Hinge / Sink Tray Installation Instructions
Series No. 274
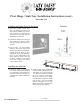
Parts List
11/07
PM 3000
• Pivot Hinge x 2 (1 left, 1 right)
• #8 x 1/2” Truss Phillips screw x 8
• #8 x 5/8” Flat-Head Phillips screw x 8
• Sink Tray x 2
Tools Required
• Phillips-head screwdriver
• Power Drill
• 1/8” Drill Bit
1. The only difference from the instructions above is that the pivot hinge is mounted to the side of the cabinet itself instead
of to a frame. The other installation instructions remain the same.
Inst
alling the Hinge to a Face Frame Cabinet
Figure A
Installing the Hinge to a Frameless Cabinet
1. The drawer front on an existing
cabinet must be removed before
the pivot hinge can be installed. If
this is the case, mark the drawer
front on the back bottom corners
before removal; mark from the
inside of the cabinet. This ensures
the drawer front is properly
aligned when it is re-installed with
the pivot hinges.
2. Using the hinge as a marking tool,
place the hinge flush to the front
edge and bottom edge of the
opening. With a pencil, mark the
top hole (a) and one bottom slot
(b), then pre-drill with a 1/8” drill
bit. (See Figure A for correct hole
locations.)
3. Screw the hinge into place on the
frame with the #8 x 5/8” flat-head
Phillips screws (included).
Hinge (left shown)
#8 x 1/2” Truss Phillips screw x 8
#8 x 5/8” Flat-head Phillips screw x 8
LD-I-PM-3000-0812
BY
Rev-A-Shelf
12400 Earl Jones Way Louisville, KY 40299 www.rev-a-shelf.com