16 Channel Digital Video Recorder WARNING RISK OF ELECTRIC SHOCK DO NOT OPEN WARNING: TO REDUCE THE RISK OF ELECTRIC SHOCK, DO NOT REMOVE COVER (OR BACK). NO USER-SERVICEABLE PARTS INSIDE. REFER SERVICING TO QUALIFIED SERVICE PERSONNEL. The lightning flash with arrowhead symbol, within an equilateral triangle, is intended to alert the user to the presence of uninsulated "dangerous voltage" within the product’s enclosure that may be of sufficient magnitude to constitute a risk of electric shock.
User’s Manual Important Safeguards 1. Read Instructions All the safety and operating instructions should be read before the appliance is operated. 2. Retain Instructions The safety and operating instructions should be retained for future reference. 3. Cleaning Unplug this equipment from the wall outlet before cleaning it. Do not use liquid aerosol cleaners. Use a damp soft cloth for cleaning. 4.
16 Channel Digital Video Recorder Table of Contents Chapter 1 — Introduction ........................................................................................................... 1 Features ................................................................................................................................. 1 Package Contents.................................................................................................................. 2 Chapter 2 — Installation & Configuration .........
User’s Manual iv
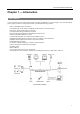
16 Channel Digital Video Recorder Chapter 1 — Introduction FEATURES Your color digital video recorder (DVR) provides recording capabilities for 16 camera inputs.
User’s Manual PACKAGE CONTENTS The package contains the following: 2 Digital Video Recorder Power Adaptors (DVR, Camera) Power Cords (DVR, Camera) USB Mouse Infrared Remote Control and Batteries REVO Remote Pro Software CD and User’s Manual (This document) Digital Video Recorder Power Adaptors Power Cords USB Mouse IR Remote Control and Batteries (AAA Type) REVO Remote Pro Software CD and User’s Manual
16 Channel Digital Video Recorder Chapter 2 — Installation & Configuration REAR PANEL CONNECTORS No special tools are required to install the DVR. Refer to the installation manuals for the other components that make up part of your system. Your DVR should be completely installed before proceeding.
User’s Manual Connecting the Observation Camera Power Cord The CAMERA power connector is provided to supply power to the observation cameras. Connect the connector of the adaptor to the DVR, and connect the AC power cord to the adaptor and then to the wall outlet. Factory Reset The DVR has a Factory Reset switch to the left of the Network port on the rear panel. This switch will only be used on the rare occasions that you want to return all the settings to the original factory settings.
16 Channel Digital Video Recorder Connector Pin Outs: Master Unit + → – → To To → → Slave Unit TX+/RX+ TX-/RX- Connecting the DVR Power Cord Connect the connector of the adaptor to the DVR, and connect the AC power cord to the adaptor and then to the wall outlet. WARNING: ROUTE POWER CORDS SO THAT THEY ARE NOT A TRIPPING HAZARD. MAKE CERTAIN THE POWER CORD WILL NOT BE PINCHED OR ABRADED BY FURNITURE. DO NOT INSTALL POWER CORDS UNDER RUGS OR CARPET. THE POWER CORD HAS A GROUNDING PIN.
User’s Manual USB Port Connect the supplied USB mouse to one of the ports. The USB mouse will be used to access many of the DVR’s functions. A USB flash drive can be connected for backup or system upgrades. INFRARED REMOTE CONTROL ID Button If a DVR System ID is set to 0, the infrared remote control will control that DVR without any additional entries. (Refer to the Advanced Setup section in this chapter for further information on setting the System ID.
16 Channel Digital Video Recorder Up, Down, Left, Right Arrow Buttons These buttons are used to navigate through menus and items displayed in the Live Monitoring or Search screens. They are also used to navigate through menus and GUI during the system setup. You also can use them to change numbers by highlighting a number in a menu and using the Up and Down arrow buttons to increase or decrease the number’s value. The arrow buttons are also used to control Pan and Tilt when in the PTZ mode.
User’s Manual ALARM Button Pressing the ALARM button resets the DVR’s outputs including the internal buzzer during an alarm. PTZ Control Buttons While in the PTZ mode, the PRESET buttons are used to save Presets and load a Preset View, the ZOOM buttons are used to Zoom In and Zoom Out, and the FOCUS buttons are used for Near Focus and Far Focus. BACK UP Button Pressing the BACK UP button allows you to copy video clips.
16 Channel Digital Video Recorder NOTE: For simplicity, most of the operation explanations in this manual are based on using the Remote Control. While setting up the DVR, there will be many opportunities to enter names and titles. When making these entries, a Virtual Keyboard will appear. Use the arrow buttons on the remote control to highlight the character you want button. That character appears in the title bar in the name or title and press the and the cursor moves to the next position.
User’s Manual Record Video Quality Setup Select the desired video quality profile from: – Higher Video Quality Priority Profile – Standard Recording Profile – Longer Recording Time Priority Profile NOTE: The higher quality setting requires more storage space. Select the Finish button to finish the Quick Setup Wizard and start the Network Setup. Select the Next button to start the Network Setup Wizard. NOTE: The Network wizard also can be accessed by selecting Network Setup in the Main Setup screen.
16 Channel Digital Video Recorder LAN Setup Select the desired network configuration between Auto Configuration and Manual Configuration, and then select the Test button to test the network configuration you set. NOTE: Selecting Auto Configuration allows the DVR to obtain LAN parameters (IP address, Gateway, Subnet Mask and DNS Server address) automatically. Selecting Manual Configuration allows you to set up LAN parameters manually.
User’s Manual Select the Finish button to finish the Setup Wizard. ADVANCED SETUP To enter the Main Setup screen, press the MENU button on the remote control. Select the of the screen by pressing the button. The Login screen appears. (Setup) icon at the top Enter the password by pressing the appropriate combination of Camera number buttons on the remote control and select the OK button. There is no default password when logging in for the first time.
16 Channel Digital Video Recorder System Menu Network Menu Camera Menu Record Menu Event Menu Display Menu NOTE: When the installed hard disk drive is not formatted, a message box appears asking you to format the hard disk drive. If you want to record video, you must format the hard disk drive. SYSTEM SETUP System Settings (SYSTEM System Tab) System ID: Set the system ID. Use the Up and Down arrow buttons or scroll the mouse wheel to increase or decrease the number.
User’s Manual Show System Log…: Displays the system logs (up to 5,000 from the latest). The icon will be displayed in the last column for system activities of remote sites.
16 Channel Digital Video Recorder Storage Settings (SYSTEM Storage Tab) Capacity: Displays the capacity of the storage drive. Disk Bad: Displays the damage status of the storage drive. Not Formatted – The device is not formatted. Good (%) – The device is working properly though some portion (%) of the storage is damaged. Bad – More than 90% of the storage is damaged. Temperature: Displays the temperature of the storage drive. N/A – The DVR cannot read the temperature.
User’s Manual NOTE: This product includes software developed by the OpenSSL Project for use in the OpenSSL Toolkit (http://www.openssl.org/). Use REVO Remote Service: Selecting the box turns the REVO Remote service On. Select the port number used when accessing REVO Remote. See Appendix – REVO Remote for details. Mac Address: Displays the MAC (Media Access Control) address of the DVR.
16 Channel Digital Video Recorder Use UPnP: Check the box when using the UPnP (Universal Plug and Play) service. When using the UPnP service, port forwarding from the NAT (Network Address Translation) device to the DVR will be enabled automatically via UPnP service. This function will be used especially when accessing to a port on a private IP address. Checking the Status box displays the port numbers forwarded from the NAT device via UPnP service.
User’s Manual NOTE: You can access a remote DVR and monitor live video images using the media players like VLC Player supporting the RTSP service. Start the media player on your local PC and enter “rtsp://ID:Password@IP address: RTSP port number/trackID=‘channel number’”, or start Internet Explorer on your Blackberry or other mobile devices and enter “http://IP address:REVO Remote port number/”. NOTE: The RTSP service might not be supported, depending on the type of media player.
16 Channel Digital Video Recorder RECORD SETUP Record Settings (RECORD Settings Tab) Recycle When Disk Full: Selecting this box records over the oldest video data once all available storage space has been used. When the box is not checked, the DVR stops recording once all available storage has been used. De-Interlace: Selecting the box toggles between On and Off. When set to On, the DVR will turn the de-interlace filter on while recording video with Very High (D1) resolution.
User’s Manual Setting up the Basic Schedule Mode… Schedule Type: Select the Basic schedule mode. Record Schedule: Select the time range that the scheduled recording will take place. Mode: Select the desired recording mode. ( : Time (Timelapse) recording, yellow : Pre-Event recording, red : Post-Event recording, & red : Time & Post-Event recording, yellow & red : Pre-Event recording & PostEvent recording) ips: Set the images per second for the selected recoding mode.
16 Channel Digital Video Recorder EVENT SETUP Motion Event Settings (EVENT Motion Tab) No.: Your DVR has built-in motion detection. Selecting the box turns the motion detection On and Off for each camera. Sensitivity: Set the DVR’s sensitivity to motion for Daytime and Nighttime independently from 1 (the least sensitive) to 5 (the most sensitive). Zone: Define the area of the image where you want to detect motion; e.g., a doorway.
User’s Manual NOTE: For the Notify action to work, the Mail should be enabled in the NETWORK – Mail setup. Motion Ignoring Interval: Set the motion ignoring dwell time. You can control excessive event logging and remote notification of motion detected after the motion dwell time by adjusting the motion ignoring dwell intervals. The DVR will not log and notify motion events occurred during the preset interval range. The recording for motion events will not be affected by the Motion Ignoring function.
16 Channel Digital Video Recorder Actions: Set up actions the DVR will take whenever it detects system events. System events can sound the DVR’s internal buzzer, notify a number of different devices and/or move PTZ cameras to preset positions. NOTE: The Alarm Out action cannot be set to System and Panic Record events. NOTE: For the Notify action to work, the Mail should be enabled in the NETWORK – Mail setup.
User’s Manual Main Monitor Settings (DISPLAY Main Monitor Tab) Sequence – Mode: Select the sequence mode between Full Sequence and Cameo Sequence. Selecting the Sequence menu icon at the top of the screen or pressing the SEQUENCE button on the remote control causes the DVR to sequence cameras. The DVR can sequence cameras in two modes: “Full” and “Cameo.” In the Full mode, the DVR sequences through the cameras with predefined screen layouts.
16 Channel Digital Video Recorder Chapter 3 — Operation NOTE: This chapter assumes your DVR has been installed and configured. If it has not, please refer to Chapter 2. LIVE MONITORING As soon as the DVR completes its initialization process, it will begin displaying live video on the attached monitor and playing live audio through the attached speaker. The default mode is to display all cameras at once. Pressing any camera button on the remote control will cause that camera to display full screen.
User’s Manual Camera Menu Selecting the (Camera Menu) icon displays the following Camera Menu. PTZ: Selecting PTZ and choosing the camera number allows you to control the selected camera as long as it has Pan, Tilt and Zoom capabilities. Selecting PTZ is the same as pressing the PTZ button on the remote control. See the following PTZ Mode section for details. Zoom: Selecting Zoom and choosing the camera number zooms the current image of the selected camera on the screen.
16 Channel Digital Video Recorder Login/Logout Selecting (Login) in the Live Monitoring menu accesses the Login screen, and you will be asked to enter the password (Logout) in the Live Monitoring menu displays the Logout screen asking you to to log into the system. Selecting confirm whether or not you want to log out the current user. DISPLAY MENU In the Live Monitoring mode or Search mode, moving the mouse pointer to the left edge of the screen displays the following Display menu icons.
User’s Manual EVENT MONITORING When an event occurs, the DVR will display the camera associated with that event if Event Monitoring On is selected in the Display setup screen (OSD tab). How the cameras are displayed depends on the number of cameras associated with the event. If one camera is associated with the event, the DVR will display that camera full screen. If two to four cameras are associated with the event, the DVR will display the cameras on a 2x2 screen.
16 Channel Digital Video Recorder You can save camera position settings as “presets” so that you can go directly to desired views. Once you have the camera at the desired settings, press the PRESET SET button, and the Set Preset dialog box will appear. Select the number you want to assign button on the remote control. Use the virtual keyboard to the preset and press the to enter the preset name. Press the PRESET SELECT button to load the PTZ preset and the Move to Preset dialog box will appear.
User’s Manual NOTE: When the DVR is not in the Recycle mode and all available storage space has been used, panic recording will not operate. Although you will be able to record without changing the unit from its original factory settings, you will want to take advantages of the DVR’s many tools. See Chapter 2 — Installation and Configuration, Record Setup for detailed descriptions of the recording mode options.
16 Channel Digital Video Recorder SEARCHING VIDEO While in the Search mode, pressing the MENU button on the remote control displays the following menu icons at the top of the screen. Pressing the MENU button again hides the menu icons. Search Go To Export Camera Menu Alarm Panic Exit NOTE: The menu icons also can be displayed by moving the mouse pointer to the top of the screen.
User’s Manual SEARCH Event Log Search The DVR maintains a log of each time the Alarm Input port is activated. The Event Log Search screen displays this list. Use the arrow buttons to highlight the event for which you would like to see video. Pressing the button will select the event video and display the first image of the event. Pressing the (Play/Pause) button on the remote control button will start playing the “event” video segment.
16 Channel Digital Video Recorder Record Table Search Standard View Compact View Expanded View Recording information about video images currently displayed on the screen displays in the recording status bar. A grey vertical line indicates the current search position. To search for specific video, move the vertical line by pressing the Left or Right arrow buttons on the remote control, scrolling the mouse wheel or clicking the mouse on the desired segment.
User’s Manual Selecting located at the bottom displays the Search menu. Go To: Displays the first or last recorded image, or searches by date and time (see below for more details). Backup: Copies a video segment and saves it (see below for more details). Zoom: Zooms the current playback image. Slow Play: Plays video at low speed (x1/2, x1/3, x1/4, x1/6 and x1/8). NOTE: Playing video at low speed will be supported for video recorded 10 images or more per second.
16 Channel Digital Video Recorder GO TO Go to the First Selecting Go to the First displays the first recorded image. Go to the Last Selecting Go to the Last displays the last recorded image. Go to the Date/Time You can use the Left and Right arrow buttons on the remote control to select the year, month, day, hours, minutes and seconds. Use the Up and Down arrow buttons to change to the date and time you want to search for video. Once you have set the date and time, press the button.
User’s Manual From: Pressing the button toggles between On and Off. When set to Off, you can enter a specific Date and Time. When set to On, the copy will be from the first recorded image. button toggles between On and Off. When set to To: Pressing the Off, you can enter a specific Date and Time. When set to On, the copy will be to the last recorded image. Channels: Select the cameras that you would like to include in your video clip.
16 Channel Digital Video Recorder Start Internet Explorer on your local PC. You can run the REVO Remote program by entering the following information in the address field. – “http://IP address:port number” (The DVR IP address and the REVO Remote port number (default: 12088) set in the Network setup screen (General tab)) – Or, “http://www.revodvr.
User’s Manual WEB MONITORING Remote Watch is a remote web monitoring program that allows you to monitor live video transmitted in real-time from the remote DVR. ① Click the icon to log out of the REVO Remote program ② Click the icon to access the web search mode. ③ Position the mouse pointer on the Remote Watch logo to see the version number of the REVO Remote program. ④ The DVR information window displays the login information of REVO Remote. ⑤ Click the screen format to select the desired display mode.
16 Channel Digital Video Recorder ⑬ Selecting a camera on the screen and clicking the right mouse button displays the text menu screen. Change Camera Title: Changes the camera name. Enable Audio: Enables audio communication with the remote site. When the audio control panel displays, click the icon to send audio to the connected remote site and click the button again to icon to monitor live audio from the connected remote site through stop sending audio.
User’s Manual ⑤ Click the icon to blur, sharpen, equalize and interpolate playback images. Click the icons to zoom out or zoom in the recorded image. Click the icons to adjust the brightness of the recorded images. NOTE: Image processing works only in the pause mode. ⑥ The playback function buttons include fast backward, pause, play, fast forward, go to the first image, go to the previous image, go to the next image, and got to the last image. ⑦ Click the screen format to select the desired display mode.
16 Channel Digital Video Recorder Appendix ERROR CODE NOTICES SYSTEM UPGRADE RELATED BACKUP RELATED No. Description No. 0 1 2 3 4 100 101 102 103 104 105 300 301 302 303 304 400 401 402 500 Unknown error. File version error. Operating system version error. Software version error. Kernel version error. Upgrade device mounting failed. Package is not found. Extracting package failed. LILO failed. Rebooting failed. Invalid package. Remote connection failed. Remote network error.
User’s Manual MAP OF SCREENS (ADVNACED SETUP) 42
16 Channel Digital Video Recorder SPECIFICATIONS VIDEO Signal Format Video Input Monitor Outputs Video Resolution NTSC 8 RJ-12 and 8 BNC inputs, 1 Vp-p, auto-terminating, 75 Ohms Composite: One (RCA), 1 Vp-p, 75 Ohms VGA: One Composite: 720x480 VGA: 800x600@60Hz, 1024x768@60Hz, 1280x1024@60Hz Playback/Record Speed (images per second) 480/480ips (NTSC) Alarm Input Alarm Output Internal Buzzer Network Connectivity Audio Input Audio Output IR Port 16 TTL, NC/NO programmable, 4.
REVO Remote Pro (Remote Administration System) Table of Contents Chapter 1 — Overview .............................................................................................. 1 1.1 In This Manual ............................................................................................... 1 1.2 Netcon Features ............................................................................................ 1 1.3 Product Information ........................................................................
User’s Manual ii
REVO Remote Pro (Remote Administration System) Chapter 1 — Overview 1.1 IN THIS MANUAL This manual describes installation and operation of REVO Remote Pro (Remote Administration System) software, which is designed to be used with remote digital video recorders (DVRs). 1.2 REVO REMOTE PRO FEATURES REVO Remote Pro program is an integrated software program that controls system management, video monitoring, video recording and image playback of multiple remote sites.
User’s Manual 2
REVO Remote Pro (Remote Administration System) Chapter 2 — Installation CAUTION: If an older version of REVO Remote Pro software is installed in your computer, you should uninstall the older version first. NOTE: In the Windows Start menu, go to Control Panel. Double click the Power Options to open the Management Properties dialog box. Under the Power Schemes tab, set both Turn off monitor and Turn off hard disks to Never. 1. Insert the installation CD. 2. Run the Setup.exe file.
User’s Manual 5. When the following dialog box appears, click Next. 6. Select whether or not to run REVO Remote Pro automatically when logging onto Windows, and then click Next. 7. Set the language option by selecting either Select language when starting REVO Remote Pro or Always start REVO Remote Pro using the language below. If you select Always start REVO Remote Pro using the language below, select the desired startup language from the list of available languages and then click OK.
REVO Remote Pro (Remote Administration System) 8. When the following dialog box appears after finishing the REVO Remote Pro installation, select Install MSXML application and click Finish. Installing the MSXML is required for REVO Remote Pro to initiate. 9. Click Next. 10. Select I accept the terms in the License Agreement, and click Next.
User’s Manual 11. Enter User Name and Organization, and click Next. 12. Select Install Now. 13. Click Finish to complete the MSXML installation.
REVO Remote Pro (Remote Administration System) Chapter 3 — Configuration After installing the REVO Remote Pro software, you will find the REVO Remote Pro shortcut icon on the desktop. Run the REVO Remote Pro program by double clicking the icon. The REVO Remote Pro program consists of the screen, 12 docking panels, menu and toolbar. NOTE: Some panels will not be displayed on the screen in the default frame layout.
User’s Manual NOTE: There might be a problem with screen display or screen update due to low image transmission speed when using Microsoft Windows Vista or later operating system. In this situation, it is recommended that you disable the Auto Tuning capability of your computer. Run the Command Prompt with elevated administrator permissions (Go to the Start Menu → Accessories → Command Prompt → Click the right mouse button and select the Run as administrator option).
REVO Remote Pro (Remote Administration System) Remote Sites Panel The Remote Sites Panel displays a list of remote sites registered during REVO Remote Pro System setup and a list of installed cameras at the remote sites. icon allows you to Entering the site name in the query box and clicking the icon allows find the remote site easily in the Remote Sites list.
User’s Manual x0.25 to x2: Sets the desired size of the Map popup screen. Full Screen: Enters the full-screen mode of the Map popup screen. Transparency…: Adjusts the transparency of the popup screen. PTZ Set…: Controls pan, tilt and zoom of the selected PTZ camera. Disable Time Out: Continues displaying the popup screen when events are detected by disabling the dwell time out. Original Ratio: Displays the Map popup screen by matching its original aspect ratio.
REVO Remote Pro (Remote Administration System) Color Control, Alarm Out Control and Image Processing Panels The panels allow you to control color and alarm out while live monitoring a remote site, or to enhance images while playing back video. NOTE: Refer to 4.1 Live Monitoring and 4.2 Playback and Search for more details. Watch Event View Panel The Watch Event View panel displays events detected at individual remote sites while REVO Remote Pro is in the live monitoring mode.
User’s Manual Emergency Event View Panel The Emergency Event View panel displays a list of events (preset for notification at the remote site) that were called from individual remote sites (LAN connection only). Selecting an event from the list and then dragging and dropping it in the desired position on the Watch or Search screen connects to the remote site, and a checkmark is placed in the box at the left.
REVO Remote Pro (Remote Administration System) The Report View panel displays the system status information of remote sites. REVO Remote Pro checks the remote icon on the panel reloads the data and clicking the icon prints the site and reports system status. Clicking the report out. Report Setup must be configured during REVO Remote Pro System setup for this feature to function. Refer to 3.3 Menu – System Menu for more details.
User’s Manual System Menu Setup The Setup screen allows setting up the system operation and remote site configuration. System 1: Set up the date/time format for REVO Remote Pro, display option, and panic recording function. Date/Time Format: Set the date/time format. Display Option: Set up the screen display, drag & drop popup option, display acceleration and OSD.
REVO Remote Pro (Remote Administration System) – Drag & Drop Popup Option: Select which mouse button will be used when displaying popup menu screens from Use Left Mouse Button, Use Right Mouse Button or both (Watch and Search Screen mode only). – Drawing Mode Setup…: Set up the display options for the screen. Normal Drawing: Depends on your PC’s CPU performance and displays images in low speed (DIB Draw Mode). Fast Drawing (Default): Displays image in normal speed (Direct Draw Mode).
User’s Manual NOTE: When selecting the User Assignment Setup mode, the user can assign camera channels to record manually on the Watch screen. Select a camera on the Watch screen and click the right mouse button then select Set Record Camera in the text menu screen. The gray icon displays on the selected camera screen. System 2: Set up the modem connection information for remote access, system password, network option, report function, and DVRNS server.
REVO Remote Pro (Remote Administration System) Report Setup: Set up the Use (On or Off) and check intervals (from 1 to 24 hours) of the report function. When using the report function, REVO Remote Pro checks on the remote site based on the user-defined interval and reports system status. DVR Name Service: Set up the IP address and port number (from 10000 to 12000) of the DVRNS (DVR Name Service) server.
User’s Manual – Reference Group: The site should be assigned to a Reference Group for effective management of multiple remote sites. Click the Add button to create a new reference group. – Device Setup: Select the system of the remote site to register. When registering an IP camera, select IP Camera. – Remote Site Setup: Select PC Based DVR when registering a DVR at the remote site that is PC based.
REVO Remote Pro (Remote Administration System) Favorite Site: The Favorite Site is a user-defined connection list that combines more than one remote site, so multiple sites can be monitored at the same time with a single connection. Add a new Favorite Site and define it by dragging and dropping sites and/or cameras to the Favorites map. Up to 64 cameras can be monitored at a time when each camera is assigned to its own position on the Favorites map.
User’s Manual button on the toolbar will save the current screen layout of the Watch screen or Search NOTE: Clicking the screen directly to the Favorite site. NOTE: The Favorite Site list does not work with modem connections. Sequence Site: Configure the sequence site. REVO Remote Pro connects to the registered sites sequentially allowing connection to more than one remote site. Register an Auto Sequencing group and add desired sites in the Group List to the Auto Sequencing group.
REVO Remote Pro (Remote Administration System) Save Setup File Allows saving the current settings of the System – Setup menu as a .xml file format. Saving the setup file can also be performed by clicking the button on the toolbar. Batch Job Setup Multiple remote sites can be upgraded or set up using the Batch Job Setup screen. Upgrade: Sets up the remote upgrade job for remote sites.
User’s Manual Setup: Sets up the remote setup job for remote sites. First, select the remote sites to set up from the Group List, and add them to the Setup Sites list by clicking the Add button. Then, click the Setup Now button to initiate the remote setup job for Setup Sites. Add: Select the site to add from the Group List and click the Add button. Remove All: Removes all the sites in the Setup Sites list. Setup Now: Performs the setup on the Setup Sites.
REVO Remote Pro (Remote Administration System) View Log: Displays the type of log and the number of log entries of REVO Remote Pro. Selecting a log type from the list displays all entries of the selected log type, and you can search for the desired log by setting up a search filter. Filter: Set up the search condition. – Search Time: Set up the time range to search within. Selecting Current Time and the desired period searches for logs from the current time and as far back as the selected time span.
User’s Manual View Menu Displays or closes the toolbar and panels. Remote Menu NOTE: The Remote menu can also be activated by clicking the right mouse button after selecting the remote site on the Remote Sites panel. Remote Setup Remote Setup can be used to change the setup of a remote DVR. Select the remote site on the Remote Sites panel, initiate the Remote Setup menu, and the setup screen displays. NOTE: Refer to the user manual for the remote DVR for more details on system setup.
REVO Remote Pro (Remote Administration System) Favorite Menu NOTE: The Favorite menu can also be accessed using the toolbar controls. Saves the current screen layout directly to the Favorite site. Sequence Menu NOTE: The Sequence menu can also be accessed using the toolbar controls. Starts or ends auto sequencing (Watch Screen Only). Clicking Auto Sequencing On allows you to select a desired Auto Sequencing group. Record Menu NOTE: The Record menu can also be accessed using the toolbar controls.
User’s Manual Layout Menu NOTE: The Layout menu can also be accessed using the toolbar controls. Screen Layout Select the desired screen layout using the layout toolbar. When changing the screen layout, the selected camera on the current screen will be located in the first cell of the new layout. When in one of the multi-view formats, selecting Previous Cameras or Next Cameras will move to the previous or next page.
REVO Remote Pro (Remote Administration System) Layout Setup Always Load Layout at REVO Remote Pro Startup: Select whether or not the selected frame layout loads automatically when REVO Remote Pro starts. Save: Enter a layout name and click the Save button to save the current frame layout as a new user-defined layout. Rename: Select the layout to change from the Layout List and click the Rename button. Then change the layout name.
User’s Manual 28
REVO Remote Pro (Remote Administration System) Chapter 4 — Operation 4.1 LIVE MONITORING REVO Remote Pro provides remote monitoring functions for viewing video images in real time from either a single site or multiple sites. In addition, when events are detected at a remote site while in the live monitoring mode, REVO Remote Pro displays the event information on the Watch Event View panel.
User’s Manual Sequence Monitoring Clicking the button on the toolbar and selecting a desired Auto Sequencing group connects to the registered sites sequentially allowing connection to more than one remote site and displays images from selected cameras. Clicking the button during sequence monitoring releases sequence monitoring and maintains the current connection. For sequence monitoring to function, the sequence sites should be registered during System setup. Refer to 3.
REVO Remote Pro (Remote Administration System) NOTE: Connecting to a Favorite site will be available if the Search Screen display option was set up to connect to selected Favorite sites. Refer to 3.3 Menu – System Menu for more details on Favorite Site setup. NOTE: When selecting the display option of Watch and Search Screen during System setup, the remote site can be also be set to connect using the right or left mouse buttons (This is user-defined and must be set during System setup).
User’s Manual Time-Lapse Search Click the button on the Search View panel to enter the time-lapse search mode. Selecting a date from the calendar initiates the time-lapse search. The dates for which recorded images are available are enabled. When first entering the time-lapse search, the latest date with recorded images will be selected (highlighted) in the calendar. Click the (Reload) button to reload the date information.
REVO Remote Pro (Remote Administration System) NOTE: The Event Search dialog box will differ depending on the specifications of the remote DVR. NOTE: The Text-In (Event Search – Text-In tab) search may not be supported, depending on the specifications and version of the remote DVR. Set up the search criteria for the event search in the Event Search dialog box, and click the Find button. The results will be displayed in the event list. A total of 100 results can be displayed at a time.
User’s Manual Image Processing The Image Processing panel allows enhancing played back images using processing controls. Blurs the image. Sharpens the image. Equalizes the image. Reduces the alias effect that occurs when using the zoom function. Reloads the original image. Playing Recorded Audio REVO Remote Pro will play audio when it is in the single-screen layout while playing back recorded video that has recorded audio.
REVO Remote Pro (Remote Administration System) NOTE: Selecting Include Audio Data includes audio data when saving video with recorded audio. This option is not available when more than one camera is selected. NOTE: When the data file reaches 2GB, saving stops. Selecting Limit File Size and adjusting the maximum file size causes saving to stop once the data file reaches the maximum file size setting. Selecting Save Split File saves video by creating multiple files in 2GB units or in the Max File Size units.
User’s Manual Diff. % to ref. image: Sets the minimum proportion (%) of blocks that must be activated to be considered as a change (Museum Search only). Activation Time: Sets the duration that the change must last to be considered as a change (Museum Search only). If a change is detected but does not last as long as the Activation Time, the change is not considered as a change. (Detection Area Select/Clear): Sets the detection area on the Search Screen by selecting or clearing blocks.
REVO Remote Pro (Remote Administration System) 4.4 PANIC RECORDING Clicking the button on the toolbar starts panic recording of cameras currently displayed on the Watch screen. Clicking the button again stops panic recording. Up to 16 channels can be recorded at a time, and you can select which cameras are to be recorded during the System setup. Clicking the button on the toolbar initiates the Record Player program and plays video saved in the recording folder designated during the System setup.
User’s Manual Function Buttons Disconnect: Disconnects the current connection on the Status View panel. NOTE: If you want to connect to another site, disconnect from the currently connected system on the Status View button. panel first by clicking the Remote Setup: Allows changing the setup of the remote DVR connected to the Status View panel. NOTE: Refer to the manual for each applicable remote DVR for more details on system setup.
REVO Remote Pro (Remote Administration System) Appendix REVIEWING VIDEO CLIPS You do not need to install any special software on you personal computer to review video saved as Self-Player files. The file contains a REVO Backup program. Double-clicking the target file starts the REVO Backup program. NOTE: It is suggested that the computer used for the REVO Backup program has at least an 800MHz Pentium III (Intel Pentium Dual Core 2.2GHz recommended).
User’s Manual Click to play the video clip. Click to go forward one frame of the video clip. Click to play the video clip in fast forward. Click to go to the end of the video clip. Click mode. to show the previous camera group if there is recorded video in the previous camera group in the current screen Click to cycle through the screen layouts. It cycles through 2x2, 1+7, 3x3, 4x4, 4x5, 5x5 and 1+32.
REVO Remote Pro (Remote Administration System) DVR NAME SERVICE (DVRNS) Overview Using Static IP addresses in LAN/WAN networks requires high management overhead and increases the cost burden to users. Therefore, it has become essential for DVRs to support Dynamic IP addresses in ADSL/VDSL networks using DHCP (Dynamic Host Configuration Protocol). This reduces cost burdens and increases cost effectiveness for system users. Use the following steps to set up a system using DVRNS.
User’s Manual Background Image Setting First, prepare the image in a bitmap or JPEG file format. Click the the background image of the map. (Background) button on the toolbar and select Go to the Property [Canvas] tab and set the background image information. Name: Enter a name of the background image. Horizontal/Vertical: Adjust the background image size by clicking each field and changing the numbers. Position: Adjust the position of the background image on the screen.
REVO Remote Pro (Remote Administration System) Click the Add button, and the following Site Item box appears. Remote Site Setup: Enter the site name and IP address of the DVR connected to the devices you want to include on the map. Click the Port… button and enter the network IP port number (8000 to 12000) that matches the value set during the LAN setup on the DVR. Check the box beside Use DVRNS to use the DVR name service.
User’s Manual Click the Display Name field of each IP address and enter the name of the DVR to display on the popup screen. Device Setting Selecting the , , or buttons on the toolbar displays the Camera, AlarmOut and AlarmIn tabs under the Image Bar. Select the icons, and drag and drop them at the desired locations on the background image. Go to the Property [Camera/AlarmOut/AlarmIn] tab and set the device information. General Name: Enter a device name. Description: Enter description of the device.
REVO Remote Pro (Remote Administration System) Event [AlarmOut]: Checking the Switch on/off box controls the alarm-out remotely by clicking the alarm-out icon on Map panel. Event [AlarmIn]: Selecting Alarm-in Event from a drop-down list and checking the Watch View Popup box sets the Map panel to pop up another screen when an alarm-in event occurs.
User’s Manual REVO MOBILE REVO Mobile for PDA REVO Mobile allows you to access remote sites and monitor live video using the Windows Mobile based PDA anytime from virtually anywhere. PDA system requirements for using the REVO Mobile program are: Operating System: Microsoft® Windows® Mobile 5 or above Processor: ARMv4 Core compatible processor Display: 240x240 pixel, 320x240 pixel or 640x480 pixel Memory: 4MB of storage memory / 96MB or more of RAM Wireless LAN: Support IEEE 802.
REVO Remote Pro (Remote Administration System) 5. When the following dialog box appears, select OK to complete the installation. 6. After installing the REVO Mobile software, the program will be installed on the My Device\Program Files\REVO Mobile 3.1.0 folder, and you will find the REVO Mobile icon on the desktop. Double click the icon or run the My Device\Program Files\REVO Mobile 3.1.0\REVO Mobile.exe file. NOTE: To remove the program, select Start on the Task Bar on the PDA.
User’s Manual NOTE: The REVO Mobile program might not work properly when connecting to the remote site via Microsoft ActiveSync. Camera: Displays the camera buttons. Click the desired camera button to select the camera to be viewed. Live video Images from the selected camera and the OSD information including camera name and date/time will be displayed on the Monitoring Screen. No Video will be displayed when there is no video signal from the selected camera.
REVO Remote Pro (Remote Administration System) REVO Mobile for iPod Touch or iPhone REVO Mobile allows you to access remote sites and monitor live video via network connection using the Apple based iPod Touch or iPhone (iPhone OS 3.0 or later version) anytime from virtually anywhere. System Diagram Installation 1. Connect your iPod Touch or iPhone to your PC. Run the iTunes program on your PC and connect to iTunes Store. 2.
User’s Manual Operation 1. Touch the Settings button to register DVRs. Select Site List, and then enter the DVR’s information. General: Enter the site name. Connection: Enter the IP address and port number of the DVR. If the DVR uses the DVRNS function, enable the Use DVRNS option and enter the name registered on the DVRNS server instead of the IP address of the DVR. Login: Enter the user ID and password set on the DVR. 2.
REVO Remote Pro (Remote Administration System) or Monitoring Touch the Connect button to connect to a DVR for monitoring. Selecting the DVR from the site list displays the video from the DVR on the screen. Disconnect: Touch to release the connection to the DVR. Camera: Touch to select the camera to monitor. The list of cameras supported by the DVR is displayed. Selecting a desired camera from the list and touching the Apply button displays video from the selected camera.