Quick Installation Guide REVO Elite HD NETWORK BOX CAMERA Please read this manual thoroughly before use, and keep it handy for future reference.
REHXT0550-1, Quick Installation Guide 1. Description This manual applies to the REHXT0550-1 network camera. The Network Camera provides a network service for a progressive-scan image sensor that can be monitored on a real-time screen regardless of distance or location. By using its dedicated program, many users are able to access the Network Camera at once, or a single user can monitor various network cameras at the same time.
REHXT0550-1, Quick Installation Guide 3
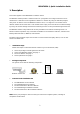
REHXT0550-1, Quick Installation Guide • • Front View NO Function 1 Focus adjustment fixing screw 2 Auto Iris lens connector Rear View NO 1 Function 4 5 Power Adaptor Terminal Power Indicator(Green) Status Indicator(Red) Audio Input Audio Output Network Connector(PoE) Video Switch 6 Video Output 7 Micro SD Card Slot 8 3pin Terminal IO 2pin RS485 Terminal 9 Reset Button 2 3 Description Main Power, 2pin terminal, DC12V/AC24V 330mA(4.0W) Indicates power input. Indicates camera status.
REHXT0550-1, Quick Installation Guide • LED Indicators LED Color Green Network Amber Unlit Status Red Power Green Indication Steady for connection to a 100 Mbit/s network. Flashes for network activity. Steady for connection to 10 Mbit/s network. Flashes for network activity. No network connection. Steady red for failed upgrade or booting. Steady green for normal operation or booting. Flashes green during firmware upgrade. Note: Steady green and red during booting.
REHXT0550-1, Quick Installation Guide 2.2 Network Connection and IP assignment The Network Camera supports the operation through the network. When a camera is first connected to the network it has no IP address. So, it is necessary to allocate an IP address to the device with the “Smart Manager” utility on the CD. 1. 2. Connect the Network Camera / device to the network and power up.
REHXT0550-1, Quick Installation Guide 3. Operation The Network Camera can be used with Windows operating system and browsers. The recommended browsers are Internet Explorer, Safari, Firefox, Opera and Google Chrome for Windows. 3.1 Access from a browser 1. 2. 3. Start a browser (Internet Explorer). Enter the IP address or host name of the Network Camera in the Location/Address field of your browser. You can see the starting page. Click Live View or Setup to enter web page. 4.
REHXT0550-1, Quick Installation Guide 3.3 Setting the admin password over a secure connection To gain access to the product, the password for the administrator must be set. This is done in the “Admin Password” dialog, which is displayed when the network camera is accessed for setup the first time. Enter your admin name and password. Note: The default administrator username and password is “admin”. If the password is lost, the Network Camera must be reset to the factory default settings. See “3.
REHXT0550-1, Quick Installation Guide 2) Control toolbar The live viewer toolbar is available in the web browser page only. It displays the following buttons: The Stop button stops the video stream being played. Pressing the key again toggles the start and stop. The Start button connects to the network camera or starts playing a video stream. The Pause button pauses the video stream being played. The Snapshot button takes a snapshot of the current image.
REHXT0550-1, Quick Installation Guide 3.5 Network Camera Setup This section describes how to configure the network camera, and is intended for product Administrators, who have unrestricted access to all the Setup tools; and Operators, who have access to the settings for Basic, Live View, Video & Image, Audio, Event, and System Configuration. You can configure the network camera by clicking Setup in the top right-hand corner of the Live View page.
REHXT0550-1, Quick Installation Guide 11
REHXT0550-1, Quick Installation Guide HD NETWORK BOX CAMERA Printed in Korea