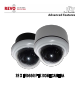
Advanced Features Model RELPTZ22-1 12 VDC/650 mA NTSC Publication No. RELPTZ22-10AF REVO America 700 Freeport Parkway Suite 100 Coppell, TX 75019 1-800-6250-REVO (7386) Copyright © 2012 REVO America Inc. All rights reserved. REVO and its logo are trademarks of REVO America Inc.
REVO America wants to ensure that your installation experience is a safe and pleasant one. Please read and adhere to these Safety Instructions. CAUTION Model RELPTZ22-1 is an indoor camera and not meant for outdoor use. Doing so will void the warranty. 1. Never perform any installation procedure or open the camera case with power on. 2. Pay attention to the Warnings and Cautions in the instructions. They are there for your safety and to ensure that the equipment does not get damaged. 3.
FCC Compliance FCC INFORMATION: This equipment has been tested and found to comply with the limits for a Class A digital device, pursuant to Part 15 of the FCC rules. These limits are designed to provide reasonable protection against harmful interference when the equipment is operated in a commercial environment.
Contents Contents ......................................................................................................................................... 2 Advanced Features ....................................................................................................................... 3 The Advanced Features on the Dome Menu ............................................................................ 5 Titling ........................................................................................
Advanced Features This manual describes the advanced features of your 22X indoor dome camera. The User manual should be followed for installation and basic setup of the camera. This manual assumes that the camera has been installed and set up using that manual, RELPTZ22-10B. In this manual you will learn how to set up Auto Scans, Presets, Tours, Alarms and Area Titles. You will do this using the DOME MENU and the submenus and a control device such as a keyboard controller or DVR.
DOME MENU AUTO SCAN PRESET TOUR ALARM AREA TITLE CAMERA DOME SETUP EXIT(ESC TO EXIT) You can make selections on the menu by using the keyboard controller, DVR or non REVO device. Function Keyboard Controller Key MENU Call the on-screen menu utility Navigate through the menu items. Joystick up or down Go into the sub-menu items. Joystick left or right Change value. Enter the editing title mode.
The Advanced Features on the Dome Menu Auto Scan Enables you to set a programmed scan of an area such as a room. You can set the camera to start in one location and move to another location and then back to the starting location at a preconfigured speed. Up to 5 different Auto Scans may be configured. Preset Enables you to create presets, which are programmed video scenes, based on specific pan, tilt, zoom, and focus settings.
TITLE EDIT MENU A01 * A B C D E F G H I J K L M N O P Q R S T U V W X Y Z 0 1 2 3 4 5 6 7 8 9 ( ) ALL DELETE EXIT(ESC TO EXIT) 1. Navigate to the TITLE EDIT MENU and move joystick to the right to select it. 2. Using the joystick, move over the letter or number that you want to use in the title. You can also twist the joystick right or left to scroll through the characters. 3. Press the CTRL key to select the character. 4. Continue selection until you have created the title. 5.
HOME FUNCTION SETUP HOME FUNCTION : Preset FUNCTION NUMBER : 10 WAITING TIME : 120 SEC FUNCTION ENABLE : ON SAVE AND EXIT(ESC TO CANCEL) In the example shown above, the camera will go to Preset 10, 120 seconds after manual control has stopped, when Function Enable is set to ON. If None is selected, nothing will happen. HOME FUNCTION: None/Tour/Auto Scan/Preset. FUNCTION NUMBER: The number of the Tour, Auto Scan or Preset that you want to start.
Auto Scan The Auto Scan Setup menu enables you to set a programmed scan of an area such as a room. You can set the camera to start in one location and move to another location and then back to the starting location at a preconfigured speed. Up to 5 different Auto Scans may be configured. AUTO SCAN SETUP NUMBER : 01 TITLE : A01 SPEED : 05 STEP START ANGLE : ----- ----END ANGLE : ----- ----SCAN DIR : CCW SWAP : OFF DWELL : 03 SEC SAVE AND EXIT(ESC TO CANCEL) NUMBER: 01-04.
1. Press the SCAN key on the keyboard controller to enter the Auto Scan menu directly. Or press the MENU key to display the main menu on the monitor. Scroll to Auto Scan and move the joystick to the right. 2. Select NUMBER and set the desired number by moving the joystick to the left or right. 3. Select TITLE and twist the joystick to enter the title edit mode. Refer to the Titling procedure. 4. Select SPEED. Use a medium range speed at first, then experiment.
There are two pages of Preset menu. Each page has 60 Presets. Pages can be scrolled by moving the joystick to the left or right on the first or last No. of Preset. PRESET SETUP NUMBER : 001 TITLE : --CAMERA SET DWELL : --- SEC 12345678901234567890 00 █**----------------02 -------------------04 -------------------NEXT PAGE SAVE AND EXIT(ESC TO CANCEL) NUMBER: 001-120. Presets. TITLE: Allows you to create a unique name for each Preset. Up to 12 characters. The Preset must be created first.
1. Press the PRST key on the keyboard controller to enter the Preset menu directly. Or press the MENU key to display the main menu on the monitor. Scroll to Preset and move the joystick to the right. 2. Select a blank Preset position by moving the joystick to one of the rows that start with 00, 02, 04, etc. Any position that has an asterisk displayed already has a preset stored. 3. After selecting a blank position, press and hold the CTRL key. Use the joystick to select the camera view you want to set. 4.
MOTION SETUP SENSITIVITY : 06 POSITION : ALL DELAY : 00 SEC OUTPUT : OFF HOLD TIME : 03 SEC EXIT(ESC TO EXIT) SENSITIVITY: 01-10. the higher the number, the greater the sensitivity. POSITION: ALL/CENTER. Selects detection across the entire frame or just the center. DELAY: 0-5 sec. Sets the time the camera will wait before triggering an alarm. OUTPUT: OFF/ON. Alarm output on or off. HOLD TIME: 03-99 sec. Sets the time the alarm will be held. 7.
12. To delete a Preset, press the HOME key at programmed Preset position. 13. To store the Preset that you created as the default programmed action for the camera, navigate to the DOME SETUP menu and select HOME FUNCTION. Refer to the Home Function procedure. TIP You can use a keyboard controller shortcut to create Presets on the fly. Keyboard Controller Shortcut 1. Select a scene that you want to save as a Preset. 2. Press number 1 to 120 on the numeric keypad. 3. Press CTRL then press PRST.
Tour This menu provides the options for creating Tours, which are a programmed sequence of events for the camera. A tour can include up to 42 Presets and save them. Up to 4 Tours may be programmed. TOUR SETUP NUMBER : 01 TITLE : T01 DWELL : -- SEC 001 003 --- --- --- --- ----- --- --- --- --- --- ----- --- 002 --- --- --- ----- 004 --- --- --- --- ----- --- --- --- --- --- ----- --- --- --- --- --- --SAVE AND EXIT(ESC TO CANCEL) NUMBER: 01-04. Selects the Tour number to be programmed.
5. You can also overwrite the programmed number and to remove a stored number from the Tour. Press the HOME key on the stored number, a blank position mark (---) will be displayed. 6. Repeat steps 2 through 5 for each desired Preset position. Each title will be displayed on top of the line. 7. To create a unique title, refer to the Titling procedure. 8. Select SAVE AND EXIT and move the joystick to the right. Press the ESC key to exit the program without saving. 9.
LATCH: ON: Alarm message will remain on the screen even though alarm input is deactivated. OFF: Alarm message will disappear on the screen after programmed hold time when alarm input is deactivated. Area Title The Area Title Setup menu enables you to label up to eight different areas for various camera angles that the camera will view. For example, as shown in the screen below, when the camera points to an angle between 124.3° (PAN), 30.7° (TILT) to 359.5° (PAN), 45.
4. Select END ANGLE. Hold down the CTRL key while moving the joystick to select the end position. Release the CTRL key to complete the selection of the end position. REVO America www.revoamerica.
Appendix A Setting Camera Addresses for Large Systems Each camera requires a unique camera address so that the control device knows which camera is at your back door and which camera is monitoring your driveway. Think of the camera address as a telephone number. In order for the video system to work with multiple cameras, it has to know which one is which. In the User manual, instructions were provided for setting up to 8 cameras. However, the camera is capable of expansion up to 255 cameras.
CAMERA ID 7 8 9 10 11 12 13 14 15 16 17 18 19 20 21 22 23 24 25 26 27 28 29 30 31 32 33 34 35 36 37 38 39 40 41 42 43 44 45 46 47 48 REVO America 1 ON OFF ON OFF ON OFF ON OFF ON OFF ON OFF ON OFF ON OFF ON OFF ON OFF ON OFF ON OFF ON OFF ON OFF ON OFF ON OFF ON OFF ON OFF ON OFF ON OFF ON OFF 2 ON OFF OFF ON ON OFF OFF ON ON OFF OFF ON ON OFF OFF ON ON OFF OFF ON ON OFF OFF ON ON OFF OFF ON ON OFF OFF ON ON OFF OFF ON ON OFF OFF ON ON OFF 3 ON OFF OFF OFF OFF ON ON ON ON OFF OFF OFF OFF ON ON ON ON OFF
CAMERA ID 49 50 51 52 53 54 55 56 57 58 59 60 61 62 63 64 65 66 67 68 69 70 71 72 73 74 75 76 77 78 79 80 81 82 83 84 85 86 87 88 89 90 REVO America 1 ON OFF ON OFF ON OFF ON OFF ON OFF ON OFF ON OFF ON OFF ON OFF ON OFF ON OFF ON OFF ON OFF ON OFF ON OFF ON OFF ON OFF ON OFF ON OFF ON OFF ON OFF 2 OFF ON ON OFF OFF ON ON OFF OFF ON ON OFF OFF ON ON OFF OFF ON ON OFF OFF ON ON OFF OFF ON ON OFF OFF ON ON OFF OFF ON ON OFF OFF ON ON OFF OFF ON 3 OFF OFF OFF ON ON ON ON OFF OFF OFF OFF ON ON ON ON OFF OFF
CAMERA ID 91 92 93 94 95 96 97 98 99 100 101 102 103 104 105 106 107 108 109 110 111 112 113 114 115 116 117 118 119 120 121 122 123 124 125 126 127 128 129 130 131 132 REVO America 1 ON OFF ON OFF ON OFF ON OFF ON OFF ON OFF ON OFF ON OFF ON OFF ON OFF ON OFF ON OFF ON OFF ON OFF ON OFF ON OFF ON OFF ON OFF ON OFF ON OFF ON OFF 2 ON OFF OFF ON ON OFF OFF ON ON OFF OFF ON ON OFF OFF ON ON OFF OFF ON ON OFF OFF ON ON OFF OFF ON ON OFF OFF ON ON OFF OFF ON ON OFF OFF ON ON OFF 3 OFF ON ON ON ON OFF OFF OFF
CAMERA ID 133 134 135 136 137 138 139 140 141 142 143 144 145 146 147 148 149 150 151 152 153 154 155 156 157 158 159 160 161 162 163 164 165 166 167 168 169 170 171 172 173 174 REVO America 1 ON OFF ON OFF ON OFF ON OFF ON OFF ON OFF ON OFF ON OFF ON OFF ON OFF ON OFF ON OFF ON OFF ON OFF ON OFF ON OFF ON OFF ON OFF ON OFF ON OFF ON OFF 2 OFF ON ON OFF OFF ON ON OFF OFF ON ON OFF OFF ON ON OFF OFF ON ON OFF OFF ON ON OFF OFF ON ON OFF OFF ON ON OFF OFF ON ON OFF OFF ON ON OFF OFF ON 3 ON ON ON OFF OFF O
CAMERA ID 175 176 177 178 179 180 181 182 183 184 185 186 187 188 189 190 191 192 193 194 195 196 197 198 199 200 201 202 203 204 205 206 207 208 209 210 211 212 213 214 215 216 REVO America 1 ON OFF ON OFF ON OFF ON OFF ON OFF ON OFF ON OFF ON OFF ON OFF ON OFF ON OFF ON OFF ON OFF ON OFF ON OFF ON OFF ON OFF ON OFF ON OFF ON OFF ON OFF 2 ON OFF OFF ON ON OFF OFF ON ON OFF OFF ON ON OFF OFF ON ON OFF OFF ON ON OFF OFF ON ON OFF OFF ON ON OFF OFF ON ON OFF OFF ON ON OFF OFF ON ON OFF 3 ON OFF OFF OFF OFF
CAMERA ID 217 218 219 220 221 222 223 224 225 226 227 228 229 230 231 232 233 234 235 236 237 238 239 240 241 242 243 244 245 246 247 248 249 250 251 252 253 254 255 REVO America 1 ON OFF ON OFF ON OFF ON OFF ON OFF ON OFF ON OFF ON OFF ON OFF ON OFF ON OFF ON OFF ON OFF ON OFF ON OFF ON OFF ON OFF ON OFF ON OFF ON 2 OFF ON ON OFF OFF ON ON OFF OFF ON ON OFF OFF ON ON OFF OFF ON ON OFF OFF ON ON OFF OFF ON ON OFF OFF ON ON OFF OFF ON ON OFF OFF ON ON 3 OFF OFF OFF ON ON ON ON OFF OFF OFF OFF ON ON ON ON
Shortcut Keys If you are using the REVO America keyboard controller you can use a shortcut key to perform operations requiring the joystick and/or other keys. Short Cut Key Function PRST Access Preset setup menu. TOUR Access Tour setup menu. PTRN Access Pattern setup menu. SCAN Access Auto Scan setup menu. No.+ CTRL+ PRST Store the current view at the selected number.
Short Cut Key Short Cut Key Function Function 15 + ON View Direction on 15 + OFF View Direction off 104 + ON WDR ON 104 + OFF WDR off 150 + ON Image Flip ON 150 + OFF Image Flip off 151 + ON Origin Check 152 + ON Place the camera in the 0° area horizontally. 153 + ON Go to the slow speed mode 154 + ON Display System Information 155 + ON Flip the camera in the 180° area horizontally.
REVO America www.revoamerica.
REVO America 700 Freeport Parkway Suite 100 Coppell, TX 75019 1-800-6250-REVO (7386) Copyright © 2012 REVO America Inc. All rights reserved. REVO and its logo are trademarks of REVO America Inc.