USER MANUAL V2 All brand and product names are trademarks or registered trademarks of REXING INC. The information in this manual is subject to change without notice. www.rexingusa.com 10/2017Rev1 1 © 2017 REXING All Rights Reserved.
Safety information To prevent injury to yourself or others, or damage to your device, read all safety information before using. Warning Failure to comply with safety warnings and regulations can result in serious injury or death. Rexing Dash Cam is not intended to be touched, modified, or calibrated while operating a vehicle. Rexing is not responsible for any damages resulting from the user's misuse of the camera. Do not use damaged power cords or plugs, or loose electrical sockets.
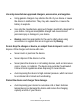
Use only manufacturer-approved chargers, accessories, and supplies. • Using generic chargers may shorten the life of your device or cause the device to malfunction. They may also cause fire or cause the battery to explode. • Use only the manufacturer-approved charger specifically designed for your device. Using an incompatible charger can cause serious personal injury or damage to your device.
• Do not allow children or animals to bite or chew the device. Doing so can result in fire or explosion, and small parts can be a choking hazard. If children use the device, make sure they use the device properly. • Never use a damaged charger. Do not handle a damaged or leaking lithium ion (Li-Ion) battery. For safe disposal of your Li-Ion battery, contact your nearest authorized service center. 4 © 2017 REXING All Rights Reserved.
Caution Failure to comply with safety precautions and regulations can result in property damage, serious injury or death. Do not use your device near other electronic devices. Most electronic devices use radio frequency signals. Your device may interfere with other nearby electronic devices. Do not use your device near other devices that emit radio signals, such as sound systems or radio towers. Radio signals from these may cause your device to malfunction. Do not expose the device to heavy smoke or fumes.
Do not store your device in excessively hot, cold, damp or dry locations. Doing so may cause the screen to malfunction, result in damage to the device, or cause the battery to explode. Your device is recommended for use within a temperature range of -10 °C to 70 °C, and a humidity range of 10% to 80%. If your device becomes overheated, allow it to cool down before use.
Clean your device and charger by wiping with a towel or eraser. Do not use chemicals or detergents. Doing so can discolor or corrode the outside of the device, and may result in electric shock or fire. Do not distribute copyright-protected material. Doing so without the permission of the content owners may violate copyright laws. The manufacturer is not responsible or liable for any legal issues that result from the user’s illegal use of copyrighted material. 7 © 2017 REXING All Rights Reserved.
Correct disposal of this product (applicable in countries with separate waste collection systems) Waste Electrical & Electronic Equipment This symbol, found on the device, accessories or accompanying literature, indicates that the product and its electronic accessories (e.g. charger, headset, USB cable) should not be disposed of with other household waste.
Disclaimer Some content and services accessible through this device belong to third parties and are protected by copyright, patent, trademark and/or other intellectual property laws. Such content and services are provided solely for your personal non-commercial use. You may not use any content or services in a manner that has not been authorized by the content owner or service provider.
Third party services may be terminated or interrupted at any time, and Rexing makes no representation or warranty that any content or service will remain available for any period of time. Content and services are transmitted by third parties by means of networks and transmission facilities over which Rexing has no control.
About this manual This device provides high-quality digital recording using Rexing’s high standards of design, construction and technological expertise. This user manual describes the device’s functions and features in detail. Please read this manual before using the device to ensure safe and proper use. Note that all descriptions included here are based on the device’s default settings. • Images and screenshots may differ in appearance from the actual product.
Contents PRODUCT SPECIFICATIONS ......................................................... 15 GETTING STARTED ...................................................................... 16 Device Layout.......................................................................... 16 Buttons ................................................................................... 17 Status Icons ............................................................................. 18 Package Contents ...............................
Exposure ................................................................................. 29 Recording Audio ..................................................................... 29 Date Stamp ............................................................................. 30 Plate Number .......................................................................... 30 Gravity Sensing ....................................................................... 30 SYSTEM SETTINGS .......................................
PHOTO SETTINGS ........................................................................ 34 Resolution ............................................................................... 34 Capture Mode ......................................................................... 34 Sequence Mode ...................................................................... 34 Quality..................................................................................... 34 Sharpness ...........................................
PRODUCT SPECIFICATIONS Image Sensor Lens CPU LCD Audio External Memory Gravity Sensor Shutter White Balance Exposure TV Interface Battery Video Format Video Resolution Languages USB Loop Recording Screen Saver Auto Shutdown Microphone Mute Wi-Fi 5MP CMOS 6-Layer Fixed-focus with full-glass elements Novatek 2.7 inch, 16:9 TFT Built-in high-sensitivity microphone/speaker Class 10 or above MicroSD card (SDHC spec.) Low / Medium / High / OFF Electronic Auto Auto ISO None 320mAh 3.
Getting Started Overview of your V2 Dashboard Camera GETTING STARTED Device Layout 1. 2. 3. 4. Power On/Off Switch Screen Button Menu Button Up Navigation Button Record Button 5. Rear Camera 6. Front Camera 7. OK (Confirm) Button Emergency Lock Button 8. Mode Button 9. Down Navigation Button Mute/Unmute Button 10. GPS Module Port 11. HDMI Port 12. MicroSD Card Slot 13. USB Charging Port 14. AV Out 15. Reset Button 16 © 2017 REXING All Rights Reserved.
Getting Started Understanding your V2 Dashboard Camera Buttons Button Functions • Press to turn on and off screen • Hold to turn the device on or off • Press to confirm a selection while in Setting Mode • Recording Mode Hot Key: Emergency Lock (Press to manually lock the file during recording) MENU – Press to enter and exit Settings Mode • Press to navigate UP through options in Settings Mode • Recording Mode Hot Key: Record (Press to start / stop recording) • Press to navigate DOWN through options in Set
Getting Started Understanding your V2 Dashboard Camera Status Icons Icon Meaning Video Resolution Blinking – Recording Wide Dynamic Range Charging Battery Power Level Microphone Mute Microphone On Video Recording Mode Video Playback Mode Photo Mode Loop Recording Memory Card Inserted White Balance 18 © 2017 REXING All Rights Reserved.
Getting Started Understanding your V2 Dashboard Camera License plate number Current video file locked 19 © 2017 REXING All Rights Reserved.
Getting Started Unpacking your V2 Dashboard Camera Package Contents Check the product box for the following items: • V2 Dashboard Camera • Operating manual • Mounting holder for camera (adhesive-mount type) • USB cable • Car charger • Thank you card The items supplied with the device and any available accessories may vary depending on the region. Appearances and specifications are subject to change without prior notice.
Getting Started Quick Start Installation Video guide: video.rexingusa.com 1. Attaching the front camera to the window mount Before the device can be used in a car, it is essential to first install a properly attached window mount. Make sure that you place the recorder in a safe, appropriate location where it will not obstruct the driver’s view. Clean windshield before apply mount, do not attach camera for at least 20 minutes. 2.
Getting Started Quick Start 3. Connecting the charger to the car's 12V DC outlet Be sure to connect only the Rexing-approved charger designed and supplied specifically for use with your device. Using an incompatible charger can cause serious personal injury or damage to your device. 4. Format the memory card To ensure the memory card works on the dash cam, we recommend using the dash cam to format the memory card, (please refer to Formatting the Memory Card section on Page 25).
Getting Started Quick Start • If the battery is completely discharged, the device will not turn on immediately when the charger is connected. Allow a depleted battery to charge for a few minutes before attempting to turn on the device. • The device can be used while it is charging, although it may take longer to fully charge the battery. • If the device receives an unstable power supply while charging, the screen may not function properly. If this happens, unplug the charger from the device.
Getting Started Quick Start Your device accepts memory cards with a maximum capacity of 128GB. Depending on the memory card manufacturer and type, some cards may not be compatible with your device. Using an incompatible card may damage the device or the memory card, or corrupt the data stored on it. Use caution to insert the memory card right-side up as shown in the image below. • Insert memory card with the gold-colored contacts facing upwards. • Push the memory card into the slot until it locks in place.
Getting Started Quick Start Removing the memory card Before removing a memory card from your computer, you must first unmount it for safe removal. Before removing a memory card from your device: 1. Press the REC button to stop the device from recording 2. Press and hold the ON/OFF button to switch off the device 3. Gently push the memory card in and let go until it unlocks Do not remove the memory card while the device is transferring or accessing information.
Getting Started Quick Start Turning the Device On and Off Press and hold the ON/OFF button for a few seconds to turn on the device. A welcome message will be displayed onscreen as shown in the image below. To turn off the device, again press and hold the ON/OFF button for a few seconds. A goodbye message will be displayed onscreen as shown in the image below. Note: The V2 Dashboard Camera will switch on and off automatically if you keep it permanently connected to the car charger.
Getting Started Quick Start Basic Operating Rexing Dash cam will atomically start recording once power on, the • indicator and the red dot icon on screen should flashing while recording. During recording, press EMERGICY • button to lock current video clip, so the loop recording will not overwrite locked video clip. All locked video clip files can be found under \CARDV\MOVIE\RO folder in memory card.
Operating your V2 Dashboard Camera System Settings VIDEO SETTINGS On Video Recording Mode, Press REC to stop recording then press MENU button once open System Settings Menu.
Operating your V2 Dashboard Camera System Settings It is recommended that you reformat a memory card after every time that images are transferred from it to a computer, or at least once a month. This keeps important elements of data and file structure clean, helping to prevent error messages and missing images. Remember to always make backup copies of all important data stored on the device. The manufacturer’s warranty does not cover loss of data resulting from user actions.
Operating your V2 Dashboard Camera System Settings Alternatively, you can use a hot key shortcut for this feature. During Recording Mode, press the DOWN button to mute / unmute the microphone for video recording. Date Stamp You have the option to display the date and time in your videos. Note that the date and time stamp cannot be removed from videos if this feature was enabled at the time of recording. Plate Number Enable this feature to enter your vehicle plate number for video recording.
Operating your V2 Dashboard Camera System Settings SYSTEM SETTINGS On Video Recording Mode, Press REC to stop recording then press MENU button twice open System Settings Menu. Date/ Time Setup Use this setting to change the device’s time and date: UP/Down – Change value OK – Move to next segment MENU – Save Settings Note: If the battery remains fully discharged or is removed from the device, the time and date will be reset.
Operating your V2 Dashboard Camera System Settings TV Mode Recommend setting: NTSC This feature will setup video output format. Light Frequency Recommend setting: US - 60Hz This option should be set according to the power supply specification used in your country or geographical region (U.S. users should select the "60Hz" option). Format Performing this operation will format memory card. Note: any files in the memory card will be lost.
Operating your V2 Dashboard Camera System Settings GPS Recommend setting: MI/H Select GPS speed unit (GPS Logger required) Update time of GPS This feature need GPS Logger connected, select a time zone to enable automatic update time of GPS. Restore Default Factory Settings Performing this operation will reset all of your device's settings to their original values. Note: any user-customized settings will be lost. Version Device firmware version information. 33 © 2017 REXING All Rights Reserved.
Operating your V2 Dashboard Camera Photo Settings PHOTO SETTINGS On Photo Mode, Press MENU button once open System Settings Menu. Resolution Recommend setting: 5M This option allows you to set the pixel resolution for captured images. Capture Mode Recommend setting: Single With this feature you can set a timer for automatically capturing images. Sequence Mode Recommend setting: Off This feature allows you to capture a sequence of 3 quick photos with one button press.
Operating your V2 Dashboard Camera Photo Settings This feature will automatically enhance captured images for a clearer, more distinct picture. White Balance Recommend setting: Auto This setting allows you to adjust the lighting balance for different environments. Color Recommend setting: Auto This feature allows you to choose a color effect for captured images. ISO Recommend setting: Auto This setting enable you to adjust the camera's sensitivity to light when taking photos.
Operating your V2 Dashboard Camera Photo Settings Quick Review Enabling this feature will allow you to immediately view each captured image for a few seconds before taking the next photo. Date Stamp Recommend setting: Date/Time This feature will automatically apply a date and/or time stamp to captured images. 36 © 2017 REXING All Rights Reserved.
Operating your V2 Dashboard Camera Updating Firmware Updating Firmware Please note that the firmware does not need to be updated unless you are experiencing any issues. The firmware is put in place to fix any bugs or glitches that may occur during normal use. The following procedure will allow you to use the Rexing website to update firmware for your V2 Dashboard Camera. This is necessary for enabling all available features on your device. 1. Download the firmware file to your computer 2. Unzip the file 3.
Operating your V2 Dashboard Camera Playback Playback Mode You can play back recorded video on your device using the following steps: 1. Press REC to stop recording 2. Press MODE twice to switch from Recording to Playback Mode 3. Press and hold the UP or DOWN button to navigate through the stored video files 4. Press OK to start playback for the selected video 5. Press OK again to pause playback 6. Press MODE to stop playback 7.
Operating your V2 Dashboard Camera Playback To delete all files: 1. Press on UP or DOWN button to navigate through the video files 2. Press OK to enter "Video" 3. Press MENU to view options for this file: Delete/Protect/Slide Show 4. Press the DOWN button once to select "Delete" 5. Press OK once to view delete options for "Current MOV" file or "ALL" files. Select "ALL" and press OK 6.
Operating your V2 Dashboard Camera Troubleshooting General Troubleshooting Problem The captured image is not stored All buttons are not responding Menu Button Not responding Device will not turn on Possible Cause Solution Memory card may be full or malfunctioning Reformat memory card or replace with a new one Image not being saved before the device is powered off Make sure to stop recording before shutting down Processing error or faulty device operation Memory card may contain errors, or is dama
Operating your V2 Dashboard Camera Troubleshooting Not holding charge Unit keep rebooting SD Card Won’t Stay In SD Card Not Recognized (Custer error) Battery may be depleted Power cord may be defective Battery may be depleted SD card may not be compatible SD card may be too thin SD Card needs to be formatted. Charge the battery for 3 hours. Make sure unit is off while charging. Turn on the unit, unplug it. If it turns off immediately, contact customer service for assistance with a replacement.
Operating your V2 Dashboard Camera Troubleshooting May have saved to the RO folder Can’t find Locked files Screen powers off unexpectedly Keeps Turning off Screen Frozen When you lock a file, it only saves the current recording. The remainder of the video may be in a separate file.
Operating your V2 Dashboard Camera Troubleshooting Memory card may be full Unable to record videos If Loop Recording has been enabled, memory card may be corrupted Check remaining space on memory card and delete files if necessary Reformat your memory card; if issue persists, replace with a new one Restore to Default Settings Make sure to hold the REC button in until the red light is blinking Stops Recording after 20-40 minutes Loop Recording off Turn Loop Recording on Stops Recording at random inter
Operating your V2 Dashboard Camera Troubleshooting SD Card is full Need more space on SD Card Make sure G-sensor is on lowest setting Clear some locked files Format SD Card Restore to default settings Stops Recording after 1-3 looped files SD Card may not be compatible “File error" is encountered when trying to play back pictures or video Memory card may be corrupted with bad sectors Reformat the memory card.
Operating your V2 Dashboard Camera Troubleshooting Horizontal stripes appear on images The Light Frequency setting is incorrect Change light frequency setting to match the power supply used in your country or geographical location: US users should select the 60Hz option; SG/MY users should select the 50hz option Auto On/Off Not working Car charging port has continuous flow of power. This feature can only work if it is being used in a charging port that turns off with the vehicle.