Owner’s Guide and Installation Instructions Solar VS160 Storage Tank WARNING: Plumber – Be Aware Use copper pipe ONLY. Plastic pipe MUST NOT be used. It is a requirement of a solar water heater installation that all pipe work be in copper and not plastic, due to the effects of high water temperatures and pressures. This water heater must be installed and serviced by a qualified person. Please leave this guide with the householder.
WARNING: Plumber – Be Aware The solar hot and solar cold pipes between the solar storage tank and the solar collectors MUST BE of copper. All compression fittings must use brass or copper olives. The full length of the solar hot and solar cold pipes MUST BE insulated.
CONTENTS HOUSEHOLDER – We recommend you read pages 4 to 22. The other pages are intended for the installer but may be of interest. About Your Water Heater ............................................................................................................ 4 Regular Care .............................................................................................................................. 13 Water Supplies.......................................................................................
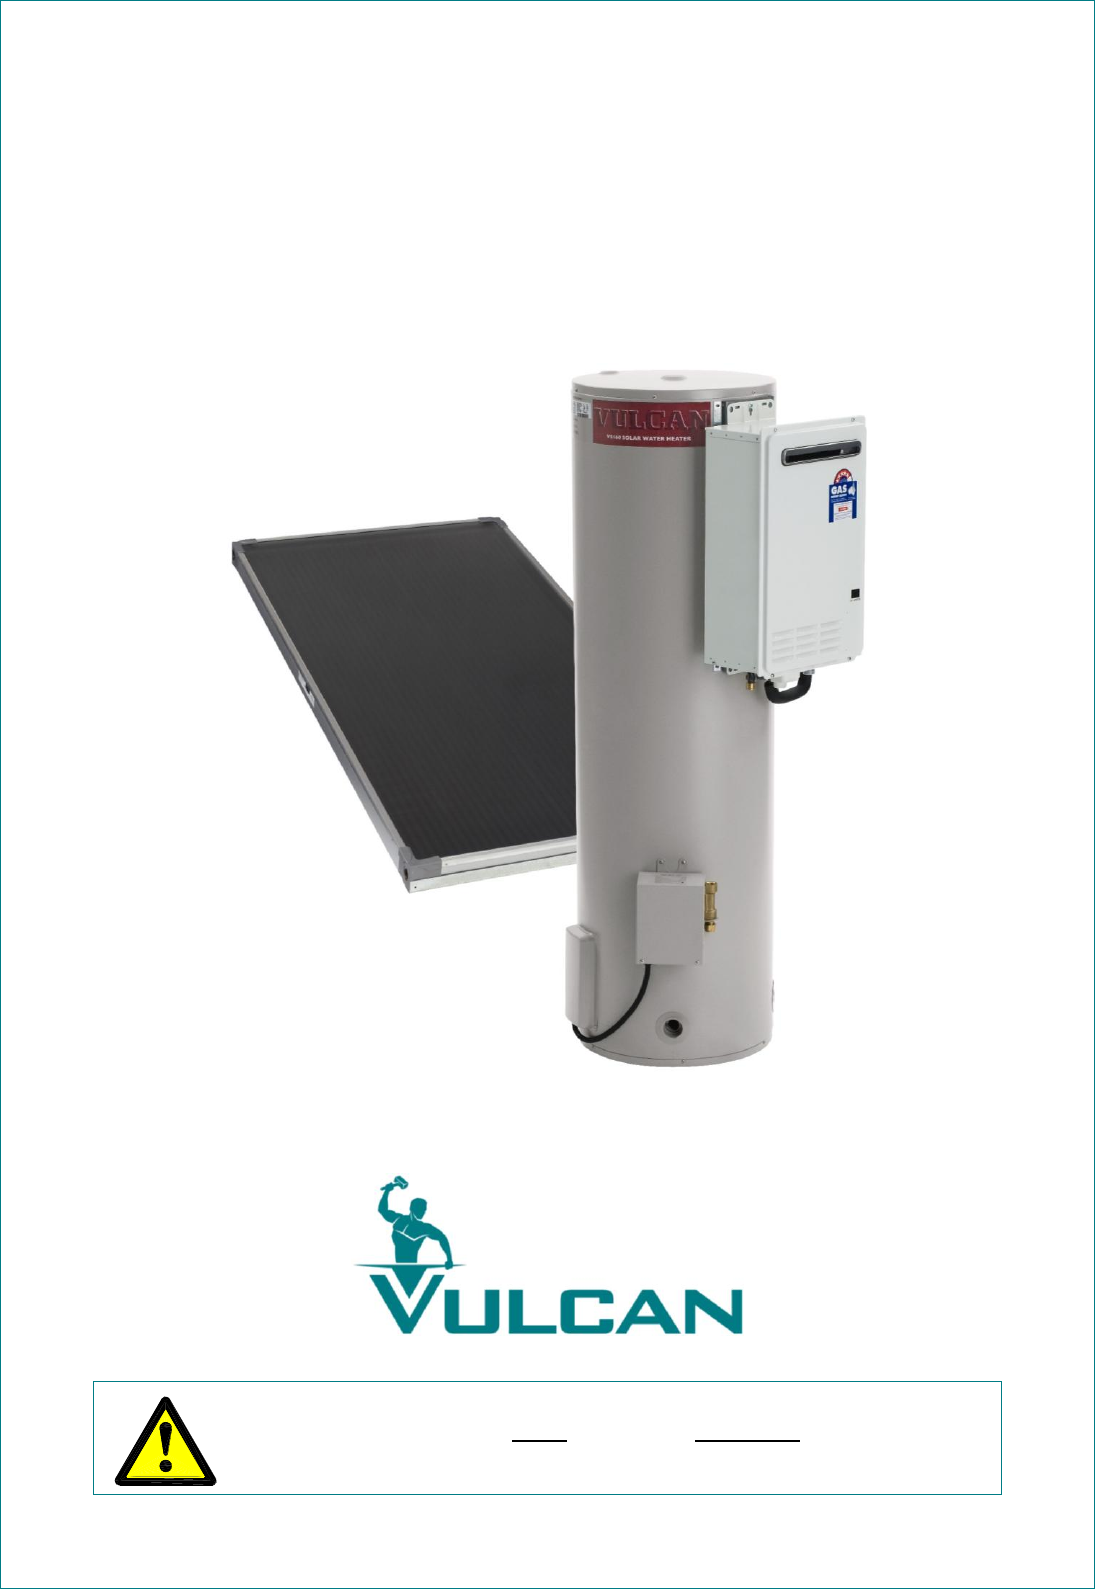
ABOUT YOUR WATER HEATER WATER HEATER APPLICATION This water heater is designed for use in a single family domestic dwelling for the purpose of heating potable water. Its use in an application other than this may shorten its life. MODEL TYPE ® Your Vulcan solar VS160 water heater is designed for the solar collector(s) to be roof mounted and the vitreous enamel lined solar storage tank to be installed at ground or floor level, remotely from the solar collector(s).
ABOUT YOUR WATER HEATER Normal operation As the sun heats the water in the solar collectors, the increase in temperature activates the circulator. The circulator switches on whenever the water in the solar collectors is hotter than the water in the solar storage tank.
ABOUT YOUR WATER HEATER Standby mode The water heater will be in Standby mode whenever conditions are not favourable for solar heating in Normal operation, and Over-temperature operation and Night Time Cooling are not required or have been completed, and conditions are not cold enough for or in-between Freeze Protection operation. Solar Monitor LED operation The LEDs on the Solar Monitor, located on the side of the solar control unit, operate to show the operational mode of the water heater.
ABOUT YOUR WATER HEATER HOTTER WATER INCREASES THE RISK OF SCALD INJURY This water heater can deliver water at temperatures which can cause scalding. Check the water temperature before use, such as when entering a shower or filling a bath or basin, to ensure it is suitable for the application and will not cause scald injury.
ABOUT YOUR WATER HEATER PRECAUTIONS Where damage to property can occur in the event of the water heater leaking, the water heater must be installed in a safe tray. Construction, installation and draining of a safe tray must comply with AS/NZS 3500.4 and all local codes and regulatory authority requirements. The water heater must be maintained in accordance with the Owner‟s Guide and Installation Instructions. Refer to “Regular Care” on page 13 and to “Anode Inspection and Replacement” on page 17.
ABOUT YOUR WATER HEATER FREEZE PROTECTION The system has a level of freeze protection designed to guard the system against damage from freeze conditions. The system must be installed with the full length of the solar hot and solar cold pipes insulated and power must be available at the solar control unit to offer protection against freeze damage (refer to “Pipe Work and Insulation” on page 8). Freeze conditions occur below 6°C.
ABOUT YOUR WATER HEATER SOLAR MONITOR A solar monitor is located on the side of the solar control unit and houses a green and a red LED. The green LED, marked “Solar”, indicates the current operational mode of the solar water heater and the red LED, marked “Attention”, may indicate a potential fault mode. The green LED will emit either a constant glow, a constant pulsing or a series of flashes, with a 2 second interval between each series.
ABOUT YOUR WATER HEATER BLEEDING THE SOLAR COLLECTOR(S) It is necessary to purge air from the collector circuit: When the water heater is to be turned on and the solar collector(s) and solar hot and solar cold pipes have been drained. After maintenance has been conducted on the pipe work and air has entered the system. If the circulator appears not to be circulating water around the system.
ABOUT YOUR WATER HEATER TO TURN ON THE WATER HEATER Open the cold water isolation valve fully at the inlet to the water heater. If the solar collector(s) and solar hot and solar cold pipes have been drained, it will be necessary to bleed the collector circuit (refer to “Bleeding the Solar Collector(s)” on page 11). If the electrical supply to the water heater has been switched off: Switch on the electrical supply at the power outlet to the solar control unit.
REGULAR CARE MINOR SIX MONTH MAINTENANCE It is recommended minor maintenance be performed every six months by the dwelling occupant. The minor maintenance includes: Operate the easing lever on the temperature pressure relief valve. It is very important you raise and lower the lever gently. Refer to “Temperature Pressure Relief Valve” on page 14. Warning: Exercise care to avoid any splashing of water, as water discharged from the drain line will be hot.
REGULAR CARE Note: The solar storage tank may need to be drained during this service. After the completion of the service, the solar storage tank will take some time to reheat the water by solar gain. If this solar storage tank is installed with an integrated or remotely installed Rheem in-series continuous flow gas booster, then for the booster‟s safe and efficient operation, it is recommended a five year service be conducted on the gas booster.
REGULAR CARE COLLECTOR GLASS Ensure the glass on your solar collector(s) is free of dust, salt spray or any other matter, which may reduce the effectiveness of the solar collector(s). If the collector glass becomes dirty, hose down or if the solar collector(s) are accessible, wash the collector glass with water and a soft brush when the solar collector(s) are cool. Have any trees trimmed which may shade the solar collector(s).
WATER SUPPLIES This water heater must be installed in accordance with this advice to be covered by the Vulcan warranty. This water heater is manufactured to suit the water conditions of most public reticulated water supplies. However, there are some known water chemistries which can have detrimental effects on the water heater and its operation and / or life expectancy. If you are unsure of your water chemistry, you may be able to obtain information from your local water supply authority.
WATER SUPPLIES ANODE INSPECTION AND REPLACEMENT The anode installed in a vitreous enamel lined steel water heater cylinder will slowly dissipate whilst protecting the cylinder. The life of the cylinder may be extended by replacing the anode. If the anode is not replaced during a five year service (refer to “Major Five Year Service” on page 13) then the maximum time after installation when the anode should be replaced is 8 years.
WATER SUPPLIES WITHIN WARRANTY SPECIFICATION -1.0 very corrosive 0 +0.4 no warranty applies to a: -standard watts density heating unit -direct (open circuit) solar collector no warranty applies to a: temperature pressure relief valve or a water heater cylinder unless an expansion control valve is fitted. no warranty applies to a: -copper sheathed heating unit -direct (open circuit) solar collector SATURATION INDEX (SI) SOLAR WATER HEATERS WITH ELECTRIC HEATING UNIT +0.
SAVE A SERVICE CALL Check the items below before making a service call. You will be charged for attending to any condition or fault that is not related to manufacture or failure of a part. NOT ENOUGH HOT WATER (OR NO HOT WATER) Insufficient sunlight Insufficient sunlight due to cloudy weather during hotter months or low solar energy contribution in colder months may mean the in-series water heater operates more often.
SAVE A SERVICE CALL TEMPERATURE PRESSURE RELIEF VALVE RUNNING Normal Operation It is normal and desirable this valve allows a small quantity of water to escape during the heating cycle. However, if it discharges more than a bucket full of water in 24 hours, there may be another problem. Continuous dribble Try gently raising the easing lever on the relief valve for a few seconds (refer to “Temperature Pressure Relief Valve” on page 14).
SAVE A SERVICE CALL GREEN LED IS NOT ILLUMINATED ON SOLAR MONITOR Check the power outlet for the solar control unit is switched on. If the power outlet for the solar control unit is switched on, switch off for a few seconds and then switch on again. If the green LED remains off there may be a fault with the water heater. Phone Rheem Service or their nearest Accredited Service Agent to arrange for an inspection.
SAVE A SERVICE CALL HIGHER THAN EXPECTED GAS BILLS With the installation of your new solar hot water system, maximum energy savings can be achieved with careful planning of hot water usage. Should you at any time feel your energy account is higher than expected, we suggest you check the following points: Is the relief valve running excessively? Refer to “Temperature Pressure Relief Valve Running” on page 20).
INSTALLATION – SYSTEM THIS WATER HEATER IS FOR OUTDOOR INSTALLATION ONLY, IF AN IN-SERIES GAS BOOSTER IS MOUNTED ON THE STORAGE TANK. THIS WATER HEATER IS NOT SUITABLE FOR POOL HEATING. The system is suitable for installation with 1 x TBT260 or 1 or 2 x HBT 200 solar collector(s). The system is not suitable for installation above 400 metres altitude. A single TBT260 solar collector may be installed up to 90° from the optimum orientation when installed as part of this system.
INSTALLATION – SYSTEM FREEZE PROTECTION The system has a level of freeze protection designed to guard the system against damage from freeze conditions. The system must be installed with the full length of the solar hot and solar cold pipes insulated and power must be available at the solar control unit to offer protection against freeze damage (refer to “Warning: Plumber Be Aware” on page 40). Freeze conditions occur below 6°C.
INSTALLATION – SOLAR STORAGE TANK SOLAR WATER HEATER STORAGE TANK LOCATION The solar storage tank is suitable for either outdoor or indoor installation. If an in-series gas booster is mounted to the solar storage tank, then the installation must be outdoors. Whether located outdoor or indoor, the solar storage tank should be installed close to the most frequently used outlet and its position chosen with safety and service in mind.
INSTALLATION – SOLAR STORAGE TANK TANK WATER SUPPLY If the water heater is supplied with water from a tank supply and a minimum water supply pressure of 200 kPa at the water heater cannot be achieved, then a pressure pump system must be installed to allow the solar circuit system to operate. Care must be taken to avoid air locks. The cold water line from the supply tank should be adequately sized and fitted with a full flow gate valve or ball valve.
INSTALLATION – SOLAR STORAGE TANK If a combination isolation valve and non return valve (duo or trio valve) is installed on the cold water line to the solar water heater and the cold water line to the temperature limiting device branches off after this valve, then a second non return valve must be installed between the cold water branch and the solar storage tank.
INSTALLATION – SOLAR STORAGE TANK CIRCULATED HOT WATER FLOW AND RETURN SYSTEM The solar storage tank of a solar water heater should not be installed as part of a circulated hot water flow and return system in a building. The benefits of solar gain will be significantly reduced and energy gained from the sun lost through the pipe work.
INSTALLATION – SOLAR STORAGE TANK Remote In-series Gas Booster as part of a Direct VS160 Solar Water Heater Installation Circulated Hot Water Flow and Return System LEGEND REDUCING HEAT LOSSES The cold water line to and the hot water line from the water heater must be insulated in accordance with the requirements of AS/NZS 3500.4. The insulation must be weatherproof and UV resistant if exposed.
INSTALLATION – SOLAR STORAGE TANK ANTI-FREEZE HEATING UNIT Additional freeze protection is provided by the anti-freeze heating unit. The anti-freeze heating unit is for heating the water at the bottom of the solar storage tank at times of very low cold water temperature. The anti-freeze heating unit provides additional energy to the water to assist in the prevention of freezing in the solar pipe work and solar collector(s).
INSTALLATION – SOLAR STORAGE TANK DIMENSIONS AND TECHNICAL DATA storage tank only (remote boost) Model 511 160 Capacity 165 litres storage tank with integrated boost Tank Mass (kg) (without booster) Tank Mass (kg) (with booster) Empty Full Empty Full 52 217 73 239 Technical data is subject to change.
INSTALLATION – SOLAR STORAGE TANK TYPICAL INSTALLATION (REMOTE BOOST) – OUTDOOR LOCATION TYPICAL INSTALLATION (REMOTE BOOST) – INDOOR LOCATION Typical Installation Typical Installation Solar Loline 160 Open Circuit Solar Loline 160 Circuit WithOpen Remote Gas Boost With Remote Gas Boost 32
INSTALLATION – SOLAR STORAGE TANK TYPICAL INSTALLATION (INTEGRATED BOOST) – OUTDOOR LOCATION Typical Installation Solar Loline 160 Open Circuit 33 With Integrated Gas Boost
INSTALLATION – SOLAR CONTROL UNIT The solar control unit is supplied mounted on the side of the solar storage tank. A kit (299158) containing components to enable the connection of the solar circuit pipe work to the tank is supplied with the tank. The solar control unit, supplied with a 1.8 metre power cord, requires a 240 V 50 Hz general purpose outlet (GPO) located within 1.2 metres of its installation.
INSTALLATION – SOLAR CONTROL UNIT Notes: All pipe work must be purged and cleared of foreign matter before connection and before attempting to operate the water heater. It is important to connect the solar cold and solar hot pipes to the correct connections at the solar collector and at the solar storage tank. Connect the solar pipes to the solar storage tank using only the fittings supplied. All olive compression fittings must use brass or copper olives.
INSTALLATION – SOLAR CONTROL UNIT SOLAR STORAGE TANK WITH RAISED SOLAR HOT INLET Numbers in parentheses refer to items on diagram on page 35. To connect the solar cold pipe to the solar control unit on a solar VS160 storage tank with a raised solar hot inlet and anti-freeze heating unit: 1.
INSTALLATION – SOLAR COLLECTOR(S) SOLAR COLLECTOR LOCATION Consideration must be given to the position of the solar collector(s) in relation to the solar storage tank. There are limitations on the maximum length of the solar hot and solar cold pipes between the solar storage tank and the solar collector(s). Refer to “Solar Storage Tank Location” on page 25 and to “Pipe Lengths” on page 39. The solar collector(s) must be installed in a shade free position.
INSTALLATION – SOLAR COLLECTOR(S) The risks include: the collector glass not 'self cleaning', leading to dirty collector glass reducing solar performance, condensation on the underside of the glass taking longer to clear, condensation droplets falling onto the absorber plate potentially causing discolouration. The collector kit is suitable for installations with an inclination of up to 45°.
INSTALLATION – SOLAR COLLECTOR(S) PIPE LENGTHS The solar hot and solar cold pipes between the solar storage tank and the solar collectors shall: be of bendable grade or hard drawn copper tube. Annealed or soft copper shall not to be used. have a continuous fall from the solar collectors to the solar storage tank. Horizontal runs of pipe work are acceptable and may be installed. not exceed the maximum recommended combined lengths as specified in the table.
INSTALLATION – SOLAR COLLECTOR(S) WARNING: Plumber – Be Aware The solar hot and solar cold pipes between the solar storage tank and the solar collector(s) MUST BE of copper. All compression fittings must use brass or copper olives. The full length of the solar hot and solar cold pipes MUST BE insulated.
INSTALLATION – SOLAR COLLECTOR(S) WARNING: Plumber – Be Aware A non return valve MUST BE installed on the cold water line to the solar storage tank AFTER the cold water branch to a temperature limiting device. Due to the higher water temperatures generated under certain conditions in the solar collector(s) of this solar water heater, an additional effective back-flow prevention device also should be used as an extra safeguard.
CONNECTIONS – PLUMBING All plumbing work must be carried out by a qualified person and in accordance with the requirements of the Standard AS/NZS 3500.4, and all local codes and regulatory authority requirements. In New Zealand, the installation must conform with Clause G12 of the New Zealand Building Code.
CONNECTIONS – PLUMBING A disconnection union must always be provided at the cold water inlet, solar cold water outlet, solar hot water inlet and hot water outlet on the water heater to allow for disconnection of the water heater. This water heater has either a plastic dip tube or fitting liner in the inlet and outlet fittings (see diagram). These must be in place for the water heater to function properly. Do not remove or damage them by using heat nearby.
CONNECTIONS – PLUMBING IN-SERIES BOOSTER – REMOTE LOCATION The in-series booster water heater may be installed remotely from the solar storage tank. If the in-series water heater is a continuous flow gas water heater, this may be located adjacent to the right had side of the solar storage tank, subject to the location of the flue terminal complying with the requirements of AS 5601 or AS/NZS 5601.1.
CONNECTIONS – PLUMBING RELIEF VALVE DRAIN DN15 copper drain lines must be fitted to the temperature pressure relief valve and expansion control valve (if one is installed) to carry the discharge clear of the water heater. Connect the drain lines to the valves using disconnection unions.
CONNECTIONS – ELECTRICAL The power supply to the water heater must not be switched on until the water heater is filled with water. All electrical work and permanent wiring must be carried out by a qualified person and in accordance with the Wiring Rules AS/NZS 3000 and all local codes and regulatory authority requirements.
CONNECTIONS – ELECTRICAL WIRING DIAGRAM – SOLAR STORAGE TANK 3 PUMP 1 4 2 Hot sensor connection Cold sensor Solar Control Unit A1 N Anti-Freeze Heating Unit Differential Controller Frost Heating Unit 47
COMMISSIONING TO FILL AND TURN ON THE WATER HEATER The power supply to the solar control unit must not be switched on until the water heater is filled with water. Open all of the hot water taps in the house (don‟t forget the shower). Open the cold water isolation valve fully on the cold water line to the water heater. Air will be forced out of the taps. Close each tap as water flows freely from it. Check the pipe work for leaks.
COMMISSIONING IN-SERIES BOOSTER Refer to the Owner‟s Guide and Installation Instructions supplied with the in-series water heater for the commissioning procedure of the in-series water heater.
COMMISSIONING SOLAR CONTROLLER OPERATION AT START-UP When the electrical supply is switched on to the solar control unit at start up: If there is no solar gain, the circulator will not activate and the green LED will emit a slow pulse. The slow pulse indicates the circulator is not activated and the power to the solar control unit has been on for less than 48 hours. If there is solar gain, the circulator activates and the green LED will emit a series of three (3) flashes.
COMMISSIONING DIAGNOSTIC FEATURES OF THE SOLAR CONTROLLER A solar monitor is located on the side of the solar control unit and houses both a green and a red LED. The green LED, marked “Solar”, indicates the current operational mode of the solar water heater and the red LED, marked “Attention”, may indicate a potential fault mode. The green LED will emit either a constant glow, a constant pulsing or a series of flashes, with a 2 second interval between each series.
DRAINING THE SOLAR COLLECTOR(S) To drain the solar collector(s) and the solar hot and solar cold pipes: Cover the solar collector(s) with an opaque material. Open a hot water tap and allow the water to run for five minutes immediately prior to draining the solar collector(s). This will assist in the transfer of any high temperature water in the solar collector(s) to the solar storage tank. Close the hot water tap. Turn off the water heater (refer to “To Turn Off The Water Heater” on page 48).
This page is intentionally blank.
This page is intentionally blank.
VULCAN SOLAR WATER HEATER WARRANTY – AUSTRALIA ONLY – SOLAR WATER HEATER MODEL 511160 1. THE VULCAN WARRANTY – GENERAL 1.1 This warranty is given by Rheem Australia Pty Limited ABN 21 098 823 511 of 1 Alan Street, Rydalmere New South Wales, the manufacturer of Vulcan mains pressure water heaters. 1.2 Rheem offer a trained and qualified national service network who will repair or replace components at the address of the water heater subject to the terms of the Vulcan warranty.
VULCAN SOLAR WATER HEATER WARRANTY – AUSTRALIA ONLY – SOLAR WATER HEATER MODEL 511160 3. WHAT IS COVERED BY THE VULCAN WARRANTY FOR THE WATER HEATERS DETAILED IN THIS DOCUMENT 3.